Struggling to remove a deadbolt that has a key on both sides can be frustrating. You might think it’s impossible without calling a locksmith or breaking the lock.
But what if you could handle it yourself, saving time and money? In this guide, you’ll discover simple, step-by-step methods to remove your double-keyed deadbolt quickly and safely. By the end, you’ll feel confident taking control of your lock situation—no stress, no guesswork.
Ready to unlock the secret? Let’s get started.

Credit: www.youtube.com
Tools Needed
Removing a deadbolt with a key on both sides requires the right tools. Using proper tools makes the job easier and safer. Below is a list of essential tools you need to complete this task.
Phillips Screwdriver
This tool is necessary to remove screws from the deadbolt. Most deadbolts have Phillips head screws. A good grip and control help prevent damage to the screws.
Flathead Screwdriver
A flathead screwdriver helps pry parts gently. It is useful for removing trim or faceplates. It can also assist in loosening stubborn screws.
Allen Wrench
Some deadbolts use hex screws. An Allen wrench set with various sizes covers this need. It helps in loosening or tightening these screws easily.
Needle-nose Pliers
These pliers help grip small parts inside the lock. They can pull out broken pieces or clips. Their narrow tip reaches tight spaces effectively.
Replacement Keys Or Spare Keys
Having the correct key or a spare is critical. It allows you to unlock the deadbolt before removal. This step prevents damage to the lock mechanism.
Lubricant Spray
A lubricant spray like WD-40 loosens stuck parts. It reduces friction and makes turning screws easier. Applying it before starting saves time.
Identify Your Deadbolt Type
Knowing your deadbolt type is the first step to remove it properly. Deadbolts come in different styles and shapes. Each type needs a different way to take it apart. Identifying your deadbolt helps avoid damage and saves time.
Look closely at the door and the lock itself. Check both sides of the deadbolt. Notice the keyholes and the screws holding it in place. These clues tell you which type of deadbolt you have.
Single Cylinder Deadbolt
This deadbolt has a keyhole on one side only. The other side has a thumb turn to lock and unlock. It is the most common deadbolt type in homes. Removing it is usually easier because one side does not have a key.
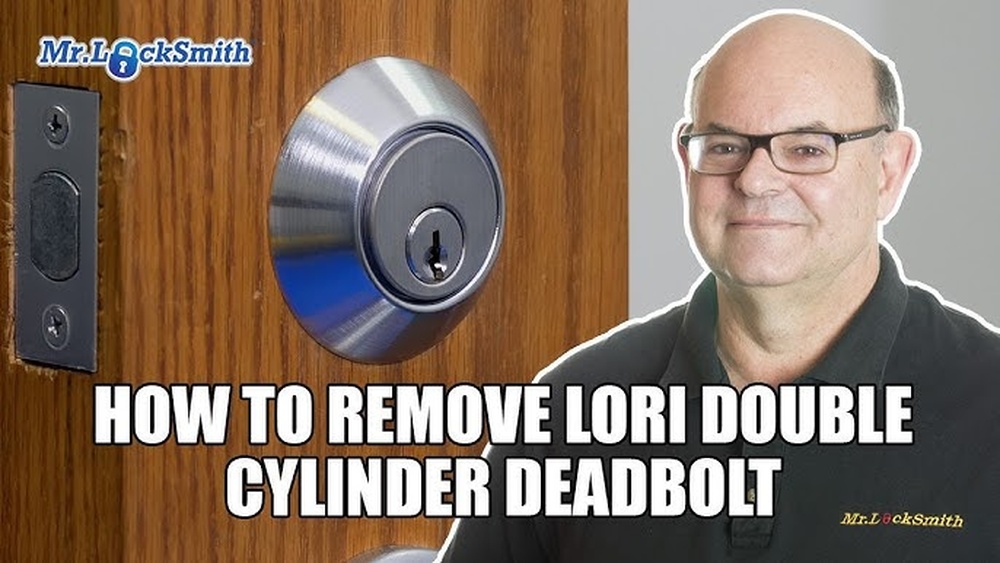
Double Cylinder Deadbolt
This type has keyholes on both sides of the door. It requires a key to lock or unlock from either side. It offers extra security but can be tricky to remove. Knowing this helps prepare for the right tools and method.
Keyless Deadbolt
This deadbolt uses a keypad or a code instead of keys. It may still have a manual key for backup. Identifying this type is important because it often needs special instructions to remove.
Smart Deadbolt
Smart deadbolts connect to your phone or home system. They may have keyholes or be completely keyless. Removing smart locks requires careful handling to avoid damage to electronics.
Prepare The Door
Preparing the door is the first step to removing a deadbolt with keys on both sides. This step helps avoid damage and makes the process smooth. You need the right tools and a clear workspace.
Take your time to get everything ready. A well-prepared door means easier deadbolt removal and less frustration.
Gather Necessary Tools
Collect all tools before starting. You will need a screwdriver, a drill, and a pair of pliers. Keep a small container for screws. This stops them from getting lost.
Clear The Workspace
Clear the area around the door. Remove rugs or objects that block access. Good lighting helps you see screws and parts clearly. A clean workspace keeps you safe.
Check Door Alignment
Look at the door’s position in the frame. Make sure it closes smoothly. Misalignment can cause problems when removing the deadbolt. Adjust the door if needed before starting.

Credit: www.amazon.in
Insert The Key On Both Sides
Removing a deadbolt with keys on both sides requires careful steps. Inserting the keys properly is the first important action. This step helps to unlock the mechanism inside the lock.
Both sides of the deadbolt must have their keys inserted at the same time. This allows the lock to be turned and removed safely. Follow the instructions below for clear guidance.
Choose The Correct Key For Each Side
Identify the keys that fit each side of the deadbolt. Usually, both keys look the same, but test to be sure. Insert the right key in each side’s keyhole to avoid damage.
Insert Keys Fully Into Both Keyholes
Push each key all the way into the lock. Partial insertion can cause the lock to jam. Make sure the keys sit firmly in place before turning.
Turn Both Keys Simultaneously
Hold the keys on both sides and turn them at the same time. This action releases the deadbolt from the door frame. Turning slowly helps prevent breaking the keys or lock.
Keep The Keys Steady While Removing The Deadbolt
Maintain pressure on the keys as you pull the deadbolt out. This keeps the lock parts aligned and avoids stuck pieces. Remove the deadbolt gently to protect the door.
Remove The Interior Thumb Turn
Removing the interior thumb turn is a key step when taking out a deadbolt with keys on both sides. This part controls the lock from inside and must come off first. The process is simple but requires care to avoid damage.
Start by locating the screws or clips holding the thumb turn in place. These small parts keep the thumb turn attached to the door. Removing them allows you to pull the thumb turn off and access the lock mechanism.
Locate The Thumb Turn Screws
Look closely at the interior side of the door. You will see screws near the thumb turn. These screws usually sit on the faceplate or under a small cover. Use a screwdriver to remove them carefully.
Remove Any Cover Plates
Some thumb turns have a cover plate hiding the screws. Use a flat tool or your fingers to gently lift the cover. Once removed, the screws become visible and ready to unscrew.
Pull The Thumb Turn Off The Spindle
After unscrewing, hold the thumb turn firmly. Pull it straight out from the door. It should slide off the spindle easily. If stuck, wiggle gently until it comes loose.
Keep Screws And Parts Safe
Store screws and any small pieces in a container. This prevents loss and helps during reassembly. Organizing parts saves time and frustration later.
Unscrew The Deadbolt Faceplate
Unscrewing the deadbolt faceplate is a key step in removing a deadbolt with keys on both sides. This faceplate covers the bolt mechanism and keeps it secure in the door. Removing it gives you access to the internal parts needed to take the lock apart.
Take your time during this step. Rushing might damage the door or the lock. Use the right tools and follow each instruction carefully for a smooth process.
Gather The Necessary Tools
Start by collecting a screwdriver that fits the screws on the faceplate. Most deadbolts use a Phillips head screwdriver. Having the right tool makes unscrewing easier and safer.
Locate The Faceplate Screws
Look at the edge of the door where the deadbolt extends. Find the small screws holding the metal faceplate in place. These screws are usually visible and easy to spot.
Remove The Screws Carefully
Turn the screws counterclockwise to loosen them. Keep a steady hand to avoid stripping the screws. Place the screws somewhere safe for reassembly later.
Take Off The Faceplate
Once the screws are out, gently pull the faceplate away from the door edge. It may require a slight wiggle if it sticks. Set the faceplate aside carefully to avoid bending or damage.
Extract The Deadbolt Mechanism
Removing a deadbolt with keys on both sides needs care and patience. The deadbolt mechanism sits inside the door. It connects the two lock cylinders.
Extracting the mechanism allows you to replace or fix the lock. Follow clear steps to avoid damage.
Locate And Remove The Screws
Start by locating the screws on the edge of the door. These screws hold the deadbolt in place. Use a screwdriver to remove them carefully. Keep the screws safe for reassembly.
Pull Out The Deadbolt Housing
Once screws are out, gently pull the deadbolt housing from the door edge. The housing contains the bolt and locking parts. Pull straight to avoid jamming or scratching the door.
Separate The Lock Cylinders
With the housing out, find the connecting bar between the two cylinders. Unscrew or unclip the bar carefully. This frees the two key cylinders from the mechanism.
Remove The Deadbolt Bolt
Slide the bolt part out of the housing. This part extends into the door frame to lock the door. Handle it gently to avoid bending or breaking.

Credit: www.amazon.com
Test The Door Without The Deadbolt
Testing the door without the deadbolt is a key step after removal. This helps ensure the door moves freely and fits well in the frame. It also checks if the door latch works properly without the deadbolt. This step prevents future problems with locking and closing.
Check Door Movement
Open and close the door slowly. Notice if it sticks or catches anywhere. The door should swing smoothly without extra effort. Any resistance might mean alignment issues.
Inspect Door Alignment
Look at the door frame and edges carefully. The door should line up evenly with the frame. Gaps or uneven spaces can cause drafts or security risks. Adjust the door if needed before adding a new lock.
Test The Latch Mechanism
Operate the door handle and watch the latch. It should retract and extend without trouble. If the latch sticks or doesn’t catch, fix it before installing a new deadbolt.
Troubleshooting Common Issues
Removing a deadbolt with a key on both sides can be tricky. Many users face common problems that block progress. Knowing how to solve these issues speeds up the task and avoids damage.
This section covers common deadbolt troubles and easy fixes. Follow these tips to handle problems with confidence.
Stuck Deadbolt Cylinder
A deadbolt cylinder may get stuck after years of use. Dirt and rust cause the key to jam inside. Try spraying some lubricant into the keyhole. Wait a few minutes, then gently wiggle the key. Do not force it, or you might break the key.
Misaligned Deadbolt Components
Sometimes the deadbolt does not turn because parts are misaligned. Check if the bolt lines up with the strike plate on the door frame. Tighten loose screws or adjust the strike plate position. This helps the bolt slide smoothly in and out.
Broken Or Worn Keys
Old keys can wear out or break inside the lock. Use needle-nose pliers to remove any stuck key pieces carefully. If the key is worn, replace it before removing the deadbolt. A strong key reduces the chance of problems during removal.
Difficulty Removing The Thumbturn
Some deadbolts have a thumbturn on the inside that blocks removal. Check for a small screw holding the thumbturn in place. Remove the screw with a screwdriver, then pull off the thumbturn. This step clears the way to access the cylinder.
Deadbolt Not Responding To Key Turns
The lock may not turn even with the correct key. This can happen if the lock mechanism is frozen or broken. Tap gently with a rubber mallet to loosen parts. If it still won’t turn, the lock might need replacement.
Tips For Reinstalling Or Replacing The Deadbolt
Reinstalling or replacing a deadbolt requires care and attention. Doing it properly ensures your door stays secure and works smoothly. Follow some simple tips to get the best results. These tips help you avoid common mistakes and make the process easier.
Choose The Right Deadbolt Type
Select a deadbolt that fits your door thickness and style. Measure the door before buying. Pick between single cylinder or double cylinder deadbolts based on your needs. The right fit prevents problems during installation.
Check The Alignment Carefully
Make sure the deadbolt and strike plate align perfectly. Test the bolt by turning the key before final installation. Misalignment can cause the lock to jam or not lock properly. Adjust the strike plate if needed.
Use Proper Tools
Prepare tools like a screwdriver, drill, and measuring tape. Using the right tools saves time and prevents damage. Avoid forcing screws or parts into place. Work slowly and carefully.
Tighten Screws Firmly But Gently
Secure the deadbolt with screws, but do not overtighten. Screws that are too tight can strip the holes or break parts. Tighten until the lock feels stable and does not move.
Test The Lock Multiple Times
After installation, test the deadbolt with the key several times. Ensure it locks and unlocks smoothly. Check both sides if the lock has keys on both sides. Fix any sticking or resistance immediately.
Frequently Asked Questions
How Do I Remove A Deadbolt With Keys On Both Sides?
First, unlock the deadbolt using one key. Then, unscrew the interior screws holding the lock in place. Carefully pull both sides apart. If stuck, gently wiggle the lock to loosen it before removal.
Can I Remove A Deadbolt Without Damaging The Door?
Yes, use the correct screwdriver to avoid stripping screws. Take your time to gently separate lock parts. Avoid forcing components to prevent door or lock damage. Proper tools and careful handling ensure a clean removal.
What Tools Are Needed To Remove A Double-sided Deadbolt?
You need a screwdriver matching the screws, usually Phillips or flathead. A pair of pliers may help with tight parts. Optionally, a lubricant can ease stuck components. Having these tools ensures smooth deadbolt removal.
How Long Does It Take To Remove A Deadbolt Lock?
Removing a deadbolt typically takes 10 to 20 minutes. Time depends on your experience and lock condition. Using the right tools speeds up the process. Patience is key for safe and effective removal.
Conclusion
Removing a deadbolt with keys on both sides is simple with the right steps. Take your time and follow the process carefully. Use the correct tools and stay safe. This guide helps you handle the task without stress. Now, you can fix or replace your deadbolt quickly.
Keep this method in mind for future needs. Doing it yourself saves money and gives you control. Trust your skills and stay patient throughout. You’ve got this!


