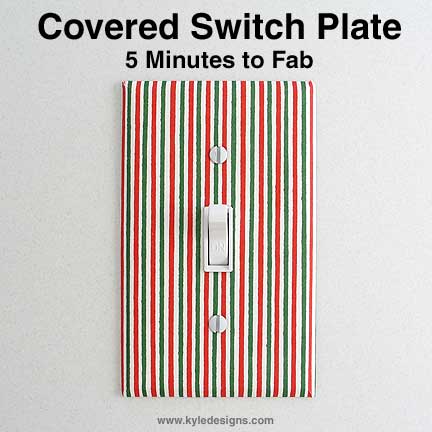
Are you tired of plain, boring light switch plates that clash with your room’s style? What if you could transform them quickly and easily with just a bit of fabric?
Covering your light switch plates with fabric is a simple, budget-friendly way to add a personal touch to any space. You don’t need special skills or expensive tools—just a few materials and some creativity. Keep reading, and you’ll discover step-by-step how to give your switch plates a fresh, stylish look that complements your home perfectly.
Materials Needed
Before starting to cover light switch plates with fabric, gather all materials. Having the right supplies makes the project smooth and fun. The choice of fabric and tools affects the final look and ease of work.
Choosing The Right Fabric
Select fabric that is thin and flexible. Cotton, linen, or light canvas work well. Avoid thick or stiff materials that do not bend easily. Pick colors or patterns that match your room style. Pre-wash fabric to prevent shrinking later.
Essential Tools
Gather scissors to cut fabric neatly. Use a small screwdriver to remove switch plates. Have strong glue or double-sided tape for sticking fabric. A ruler helps measure fabric size. A pencil marks fabric edges for cutting.
Optional Decorative Items
Add small buttons, ribbons, or beads for extra style. Fabric paint can create custom designs. Use a clear sealant to protect fabric and decorations. These extras personalize your switch plates further.
Preparing The Switch Plate
Preparing the switch plate is the first step to cover it with fabric. This step makes sure the fabric sticks well and looks neat. You need to remove the plate carefully and clean it fully. A clean surface helps the glue hold the fabric tightly.
Removing The Plate Safely
Turn off the power to the switch from the breaker box. Use a screwdriver to take out the screws holding the plate. Keep the screws safe for later. Pull the plate gently away from the wall. Avoid forcing it to stop any damage.
Cleaning And Drying
Use a soft cloth and mild soap to clean the plate. Remove all dust, oil, and dirt for better fabric adhesion. Rinse the plate with clean water. Dry it completely with a towel or let it air dry. A dry plate ensures the glue will not peel off.
Cutting And Measuring Fabric
Cutting and measuring fabric is a key step in covering light switch plates. It ensures the fabric fits well and looks neat. Accurate measurements help avoid waste and make the process easier. Taking your time here leads to a better final look.
Measuring The Plate Dimensions
Start by removing the light switch plate from the wall. Use a ruler or tape measure to find the width and height. Measure the edges carefully. Note the exact size on paper. Also measure the screw holes to avoid covering them.
Cutting Fabric For A Perfect Fit
Lay the fabric flat on a clean surface. Use sharp scissors to cut the fabric slightly bigger than the plate. Add about half an inch on each side for folding under. Cut slowly and follow the measured lines. This helps the fabric fit tightly without wrinkles.
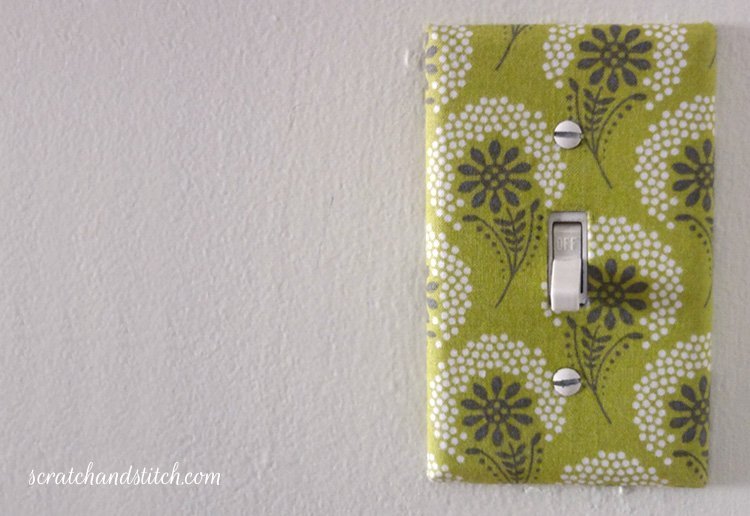
Credit: scratchandstitch.com
Applying Fabric To The Plate
Applying fabric to a light switch plate is a simple way to add style to any room. The process needs care to make sure the fabric sticks well and looks smooth. You will work carefully to avoid wrinkles and bubbles that can spoil the look.
Start by cutting the fabric slightly larger than the plate. This extra fabric helps cover the edges neatly. Use a flat surface and get your adhesive ready before placing the fabric.
Using Adhesive Effectively
Choose a strong glue suitable for fabric and plastic. Spread a thin, even layer on the back of the plate. Avoid using too much glue; it can soak the fabric and cause bumps. Press the fabric gently on the plate, starting at the center. This helps prevent air pockets under the fabric.
Allow the glue to set a little before moving to the next step. This pause makes the fabric stick better and helps you smooth it out easily.
Smoothing Out Wrinkles And Bubbles
Use your fingers or a flat tool to press the fabric from the center outwards. This action pushes out air and smooths the fabric. Work slowly and carefully to avoid stretching the fabric. Small wrinkles can be fixed by lifting and repositioning the fabric gently. For bubbles, prick the fabric lightly with a pin and press again.
Take your time. A smooth finish looks neat and lasts longer. Once happy, trim the extra fabric around the edges with sharp scissors.
Finishing Touches
Finishing touches make your fabric-covered light switch plates look neat and professional. These final steps help secure the fabric and give a clean, polished look. Taking time here improves durability and appearance.
Trimming Excess Fabric
Carefully trim the fabric edges close to the plate. Use sharp scissors for clean cuts. Avoid cutting too close to prevent fraying. Leave a small margin for folding under the edges. Take your time to keep lines straight and tidy.
Sealing The Edges
Apply a thin line of clear craft glue or fabric glue along the edges. Press the fabric firmly to stick it down. This stops the fabric from unraveling over time. Let the glue dry completely before handling the plate. Smooth edges create a neat finish that lasts long.
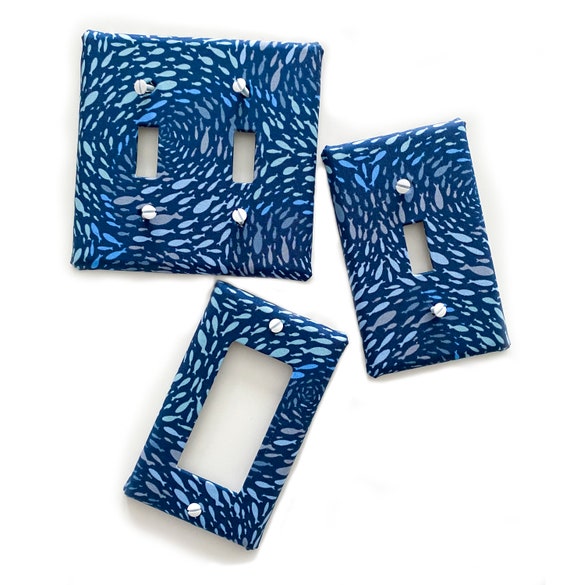
Credit: www.etsy.com
Reinstalling The Switch Plate
Reinstalling the switch plate is the final step in your fabric covering project. It may seem simple, but it requires care to avoid any damage or safety risks. Take your time to make sure the plate fits well over the fabric and the switch.
This part brings your project together and makes your switch look neat. Follow the steps below to complete the job safely and correctly.
Ensuring Safety
Turn off the power to the switch at the main circuit breaker. Double-check that the switch does not work by trying to turn the light on or off. This prevents electric shock during installation.
Use a voltage tester to confirm no current flows through the switch. Avoid touching any wires or metal parts without gloves. Safety is the top priority before you reinstall the plate.
Screwing The Plate Back
Place the fabric-covered plate carefully over the switch. Align the screw holes with the switch box holes. Hold the plate steady to avoid shifting the fabric.
Use a screwdriver to tighten the screws slowly. Do not overtighten as this can crack the plate or damage the fabric. Tighten just enough to hold the plate firmly in place.
Once secure, turn the power back on and test the switch. Your fabric-covered switch plate is now ready and safe to use.
Creative Design Ideas
Creative design ideas make fabric-covered light switch plates stand out. They add personality and style to any room. Simple fabric can transform a plain switch plate into a small work of art. These ideas help you explore fun ways to mix textures, colors, and details. Brighten your space with unique patterns and little touches that catch the eye.
Mixing Patterns And Colors
Combine different patterns to create visual interest. Stripes with florals, polka dots with checks—mix carefully. Use colors that complement or contrast for bold effects. Soft pastels with bright shades add depth and charm. Try repeating colors in different patterns for balance. Experiment with fabric scraps to find the best match. This approach turns switch plates into stylish accents.
Adding Embellishments
Embellishments bring texture and detail to fabric covers. Sew or glue small buttons around the edges for a cute border. Add tiny beads or sequins for sparkle and shine. Use lace or ribbon trim to give a vintage touch. Fabric flowers or appliques add a playful, 3D effect. These simple additions make switch plates feel special and unique. Personal touches create a cozy, inviting look.
Maintenance Tips
Fabric-covered light switch plates add style and personality to any room. Keeping them clean and in good shape is important. Proper care helps the fabric look fresh and last longer. Small repairs can fix damage before it gets worse. Follow these simple tips to maintain your fabric-covered plates easily.
Cleaning Fabric-covered Plates
Dust the fabric gently with a soft brush or cloth. Avoid using water directly on the fabric. Light stains can be spot cleaned with a damp cloth. Dab the stain carefully, do not rub hard. Use mild soap if needed, but test on a small area first. Let the plate air dry completely before reattaching it to the wall.
Repairing Minor Damages
Loose fabric edges can be glued back with fabric adhesive. Use a small brush to apply glue under the fabric. Press gently and hold until it sticks well. Small tears can be patched with matching fabric pieces. Cut patches slightly larger than the tear. Attach patches with fabric glue and smooth out wrinkles. Regular checks help catch damage early for easy repairs.
Credit: www.kyleswitchplates.com
Frequently Asked Questions
How Do You Cover Light Switch Plates With Fabric?
To cover light switch plates, remove the plate, cut fabric slightly larger, and use adhesive glue. Wrap fabric around the plate and press firmly. Let it dry before reinstalling for a neat, decorative finish that matches your room decor.
What Materials Are Needed To Cover Switch Plates With Fabric?
You need fabric, scissors, adhesive glue, a paintbrush, and a screwdriver. Choose lightweight fabric for easy wrapping. Use strong glue to ensure fabric sticks well. A screwdriver helps remove and reattach the switch plate safely.
Can Fabric-covered Switch Plates Be Cleaned Easily?
Yes, fabric-covered switch plates can be cleaned gently. Use a soft, damp cloth to wipe dirt or dust. Avoid soaking or using harsh chemicals as it may damage the fabric or adhesive. Spot clean for best results.
Is It Safe To Cover Switch Plates With Fabric?
Yes, it is safe if done properly. Ensure the fabric does not interfere with electrical parts. Use non-flammable fabric and avoid covering vents or switches. Always turn off power before removing or installing switch plates.
Conclusion
Covering light switch plates with fabric adds style to any room. It’s a simple, affordable way to refresh your space. You only need a few materials and basic steps. The process is quick and fun to do yourself. Choose fabric that matches your décor for the best look.
This small change can make a big difference in your home. Try it today and see how it brightens your walls. Easy, creative, and personal—fabric switch covers are a smart choice.