If you want to install a scope mount perfectly, knowing how to drill and tap is a must. Doing this yourself saves money and gives you full control over the process.
But it can feel tricky if you’re not sure where to start. In this guide, you’ll discover simple, step-by-step instructions to help you drill and tap with confidence. By the end, you’ll have the skills to secure your scope mount firmly and precisely, making every shot count.
Ready to get started? Let’s dive in.

Credit: www.vintagegunscopes.com
Choosing The Right Tools
Choosing the right tools is the first step to drill and tap for a scope mount. Using the correct tools makes the job easier and safer. It also helps to get precise holes and threads. This section explains how to select drill bits, taps, and other accessories.
Selecting Drill Bits
Choose drill bits made from high-speed steel or cobalt. These materials last longer and cut clean holes. Match the drill bit size to the tap’s requirements. Use a drill bit that is slightly smaller than the tap’s diameter. This allows room for the threads. Avoid using dull or worn bits to prevent damage.
Picking The Correct Tap
Select a tap that fits the thread size of your scope mount screws. Common thread types are metric or imperial. Check the mount’s specifications before buying taps. Choose a tap set with a taper, plug, and bottoming tap for best results. Use a hand tap wrench to control pressure and avoid breakage.
Essential Accessories
Use cutting oil to lubricate the tap and drill bit. It reduces friction and heat during cutting. A center punch helps mark the drilling spot accurately. This prevents the drill bit from slipping. A tapping guide or drill press ensures straight holes. Keep a brush or cloth handy to clean metal shavings.
Preparing The Work Area
Preparing the work area is the first step before drilling and tapping for a scope mount. A clean and organized space helps you work safely and accurately. Take time to set up everything properly. This will make the process smoother and prevent mistakes.
Securing The Rifle
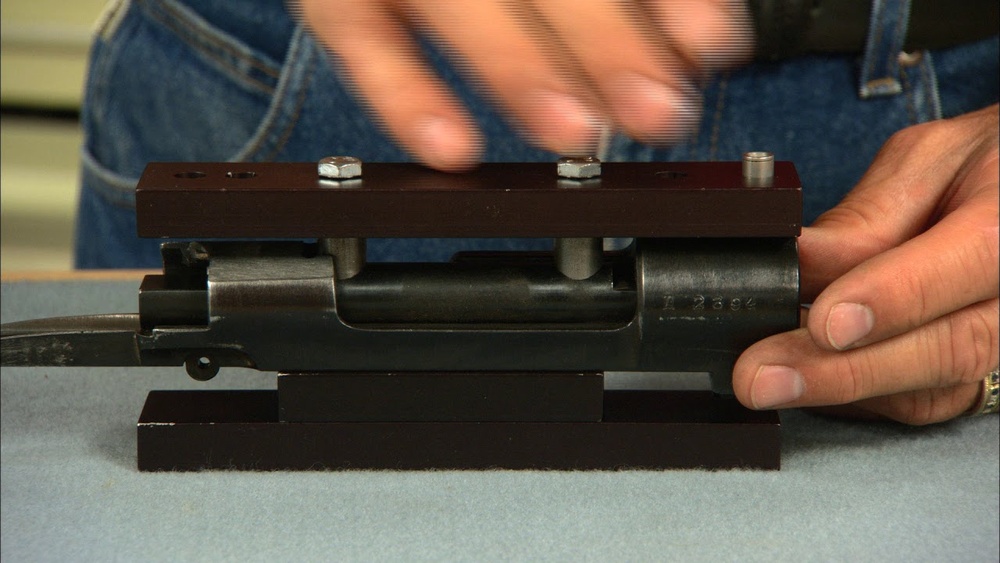
Place the rifle on a stable surface. Use a gun vise or padded clamps to hold it firmly. Do not let the rifle move during drilling. Movement can cause errors or damage. Double-check the rifle is steady before starting.
Marking The Drill Points
Use the scope mount as a template. Align it on the rifle’s rail or base. Mark the exact spots where you will drill. Use a fine-tip marker or punch tool. Clear and precise marks guide your drill bit perfectly.
Ensuring Safety Measures
Wear safety goggles to protect your eyes from debris. Use ear protection if needed. Keep your hands away from the drill path. Work in a well-lit area to see clearly. Keep the workspace free of distractions and clutter.
Drilling Techniques
Drilling is a key step when fitting a scope mount. It needs focus and care to get right. Proper drilling techniques help create clean holes that fit screws perfectly. This ensures your scope mount stays secure and steady. Avoid common errors by following clear steps.
Understanding the right speed, alignment, and mistakes to avoid will improve your drilling job. This section explains these important tips in simple terms.
Setting Drill Speed
Choose a slow drill speed for metal surfaces. Slow speed stops the drill bit from overheating. Overheating can dull the bit quickly. Use steady pressure, not force. Let the drill bit do the work. Faster speed suits softer materials but not metal.
Maintaining Drill Alignment
Keep the drill straight and steady. Align the bit exactly where you want the hole. Use a guide or clamp to hold the workpiece. Misalignment causes uneven holes and weak mounting points. Check your angle often during drilling.
Avoiding Common Mistakes
Do not rush the drilling process. Rushing leads to mistakes and poor fit. Avoid pushing too hard on the drill. This can break the bit or damage the material. Always wear safety glasses to protect your eyes. Double-check measurements before drilling any hole.
Credit: www.galatiinternational.com
Tapping Process
The tapping process is a key step when installing a scope mount. It creates threads inside a drilled hole. These threads allow screws to hold the mount firmly in place. Proper tapping ensures a secure fit and prevents damage to the material. Taking care during tapping makes the mount last longer and stay stable under recoil.
Choosing Tap Direction
Start tapping by turning the tap clockwise. This cuts the threads inside the hole. Turn the tap slowly and steadily. After a few turns, reverse the tap slightly. This breaks the metal chips and clears the threads. Repeat this back-and-forth motion. It helps avoid tap breakage and keeps threads clean.
Using Lubricants
Apply lubricant to the tap and hole before starting. Lubricants reduce friction and heat. They make tapping smoother and easier. Use cutting oil or light machine oil. Avoid thick grease as it can clog the threads. Lubrication also protects the tap from wear and damage.
Clearing Metal Shavings
Metal shavings can block the tap and damage threads. Stop tapping often to clear shavings from the hole. Use a small brush or compressed air to clean the threads. Keeping the hole clean prevents tap jamming. It also ensures clean, strong threads for the screws.
Mount Installation Tips
Mount installation is a key step to secure your scope correctly. Proper mounting ensures stability and accuracy during shooting. Follow these tips to get the best results.
Verifying Thread Fit
Check the threads on your screws and tapped holes carefully. Make sure they match perfectly before installation. A wrong thread fit can strip the holes or cause loose mounting. Test the screws by hand first to ensure smooth threading.
Aligning The Scope Mount
Place the mount on the rifle carefully. Align it straight with the barrel and receiver. Use a level or alignment tool if available. Proper alignment prevents scope drift and improves shooting accuracy. Tighten screws slightly to hold the mount in place before final tightening.
Tightening To Specifications
Follow the manufacturer’s torque specs for tightening screws. Over-tightening can damage the mount or rifle. Under-tightening can cause the scope to shift during use. Use a torque wrench for best control. Tighten screws evenly in a crisscross pattern for balanced pressure.
Troubleshooting Issues
Drilling and tapping for a scope mount can have small problems. These issues may slow down your work or harm your rifle. Knowing how to fix common problems helps you finish the job well. Below are simple ways to solve frequent troubles during this task.
Fixing Stripped Threads
Stripped threads happen when the tap or screw damages the hole. The screw will not hold tight. Use a thread repair kit with a helicoil insert. It replaces the damaged threads inside the hole. Another choice is to drill a larger hole and tap a bigger thread size. Avoid forcing screws to stop stripping threads again.
Dealing With Misaligned Holes
Misaligned holes cause the scope mount not to fit properly. Check your drill guide before drilling. Use a clamp or jig to hold the rifle steady. If holes are slightly off, use an elongated slot on the mount. This helps adjust the position. For big errors, fill the holes and start again carefully.
Preventing Damage To The Rifle
Protect the rifle surface before drilling. Use painter’s tape over the area to avoid scratches. Drill slowly with a sharp bit to prevent cracking. Clear metal chips often to stop them from scratching. Wear safety glasses and keep your hands away from the drill path. Take your time to avoid costly damage.
Maintenance And Care
Proper maintenance and care are key after drilling and tapping for a scope mount. They keep your equipment working well and safe. Taking small steps helps avoid damage and extends the life of your tools and mounts.
Cleaning After Installation
Clean the drilled and tapped area carefully. Use a soft brush to remove metal shavings and dust. Wipe the surface with a clean cloth. Avoid using water directly on metal parts to stop rust. Use a light oil to protect threads from corrosion.
Inspecting For Wear
Check the tapped holes and screws often. Look for signs of wear or damage. Tighten screws if they feel loose. Replace any parts that show cracks or stripping. Early checks prevent bigger problems later.
Storing Tools Properly
Store your drill and tap tools in a dry, clean place. Keep them in a toolbox or case to avoid moisture and dust. Oil metal parts lightly before storing. Proper storage keeps tools sharp and ready for use.

Credit: www.youtube.com
Frequently Asked Questions
How Do I Drill Holes For A Scope Mount?
To drill holes, first mark the exact location. Use a center punch to prevent bit slipping. Drill slowly with a properly sized bit for accuracy and clean holes.
What Size Tap Is Needed For Scope Mounts?
The tap size depends on your scope mount screws. Commonly, 6-48 or 8-32 taps are used. Always confirm with your mount specifications.
How To Avoid Damaging The Rifle While Tapping?
Use a drill guide to keep angles straight. Apply light oil to the tap for smooth cutting. Tap slowly and back out frequently to clear chips.
Can I Tap Aluminum For Scope Mounts?
Yes, aluminum is easy to tap. Use sharp taps and cutting oil to ensure clean threads. Tap carefully to avoid stripping soft metal.
Conclusion
Drilling and tapping for a scope mount takes care and patience. Choose the right tools and measure twice before drilling. Keep your work steady to avoid mistakes. Tap slowly to create clean threads. Clean the hole to remove any debris before mounting.
Taking these steps helps your scope stay secure and aligned. Practice makes the process easier and safer. Enjoy better accuracy on your next shooting trip. Simple steps lead to strong, reliable scope mounts.