Ready to give your kitchen or bathroom a fresh, stylish update without the hassle of a full remodel? Installing cabinet hardware is one of the simplest ways to transform your space—and you can do it yourself with just a few tools and easy steps.
Whether you’re replacing old knobs or adding sleek new pulls, this guide will walk you through everything you need to know to install cabinet hardware perfectly. By the end, you’ll have the confidence to tackle this project on your own and enjoy a polished, professional look that elevates your home.
Let’s get started!
Choosing Cabinet Hardware
Choosing the right cabinet hardware is an important step in your installation project. The hardware not only adds function but also enhances the look of your cabinets. Picking pieces that fit your style and needs can make your space feel complete and polished.
Cabinet hardware comes in many shapes and sizes. The choice depends on your cabinet design and how you want to use them. Consider the feel and ease of use as well as the visual impact.
Types Of Cabinet Hardware
There are several types of cabinet hardware. Knobs are small and round, perfect for a simple look. Pulls are longer handles, ideal for drawers and larger doors. Cup pulls offer a vintage touch with their curved shape. Bar pulls provide a modern, sleek appearance. Choose the type that matches your cabinet’s function and style.
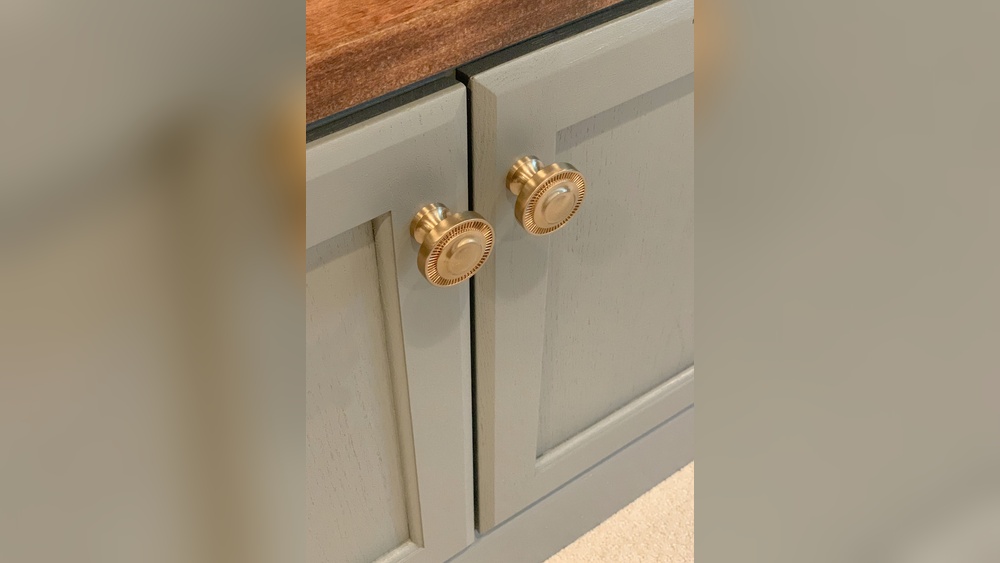
Matching Style And Finish
Hardware style should match your cabinet design. Classic cabinets suit traditional hardware, like bronze or brass finishes. Modern cabinets look great with chrome or matte black pulls. The finish must blend with other room fixtures. Consistency in style and finish keeps the room balanced and appealing.
Selecting Appropriate Pull Length
The pull length affects both look and function. For drawers, a pull about one-third the drawer width works well. Larger drawers need longer pulls for easy grip. Small cabinet doors often look best with shorter pulls or knobs. Measure carefully to find the right size for comfort and style.
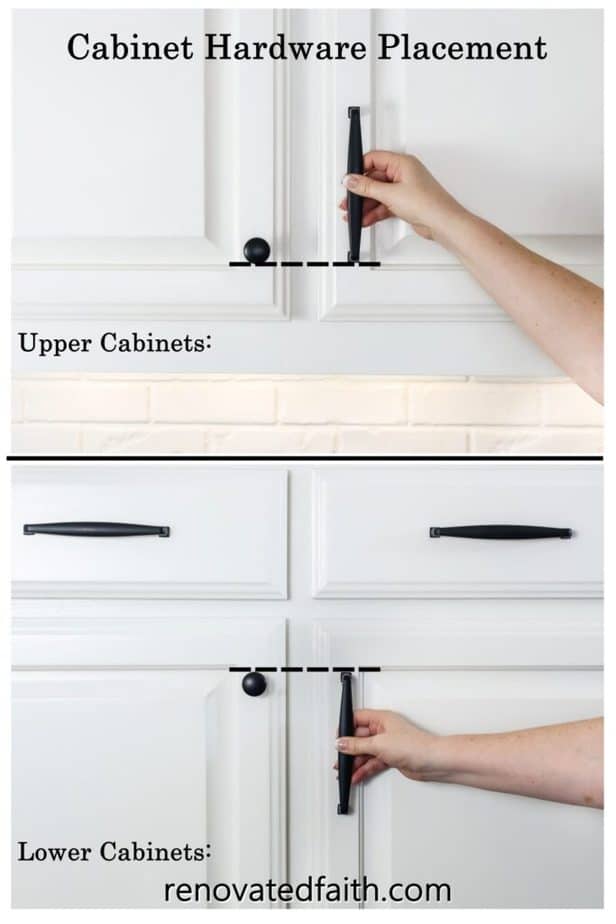
Credit: renovatedfaith.com
Tools And Materials Needed
Installing cabinet hardware requires the right tools and materials. These help you work efficiently and get a clean, professional look. Knowing what you need saves time and prevents mistakes.
This section lists the must-have items and some extras that make the job easier. Prepare everything before you start to keep the process smooth.
Essential Tools
- Power drill with drill bits for pilot holes
- Screwdriver (Phillips or flathead depending on screws)
- Measuring tape for precise placement
- Pencil to mark drill points
- Level to keep hardware straight
- Combination square for accurate alignment
- Clamps to hold parts steady if needed
Hardware Components
- Cabinet knobs or pulls as chosen for style
- Matching screws, usually included with hardware
- Mounting plates if your hardware requires them
- Anchors for hollow cabinet doors if needed
Optional Accessories
- Jigs or templates to speed up marking drill holes
- Masking tape to prevent wood splintering
- Wood filler to fix any mistakes
- Touch-up paint or stain for small repairs
- Gloves to protect your hands
Preparing Cabinets For Installation
Preparing cabinets for hardware installation sets the foundation for a smooth project. It ensures the new hardware fits well and looks great. Taking the time to ready your cabinets saves effort later and improves the final result.
Removing Old Hardware
Start by carefully removing any old knobs or pulls. Use a screwdriver to loosen screws holding the hardware. Keep the screws if you plan to reuse them. Removing old hardware clears the surface and reveals any damage to fix.
Cleaning And Inspecting Surfaces
After removing hardware, clean the cabinet doors and drawers thoroughly. Use a mild cleaner and a soft cloth. Cleaning removes dust, grease, and dirt that can affect installation. Check surfaces for cracks, holes, or damage. Repair any issues before proceeding to ensure a smooth surface for mounting new hardware.
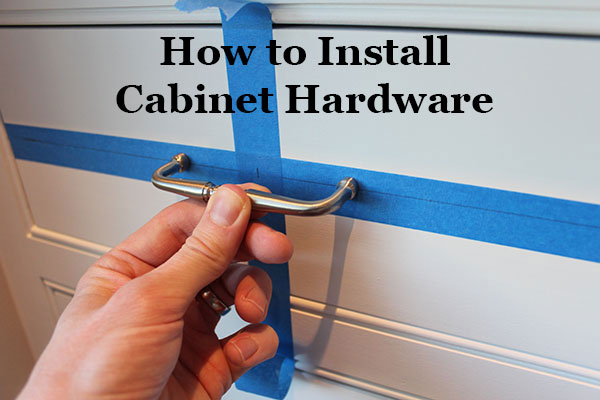
Marking Hole Locations
Measure carefully to mark where the new hardware will go. Use a ruler or tape measure for accuracy. Mark holes with a pencil or painter’s tape. Double-check measurements to keep hardware aligned and consistent across all cabinets. Proper marking prevents mistakes and makes the installation process easier.
Marking And Measuring
Marking and measuring are crucial first steps when installing cabinet hardware. Accurate marks ensure that handles and knobs align perfectly. This avoids mistakes that can damage the cabinet or look unprofessional. Taking your time here saves effort later.
Use proper tools like a tape measure, pencil, and level. Measure twice to avoid errors. Mark lightly so you can adjust if needed. Consistent measurements create a balanced, polished appearance across all cabinets.
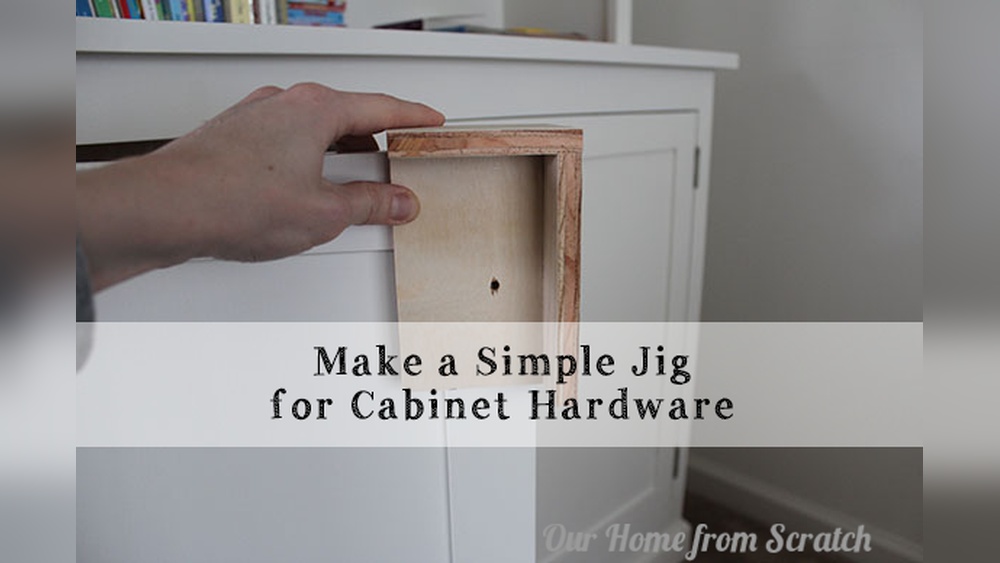
Using A Template Or Jig
Templates or jigs help mark holes quickly and accurately. They keep the hardware placement uniform on every cabinet door and drawer. You can buy adjustable jigs or make one from scrap wood.
Place the template on the cabinet surface. Align it using edges or corners. Mark the hole positions through the template’s guide holes. This method reduces guesswork and speeds up the process.
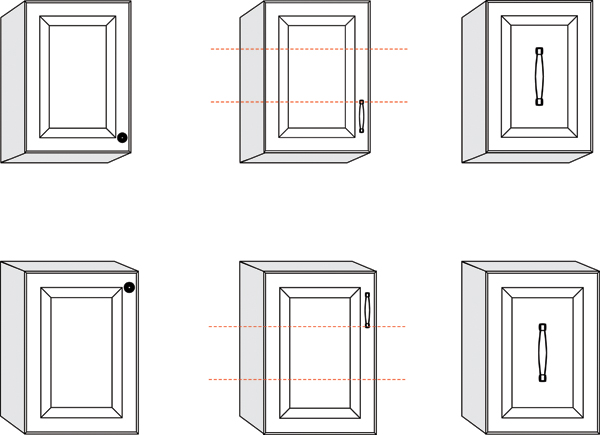
Standard Placement Guidelines
Knobs usually go 2 to 3 inches from the cabinet corner. For drawers, place pulls horizontally near the top edge. For doors, install pulls vertically near the outer edge.
Keep pulls about one-third the drawer’s width for a balanced look. Some prefer knobs centered vertically and horizontally on doors. Follow simple placement rules to achieve a neat, professional style.
Ensuring Consistency Across Cabinets
Measure all cabinets before drilling any holes. Use a level to check your marks for straightness. Recheck distances from edges and corners on each cabinet.
Consistent hardware placement ties the room together visually. It makes cabinets look like one coordinated unit. Take your time to align marks carefully on every door and drawer.
Drilling Holes
Drilling holes is a key step in installing cabinet hardware. Proper holes ensure the knobs and pulls fit securely and look great. Taking care during drilling saves time and prevents damage. Use the right tools and methods for best results.
Choosing Drill Bit Size
Select a drill bit that matches the screw size. Too large a bit makes loose holes. Too small a bit can split the wood. Check the hardware package for screw dimensions. Use a bit slightly smaller than the screw diameter for a snug fit.
Drilling Techniques
Mark the hole position with a pencil or template. Use a clamp to hold the cabinet steady. Drill slowly and apply steady pressure. Stop drilling as soon as you reach the other side. Clear wood dust from the hole before installing hardware.
Preventing Damage To Cabinets
Place painter’s tape over the drilling spot. This reduces wood splintering and chipping. Use a backing board behind the drilling area. Drill straight to avoid angled holes. Avoid pushing too hard to keep the surface intact.
Credit: ourhomefromscratch.com
Attaching Hardware
Attaching hardware to cabinets is a key step for functionality and style. Proper attachment ensures handles and knobs stay secure and look great.
Follow simple steps to attach hardware cleanly and safely. Use the right tools and techniques for a strong hold.
Inserting Screws
Start by aligning the hardware holes with the cabinet surface. Insert screws from the inside of the cabinet through the holes.
Hold the hardware steady on the front side as you guide the screws. This keeps the hardware in place and prevents shifting.
Hand-tighten the screws at first to check alignment before fully securing them.
Securing Knobs And Pulls
Once screws are in place, thread knobs or pulls onto the screws. Hold the hardware firmly to avoid wobbling.
Use a screwdriver to tighten the screws slowly. Tighten evenly to ensure the hardware sits flat against the cabinet.
Check the hardware’s position and adjust if needed before fully tightening.
Avoiding Over-tightening
Stop tightening as soon as the hardware feels snug and stable. Over-tightening can crack wood or damage finishes.
Use gentle pressure and avoid forcing screws beyond their natural stop. This protects the cabinet’s surface and hardware.
If resistance increases suddenly, back off slightly to prevent damage.
Tips For Perfect Alignment
Perfect alignment is key when installing cabinet hardware. It ensures a neat, professional look and smooth functionality. Small errors can make hardware appear crooked or uneven. Follow these simple tips to achieve flawless alignment every time.
Checking Hardware Placement
Measure carefully before drilling holes. Use a ruler or tape measure to mark the exact spots. Double-check the marks to avoid mistakes. Align the hardware with cabinet edges or drawer fronts for consistent placement. Use a pencil to make light marks that are easy to erase later.
Adjusting For Visual Balance
Look at the hardware from different angles. Sometimes, perfect measurements don’t look right to the eye. Adjust the position slightly to create visual harmony. For drawers, placing pulls slightly above center often looks better. Trust your eyes to balance precision with appearance.
Maintaining Uniformity
Keep the hardware placement consistent across all cabinets and drawers. Use a jig or template to repeat the exact position. Uniformity creates a clean, organized look that enhances the room’s style. Check alignment regularly during installation to maintain perfect uniformity.
Common Mistakes To Avoid
Installing cabinet hardware might seem simple but can be tricky. Mistakes can lead to poor looks or damage. Avoiding common errors makes your work neat and long-lasting. Learn what to watch out for below.
Misaligned Hardware
Hardware that is not straight looks messy and unprofessional. It can make drawers and doors hard to use. Use a level or ruler to keep handles and knobs perfectly aligned. Double-check measurements before drilling any holes.
Incorrect Hole Placement
Placing holes in the wrong spot can ruin your cabinets. Measure carefully from the edges and mark spots clearly. Use a template or jig to keep holes consistent on all cabinets. Avoid guessing or eyeballing the location.
Damaging Cabinet Surfaces
Drilling or screwing without care can scratch or crack cabinet surfaces. Use painter’s tape on the drilling spot to protect the finish. Drill slowly and steadily to avoid splintering wood or chipping paint. Tighten screws just enough to hold hardware firmly.
Finishing Touches
Finishing touches complete your cabinet hardware installation. They ensure a clean look and smooth function. These final steps make your cabinets look polished and work well every day.
Cleaning Up
Wipe away dust and fingerprints from the hardware. Use a soft cloth and mild cleaner for best results. Avoid harsh chemicals that can damage finishes. Clean the surrounding cabinet surface too. This step enhances the new hardware’s shine and appeal.
Testing Hardware Functionality
Open and close each door or drawer several times. Check for smooth movement and secure attachment. Tighten screws if any hardware feels loose. Make sure knobs and pulls do not wobble. Proper testing prevents future problems and improves usability.
Maintaining Your Hardware
Regularly clean your hardware to keep it looking new. Use gentle cleaners and a soft cloth. Avoid abrasive tools that scratch surfaces. Periodically check screws and tighten if needed. Proper care extends the life and beauty of your cabinet hardware.
Credit: www.cabinetknob.com
Frequently Asked Questions
What Is The 1 3 Rule For Cabinet Hardware?
The 1 3 rule for cabinet hardware means the pull length should be one-third the drawer or door width. This ensures balanced, proportional, and visually appealing hardware placement.
How Do I Install Cabinet Hardware?
To install cabinet hardware, mark hole positions using a template. Drill holes carefully. Insert screws from inside. Attach knobs or pulls and tighten screws firmly without over-tightening.
Where Should Drawer Pulls Be Placed?
Place drawer pulls centered horizontally and vertically on the drawer front. For wider drawers, position pulls one-third from the edge. Maintain consistent placement across all drawers for a balanced, professional look. Use measuring tools or a jig to ensure accuracy and uniformity.
Where To Drill Holes For Cabinet Pulls?
Drill holes for cabinet pulls on the door corner opposite the hinge. Center holes vertically and horizontally on drawers. Use a template guide for accurate placement.
Conclusion
Installing cabinet hardware can be simple and rewarding. Measure carefully and mark holes precisely. Use the right tools to avoid mistakes. Tighten screws gently to prevent damage. Consistent placement creates a neat, professional look. Take your time for the best results.
Your cabinets will look fresh and stylish. Enjoy the new feel of your space.