Are you tired of your automatic light switch turning off too soon or staying on longer than you want? Changing the timer on your automatic light switch can solve this problem and give you full control over your lighting.
Imagine never having to walk into a dark room or waste electricity again. In this guide, you’ll learn exactly how to adjust the timer quickly and easily, even if you’re not a tech expert. Keep reading, and you’ll discover simple steps that make your lights work perfectly for your schedule and lifestyle.

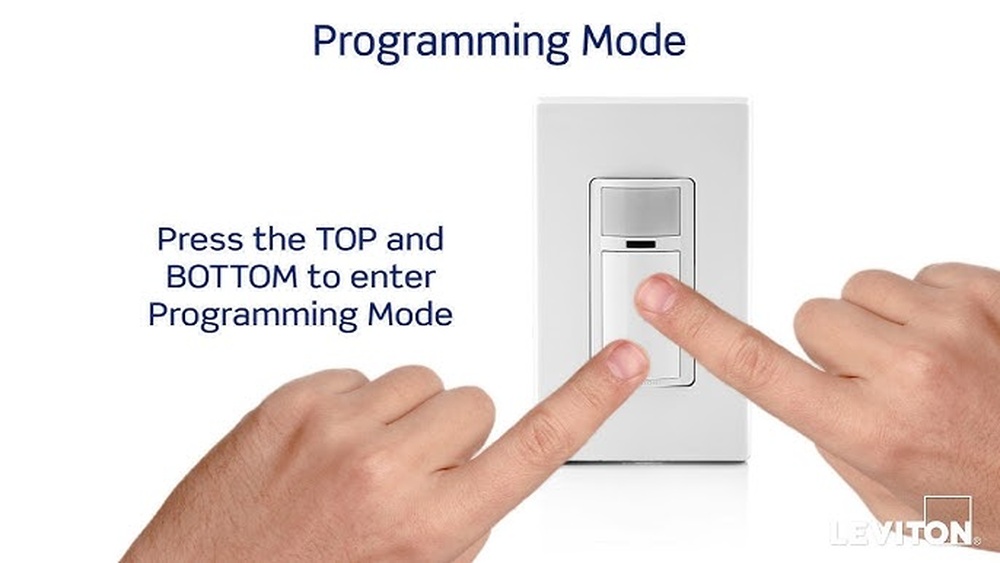
Credit: www.youtube.com
Types Of Automatic Light Switch Timers
Automatic light switch timers help control when your lights turn on and off. They save energy and add convenience. Different types of timers offer various features and ease of use. Understanding these types helps you choose the best one for your needs.
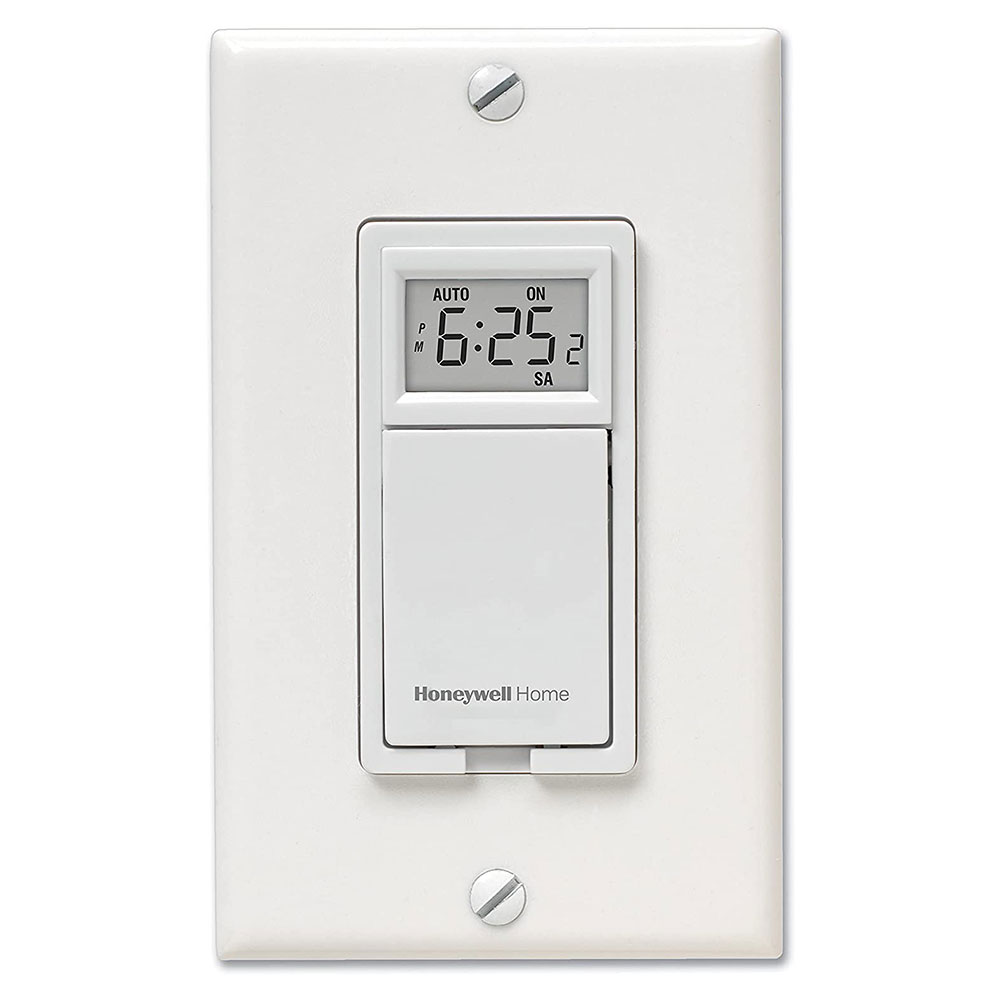
Digital Timers
Digital timers show time on a screen. You can set exact on and off times. They often allow multiple programs for different days. These timers are very accurate. You can easily change the schedule anytime. They usually need batteries or electricity to work.
Mechanical Timers
Mechanical timers use a dial to set time. You turn the dial to select how long lights stay on. These timers work without batteries. They are simple and durable. Mechanical timers are easy to use but less precise than digital ones. Good for basic needs and short periods.
Smart Timers
Smart timers connect to your phone or home system. You control them with an app or voice commands. They offer flexible schedules and remote access. Smart timers can adjust to your habits automatically. Some models support voice assistants like Alexa or Google. Great for tech-savvy users wanting full control.

Credit: www.wikihow.com
Tools Needed For Timer Adjustment
Adjusting the timer on an automatic light switch is a simple task. It needs a few basic tools and safety gear. Having the right tools makes the process smooth and safe. Let’s look at what you need before starting the adjustment.
Basic Tools
A small flathead screwdriver is essential for opening the switch cover. You will also need a Phillips screwdriver for removing screws inside. A pair of needle-nose pliers helps in handling small wires. A voltage tester is important to check if the power is off. Keep a flashlight handy for better visibility in dark spaces.
Safety Equipment
Wear insulated gloves to protect from electrical shocks. Safety goggles prevent dust or sparks from reaching your eyes. Use rubber-soled shoes to avoid grounding yourself. Turn off the main power supply before starting any work. Keep a fire extinguisher nearby just in case.
Preparing To Change The Timer
Preparing to change the timer on an automatic light switch requires careful steps. Safety is the top priority. You must take simple actions before touching the switch itself.
These steps help avoid electric shock and protect your switch. Follow the instructions closely for a smooth process.
Turn Off Power
Locate the circuit breaker that controls the light switch. Switch it off to cut power to the area. Test the switch to make sure no electricity flows. Use a non-contact voltage tester for safety. Never skip this step. It ensures your hands stay safe during the work.
Remove The Switch Cover
Unscrew the switch cover gently with a screwdriver. Place the screws somewhere safe to avoid loss. Carefully pull the cover away from the wall. Avoid damaging the wires behind. This exposes the timer mechanism inside the switch. Now you can access the timer settings for adjustment or replacement.
Adjusting The Timer Settings
Adjusting the timer settings on an automatic light switch lets you control when lights turn on or off. This saves energy and adds convenience. Different types of timers have unique ways to set the schedule. Below are simple steps for digital, mechanical, and smart timers.
Setting Digital Timer
Digital timers show a screen with time and options. Press the mode or set button to enter time setting. Use arrow keys to adjust the hour and minute. Confirm the time by pressing the set button again. Next, program the on and off times by selecting start and stop. Save your settings before exiting the menu. The digital timer now controls your light automatically.
Setting Mechanical Timer
Mechanical timers have a dial with numbers and small pins or tabs. Turn the dial clockwise to the current time. Push down the pins or tabs at the hours you want the light on. Leave pins up for off times. Rotate the dial slowly to check the pins move smoothly. Plug in your light switch and timer. The light will follow the mechanical timer’s schedule.
Configuring Smart Timer
Smart timers connect to your phone or home network. Download the app related to your timer brand. Open the app and pair your device following prompts. Set the on and off times using the app’s scheduler. You can also set multiple schedules for different days. Save your settings in the app. The smart timer adjusts your lights based on your chosen times.
Testing The New Timer Settings
Testing the new timer settings is essential to ensure your automatic light switch works as planned. This step confirms the timer turns the lights on and off at the right times. Proper testing helps avoid wasted energy and inconvenience.
It is best to observe the switch during its first full cycle after setting the timer. This allows you to see if the changes match your needs. Check for any delays or failures in operation. Early detection makes fixing issues easier and quicker.
Power On And Check
Turn the power back on at the circuit breaker or fuse box. Watch the light switch closely as it powers up. The timer display or indicator light should activate. Verify the set times appear correctly on the timer screen.
Allow the timer to complete a full on/off cycle. Note whether the lights respond at the programmed times. Test both the on and off functions. Confirm the light switch follows the new schedule without errors.
Troubleshooting Common Issues
If the lights do not turn on or off as expected, check the timer settings again. Make sure the current time is correct on the timer. Incorrect clock settings often cause timing errors.
Inspect the wiring connections for any loose or wrong wiring. Tighten all screws and ensure wires are properly seated. Faulty wiring can stop the timer from working fully.
Reset the timer and re-enter the settings if problems persist. Sometimes, the timer needs a restart to apply changes. Consult the timer’s manual for reset instructions.
Maintenance Tips For Automatic Light Switches
Proper care keeps your automatic light switch working well for years. Regular upkeep prevents faults and ensures smooth operation. Simple steps save time and cost on repairs.
Regular Cleaning
Dust and dirt can block the sensor or buttons. Use a soft, dry cloth to wipe the switch surface gently. Avoid wet cloths or harsh chemicals that may damage it. Clean the switch at least once a month to keep it responsive. Check the surrounding area for spider webs or debris too.
Periodic Testing
Test your automatic light switch to confirm it works correctly. Turn it on and off several times to check response speed. Adjust the timer settings and observe if the lights change accordingly. Do this every few months to catch issues early. Fast fixes prevent bigger problems later.
Credit: stonedesignbysantos.com
Frequently Asked Questions
How Do I Reset The Timer On An Automatic Light Switch?
To reset the timer, first turn off the power. Then press the reset button or follow the manual’s steps. This clears previous settings and allows you to set a new timer accurately.
Can I Change The Timer Without Tools?
Yes, many automatic light switches have simple buttons or dials. You can adjust the timer directly on the switch without needing any tools.
Why Won’t My Automatic Light Switch Timer Change?
If the timer won’t change, power might still be on or the switch could be locked. Ensure power is off and check for a lock feature in the manual.
How Long Does It Take To Change The Timer?
Changing the timer usually takes just a few minutes. It involves resetting the switch and setting the desired time using buttons or dials.
Conclusion
Changing the timer on your automatic light switch is simple and quick. Just follow the steps carefully for the best results. Adjusting the timer helps save energy and adds convenience to your home. You can set the light to fit your daily schedule easily.
Remember to test the switch after changing the timer. This way, you ensure it works as you want. Keep your home safe and well-lit without any hassle. Try it today and enjoy better control over your lighting.

