Are you looking to control several light fixtures with just one switch? It’s easier than you might think, and it can make your space look cleaner and more organized.
Imagine turning on all your lights with a single flick – no more running around flipping multiple switches. In this guide, you’ll learn simple steps to connect multiple lights to one switch safely and efficiently. Whether you want to brighten up a room or add convenience, this article will give you the clear, straightforward advice you need to get started.
Keep reading, and you’ll be ready to tackle this project with confidence.

Credit: diy.stackexchange.com
Tools And Materials Needed
Before starting to connect multiple light fixtures to one switch, gather the right tools and materials. This preparation saves time and helps avoid mistakes. Having everything ready ensures a smooth and safe installation process.
Essential Tools
- Voltage tester – checks if wires are live
- Wire strippers – remove insulation from wires
- Screwdrivers – flathead and Phillips for screws
- Needle-nose pliers – bend and hold wires
- Electrical tape – insulates wire connections
- Wire nuts – secure wire connections
- Drill – for mounting fixtures or switch boxes
- Measuring tape – measures wire lengths and distances
Required Materials
- Light fixtures – choose the style and type needed
- Single-pole switch – controls multiple fixtures
- Electrical wire – typically 14/2 or 12/2 gauge, depending on circuit
- Wire connectors – join wires safely and securely
- Electrical boxes – house switches and fixtures
- Switch plate cover – finishes the switch installation
- Circuit breaker – protects the circuit from overload

Credit: www.youtube.com
Safety Precautions
Working with electrical wiring can be risky. Safety is the top priority before starting to connect multiple light fixtures to one switch. Taking the right safety steps protects you from shocks and accidents. Follow these simple precautions to keep the job safe and smooth.
Power Shutoff
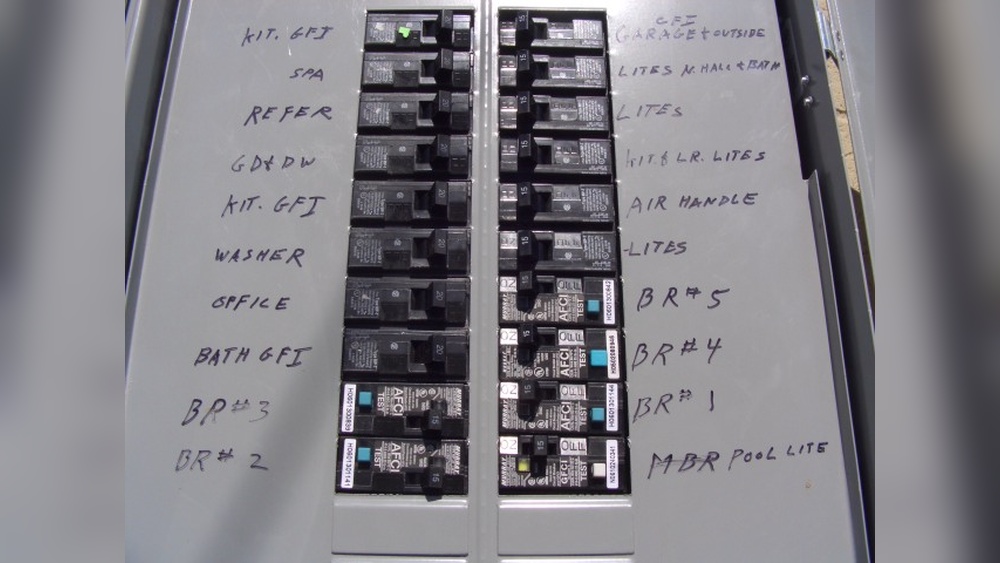
Turn off the power at the circuit breaker. Do not rely only on the wall switch. Use a voltage tester to make sure no electricity flows. This step prevents shocks and short circuits. Never start wiring while the power is on.
Proper Gear
Wear insulated gloves to protect your hands. Use safety goggles to shield your eyes. Choose tools with insulated handles. These tools reduce the risk of electrical shock. Proper gear helps you work safely and confidently.
Basic Wiring Concepts
Before wiring multiple light fixtures to one switch, learn basic wiring concepts. These ideas help you work safely and correctly. Understanding how circuits work and the types of wires used is key. This knowledge makes installation easier and prevents problems.
Understanding Circuits
A circuit is a path for electricity to flow. It starts at the power source and ends at the light fixture. The switch controls the flow by opening or closing the circuit. When the switch is on, electricity flows to the lights. When off, the flow stops.
Circuits must be complete for lights to work. Breaks or wrong connections stop the flow. Multiple lights on one switch share the same circuit. This means electricity flows through all lights in order.
Types Of Wires
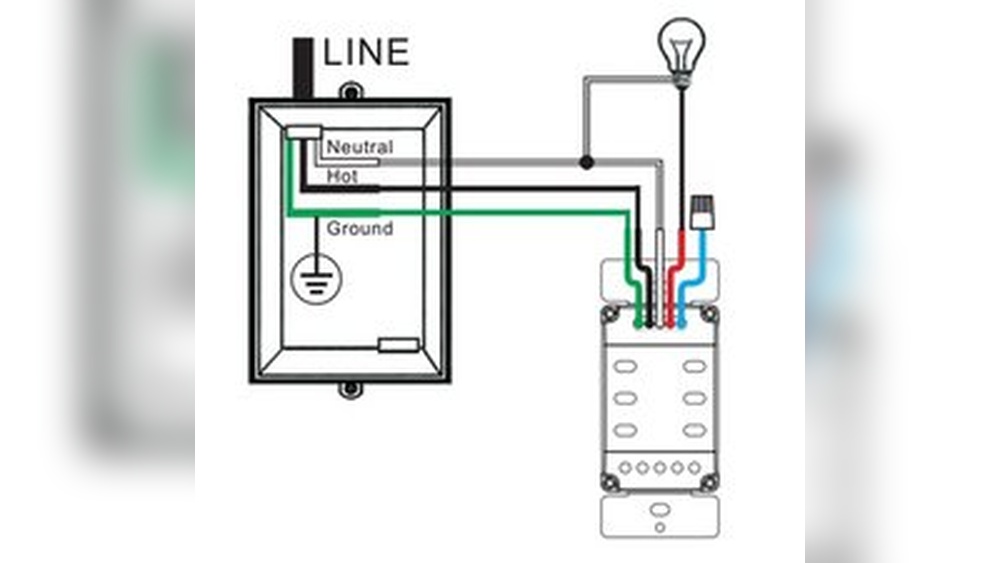
Wires carry electricity from the switch to the lights. Each wire has a role in the circuit. The black wire is the “hot” wire. It carries current from the power source to the lights and switch.
The white wire is the “neutral” wire. It returns electricity back to the power source. The green or bare wire is the ground. It protects against electrical faults by directing current safely to the earth.
Knowing these wire types helps connect fixtures correctly. Wrong wiring can cause shorts or shocks. Use wires with the right gauge for your circuit. Thicker wires carry more current safely.
Planning Your Wiring Layout
Planning your wiring layout is the first step to connect multiple light fixtures to one switch. It helps you organize the wiring and avoid mistakes. Careful planning saves time and ensures safety.
Start by deciding where each light fixture will go. This helps you know how much wire you need. Then, calculate the total wire length to cover all fixtures. Accurate measurement prevents running out of wire during installation.
Determining Fixture Locations
Choose the best spots for your light fixtures. Think about the room’s purpose and where light is most needed. Mark each location clearly on a floor plan or wall.
Space the fixtures evenly for good lighting balance. Avoid placing them too close to switches or outlets. This avoids overcrowding and keeps wiring neat.
Calculating Wire Lengths
Measure the distance from the switch to each fixture. Add extra length for corners and bends in the wiring path. This ensures you have enough wire to work with.
Use a flexible tape measure to follow the planned route. Write down each length and add them up for total wire needed. Buy a little extra wire to cover any errors or changes.
Step-by-step Wiring Process
Connecting multiple light fixtures to one switch needs careful wiring. Following steps helps ensure safety and functionality. Each part of the wiring process builds on the last. Pay close attention to every detail for best results.
Turning Off Power
Start by turning off the power at the circuit breaker. This stops electricity flow and keeps you safe. Double-check by using a voltage tester on the wires. Never skip this step before touching any wires.
Running The Cables
Run cables from the switch box to each light fixture location. Use cables rated for your home’s electrical system. Keep cables neat and secure inside walls or ceilings. Leave enough length to make connections easily.
Connecting To The Switch
Strip the cable ends carefully. Connect the black (hot) wire to the switch terminal. Join all white (neutral) wires together with a wire nut. Attach the ground wire to the switch’s green screw or grounding system.
Wiring The Fixtures
At each fixture, connect the black wire to the fixture’s hot wire. Join the white wire to the fixture’s neutral wire. Connect the ground wires to the fixture’s grounding point. Secure all connections with wire nuts and electrical tape.

Credit: diy.stackexchange.com
Testing Your Connections
Testing your connections is a crucial step after wiring multiple light fixtures to one switch. It ensures safety and confirms that all fixtures work properly. This process helps catch wiring mistakes early.
Take your time and follow each step carefully. Proper testing saves time and prevents hazards like short circuits or flickering lights.
Restoring Power
First, restore power by turning the breaker back on. Use the main electrical panel to do this safely. Avoid flipping the switch before restoring power.
Once power is on, return to the switch controlling your light fixtures. Flip the switch to the ON position. This action will send electricity to the connected fixtures.
Checking Each Fixture
Check each light fixture one by one. Make sure all bulbs light up as expected. If a fixture does not turn on, note it for further inspection.
Look for flickering or dim lighting. These signs may mean loose wiring or poor connections. Tighten any loose wires and test again.
Test the switch multiple times. Confirm all fixtures respond properly every time. This confirms a solid and safe connection.
Troubleshooting Common Issues
Troubleshooting common issues helps ensure your lighting setup works correctly. Problems can occur with wiring, switches, or fixtures. Identifying the cause saves time and effort.
Check each part carefully. Test the switch, wiring connections, and light fixtures. Simple fixes can often restore full function quickly.
Fixtures Not Turning On
First, check the light bulbs. Make sure they are not burned out. Replace any faulty bulbs with new ones.
Next, inspect the wiring connections inside each fixture. Loose or disconnected wires stop power flow. Tighten or reconnect any loose wires securely.
Confirm the power is reaching the fixtures. Use a voltage tester to check. No power means a wiring or switch problem.
Switch Problems
Test the switch by turning it on and off several times. A faulty switch may feel loose or not click properly.
Turn off power before inspecting the switch wiring. Loose wires can cause the switch to fail. Tighten any loose connections carefully.
Consider replacing the switch if it shows signs of damage or wear. A new switch often solves common issues quickly.
Tips For Efficient Wiring
Wiring multiple light fixtures to one switch needs care and planning. Proper wiring makes your setup safe and neat. It also helps avoid future problems and saves time during installation. Follow these tips for efficient wiring to keep everything organized and secure.
Using Wire Connectors
Wire connectors join wires safely and firmly. They prevent loose connections that cause flickering lights. Choose the right size of connector for your wires. Twist wires together before placing the connector. Make sure no bare wire is exposed outside the connector. This keeps the connection strong and safe.
Labeling Wires
Label each wire clearly before connecting. Use tape or tags with easy words or numbers. Labels help identify wires during installation or repairs. They reduce confusion and mistakes. Mark wires at both ends for better clarity. This simple step saves time and frustration later.
Frequently Asked Questions
How Do I Wire Multiple Lights To One Switch?
Connect all fixture wires in parallel to the switch. Use a single hot wire from the switch to each light’s hot terminal. Neutral wires connect together, separate from the switch. This setup allows all lights to operate simultaneously from one switch.
Can I Use One Switch For Different Types Of Light Fixtures?
Yes, a single switch can control various light fixtures. Ensure all fixtures share the same voltage and switch rating. Proper wiring and compatibility guarantee safe and efficient operation of mixed light types from one switch.
What Gauge Wire Is Best For Multiple Light Fixtures?
Use 14-gauge wire for lighting circuits up to 15 amps. For higher loads or longer runs, 12-gauge wire is recommended. Always follow local electrical codes and consider the total wattage of all connected fixtures.
Is It Safe To Connect Several Lights To One Switch?
Yes, it is safe if done correctly. Ensure the switch and wiring can handle the total electrical load. Follow electrical codes and use appropriate circuit breakers for protection and safety.
Conclusion
Connecting several light fixtures to one switch can save space and add convenience. Plan your wiring carefully and follow safety rules. Use the right tools and materials for a solid connection. Test the lights after installation to ensure they work well.
This simple setup brightens rooms easily and keeps your space neat. Take your time and stay safe while working. Enjoy the clear, easy control over your lighting.