Is your deck looking worn out because of a damaged board? You don’t need to replace the entire deck or struggle with visible screws ruining its clean look.
Replacing a deck board with hidden fasteners is easier than you might think—and it keeps your deck looking smooth and beautiful. In this guide, you’ll learn simple steps to swap out that old board quickly and seamlessly. By the end, you’ll have the confidence to fix your deck like a pro, saving time and money while enhancing your outdoor space.
Ready to make your deck look brand new again? Let’s dive in!

Credit: www.renaissancebuildingco.com
Tools And Materials Needed
Replacing a deck board with hidden fasteners needs the right tools and materials. Using proper items makes the job easier and the deck stronger. Prepare everything before starting for smooth work and good results.
Essential Tools
You need a drill with drill bits to make holes. A pry bar helps remove the old board without damage. A tape measure ensures correct board size. A saw cuts boards to fit. A rubber mallet taps fasteners into place. Safety glasses protect your eyes during work.
Choosing The Right Deck Boards
Pick boards that match your existing deck in wood type and color. Look for boards that fit your climate well. Make sure the boards are straight and free of cracks. Choose boards with smooth surfaces to avoid splinters.
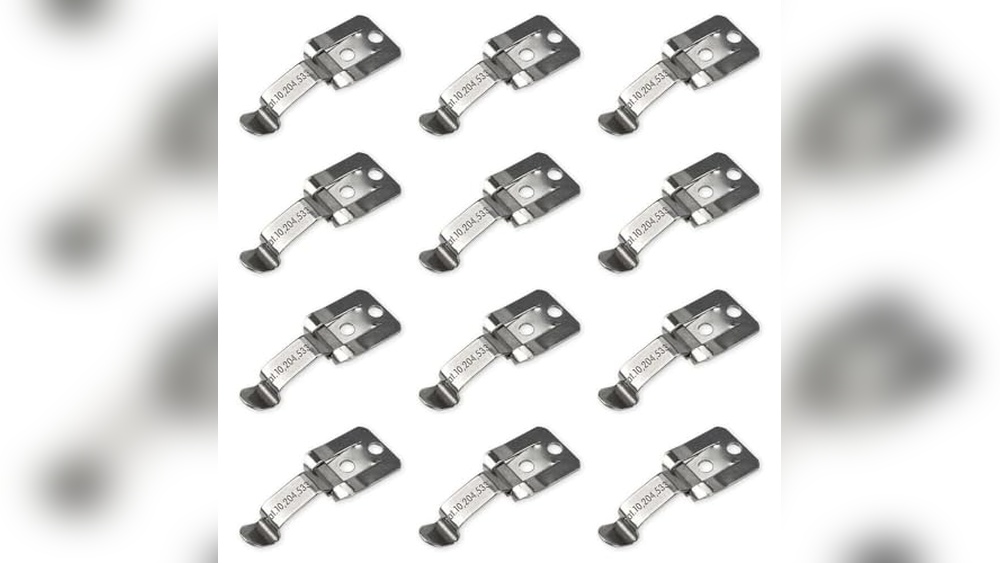
Selecting Hidden Fasteners
Select fasteners made for the deck board material. Stainless steel fasteners resist rust and last longer. Check that fasteners fit your board thickness. Use fasteners that allow for wood expansion and contraction.
Credit: www.finehomebuilding.com
Preparing The Deck Area
Preparing the deck area is the first step to replace a deck board with hidden fasteners. This stage makes the work easier and safer. It helps to avoid damage to other parts of the deck. Taking time here leads to a smooth repair process.
Clearing The Workspace
Start by removing all furniture and objects from the deck. Clear away leaves, dirt, and dust. A clean space prevents accidents and allows better access to the boards. Use a broom or blower to clear debris. Make sure the area is dry before starting work.
Inspecting The Deck Structure
Look closely at the deck frame and joists. Check for any signs of rot, cracks, or damage. Weak or damaged parts can cause future problems. Use a screwdriver or awl to test the wood’s firmness. Replace or repair any weak sections before installing the new board. This ensures a strong, safe deck.
Removing The Damaged Deck Board
Removing a damaged deck board with hidden fasteners requires careful steps. The goal is to avoid damage to surrounding boards. Start by finding where the fasteners are placed. Then, gently remove the board from the deck frame. This process keeps the deck strong and ready for a new board.
Locating Fasteners
Hidden fasteners are usually clipped under the deck board edges. Look for small gaps or slots along the sides. These gaps show where the fasteners hold the board. Use a screwdriver or a small pry bar to check under the edges. Knowing the fastener spots helps prevent damage during removal.
Carefully Detaching The Board
Start loosening the board by lifting near the fasteners. Use a pry bar gently to avoid breaking the wood. Work slowly from one end to the other. Free the board from clips or screws holding it. Remove the board completely without forcing it out. This careful method saves nearby boards and fasteners.
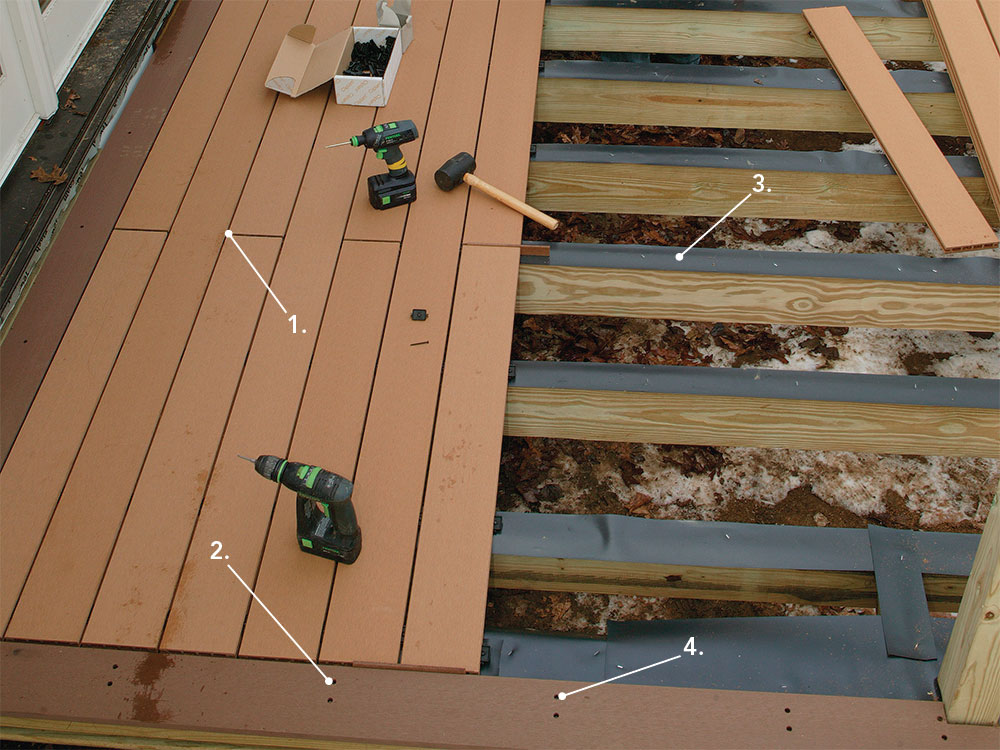
Installing The New Deck Board
Installing the new deck board with hidden fasteners is a careful process. It needs attention to detail to make sure the board fits well and stays secure. This part of the job ensures your deck looks clean without visible screws or nails. Follow these steps to place the new board correctly and attach it firmly.
Positioning The Board
Place the new deck board in the gap where the old one was removed. Align it closely with the existing boards. Make sure the board sits flat on the joists below. There should be no gaps or raised edges. Check that the board’s edges match the deck’s line. A straight board means a neat finish.
Attaching Hidden Fasteners
Slide the hidden fasteners into the grooves on the board’s sides. Fasteners lock the board without showing screws on top. Secure the fasteners to the joists using a drill and screws. Tighten the screws just enough to hold the board firmly. Avoid over-tightening to prevent damage. Repeat for each fastener along the board length.
Ensuring Proper Alignment
Check the board’s position before tightening all fasteners. Use a level to confirm the board is flat. Adjust the board slightly if it looks uneven. Maintain a small gap between boards for drainage. Keep all boards parallel for a smooth look. Proper alignment improves the deck’s strength and beauty.
Finishing Touches
After installing the new deck board with hidden fasteners, the final steps bring your project together. These finishing touches improve safety and appearance. They ensure the deck is ready for use and will last longer.
Checking For Stability
Start by walking on the new board gently. Feel for any movement or looseness. Press down on the board edges to test firmness. Tighten fasteners if you notice any wobble. A stable board prevents accidents and damage later. Check all surrounding boards to keep the deck solid.
Cleaning The Deck Surface
Remove dust and debris from the deck surface. Use a broom or soft brush for this job. Clear hidden fastener tracks carefully to avoid damage. Wash the deck with mild soap and water if needed. Let the deck dry completely before using it. A clean deck looks great and helps protect the wood.

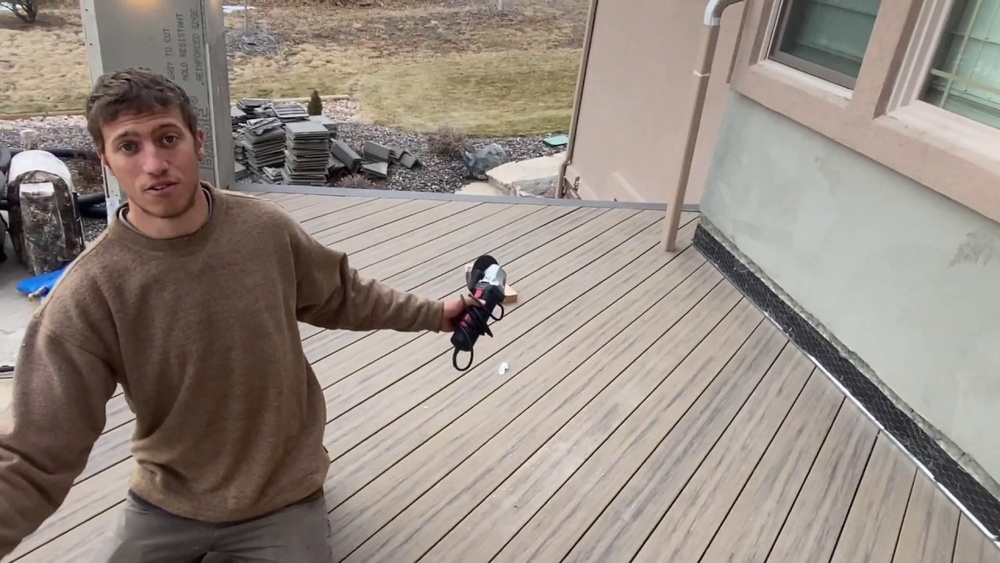
Credit: www.youtube.com
Maintenance Tips For Longevity
Maintaining your deck after replacing a board with hidden fasteners is key to keeping it strong. Proper care helps avoid damage and extends the deck’s life. Small, regular steps make a big difference over time.
Regular Inspections
Check your deck often for loose or damaged boards. Look closely at the hidden fasteners to spot rust or wear. Catch problems early to prevent bigger repairs. Tighten any loose fasteners with the right tools. Keeping the deck stable ensures safety and durability.
Cleaning Hidden Fasteners
Clean debris and dirt from around the hidden fasteners regularly. Use a soft brush or cloth to avoid damage. Avoid harsh chemicals that can corrode the fasteners. Clean fasteners help maintain a firm hold on the deck boards. This simple step keeps your deck looking neat and secure.
Frequently Asked Questions
How Do Hidden Fasteners Work For Deck Boards?
Hidden fasteners secure deck boards from underneath or between planks. They avoid visible screws, providing a clean, smooth surface and enhancing deck aesthetics and safety.
Can I Replace A Single Deck Board With Hidden Fasteners?
Yes, you can replace one deck board using hidden fasteners. Remove the damaged board carefully, then install a new board with compatible hidden clips for a seamless look.
What Tools Are Needed To Replace Deck Boards With Hidden Fasteners?
You need a drill, pry bar, saw, screwdriver, and hidden fastener clips. These tools help remove old boards and securely attach new ones without visible screws.
Are Hidden Fasteners More Durable Than Traditional Screws?
Hidden fasteners protect screws from weather exposure, reducing rust and wear. This increases durability and prolongs the life of your deck compared to traditional exposed screws.
Conclusion
Replacing a deck board with hidden fasteners is easier than you think. Follow the steps carefully to keep your deck looking smooth and safe. Using hidden fasteners hides nails and screws, giving a clean finish. Take your time and check each board for a perfect fit.
A well-done repair can extend your deck’s life and beauty. Keep your tools ready and work safely. Enjoy your refreshed deck space for relaxing and fun times outdoors. Simple fixes like this make a big difference.