If you want to upgrade your rifle with a custom scope mount, drilling and tapping your rifle is a skill you need to master. It might sound tricky, but with the right steps, tools, and tips, you can do it yourself safely and accurately.
Imagine having a perfectly aligned scope that boosts your shooting precision every time. In this guide, you’ll learn exactly how to drill and tap your rifle for scope mounts, avoiding common mistakes and achieving professional results. Ready to take control of your setup?
Keep reading to discover how simple the process can be.
Preparing Your Rifle
Preparing your rifle for drilling and tapping is the first step to a secure scope mount. This process ensures accuracy and safety during installation. Proper preparation also protects your rifle from damage.
Take time to understand your rifle and gather all needed tools. Follow safety rules strictly to avoid accidents. Careful preparation leads to a better shooting experience.
Choosing The Right Rifle
Select a rifle that suits your needs and is compatible with scope mounts. Check if the rifle’s material can be drilled and tapped without damage. Avoid rifles with thin or soft metal parts. A solid and stable rifle body works best.
Gathering Necessary Tools
Collect all tools before starting. You need a drill, drill bits, tap set, center punch, and a clamp. A ruler or measuring tape helps with precise marking. Use quality tools to get clean, accurate holes.
Safety Precautions
Always wear safety glasses to protect your eyes from metal shavings. Ensure the rifle is unloaded before work begins. Work in a clean, well-lit area to avoid mistakes. Secure the rifle firmly to prevent slipping during drilling.
Selecting The Scope Mount
Choosing the right scope mount is key to a stable and accurate setup. The mount holds the scope securely on your rifle. A poor choice can cause misalignment and affect your shooting. Consider the types of mounts, materials, and compatibility with your rifle and scope. These factors help ensure a strong fit and lasting performance.
Types Of Scope Mounts
Scope mounts come in several styles. Ring mounts hold the scope by clamping around its tube. They are common and easy to find. One-piece mounts combine rings and a base for added strength. Rail mounts attach directly to a Picatinny or Weaver rail on the rifle. Each type suits different needs and rifle designs.
Material Considerations
Mount materials affect durability and weight. Aluminum mounts are lightweight and resist corrosion. Steel mounts are heavier but very strong. Some mounts use a mix of metals for balance. Choose a material that fits your shooting style and environment. A sturdy mount keeps your scope steady during recoil.
Mount Compatibility
Check if the mount fits your rifle’s model and scope size. The base must match the rifle’s mounting system. Ring sizes should match the scope tube diameter. Also, consider the mount height for proper eye alignment. Proper compatibility prevents damage and ensures comfort while aiming.
Marking Drill Points
Marking drill points on a rifle is the first step for a strong and accurate scope mount. Precise marks help avoid mistakes and keep the scope steady. Careful marking ensures the mount sits in the right place for the best shooting experience.
Measuring Mount Placement
Measure the exact spot on the rifle where the mount will go. Use a ruler or caliper for accuracy. Mark the center line and hole positions clearly. Keep the marks small but visible to avoid confusion during drilling.
Using Templates Or Jigs
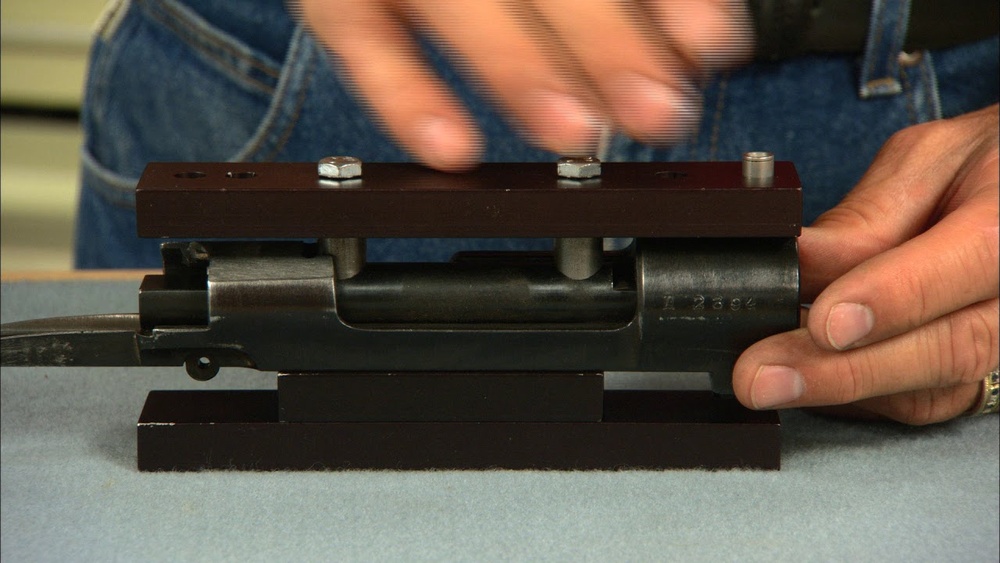
Templates or jigs guide you to mark drill points correctly. They fit on the rifle and show where to drill holes. This reduces errors and saves time. Use a template made for your rifle model for best results.
Double-checking Alignment
Check your marks twice before drilling. Ensure the holes line up with the mount and the scope. Look from different angles for proper alignment. Correct any mistakes early to avoid damage and poor fit.

Credit: www.youtube.com
Drilling The Rifle
Drilling the rifle is a critical step in mounting a scope. It requires care and precision to avoid damage. The right tools and techniques ensure a clean, accurate hole. This section guides you through the drilling process for scope mounts.
Choosing Drill Bits
Select drill bits made for metal. High-speed steel (HSS) bits work well. Use the size recommended for your mounting screws. Start with a smaller bit to create a pilot hole. This helps guide the larger bit and prevents slipping.
Drilling Techniques
Secure the rifle firmly in a vise. Use steady, gentle pressure while drilling. Keep the drill bit perpendicular to the rifle surface. Drill slowly to avoid overheating the metal. Apply cutting oil to reduce friction and heat. Remove the bit occasionally to clear metal shavings.
Avoiding Common Mistakes
Do not rush the drilling process. Avoid using excessive force that can damage the barrel. Never drill at an angle; it causes misalignment. Always wear safety glasses to protect your eyes. Double-check measurements before drilling to ensure correct placement.
Tapping Threads
Tapping threads is a key step in drilling and tapping a rifle for scope mounts. It creates the internal grooves inside the hole. These grooves allow screws to hold the mount firmly. Doing this correctly ensures a strong, lasting fit for your scope. It needs care and precision to avoid damaging the rifle.
Selecting The Tap Size
Choose the right tap size for the screws you will use. The size depends on the diameter and thread pitch of the screws. Check the mount’s instructions for the correct size. Using the wrong tap can strip the threads or make a weak hold. Always measure carefully before starting to tap.
Proper Tapping Methods
Start tapping slowly and keep the tap straight. Turn the tap clockwise a half-turn, then back it off slightly. This helps clear metal chips from the hole. Keep the tap aligned to avoid crooked threads. Use steady pressure and do not force the tap.
Lubrication And Care
Apply a small amount of cutting oil or lubricant to the tap. This reduces friction and helps cut clean threads. Lubrication prevents the tap from breaking inside the hole. Clean the tap regularly to remove metal shavings. Proper care extends the life of your tools and improves thread quality.

Credit: www.letsgoshooting.org
Installing The Scope Mount
Installing the scope mount on your rifle is a crucial step to ensure accuracy. This process requires care and attention. A properly installed mount keeps your scope steady and aligned. Follow the steps carefully for the best results.
Securing Screws
Start by placing the mount on the drilled and tapped holes. Use the correct screws made for your rifle model. Tighten each screw slowly and evenly. Avoid over-tightening as it can damage the threads. Use a torque wrench if possible to reach the recommended tightness.
Ensuring Mount Stability
Check the mount for any movement or wiggle. The mount must sit flat on the rifle surface. Press gently and try to move it side to side. If it moves, loosen screws and reposition the mount. Tighten screws again and recheck stability before proceeding.
Final Adjustments
Adjust the mount to align the scope perfectly. Make sure the scope sits level and straight. Use a bubble level or scope leveling tool for accuracy. Double-check that all screws remain tight after adjustment. Your scope mount is now ready for use.
Testing And Maintenance
Testing and maintenance are key after drilling and tapping your rifle for scope mounts. They keep your scope steady and accurate. Regular checks help spot problems early. Taking care of your setup extends its life. Let’s explore how to test and maintain your scope mount properly.
Checking Scope Alignment
Start by checking if your scope is straight. Use a scope level or a small bubble level. Place it on top of the scope tube. Look through the scope to see if the reticle is vertical and horizontal. Tighten the screws evenly to avoid tilting. Test the alignment by aiming at a distant target. Small adjustments improve accuracy.
Regular Maintenance Tips
Clean the mounting area often. Use a soft cloth to remove dirt and oil. Check screws and bolts regularly. Tighten them gently with the right tools. Avoid over-tightening to prevent damage. Apply a small amount of anti-seize lubricant to threads. This stops rust and keeps screws easy to remove. Store your rifle in a dry place to avoid moisture damage.
Troubleshooting Issues
If your scope moves after shooting, check screw tightness. Loose screws cause shifting and poor accuracy. If alignment is off, re-level the scope. Look for worn threads or damaged parts. Replace any broken screws or mounts immediately. If you notice rust or corrosion, clean and lubricate the area. Regular checks prevent most common problems.

Credit: www.badacetactical.com
Frequently Asked Questions
How Do I Drill A Rifle For Scope Mounts Safely?
Use a drill press for accuracy and stability. Mark the exact spot and use the correct drill bit size. Wear safety goggles and secure the rifle firmly to avoid movement during drilling.
What Size Tap Is Needed For Rifle Scope Mounts?
Most rifle scope mounts require a 6-48 or 8-40 tap size. Check your scope mount specifications to confirm the correct thread size before tapping.
Can I Tap My Rifle Without Professional Tools?
It is possible but not recommended. Professional tools ensure precise threading and prevent damage. Using improper tools can misalign threads and damage the rifle.
How Do I Prevent Metal Shavings When Drilling?
Apply cutting oil to the drill bit and work slowly. This reduces heat and metal debris. Clean the shavings frequently to avoid clogging and maintain accuracy.
Conclusion
Drilling and tapping a rifle for scope mounts takes care and focus. Use the right tools and work slowly to avoid mistakes. Mark the spots clearly before you start drilling. Keep the drill steady and tap the threads gently. Double-check your work often to ensure a secure fit.
This process helps you add a stable mount for your scope. With patience, you will improve your shooting experience. Take your time, and your effort will pay off.