Are you ready to upgrade your home bar or brewery with a professional touch? Knowing how to mount tap handles properly can make all the difference in both style and functionality.
Whether you’re adding new taps or replacing old ones, this simple skill will save you time and frustration. In this guide, you’ll discover easy steps to get your tap handles mounted securely and looking great. Stick around—you’re just a few clicks away from mastering a task that makes your setup stand out.
Credit: www.etsy.com
Choosing The Right Tap Handle
Choosing the right tap handle is important for both function and style. It affects how easy it is to pour your drink and how your bar or kitchen looks. A good tap handle matches your space and the kind of beer or drink you serve. Think about the types, materials, and size before making your choice.
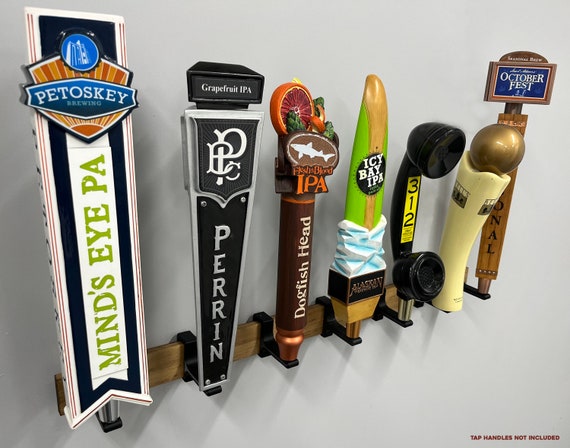
Types Of Tap Handles
Tap handles come in many shapes and designs. Some are simple sticks, while others have logos or unique shapes. Classic handles suit most settings. Novelty handles add a fun touch. Choose a style that fits your bar’s theme and your personal taste.
Material Considerations
Common materials include wood, metal, and plastic. Wood gives a warm, traditional feel. Metal offers durability and a modern look. Plastic is lightweight and easy to clean. Pick a material that fits your style and lasts long in your environment.
Size And Compatibility
Size matters for comfort and fit. Handles must fit the tap faucet securely. Too large or too small causes problems when pouring. Measure your tap before buying. Check if the handle’s connector matches your tap type for a tight fit.
Gathering Necessary Tools
Gathering the right tools makes mounting tap handles easier and faster. The correct tools help you avoid damage and ensure a secure fit. Preparation saves time and reduces frustration during installation.
Essential Tools List
- Screwdriver – for tightening screws firmly
- Drill – to create holes in hard surfaces
- Measuring tape – to measure exact placement
- Level – to keep the tap handle straight
- Wrench – for tightening nuts or bolts
- Marker or pencil – to mark drilling points
Optional Accessories
- Protective gloves – to keep your hands safe
- Stud finder – to locate solid mounting spots
- Anchors – for mounting on drywall or plaster
- Cleaning cloth – to wipe dust after drilling
- Rubber washers – to prevent damage to handles
- Masking tape – to mark drill spots precisely
Preparing The Tap Faucet
Preparing the tap faucet is an important step before mounting tap handles. It makes sure the handle fits well and works smoothly. Taking time here helps avoid problems later. Follow simple steps to get your faucet ready.
Cleaning The Faucet
Start by cleaning the faucet surface. Use a soft cloth and mild soap. Remove dirt, grease, and old residue. Clean surfaces help the handle stick better. Dry the faucet completely before moving on.
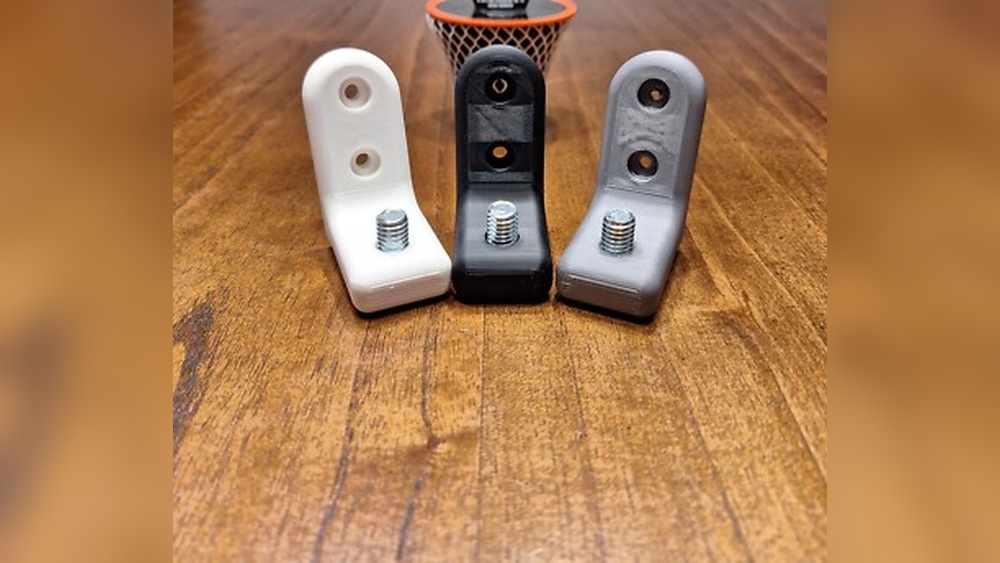
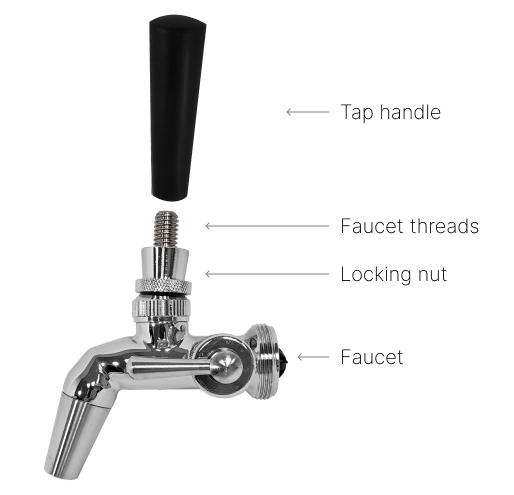
Checking Thread Size
Check the thread size on the faucet stem. Threads hold the tap handle in place. Use a ruler or thread gauge to measure. Make sure the tap handle matches the thread size. This step prevents loose or tight fitting handles.
Credit: xpresstaphandles.com
Attaching The Tap Handle
Attaching the tap handle is a key step in setting up your draft system. It needs to fit well and stay secure during use. Proper attachment ensures smooth pouring and a neat look. Follow simple steps to attach the handle safely and correctly.
Aligning The Handle
Start by placing the tap handle onto the faucet’s threaded rod. Check the handle’s position so it faces forward. This makes it easy to grab and pull. Make small adjustments to avoid a crooked look. Proper alignment improves both function and style.
Securing The Handle
Hold the handle firmly in place. Use the provided screw or nut to fasten it to the faucet. Turn the screw clockwise until tight. Avoid over-tightening to prevent damage. The handle should feel stable and not wiggle.
Avoiding Common Mistakes
Do not force the handle onto the faucet. Forcing may strip the threads or crack the handle. Check that the screw or nut matches the faucet size. Tighten only until snug, not overly tight. Test the handle by pulling it gently to confirm stability.
Testing The Installation
Testing the installation of tap handles is a key step after mounting. This process ensures the handles work well and stay secure. It helps avoid problems later, like loose handles or awkward positions. Take time to check everything carefully before using your tap handles.
Ensuring Firm Attachment
Start by gently pulling the tap handle. It should feel tight and not move easily. If it wobbles or feels loose, tighten the mounting screw or bolt. Use the right tools to avoid damaging the handle or faucet. A firm attachment prevents leaks and keeps the handle stable.
Check the handle from different angles. Make sure it stays in place with normal use. Test several times for confidence. If it loosens quickly, recheck your mounting method or hardware.
Adjusting For Comfort
Hold the tap handle and try pulling it as you would to pour a drink. Notice if the position feels natural and comfortable. Adjust the angle or height if it feels awkward or hard to reach. Proper comfort makes pouring easier and safer.
Ensure the handle does not hit nearby surfaces or other taps. Leave enough space to pull it fully. Small adjustments can improve usability a lot. Take your time to find the best position for daily use.
Maintaining Tap Handles
Maintaining tap handles keeps them looking good and working well for a long time. Proper care helps avoid damage and keeps your setup neat. Regular attention prevents dirt buildup and wear that can spoil the look or function.
Regular Cleaning Tips
Use a soft cloth to wipe tap handles often. Avoid harsh chemicals that can damage the finish. Warm water and mild soap work best for cleaning. Dry handles completely to stop water spots or rust. Clean both the handle and the mounting area for best results.
Handling Wear And Tear
Check tap handles for loose parts regularly. Tighten screws or bolts to keep handles secure. Replace worn parts before they break. Use gentle force when pulling handles to avoid damage. Store extra handles safely to prevent scratches or dents.

Credit: www.amazon.com
Frequently Asked Questions
How Do I Mount Tap Handles Correctly?
To mount tap handles, first remove the existing handle. Align the new handle with the faucet stem. Push or screw it in place securely. Ensure it fits snugly to avoid leaks or wobbling.
What Tools Are Needed To Mount Tap Handles?
You typically need a screwdriver or wrench. Some handles require hex keys or Allen wrenches. Always check the handle’s mounting instructions for specific tools. Proper tools ensure a secure and damage-free installation.
Can I Mount Tap Handles On Any Faucet Type?
Most tap handles fit standard faucets. However, some faucets need specialized handles or adapters. Check the compatibility before purchasing. Matching the handle and faucet type ensures proper function and aesthetics.
How To Prevent Tap Handles From Loosening?
Tighten the handle firmly but avoid overtightening. Use thread seal tape or adhesive if recommended. Regularly check the handle for looseness. Proper mounting and maintenance keep handles secure and functional.
Conclusion
Mounting tap handles is simple with the right steps. Choose a strong spot and use proper tools. Attach the handle tightly to avoid wobbling. Check the alignment to keep it straight. Clean the area before starting for better grip. Take your time and follow each step carefully.
This will help your tap handle look good and work well. Enjoy serving drinks with a neat, easy-to-use tap handle. Practice a few times to get comfortable with the process.