Have you ever wished you could control your existing light with a simple switch? Maybe the light is always on, or you have to unplug it every time you want to turn it off.
Adding a switch can make your life so much easier—and it’s not as hard as you might think. In this guide, you’ll discover clear, step-by-step instructions to help you add a switch to your existing light quickly and safely. By the end, you’ll have the power to control your lighting exactly how you want, making your space more convenient and comfortable.
Ready to take control of your lighting? Let’s get started!

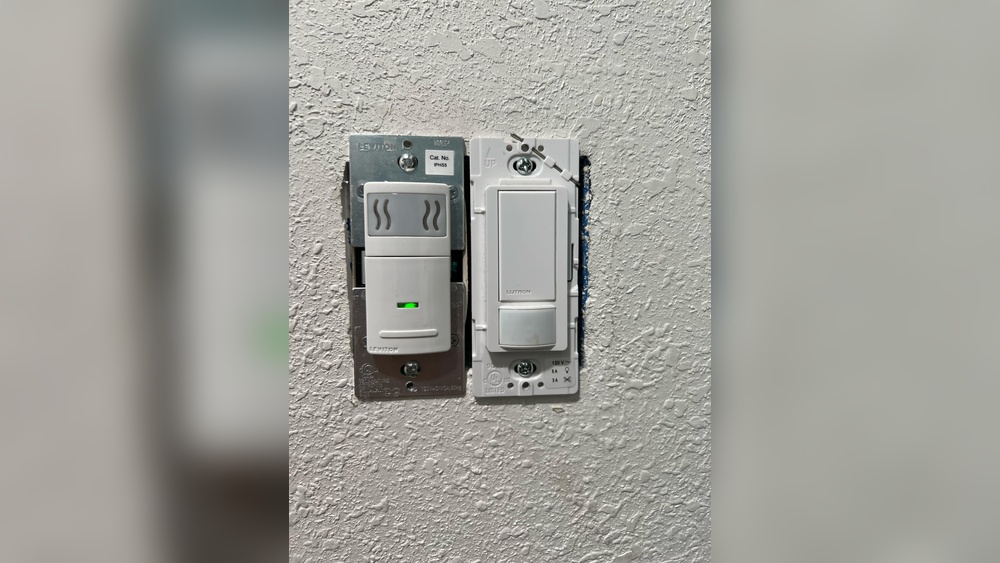
Credit: diy.stackexchange.com
Tools And Materials Needed
Adding a switch to an existing light is a simple task with the right tools and materials. Preparing these items before starting saves time and ensures safety. This section explains the basic tools and materials needed for this project.
Basic Electrical Tools
A voltage tester checks if wires carry electricity. Wire strippers remove insulation without damaging wires. A screwdriver set includes flathead and Phillips types. Needle-nose pliers help bend and hold wires. Electrical tape insulates wire connections. A drill may be needed for mounting the switch box.
Switch Types
Single-pole switches control one light from one location. Three-way switches control one light from two locations. Dimmer switches adjust light brightness. Choose a switch that fits your needs and matches your wiring setup. Standard switches are the easiest to install for beginners.
Wiring And Accessories
Use electrical wire rated for your home’s circuit amperage. Wire connectors, or wire nuts, secure wire ends together. A switch box holds the switch and wires safely. Wall plates cover the switch and give a finished look. Always choose materials that meet local electrical codes.

Credit: www.finehomebuilding.com
Safety Precautions
Working with electricity can be risky. Safety is the top priority when adding a switch to an existing light. Taking the right precautions protects you from shocks and accidents. Follow these steps to work safely and confidently.
Power Shutdown
Always turn off the power at the main breaker before starting. This stops electricity flow to the wires you will touch. Double-check that the light is off to confirm power is cut. Do not skip this step.
Using A Voltage Tester
Use a voltage tester to check wires for electricity. Test the wires even after turning off the power. This tool shows if any current remains. Never trust that power is off without testing.
Protective Gear
Wear safety gloves to avoid electric shocks. Use goggles to protect your eyes from sparks or debris. Wear rubber-soled shoes to reduce risk. Always dress for safety before starting work.
Locating The Circuit
Locating the circuit is the first step to add a switch to an existing light. This step helps you understand how the wiring works. It also ensures your work is safe and effective. Knowing the circuit layout prevents mistakes and saves time.
Start by identifying the light fixture. Then find the power source. Finally, trace the existing wiring to see where connections run. This method makes the process clear and manageable.
Identify The Light Fixture
Find the exact light fixture you want to control with the switch. Check its position on the ceiling or wall. Turn off the power before inspecting the fixture. Remove the cover carefully to see the wires inside. Note the wire colors and their connections. This step helps you know what you will work with next.
Find The Power Source
Locate the circuit breaker or fuse that controls the light fixture. Turn off the power to avoid shocks. Use a voltage tester to confirm the power is off. The power source is usually in the main panel. Sometimes, it can be near the fixture or in a junction box. Knowing the power source helps you control the light safely.
Tracing Existing Wiring
Look at the wires coming from the light fixture. Follow them to see where they go. They may run inside walls or ceilings to the switch or power source. Use a wire tracer tool for better accuracy. Mark the wires with tape to keep track. This step shows how the current switch or circuit works. It guides you on where to connect the new switch.
Preparing The Switch Location
Preparing the switch location is an important step before adding a new switch to your existing light. It helps ensure safety and makes installation easier. This process involves picking the right spot, cutting an opening in the wall, and installing the electrical box.
Each step requires careful attention to detail. Follow these guidelines to prepare the switch location correctly and get ready for the wiring work.
Choosing The Spot
Select a spot that is easy to reach and near the existing wiring. Usually, switches are placed at a standard height of about 48 inches from the floor. Avoid locations near water sources or where the switch can get wet. Also, consider the wall space and any furniture nearby to avoid blocking the switch.
Cutting The Wall Opening
Mark the outline of the electrical box on the wall using a pencil. Use a level tool to keep the lines straight. Cut carefully along the marked lines with a drywall saw or utility knife. Make sure the opening fits the electrical box snugly to avoid gaps. Wear safety glasses to protect your eyes from dust and debris.
Installing The Electrical Box
Insert the electrical box into the wall opening. Secure it with screws or built-in clamps to hold it firmly in place. Check that the box is flush with the wall surface for a clean finish. Ensure there is enough space inside the box for wiring. Proper installation of the box helps prevent electrical hazards and supports the switch firmly.
Wiring The Switch
Wiring the switch is a key step to control your light. It connects the switch to the power source and the light fixture. This step needs care and attention to make sure it is safe and works well.
Follow each part carefully. Use the right tools and materials. Turn off the power before you start to avoid shocks.
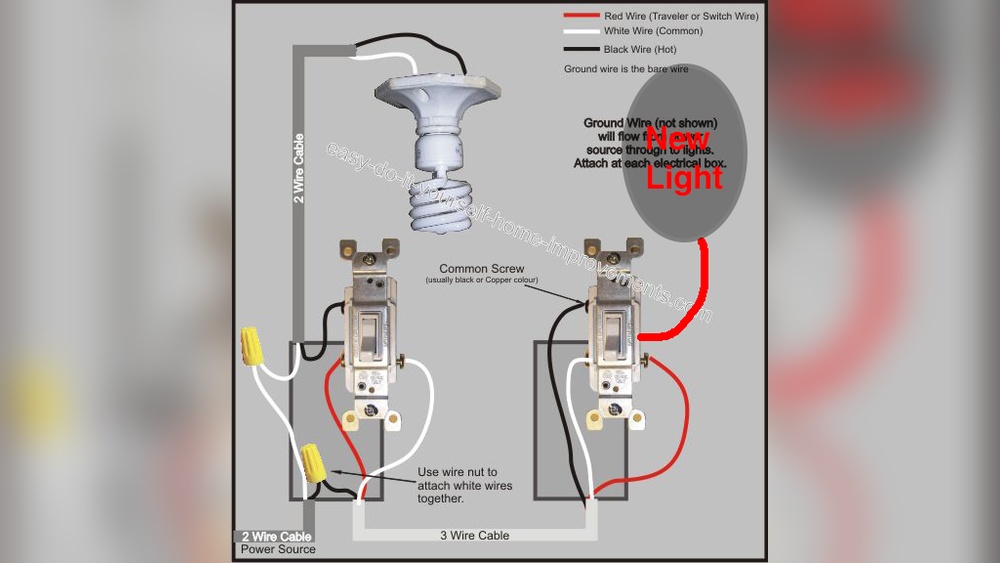
Connecting The Wires
Identify the wires: black (hot), white (neutral), and green or bare (ground). Connect the black wire from the power source to one switch terminal. Attach the black wire from the light fixture to the other terminal. Keep white wires together with a wire nut. Do not connect white wires to the switch.
Securing Wire Nuts
Twist wire ends together tightly before placing wire nuts. Screw the wire nut clockwise until it feels secure. Tug lightly on each wire to check the connection. Use wire nuts that fit the wire size. Proper wire nuts stop wires from loosening or touching each other.
Grounding The Switch
Locate the green or bare copper ground wire. Connect it to the green grounding screw on the switch. If no ground wire exists, attach the switch ground to the metal box. Grounding protects you from electric shocks. Always ensure the ground connection is tight and secure.
Testing The Installation
Testing the installation is a key step after adding a switch to an existing light. This step ensures the switch works correctly and safely. Follow each part carefully to confirm the setup is right. Safety comes first.
Restoring Power
Start by turning the power back on at the circuit breaker. Make sure the area is dry and safe. Check that no wires are exposed. Switch the breaker to the ON position. This action supplies electricity to your new switch and light.
Checking Switch Operation
Flip the switch up and down slowly. Watch the light closely. The light should turn on and off smoothly with the switch. Try this a few times. The switch should feel solid and work without any strange sounds or resistance.
Troubleshooting Common Issues
If the light does not turn on, check the wiring again. Look for loose connections or wrong wire placement. The breaker might also be off or faulty. If the switch feels hot or sparks, turn off the power immediately. Fix wiring mistakes or call an electrician if unsure.
Finishing Touches
Finishing touches are key to a neat and safe light switch installation. This part ensures your work looks clean and professional. It also protects the wiring and keeps the switch steady for daily use.
Mounting The Switch Plate
Place the switch plate over the switch carefully. Align the screw holes with the switch box. Use a screwdriver to tighten the screws gently. Avoid overtightening to prevent cracking the plate. The plate should sit flat against the wall. This step secures the switch and gives a finished look.
Cleaning Up The Area
Remove any dust or debris around the switch area. Use a dry cloth to wipe the wall and switch plate. Check for paint splatters or fingerprints and clean them off. Clear the floor space from tools and wire scraps. A clean area reduces hazards and improves appearance. Your new switch is now ready to use safely.

Credit: www.do-it-yourself-help.com
Frequently Asked Questions
How Do I Add A Switch To An Existing Light?
Turn off power first. Run a cable from the switch to the light fixture. Connect wires: black to black, white to white, and ground to ground. Secure the switch and restore power. Test the switch for proper operation.
What Tools Are Needed To Install A Light Switch?
You need a screwdriver, wire stripper, voltage tester, electrical tape, and a drill. These tools help safely connect wires and mount the switch. Always use insulated tools for electrical work to prevent shocks.
Can I Add A Switch Without Rewiring The Entire Circuit?
Yes, you can add a switch by tapping into the existing light’s wiring. Use a switch loop to control the light. This avoids rewiring the whole circuit and saves time and effort.
Is It Safe To Install A Light Switch Myself?
Yes, if you follow safety guidelines. Always turn off the power at the breaker. Use a voltage tester to confirm no live wires. If unsure, consult a licensed electrician to avoid hazards.
Conclusion
Adding a switch to an existing light can be simple and safe. Follow the steps carefully and use the right tools. Always turn off the power before starting work. Taking your time helps avoid mistakes and keeps you safe. A new switch gives you better control over your lighting.
Enjoy the convenience and improved function in your home. Small changes can make a big difference. Keep learning and trying new projects with confidence.