Are you ready to make your home warmer and more comfortable this winter? Knowing how to hook up a gas wall heater can save you money and give you control over your heating.
But if you’re unsure where to start, don’t worry—this guide will walk you through every step clearly and safely. By the end, you’ll feel confident setting up your heater and enjoying cozy warmth right where you need it. Keep reading to discover simple tips and tricks that will make the process easy for you.
Choosing The Right Heater
Choosing the right gas wall heater is important for comfort and safety. The right heater keeps your space warm without wasting energy. It fits your room size and meets safety rules. This guide helps you pick the best heater for your needs.
Types Of Gas Wall Heaters
There are several types of gas wall heaters. Direct vent heaters use outside air for burning gas. They are safe and efficient. Vent-free heaters release warm air directly into the room. They need good ventilation. Wall furnaces heat larger areas and connect to a vent. Choose a type that suits your room and ventilation.
Sizing Your Heater
Heater size depends on your room’s square footage. Small rooms need less heat, large rooms need more. Measure your room’s length and width. Multiply to find the area in square feet. Check the heater’s BTU rating. Match it to the room size for best heating. A heater too small won’t warm well. One too big wastes energy.
Safety Certifications
Check for safety certifications before buying. Look for labels from recognized groups like UL or CSA. These marks show the heater meets safety standards. Certified heaters reduce risks of fire and gas leaks. Always choose certified products for peace of mind and safe use.

Credit: www.mitindore.co.in
Gathering Tools And Materials
Before hooking up a gas wall heater, gathering the right tools and materials is key. This step saves time and avoids frustration during installation. Having everything ready helps the process go smoothly and safely.
Essential Tools
Start with basic hand tools like a pipe wrench and adjustable wrench. A drill with bits is needed to make holes for mounting. Pipe cutters help trim gas lines accurately. A screwdriver set is useful for securing screws and parts. A tape measure ensures precise placement. A level keeps the heater straight on the wall.
Required Materials
You will need gas piping that matches your heater’s specifications. Use pipe fittings such as elbows, tees, and connectors. Thread sealant or gas-rated tape prevents leaks. Mounting brackets and screws secure the heater. A gas shutoff valve is critical for safety. Also, have a vent kit if your model needs venting outside.
Safety Gear
Wear safety glasses to protect your eyes from debris. Use gloves to avoid cuts and burns. A mask can help if dust or fumes appear. Keep a fire extinguisher nearby for emergencies. Proper safety gear protects you during installation.
Preparing The Installation Area
Preparing the installation area is a key step before hooking up a gas wall heater. It helps ensure safety and smooth setup. Taking time to prepare the space reduces risks and makes the heater work better.
Selecting Location
Choose a spot near an exterior wall for easy venting. Avoid places with high traffic or clutter. The heater should be away from curtains, furniture, or anything flammable. Pick a location that allows good access for maintenance and repairs.
Clearing The Space
Remove all objects and debris from the chosen area. Clean the wall and floor surfaces to avoid dust buildup. Keep the space clear around the heater for airflow. This helps the heater run efficiently and prevents fire hazards.
Checking Ventilation
Good ventilation is crucial for gas heaters. Confirm there is a vent or flue opening nearby. Make sure the vent path is free from blockages. Proper airflow stops harmful gases from building up indoors. Test the vent system before starting installation.
Connecting The Gas Supply
Connecting the gas supply is a key step in installing a gas wall heater. It requires care and attention to ensure safety. This section covers how to handle the gas line correctly. Follow these steps carefully to avoid any problems.
Shutting Off Gas
Before starting, turn off the main gas valve. This stops gas flow and prevents accidents. Use a wrench to close the valve fully. Check that no gas is leaking by sniffing near the valve. If you smell gas, do not continue. Call a professional for help.
Attaching Gas Line
Attach the gas line to the heater’s inlet pipe. Use pipe thread sealant or Teflon tape on the threads. This creates a tight seal to stop leaks. Screw the gas line by hand at first. Then tighten it with a wrench. Avoid over-tightening to prevent damage.
Testing For Leaks
After connecting, check for gas leaks. Mix soap and water in a spray bottle. Spray the solution on all joints and connections. Watch for bubbles forming. Bubbles mean gas is escaping. Tighten connections or replace parts if needed. Never use a flame to test for leaks.
Mounting The Heater
Mounting the gas wall heater is a key step in setting up your unit safely and correctly. Proper mounting ensures the heater stays secure and works efficiently. The wall must hold the weight and keep the heater steady during use. Follow clear steps to make sure the heater fits well and stays in place.
Marking And Drilling
Start by holding the heater against the wall. Use a pencil to mark the spots where screws will go. Check the heater’s manual for exact points. Use a level to keep marks straight. Drill holes on the marks using a drill bit that fits the screws. Drill carefully to avoid damage to the wall.
Securing The Unit
Place wall anchors in the drilled holes for extra strength. Align the heater with the drilled holes. Insert screws through the heater’s mounting holes. Tighten screws firmly but do not over-tighten. Over-tightening can damage the heater or wall. Make sure the heater is flush against the wall.
Ensuring Stability
Check the heater for any movement by gently shaking it. The unit should not wobble or shift. Use additional brackets if needed for extra support. Confirm all screws and anchors are tight. A stable heater improves safety and heating performance. Double-check stability before connecting the gas supply.
Electrical Hookup
Electrical hookup is a key step when installing a gas wall heater. It powers the heater’s controls and safety features. Proper wiring ensures the heater works safely and efficiently. Follow the correct steps to connect the electrical system.
Power Requirements
Check the heater’s manual for voltage and amperage needs. Most gas wall heaters need a 120-volt power supply. Confirm the circuit can handle the heater’s electrical load. Use a dedicated circuit to avoid overloads.
Wiring Connections
Turn off the main power before starting any wiring. Use the right wire gauge as specified in the manual. Connect the heater’s wires to the house wiring carefully. Match the colors: black to black, white to white, and green or bare copper to ground. Secure all connections with wire nuts. Double-check each connection for tightness.
Safety Precautions
Wear insulated gloves to prevent shocks. Never work on live wires. Use a voltage tester to confirm power is off. Follow local electrical codes strictly. If unsure, hire a licensed electrician. Proper hookup prevents hazards like fire and electric shock.
Final Safety Checks
Final safety checks are critical after hooking up a gas wall heater. These steps ensure the heater works safely and efficiently. Skipping these checks can lead to leaks, poor heating, or dangerous situations. Take your time and follow each step carefully.
Inspecting Connections
Start by examining all gas line connections. Look for tight fittings and no gaps. Use a soap and water mix on joints to spot leaks. Bubbles mean a leak exists. Tighten fittings or replace faulty parts immediately. Check the vent and electrical connections too. Everything must be secure and clean.
Testing Heater Operation
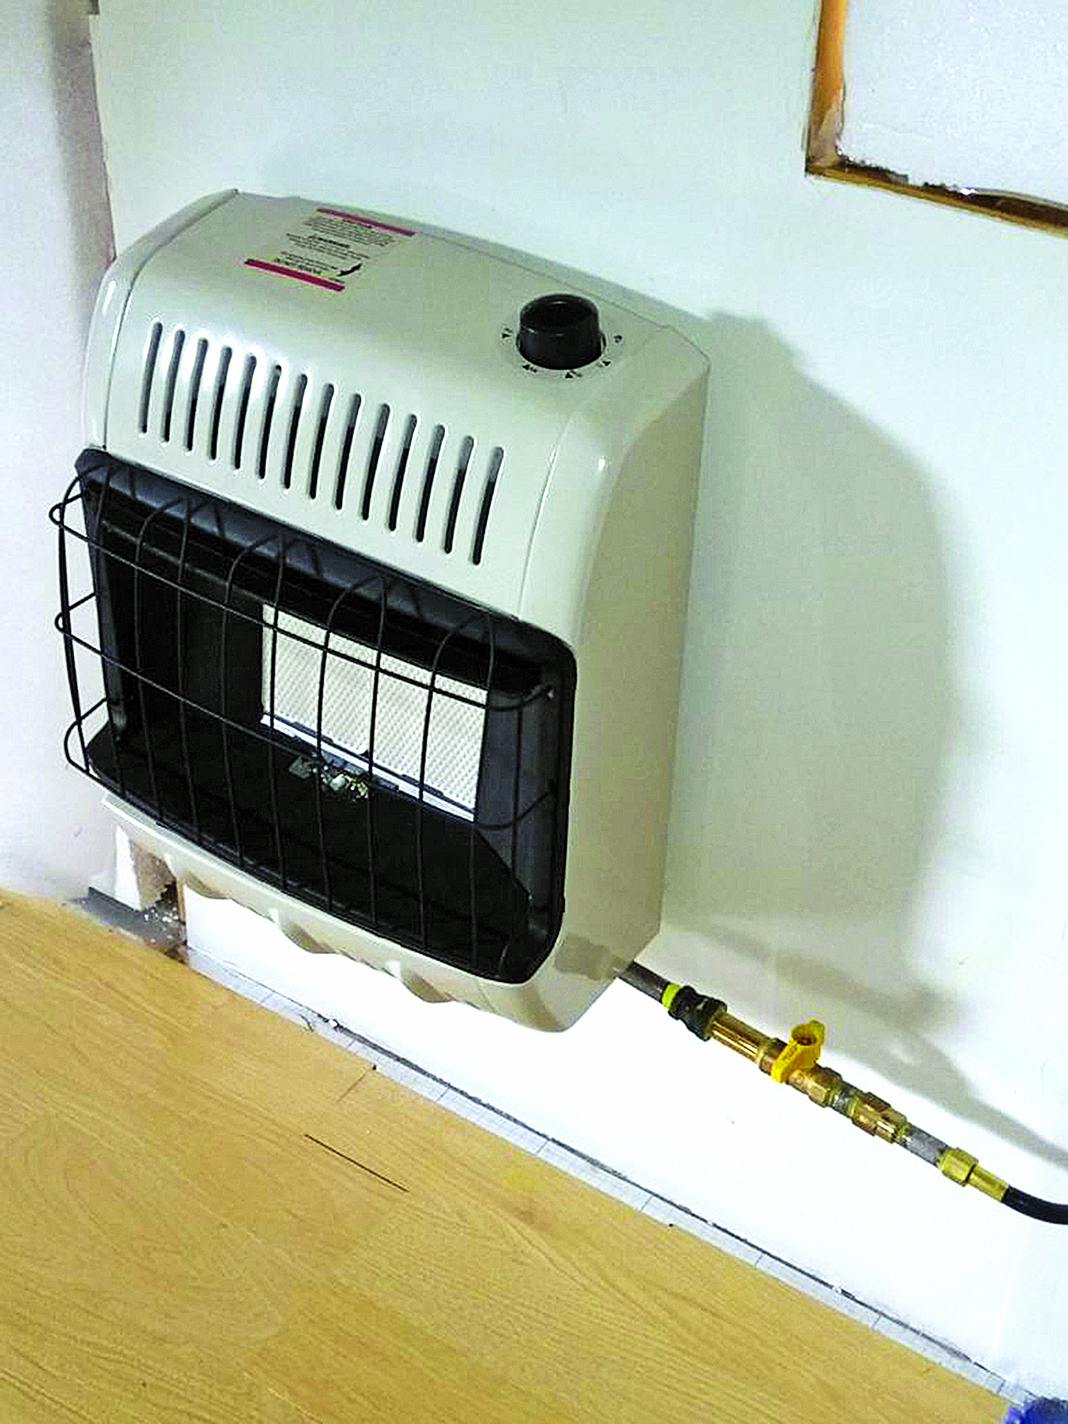
Turn on the gas supply and ignite the heater. Watch the pilot light or ignition system closely. The flame should burn steady and blue. Yellow or flickering flames indicate problems. Listen for strange noises or smells of gas. The heater should heat the room evenly. If it shuts off suddenly, there may be a safety issue.
Troubleshooting Common Issues
Low heat output often means clogged filters or blocked vents. Clean or replace these parts to improve airflow. If the heater does not start, check the thermostat settings and power supply. Smelling gas means turn off the heater and call a professional. Always fix problems before full use to keep your home safe.
Credit: www.backwoodshome.com
Maintenance Tips
Keeping your gas wall heater in good shape is key for safety and warmth. Regular maintenance helps it run smoothly. It also extends the heater’s life and saves money on repairs. Follow these simple tips to maintain your heater well.
Regular Cleaning
Dust and dirt can block the heater’s vents and reduce heat output. Clean the outside and inside parts regularly. Use a soft brush or vacuum to remove dust. Avoid water or harsh cleaners. Keep the area around the heater free of debris.
Inspecting Components
Check the heater’s parts for wear and damage. Look at the pilot light, gas line, and thermostat. Make sure the flame is blue, not yellow. Yellow flames may mean a gas leak. Tighten loose screws and replace broken parts quickly. Safety first.
Scheduling Professional Service
Have a professional check your heater once a year. Experts can spot hidden issues and fix them safely. They clean parts you cannot reach. This service helps prevent breakdowns and keeps the heater efficient. Set a reminder for yearly maintenance.

Credit: www.youtube.com
Frequently Asked Questions
How Do I Safely Connect A Gas Wall Heater?
Turn off the main gas supply before starting. Use approved fittings and pipes. Follow local codes and manufacturer instructions. Check for leaks with soapy water after connection. Hire a professional if unsure about any step.
What Tools Are Needed To Hook Up A Gas Wall Heater?
You need a pipe wrench, adjustable wrench, gas line, pipe sealant, and a gas detector. A drill and mounting hardware may also be required. Always use tools designed for gas line installation for safety.
Can I Install A Gas Wall Heater Myself?
Yes, if you have plumbing and gas experience. Follow all safety guidelines and local codes. Improper installation risks gas leaks and fire hazards. When in doubt, consult a licensed professional.
How Do I Check For Gas Leaks After Installation?
Apply soapy water to all joints and connections. Bubbles indicate a leak. Never use an open flame. If you detect a leak, turn off the gas immediately and repair the connection.
Conclusion
Hooking up a gas wall heater can be safe and simple. Follow each step carefully for best results. Always check for gas leaks before turning it on. Proper installation helps keep your home warm and secure. If unsure, call a professional to avoid risks.
Regular maintenance keeps the heater working well. Enjoy cozy warmth during cold days with your new heater. Stay safe and comfortable all winter long.