Are your cabinet handles looking dull or outdated? Giving your cabinet hardware a fresh coat of gold paint can instantly brighten your space and add a touch of luxury—without spending a fortune.
You don’t need to hire a professional or buy new hardware to get that stunning, polished look. In this guide, you’ll discover simple, step-by-step tips to transform your cabinet hardware into eye-catching gold pieces. Ready to upgrade your cabinets and impress everyone who walks into your room?
Let’s dive in!
Gathering Materials
Gathering the right materials makes painting cabinet hardware gold easier and neater. Proper tools and supplies save time and help achieve a smooth finish.
This section covers what to pick for paint, brushes, and setting up your work area.
Choosing The Right Paint
Pick paint made for metal surfaces. Spray paint in gold tones works best for small hardware pieces. It gives even coverage and a shiny look. Use oil-based or enamel paint for durability. Avoid water-based paints, as they may chip quickly.
Selecting Brushes And Tools
Choose fine, soft brushes if you use liquid paint instead of spray. Small foam brushes or artist brushes work well. Have a few sizes ready to reach tight corners. Use a screwdriver to remove hardware from cabinets. Keep sandpaper handy to smooth rough spots before painting.
Preparing Work Area
Set up a clean, well-ventilated space. Lay down newspaper or a drop cloth to catch paint drips. Use gloves to protect your hands from paint. Keep hardware pieces organized on trays or paper to avoid losing them. Good lighting helps see paint coverage clearly.
Removing Hardware
Removing cabinet hardware is the first step in painting it gold. This process needs care. Proper removal keeps the hardware safe and ready for painting. It also protects the cabinet surface from damage. Taking time here makes the next steps easier and cleaner.
Safely Detaching Handles And Knobs
Start by opening the cabinet doors or drawers. Use a screwdriver that fits the screws well. Turn the screws slowly to avoid stripping them. Hold the handle or knob firmly while unscrewing. This stops the hardware from falling or scratching the cabinet. Place the hardware on a soft surface after removal.
Organizing Hardware Pieces
Keep all screws and hardware parts together. Use small containers or labeled bags for each set. Labeling helps match handles and knobs to their correct spots later. Organizing saves time when you reattach the hardware. It also prevents losing small pieces during painting.
Cleaning And Sanding
Cleaning and sanding are the first steps to paint cabinet hardware gold. These steps prepare the surface. They help the paint stick well and last longer. Skipping this can cause peeling and uneven color. Take time to clean and sand carefully. It sets a strong base for painting.
Removing Dirt And Grease
Start by removing all dirt from the hardware. Use warm water and mild soap. Scrub gently with a soft brush or cloth. Grease and oils can stop paint from sticking. Use a degreaser or rubbing alcohol to wipe the hardware. Make sure to clean every corner. Let the hardware dry completely before the next step.
Sanding For Better Adhesion
Sanding creates a rough surface for paint to hold onto. Use fine-grit sandpaper, about 220 grit. Rub the hardware gently but cover all areas. Sand until the surface feels slightly rough. This will help the paint grip well. After sanding, wipe the dust off with a damp cloth. Let the hardware dry before painting.
Priming The Hardware
Priming the cabinet hardware is an important step before painting it gold. It helps the paint stick better and last longer. Without primer, the paint may peel or chip quickly. Take your time to prepare the hardware well for a smooth finish.
Choosing The Appropriate Primer
Select a primer made for metal surfaces. This type sticks well to metal and stops rust. Look for a spray primer for easy, even coverage. Avoid thick primers that can hide details on the hardware. A good primer creates a solid base for gold paint.
Applying Primer Evenly
Clean the hardware with soap and water. Let it dry completely before priming. Shake the primer can well. Hold the spray can 6 to 8 inches away. Spray in light, even coats. Avoid heavy layers that cause drips. Allow each coat to dry before adding another. Two thin coats work better than one thick coat.
Painting With Gold
Painting cabinet hardware gold can brighten any room. It adds a touch of luxury and style. The process needs care to get a smooth and lasting finish.
Follow clear steps to paint your hardware with a rich gold color. Prepare well, apply the base, then build layers of gold paint. Finish with tips to keep it smooth and shiny.
Applying Base Coat
Start with a clean surface. Remove dirt and grease with soap and water. Dry hardware fully before painting.
Use a primer to help paint stick better. Choose a white or light-colored primer for gold paint. Apply one thin layer and let it dry completely.
Adding Gold Paint Layers
Pick a good quality gold spray paint or brush-on paint. Shake the spray can well for even color.
Apply the gold paint in thin, even coats. Hold the spray can about 8-10 inches from the surface. Let each coat dry before adding the next.
Two to three coats usually give full coverage and a rich gold finish.
Tips For Smooth Finish
Spray or brush in a well-ventilated, dust-free area. Avoid thick layers that drip or run.
Lightly sand between coats with fine sandpaper. This helps the paint stick better and smooths out bumps.
Allow the final coat to dry for at least 24 hours. Handle hardware carefully until fully cured.
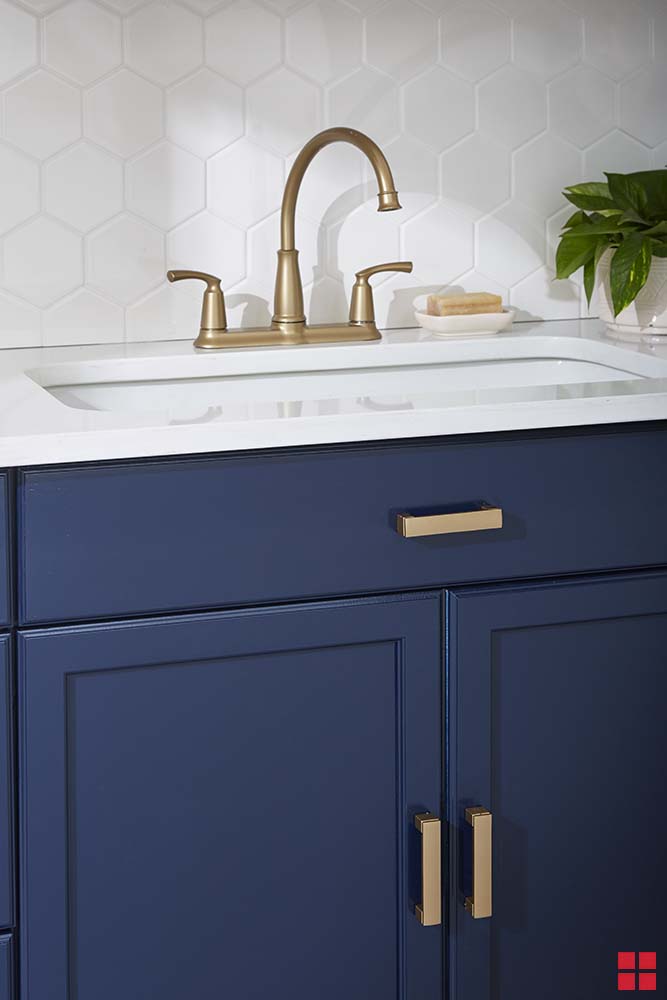
Credit: www.rustoleum.com
Sealing And Protecting
Sealing and protecting painted cabinet hardware is important. It keeps the gold finish bright and stops it from chipping or fading. A good sealant also protects against fingerprints and water damage. This step helps your hardware look new for a long time. Let’s explore how to choose and apply the best clear coat for your project.
Choosing A Clear Coat
Pick a clear coat made for metal surfaces. Look for one that is water-resistant and durable. A polyurethane or acrylic clear coat works well. Glossy finishes show shine, while matte finishes hide scratches. Choose a finish that matches your style. Check if the clear coat is compatible with your gold paint. This prevents peeling or cloudiness on the hardware.
Applying Protective Sealant
Apply the clear coat in thin, even layers. Use a small brush or spray for smooth coverage. Let each layer dry completely before adding the next. Two or three coats give the best protection. Avoid thick layers that drip or bubble. After the final coat dries, handle the hardware gently. This helps keep the gold finish flawless for years.
Drying And Curing
Drying and curing are key steps after painting cabinet hardware gold. They help the paint set properly and last longer. Skipping or rushing this part can cause peeling or damage.
Patience during drying and curing ensures a smooth, shiny finish. It also protects the hardware from scratches and wear. Follow the right times and conditions for the best results.
Recommended Drying Time
After painting, let the hardware dry at least 1 to 2 hours. This time allows the paint to harden on the surface. Avoid touching the pieces during this stage to prevent marks.
For full drying, wait at least 24 hours. Keep the hardware in a dry, dust-free area. Avoid direct sunlight or heat, which can cause cracking.
Ensuring Long-lasting Results
Curing is the process where paint fully hardens over days. Let the hardware cure for 5 to 7 days before use. This step makes the gold paint durable and resistant.
Place the pieces in a cool, dry spot with good air circulation. Avoid moisture and heavy handling during curing. This care helps keep the paint bright and intact for years.
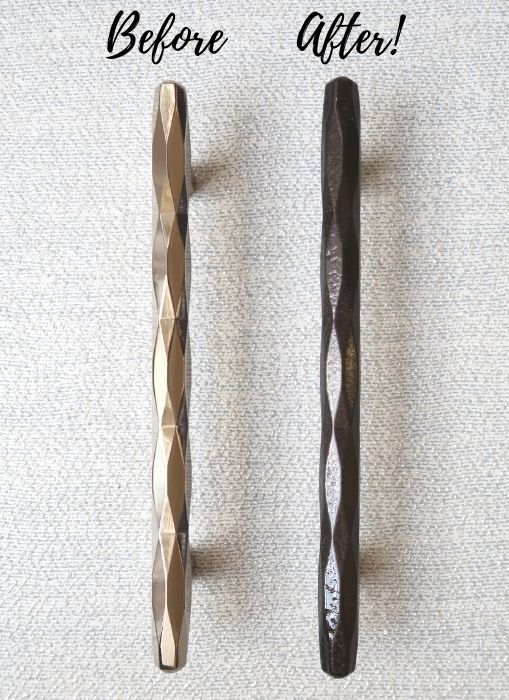
Credit: porchdaydreamer.com
Reinstalling Hardware
After painting your cabinet hardware gold, it is time to put everything back. Reinstalling hardware needs care and patience. This step ensures your cabinets look neat and polished. It also protects the new paint from chipping or peeling. Taking the right steps will help your hardware last longer and shine brighter.
Properly Attaching Painted Pieces
Start by lining up each piece with its original spot. Use the same screws you removed before painting. Tighten the screws gently to avoid cracking the paint. Check if the hardware fits well and does not wobble. If it feels loose, tighten a little more but avoid over-tightening. This keeps the hardware secure and prevents damage.
Final Touches And Inspection
After attaching all pieces, wipe off any dust or fingerprints. Use a soft cloth to keep the shine intact. Look closely for any missed spots or scratches on the paint. Touch up small areas if needed with a tiny brush. Open and close doors to make sure everything works smoothly. This final check gives you confidence in your fresh, gold hardware look.
Maintenance Tips
Keeping your gold-painted cabinet hardware looking fresh takes simple care. Proper maintenance helps preserve its shine and prevents peeling or chipping. Follow these tips to enjoy your beautiful hardware for a long time.
Cleaning Painted Hardware
Use a soft cloth to clean the hardware gently. Avoid harsh scrubbing that can damage the paint. Mild soap mixed with water works best for removing dirt. Dampen the cloth slightly and wipe the surface softly. Never soak the hardware or use strong chemicals. Dry the hardware thoroughly after cleaning to avoid water spots.
Avoiding Damage Over Time
Protect the hardware from scratches by handling with care. Avoid using abrasive tools or rough materials nearby. Keep sharp objects away to prevent chips in the paint. Consider applying a clear sealant for extra protection. Repaint small damaged areas quickly to stop further wear. Regular checks help catch issues early and maintain the gold finish.
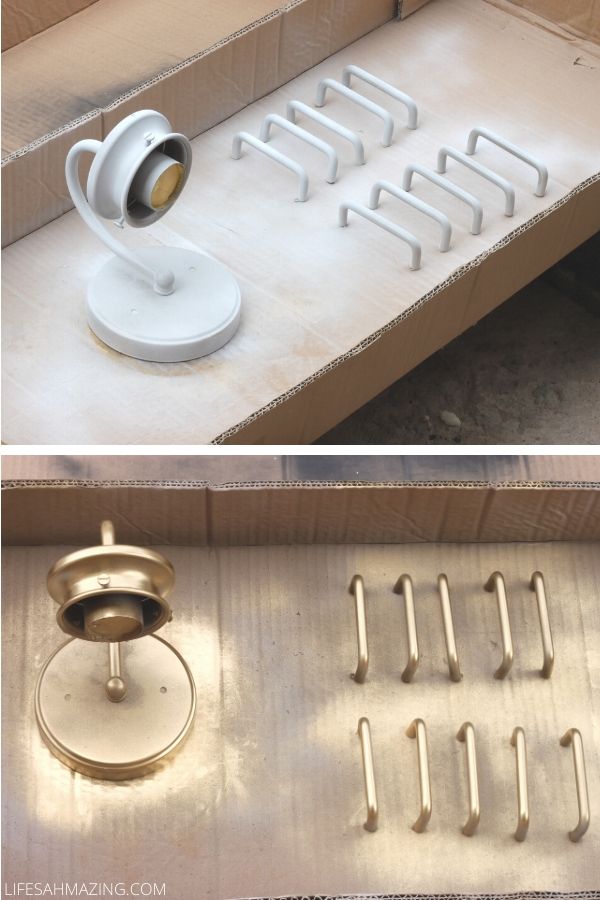
Credit: www.lifesahmazing.com
Frequently Asked Questions
What Materials Do I Need To Paint Cabinet Hardware Gold?
You need spray paint or brush-on gold paint, primer, sandpaper, painter’s tape, and a protective clear coat. Clean hardware thoroughly before painting for best results.
How Do I Prepare Cabinet Hardware For Painting?
Remove hardware from cabinets, clean off grease and dirt, lightly sand surfaces, and apply primer. Proper prep ensures paint adheres evenly and lasts longer.
Can I Paint Cabinet Hardware Without Removing It?
It’s best to remove hardware for even coverage and to avoid paint on cabinets. Painting in place may cause drips and uneven finishes.
How Long Does It Take For Gold Paint To Dry?
Gold spray paint usually dries to touch in 15-30 minutes and fully cures in 24 hours. Drying times vary by brand and humidity.
Conclusion
Painting cabinet hardware gold adds a fresh, elegant look to any room. The process is simple and affordable. With careful preparation and patience, you can achieve a smooth, lasting finish. This small change can brighten your space and update your decor.
Try it yourself and enjoy the new shine on your cabinets. A little effort brings a big difference. Give your cabinets a golden touch today.


