Have you ever struggled with a stubborn deadbolt that just won’t turn or worried about your home’s security? Changing a deadbolt might seem tricky, but it’s simpler than you think—and you can do it yourself.
Imagine the peace of mind you’ll feel knowing your door is locked tight with a brand-new, reliable deadbolt. In this guide, you’ll learn easy, step-by-step instructions that anyone can follow, even if you’re not a DIY expert. Ready to take control of your home’s safety?
Let’s get started.
Credit: www.youtube.com
Tools You’ll Need
Changing a deadbolt is easier with the right tools. Having these tools ready saves time and effort. Each tool helps with a specific part of the job. Prepare them before starting for a smooth process.
Screwdriver
A screwdriver is essential to remove and install screws. Most deadbolts use Phillips head screws, so a Phillips screwdriver is best. Some models may need a flathead screwdriver. A good grip on the screwdriver helps avoid slipping.
New Deadbolt Lock
The new deadbolt lock replaces the old one. Choose a lock that fits your door’s thickness and style. Check if the lock comes with all parts included. This avoids extra trips to the store.
Measuring Tape
Measuring tape ensures the new lock fits perfectly. It helps measure door thickness and hole size. Accurate measurements prevent mistakes during installation. Keep the tape handy for quick checks.
Chisel
A chisel shapes the door frame if needed. Sometimes the new lock’s plate requires a larger recess. Use the chisel carefully to avoid damage. Light taps work best for neat results.
Hammer
A hammer works with the chisel to adjust the door frame. It also helps tap pieces into place. Use a small hammer for better control. Avoid heavy hits to protect the door and lock.
Pencil
A pencil marks measurements and screw positions. Clear markings guide the installation steps. It helps keep track of adjustments during the process. Use a sharp pencil for precise lines.
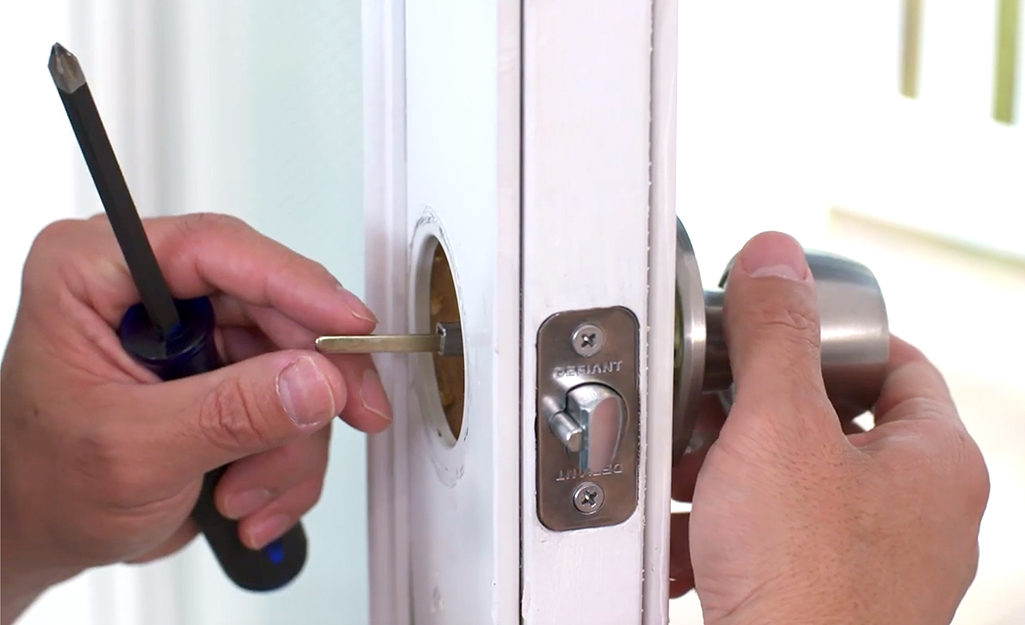
Credit: www.homedepot.com
Choosing The Right Deadbolt
Choosing the right deadbolt is important for your home’s safety. A good deadbolt stops burglars and keeps your family safe. Picking the correct deadbolt means you get the best protection and ease of use. Not all deadbolts work the same way or offer the same security. Knowing the types and features helps you make a smart choice.
Types Of Deadbolts
Single-cylinder deadbolts use a key outside and a thumb turn inside. They are common and easy to use. Double-cylinder deadbolts need a key on both sides. These are good for doors with glass near the lock. There are also lockable thumb turn deadbolts. They let you lock the thumb turn from inside for extra security. Choose the type that fits your door and your needs.
Security Features To Consider
Look for a deadbolt with a solid metal bolt. A bolt at least one inch long gives better protection. Pick locks with anti-pick pins inside to stop lock picking. Some deadbolts have drill-resistant plates to block drilling attacks. A reinforced strike plate on the door frame strengthens the lock. Check if the deadbolt is Grade 1 or 2 for high security. These features make your door much harder to break into.
Removing The Old Deadbolt
Removing the old deadbolt is the first step in changing your lock. This process makes room for the new deadbolt. It is important to do it carefully to avoid damage. Follow these simple steps to remove the old deadbolt properly.
Unscrewing The Exterior And Interior
Start by finding the screws on the inside part of the door. Use a screwdriver to remove these screws. Keep the screws safe for later use or discard if new screws come with the new deadbolt.
Next, gently pull off the interior and exterior parts of the deadbolt. They should come off easily after removing the screws. If stuck, wiggle the pieces slightly to loosen them.
Taking Out The Latch
After removing the main lock parts, focus on the latch inside the door edge. Locate the screws holding the latch in place. Unscrew these and carefully pull the latch out.
Check the door edge for any debris or damage. Clean the area before installing the new deadbolt. This ensures a smooth fit for your new lock.
Installing The New Deadbolt
Installing the new deadbolt is the key step after removing the old one. This process ensures your door locks securely and works smoothly. Each part must fit correctly. Take your time and follow the steps carefully. A properly installed deadbolt adds safety and peace of mind.
Positioning The New Latch
Start by placing the new latch into the door’s edge. The latch bolt should face the door frame. Push it in until the faceplate sits flush with the door. Use screws to fix the latch firmly. Make sure it is tight but do not over-tighten.
Attaching The Exterior And Interior Parts
Next, align the exterior part of the deadbolt with the latch. The key slot should be on the outside. Hold it steady while attaching the interior part. Insert screws through the inside piece and tighten them evenly. Check that both sides fit well and turn smoothly.
Aligning The Strike Plate
The strike plate must line up with the latch on the door frame. Place it over the existing hole or mark a new one. Use screws to secure the plate tightly. Test the deadbolt by locking and unlocking. Adjust the plate if the bolt does not slide easily.
Testing The New Lock
After installing a new deadbolt, testing it is very important. This step ensures your lock works well and keeps your home safe. A properly tested lock will open and close without trouble. It will also keep your door secure from outside forces. Taking time to check the new lock helps avoid future problems.
Checking Lock Functionality
Start by turning the key in the lock. It should turn smoothly without sticking. Test the lock from both inside and outside. Make sure the bolt slides fully into the door frame. Try locking and unlocking several times. The key should not get stuck at any point.
Adjusting For Smooth Operation
If the lock feels tight or hard to turn, adjustments may be needed. Check the alignment of the bolt and strike plate. The bolt must line up exactly with the hole in the door frame. Loosen the screws on the strike plate. Move it slightly until the bolt fits easily. Tighten the screws back and test again. Repeat until the lock works smoothly every time.
Tips For Maintaining Your Deadbolt
Keeping your deadbolt in good shape helps protect your home. Regular care avoids problems and saves money. Small steps can make a big difference. Follow these tips to keep your deadbolt working smoothly and safely.
Lubricate The Lock Mechanism
Use a graphite or silicone spray to lubricate the lock. Avoid oil-based lubricants that attract dirt. Spray inside the keyhole and on moving parts. This reduces friction and prevents the lock from sticking.
Check For Loose Screws
Look at the screws on the lock and door frame. Tighten any that are loose with a screwdriver. Loose screws can cause the lock to misalign. This makes it harder to turn the key or bolt.
Clean The Keyhole Regularly
Dust and dirt can build up inside the keyhole. Use compressed air to blow out debris. Wipe the outside with a soft cloth. Clean keyholes help the key slide in easily.
Test The Lock Often
Turn the key and bolt several times every few months. This prevents the lock from getting stuck. Early testing can spot problems before they get worse.
Replace Worn Keys
Check your keys for wear and tear. Bent or damaged keys can harm the lock. Make new copies if your keys show signs of damage. Use fresh keys to avoid lock jams.
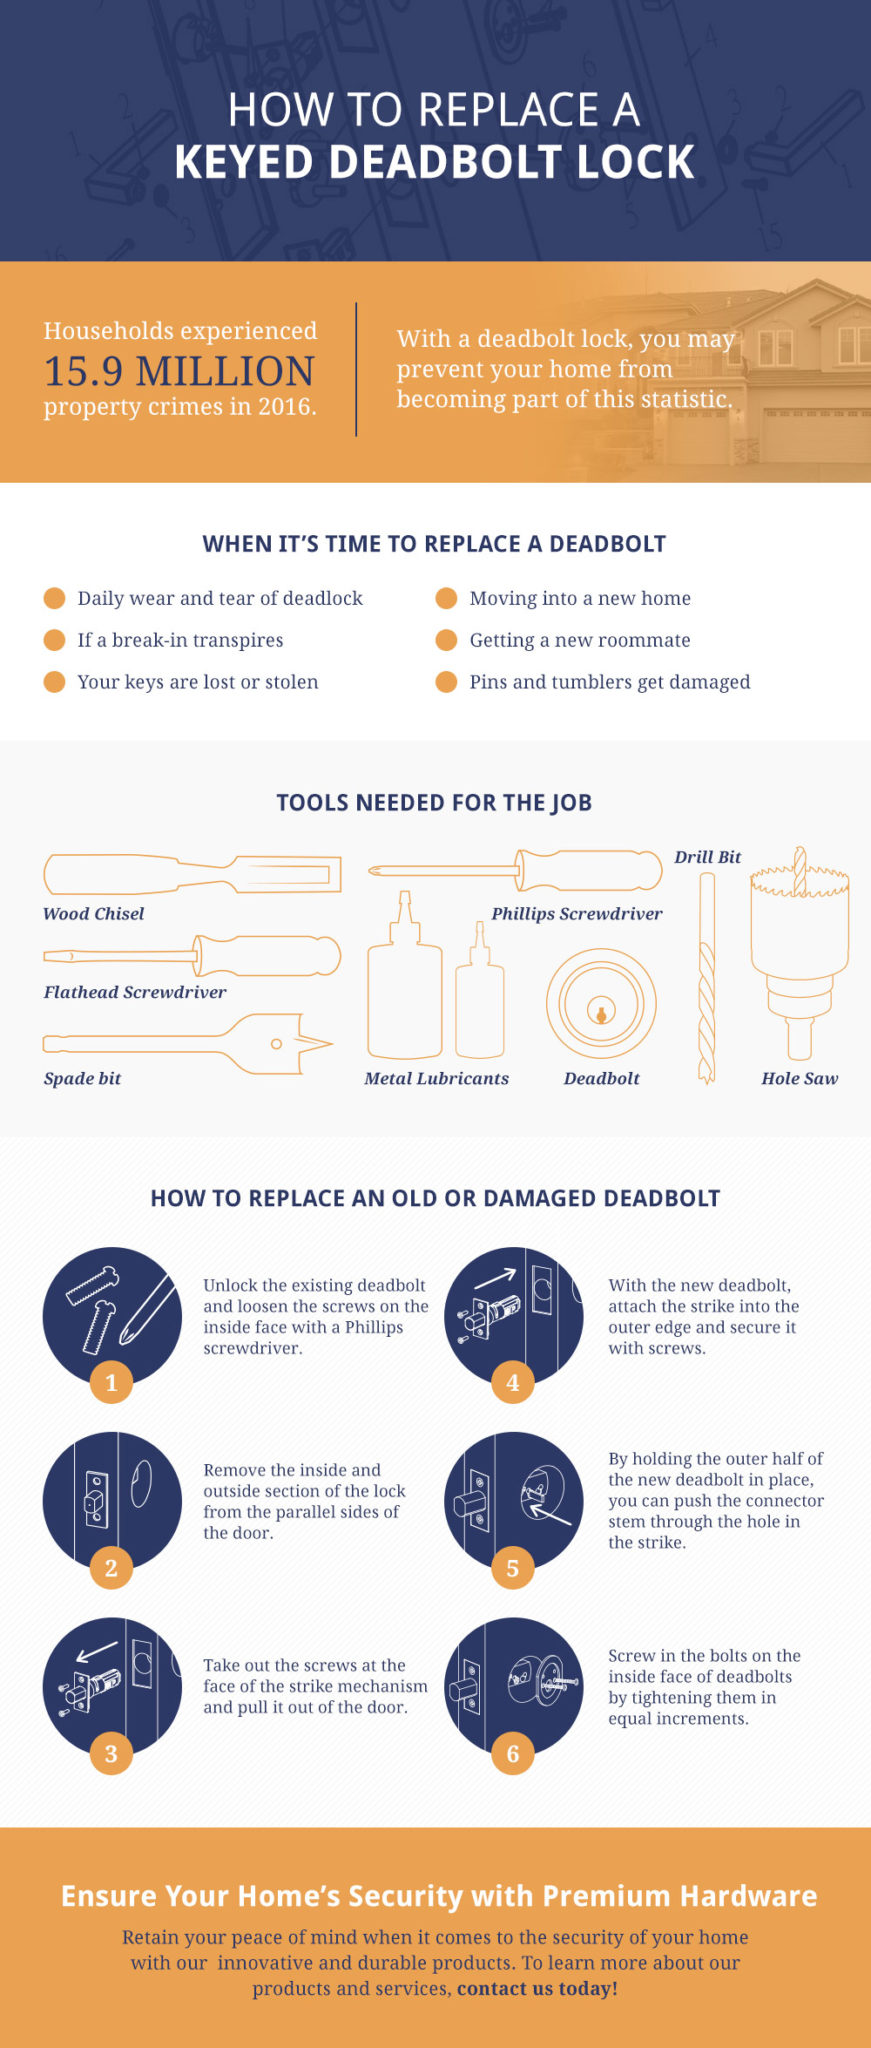
Credit: premiumhardware.net
Frequently Asked Questions
How Do I Remove A Deadbolt Lock?
To remove a deadbolt, first unscrew the interior and exterior plates. Then, pull the lock apart gently. Remove the latch mechanism from the door edge by unscrewing it. Keep all screws for reinstalling the new deadbolt lock easily.
What Tools Do I Need To Change A Deadbolt?
You need a Phillips screwdriver, flathead screwdriver, and possibly a drill. Some deadbolts require an Allen wrench. Having a tape measure helps for proper alignment. Ensure you have all tools before starting the replacement process.
How Long Does It Take To Replace A Deadbolt?
Replacing a deadbolt usually takes 15 to 30 minutes. Time varies based on your experience and door type. Preparation and tool readiness can speed up the process. Always follow the manufacturer’s instructions carefully for best results.
Can I Change A Deadbolt Without Drilling New Holes?
Yes, if the new deadbolt matches your door’s existing holes. Most standard deadbolts fit standard door preparations. Check the size and alignment before purchasing. Avoid drilling unless necessary to prevent door damage.
Conclusion
Changing a deadbolt is simpler than it seems. Gather your tools and follow each step carefully. Take your time to avoid mistakes. A new deadbolt improves home security and peace of mind. Practice makes the process easier next time. Stay safe and confident with your updated lock.