Have you ever faced a flickering light or a switch that just won’t work right? Replacing a light switch might sound tricky, but it’s easier than you think—and you don’t need to be an expert to do it yourself.
Imagine saving money, fixing the problem fast, and feeling proud that you handled it on your own. In this guide, you’ll get simple, step-by-step instructions to replace your light switch safely and quickly. Ready to take control and brighten up your home?
Let’s get started!

Credit: blueskysparky.com
Tools And Materials Needed
Replacing a light switch is a simple task with the right tools and materials. Having everything ready makes the job faster and safer. This section covers the basic items needed for a smooth switch replacement.
Essential Tools
Start with a screwdriver set, including flathead and Phillips types. A voltage tester is crucial to check if the power is off. Wire strippers help remove the insulation without damage. Needle-nose pliers are useful for bending wires. A flashlight or headlamp can improve visibility in dark areas.
Choosing The Right Switch
Select a switch that fits your wall box and matches your home’s style. Single-pole switches work for simple on/off control. Three-way switches control lights from two spots. Check the switch’s voltage and amperage rating. Buy switches from trusted brands to ensure quality and safety.
Safety Gear
Wear insulated gloves to protect against electric shock. Safety goggles keep debris out of your eyes. Use non-slip shoes for better grip. Keep a first aid kit nearby. Turn off the power at the circuit breaker before starting any work.

Credit: www.wikihow.com
Prepare For Replacement
Preparing to replace a light switch is the first step to a safe and smooth process. Safety matters most, so follow each step carefully. Taking time to prepare helps avoid accidents and mistakes.
Preparation includes turning off power, checking if power is off, and removing the switch cover plate. Each step is simple but important for safety and success.
Turn Off Power
Locate your home’s main electrical panel. Find the breaker for the room where the switch is. Flip the breaker to the OFF position. This stops electricity from flowing to the switch. Never skip this step.
Test For Power
Use a voltage tester or a non-contact voltage detector. Touch it to the wires inside the switch box. If the tester shows no power, it is safe to work. Always double-check to avoid shocks.
Remove Cover Plate
Use a screwdriver to remove the screws on the cover plate. Carefully pull the plate away from the wall. Keep the screws safe for later. Removing the cover gives you access to the switch.
Remove Old Switch
Removing the old light switch is the first step in the replacement process. It requires care and attention to avoid any electrical hazards. Always ensure the power is turned off at the breaker before starting. Safety comes first.
Once the power is off, you can begin by unscrewing the switch from the wall. This exposes the wiring and allows you to disconnect the old switch safely.
Unscrew The Switch
Locate the screws holding the switch plate in place. Use a screwdriver to remove these screws carefully. Keep the screws safe; you will need them to install the new switch. Gently pull the switch away from the wall to see the wires behind it. Do not pull hard to avoid damaging the wires.
Disconnect Wires
Identify the wires connected to the switch. Each wire is attached to a screw or inserted into a slot. Loosen the screws or release the wires gently. Take note of how the wires connect to the switch. This helps when attaching the new switch. After disconnecting, tuck the wires back into the electrical box carefully.
Install New Switch
Replacing a light switch involves turning off power, removing the old switch, and connecting wires to the new one. Careful wiring ensures the switch works safely and correctly.
Connect Wires To New Switch
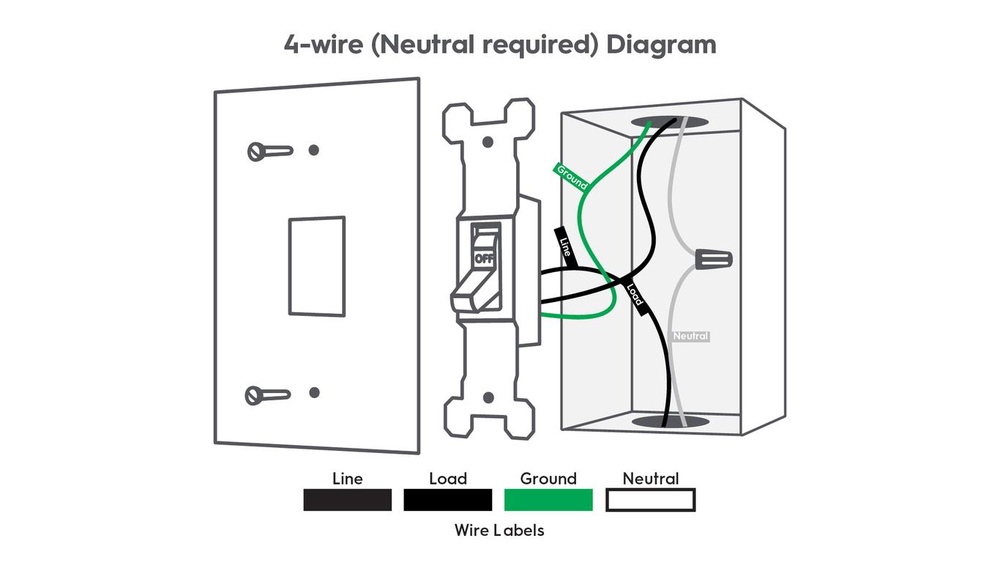
Start by matching each wire to the correct terminal on the new switch.
Typically, the black (hot) wire connects to the brass screw.
The white (neutral) wire usually does not connect to the switch but to the wire nut.
The green or bare copper wire goes to the green grounding screw.
Tighten each terminal screw securely to hold the wires in place.
Secure The Switch In Place
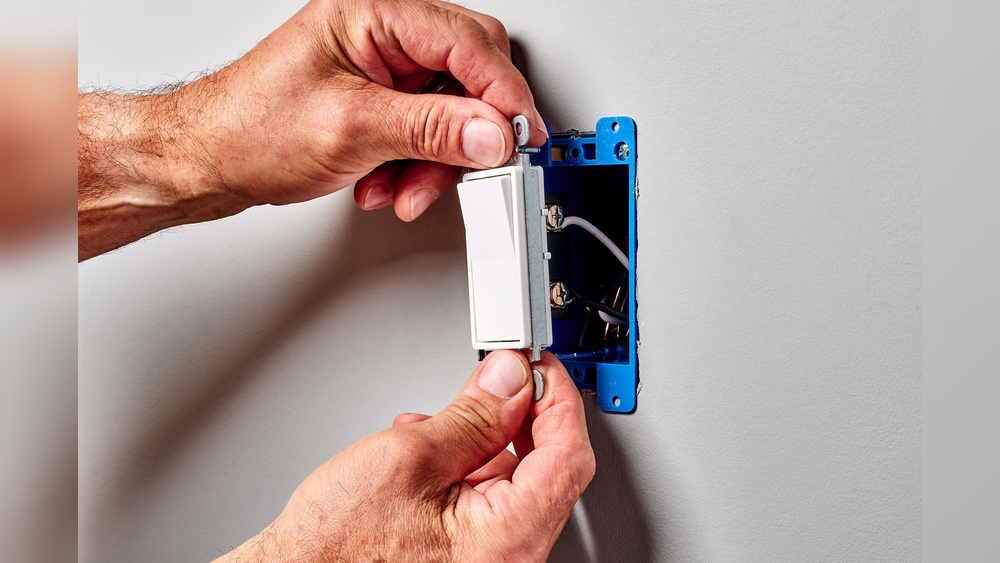
Gently push the wires back into the electrical box.
Align the switch with the mounting holes on the box.
Use screws to fix the switch firmly to the box.
Check that the switch sits flat and does not move.
Attach Cover Plate
Place the cover plate over the switch.
Line up the screw holes on the plate with those on the switch.
Insert and tighten the screws carefully.
Do not overtighten to avoid cracking the plate.
Your new switch installation is now complete and neat.
Restore Power And Test
After installing a new light switch, restoring power and testing it ensures the job is done right. This step confirms the switch works safely and correctly. It also helps spot any wiring mistakes early. Follow these simple steps to power up and check your new switch.
Turn Power Back On
Locate the circuit breaker panel. Flip the switch controlling the light circuit to the ON position. Make sure the power is restored to the room. Avoid touching any wires or metal parts. Use caution and keep your hands dry.
Test The Switch Functionality
Flip the light switch up and down. Check if the light turns on and off properly. Test all switch positions if it has multiple settings. Watch for any flickering or unusual sounds. These could indicate wiring issues. Confirm the switch feels firm and works smoothly.
Troubleshooting Tips
Troubleshooting a light switch can save time and effort. Knowing common issues helps fix problems fast. This section covers simple tips for common switch troubles.
Switch Not Working
Check the power first. Make sure the breaker is on. Test the switch with a voltage tester. Loose wires can cause failure. Tighten all wire connections carefully. Replace the switch if no power flows.
Flickering Light
Flicker often means a bad connection. Inspect the wiring at the switch. Look for loose or damaged wires. Also, check the light bulb and socket. Sometimes replacing the bulb fixes the flicker. If the problem stays, replace the switch.
Switch Feels Warm
A warm switch can signal a problem. It may mean too much current flows. Check for loose wires or damage. Warmth can also mean the switch is old. Replace it to avoid safety risks. Never ignore a hot switch.
Safety Reminders
Replacing a light switch involves working with electricity. Safety must be the top priority. Taking the right precautions prevents accidents and injuries. Always follow safety rules carefully before starting any work on switches.
When To Call A Professional
Some electrical jobs are too risky for beginners. Complex wiring or old electrical systems need expert help. If unsure about any step, call a licensed electrician. Professionals have the training and tools to work safely. This reduces the chance of electric shock or fire.
Avoiding Common Mistakes
Turning off the power is the first and most important step. Test the wires with a voltage tester to be sure. Do not touch wires with wet hands. Use insulated tools only. Avoid mixing up wire connections. Wrong wiring can cause short circuits. Secure wires tightly in terminals to prevent loose connections.
:max_bytes(150000):strip_icc()/how-to-replace-a-light-switch-1824670_07_newswitch_40431-69f2872f4a734dc89e3c2bed8711fc69.jpg)
Credit: www.thespruce.com
Frequently Asked Questions
How Do You Safely Turn Off Power Before Replacing A Switch?
Always switch off the circuit breaker controlling the switch. Use a voltage tester to confirm no electricity flows. This prevents shocks and ensures safe handling during replacement.
What Tools Are Needed To Replace A Light Switch?
You need a screwdriver, voltage tester, wire stripper, and replacement switch. These tools help safely remove and install the switch without damaging wires or components.
How Do You Identify Wires For A Light Switch Replacement?
Typically, black is live, white is neutral, and green or bare is ground. Confirm with a voltage tester for accuracy before disconnecting any wires.
Can You Replace A Light Switch Without Professional Help?
Yes, if you follow safety steps and have basic electrical knowledge. Always turn off power and use proper tools. When unsure, consult a licensed electrician.
Conclusion
Replacing a light switch can be simple with the right steps. Always turn off the power to stay safe. Take your time to remove the old switch carefully. Connect the wires to the new switch correctly. Test the switch before closing the wall plate.
Small tasks like this save money and build confidence. Try this project to improve your home’s lighting. You’ll feel proud once the switch works perfectly. Safety first, then enjoy the bright results.