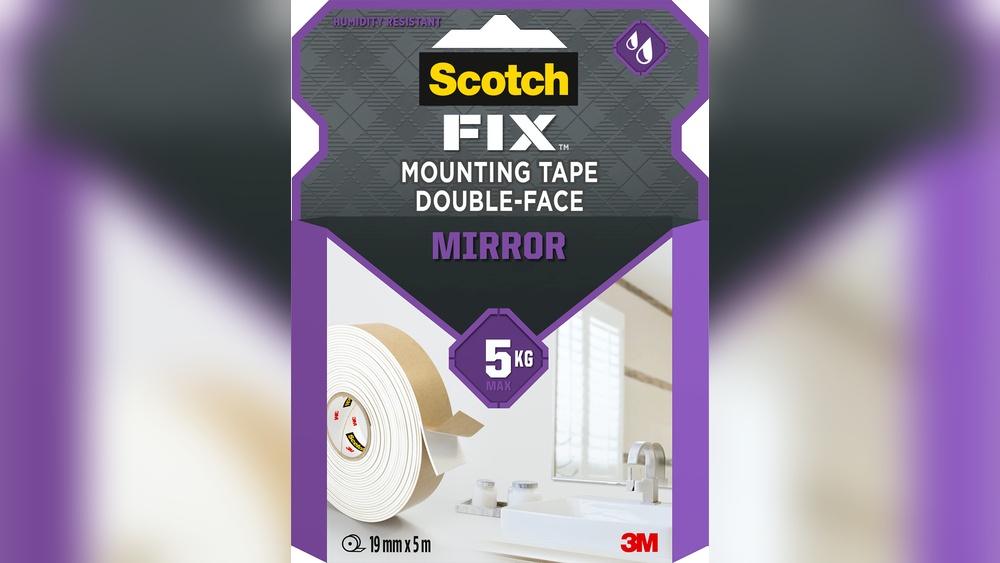
Are you tired of struggling with messy glue or complicated tools to hang your mirrors? You might have heard about mirror mounting tape as a quick and easy fix.
But does mirror mounting tape really work the way you hope? Before you buy a roll or start sticking, it’s important to know if this tape can hold your mirror securely and safely. You’ll discover the truth about mirror mounting tape and learn how to use it the right way to get the best results.
Keep reading to find out if this simple product can solve your mirror-hanging problems once and for all.
How Mirror Mounting Tape Works
Mirror mounting tape is a popular choice for hanging mirrors without nails or screws. It uses strong adhesive to hold mirrors firmly on walls. Understanding how this tape works helps in choosing the right product for your needs.
Adhesive Properties
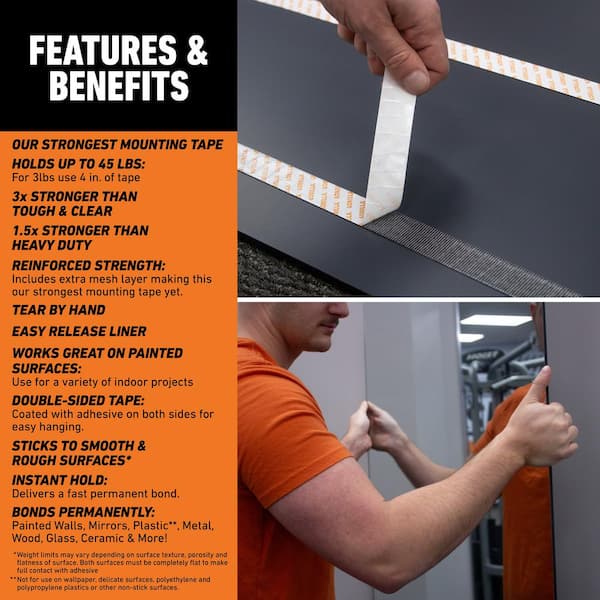
The tape has a sticky side that grips surfaces tightly. It uses special glue that stays strong over time. This glue resists moisture and heat, making it reliable in bathrooms or kitchens. The adhesive bonds quickly and holds mirrors safely.
Surface Compatibility
Mirror mounting tape works best on smooth, clean surfaces. Walls like painted drywall, glass, and tiles are ideal. It may not stick well to rough or dusty walls. Cleaning the surface before application improves the bond strength.
Weight Capacity
The tape can hold light to medium-weight mirrors. Each tape strip supports a certain weight, often listed on the package. Using multiple strips increases the overall strength. Always check the weight limit to avoid accidents.
Types Of Mirror Mounting Tape
Mirror mounting tape comes in several types. Each type has different strengths. Choosing the right tape helps keep mirrors safe and secure.
These tapes differ in thickness, stickiness, and material. Understanding each type makes your project easier and more reliable.
Double-sided Foam Tape
Double-sided foam tape is soft and thick. It absorbs shocks and fits uneven surfaces well. This tape sticks to many materials like glass and wood. It works best for light to medium-weight mirrors.
Vhb Tape
VHB tape stands for Very High Bond tape. It is strong and holds heavy mirrors firmly. This tape resists water and heat. It creates a long-lasting bond on smooth and rough surfaces alike.
Acrylic-based Tape
Acrylic-based tape offers strong adhesion and durability. It can handle outdoor conditions better than other tapes. This tape is thin but powerful, ideal for permanent mounting jobs. It sticks well to glass, metal, and painted walls.
Preparing Surfaces For Application
Preparing surfaces before using mirror mounting tape is key to strong adhesion. Clean and dry surfaces help the tape stick better and last longer. Proper preparation also prevents bubbles and peeling later.
Each step in surface preparation impacts how well the tape works. Small details matter for a firm hold.
Cleaning Techniques
Remove all dust, dirt, and grease from the surface. Use a soft cloth with rubbing alcohol or mild soap. Avoid oily or waxy cleaners as they can reduce tape grip. Wipe the area gently but thoroughly. Let the surface look clean and feel smooth.
Drying And Temperature
Make sure the surface is completely dry before applying tape. Moisture blocks strong bonding. Apply tape at room temperature for best results. Cold or hot surfaces weaken the adhesive. Keep the area dry and between 60°F and 80°F if possible.
Surface Texture Effects
Smooth surfaces hold tape better than rough ones. Bumpy or porous areas create air pockets. These pockets can cause tape to peel off quickly. Sand rough spots lightly to create a flatter surface. A smooth, even texture helps tape stay stuck longer.

Credit: www.amazon.sa
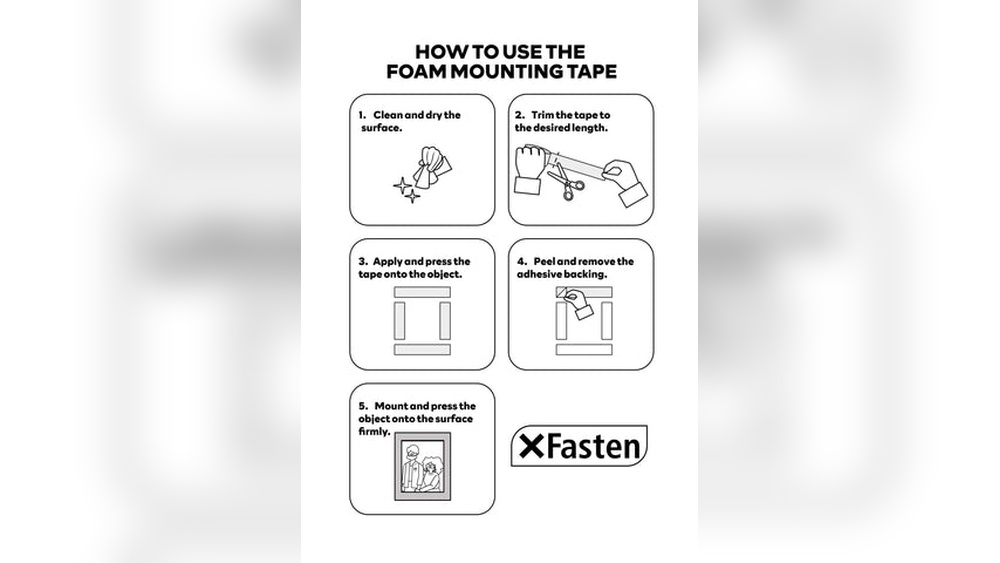
Step-by-step Mounting Process
The step-by-step mounting process for mirror mounting tape is simple and effective. It ensures the mirror stays securely in place. Following each step carefully improves the tape’s hold and prevents damage. This guide helps you mount your mirror quickly and safely.
Measuring And Cutting Tape
Start by measuring the mirror’s edges. Cut the tape into strips that match these measurements. Use scissors for clean, straight edges. Make sure the tape pieces are not too short. Proper tape length ensures strong adhesion to the wall and mirror.
Applying Tape To Mirror
Clean the mirror’s back surface with a dry cloth. Remove any dust or dirt for better sticking. Peel off the tape’s protective backing carefully. Stick the tape strips firmly along the edges of the mirror. Press each strip to avoid air bubbles or gaps.
Pressing And Setting Time
After placing the mirror on the wall, press it firmly. Hold for at least 30 seconds to secure the tape. Avoid moving the mirror during this time. Let the tape set for several hours before hanging items on it. This wait helps the tape reach full strength.
Common Challenges And Solutions
Using mirror mounting tape has its benefits. Yet, some challenges can affect its performance. Understanding these issues helps you fix them fast. This guide covers common problems and simple solutions.
Tape Lifting Or Peeling
Tape can lift or peel from the surface. Dust and dirt reduce its stickiness. Clean the surface well before applying tape. Press the tape firmly for better grip. Avoid touching the sticky side of the tape.
Uneven Surfaces
Uneven walls or mirrors cause weak tape hold. The tape works best on flat, smooth surfaces. Use a filler or sand rough spots first. This creates a smooth area for the tape. It helps the tape stick longer and stronger.
Humidity And Moisture Issues
Moisture can weaken the tape’s hold. Bathrooms and kitchens have high humidity. Choose tape designed for wet or humid areas. Make sure the surface is dry before applying tape. This prevents the tape from losing grip over time.

Credit: www.ebay.com
Comparing Tape To Other Mounting Methods
Mounting a mirror can be done in several ways. Each method has its own benefits and drawbacks. Choosing the right one depends on the mirror size, wall type, and your skill level. Tape is popular for small mirrors and light weight. Let’s compare tape to other common mounting methods.
Screws And Brackets
Screws and brackets offer strong, secure support. They hold heavy mirrors without risk of falling. Installation requires tools and drilling holes. This can damage walls or tiles. It takes more time and effort than tape. Ideal for large mirrors or permanent fixtures.
Adhesive Glues
Adhesive glues provide a strong bond for mirrors. They work well on smooth, clean surfaces. Glues can hold more weight than tape. Application needs care to avoid mess and bubbles. Removing glued mirrors may damage walls or paint. Good for medium to large mirrors.
Suction Cups
Suction cups stick to glass or smooth surfaces. They require no tools or damage to walls. Best for temporary mounting or movable mirrors. Suction power can weaken over time. Not suitable for heavy or large mirrors. Easy to use but less reliable long term.
Tips For Long-lasting Hold
Mirror mounting tape can hold your mirror firmly if used right. Small steps make a big difference. Follow these tips to keep your mirror secure for a long time.
Choosing The Right Tape
Select tape made for heavy objects and smooth surfaces. Check the tape’s weight limit. Look for strong adhesive types like double-sided foam tape. Avoid cheap tapes that lose stickiness fast.
Optimal Surface Preparation
Clean both the wall and mirror edges well. Remove dust, grease, or moisture. Use rubbing alcohol and a clean cloth. Let the surfaces dry completely before applying tape. Smooth, dry surfaces help tape stick better.
Maintenance And Inspection
Check the mirror and tape regularly. Look for signs of peeling or slipping. Press tape edges firmly if needed. Replace tape if it loses stickiness or if the mirror feels loose. Early care prevents accidents and damage.
Removing Mirror Mounting Tape Safely
Removing mirror mounting tape can be tricky. The tape sticks very well to surfaces. Pulling it off carelessly can damage the mirror or wall. Safe removal protects both the mirror and the surface. Use gentle methods to loosen the tape without harm.
Heat Application
Heat softens the adhesive on the tape. Use a hairdryer on low heat. Hold it close to the tape for a few minutes. The warmth makes the tape easier to peel off. Avoid overheating to prevent damage to the mirror or wall.
Using Solvents
Solvents dissolve the glue in the tape. Rubbing alcohol or vinegar works well. Apply a small amount to a cloth. Dab gently on the tape edges. Let it sit for a minute. The glue will loosen, making removal smoother.
Avoiding Surface Damage
Pull tape slowly at a low angle. Do not use sharp tools to scrape. Test solvents on a small hidden area first. Stop if paint or surface starts to peel. Patience prevents scratches and marks on the surface.
Credit: www.homedepot.com
Frequently Asked Questions
Does Mirror Mounting Tape Hold Heavy Mirrors Securely?
Yes, high-quality mirror mounting tape is designed to hold heavy mirrors firmly. Always check the tape’s weight capacity before use for safety.
Can Mirror Mounting Tape Damage Walls Or Surfaces?
Mirror mounting tape generally does not damage walls if removed carefully. Test on a small area first to avoid any surface damage.
How Long Does Mirror Mounting Tape Last Once Applied?
Mirror mounting tape can last several years if applied properly on clean, dry surfaces. Humidity and temperature can affect its longevity.
Is Mirror Mounting Tape Suitable For Bathroom Mirrors?
Yes, waterproof mirror mounting tape is ideal for bathroom mirrors. It resists moisture and maintains strong adhesion in humid environments.
Conclusion
Mirror mounting tape works well for many lightweight mirrors. It holds firmly on smooth, clean surfaces. Avoid using it on rough or heavy objects. Always follow the instructions for the best hold. The tape saves time and avoids drilling holes.
It offers a neat and simple way to hang mirrors. Keep in mind, weight limits matter for safety. Overall, mirror mounting tape provides a quick, easy solution for mirror placement. Try it and see if it fits your needs.