Have you ever wondered how easy it really is to move a light switch in your home? If you’re thinking about changing the layout or just want to make your space more convenient, knowing what’s involved can save you time and frustration.
Moving a light switch might sound complicated, but with the right steps, it can be simpler than you expect. You’ll discover exactly what you need to know before starting, so you can decide if it’s a project you can handle yourself or when to call in a pro.
Keep reading to find out how to make your home lighting work better for you.
Tools You’ll Need
Moving a light switch is a simple task with the right tools. Having the proper equipment makes the job safe and smooth. This section covers the essential tools you will need to complete the move.
Basic Hand Tools
Start with a screwdriver set. A flathead and a Phillips screwdriver usually work best. You will need these to remove the switch cover and unscrew the switch from the wall box. Wire strippers are useful to trim and strip the wires cleanly. A voltage tester is crucial to check if the power is off before you touch any wires. Lastly, a pair of needle-nose pliers helps in bending and twisting wires easily.
Safety Equipment
Safety should be your top priority. Wear insulated gloves to protect your hands from electric shock. Use safety goggles to shield your eyes from dust or small debris. A sturdy ladder might be necessary if the switch is high on the wall. Make sure the area has good lighting to see everything clearly. Turn off the power at the breaker box before starting any work.

Credit: www.youtube.com
Preparing For The Move
Preparing to move a light switch is an important first step. This ensures safety and makes the job easier. Taking the right precautions helps avoid accidents and damage. Follow these simple steps before you start the actual move.
Turn Off The Power
Safety is the top priority. Find the circuit breaker that controls the light switch. Switch it off to cut the electricity. Test the switch to be sure power is off. Use a voltage tester for extra safety. Never skip this step to prevent shocks.
Remove The Switch Cover
Use a screwdriver to take off the switch cover plate. Keep the screws in a safe place. Gently pull the cover away from the wall. This gives access to the switch and wiring. Handle the cover carefully to avoid cracks or breaks.
Disconnecting The Old Switch
Disconnecting the old switch is the first step in moving a light switch. It requires care and attention to avoid mistakes. Safety is the priority. Always turn off the power before touching any wires.
Understanding the wiring setup helps to remove the switch correctly. Each wire has a purpose. Identifying them makes the process smoother and safer.
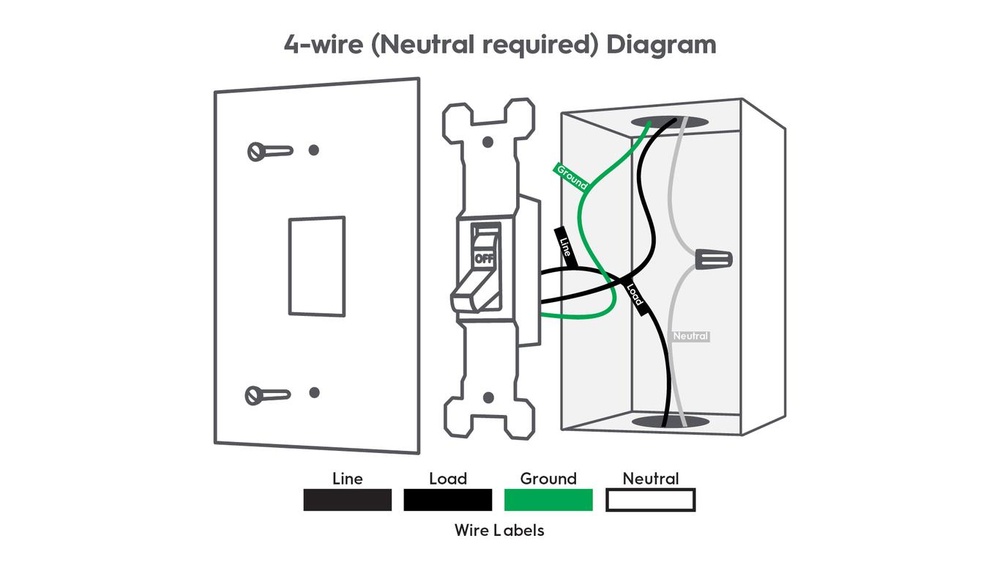
Identify Wiring
Look at the switch to see the wires connected. Usually, there are two or three wires. They can be black, white, or green. Black wires carry power. White wires are neutral. Green or bare wires are ground wires.
Use a voltage tester to check that the power is off. This tool shows if electricity is still running through the wires. Never skip this step. It protects you from electric shock.
Unscrew And Detach Wires
Remove the screws holding the switch to the wall box. Pull the switch gently out to access the wires. Loosen the screws on the switch terminals. This frees the wires from the switch.
Carefully detach each wire. Remember their position for reconnecting later. Use tape or labels to mark them. Keep wires separated to avoid confusion or short circuits.
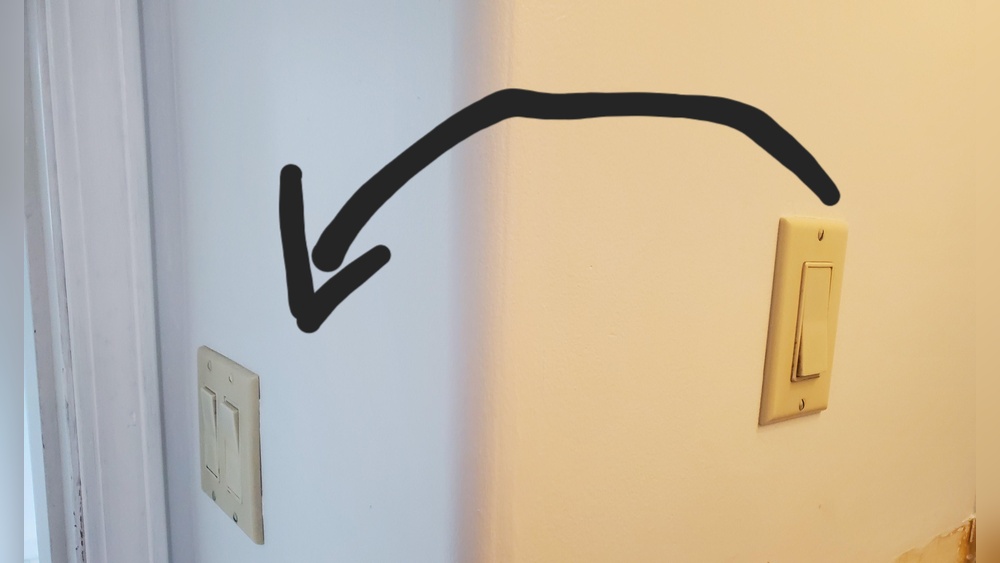
Selecting The New Location
Selecting the new location for a light switch requires careful thought. The new spot must be easy to reach and make sense for daily use. You want the switch to be practical and safe. This step sets the foundation for a smooth move.
Check Wall Structure
Start by examining the wall where you want the switch. Look for studs, pipes, or electrical wires inside the wall. Use a stud finder or tap the wall to find solid areas. Avoid drilling into pipes or wires to prevent damage or accidents. The wall must support the new switch box securely.
Plan Wiring Route
Think about how to run the wires from the power source to the new switch. The path should be as short and simple as possible. Avoid sharp bends or crossing other electrical lines. Plan the route to keep wires hidden and protected inside the wall. A clear wiring plan makes the installation safer and easier.
Installing The Switch In A New Spot
Installing a light switch in a new spot can change how you use your room. The process involves a few clear steps. Each step needs care to keep things safe and working well. Understanding these steps helps you see how easy or hard the job can be.
Cut Wall Opening
Start by marking the new spot on the wall. Use a stud finder to avoid cutting into studs or pipes. Cut a neat hole with a drywall saw. The hole should fit the new switch box perfectly. Be careful to keep the edges smooth and even.
Run New Wiring
Turn off power at the breaker before handling wires. Pull new wires from the power source to the new hole. Use fish tape to guide wires through walls. Connect wires carefully to match the switch terminals. Check local codes for wire type and size.
Secure The Switch
Place the switch into the new box. Screw the switch tightly but gently to avoid damage. Attach the switch cover plate for a clean look. Turn the power back on and test the switch. Make sure it controls the light without issues.

Credit: www.reddit.com
Testing And Finishing Touches
After moving a light switch, testing and finishing touches are key steps. They ensure safety and proper function. These steps are simple but very important. Follow them carefully for best results.
Restore Power And Test
Turn the circuit breaker back on to restore power. Now, flip the light switch to check if the light works. Test both the on and off positions. Make sure the light responds without flickering or delays. If the light does not work, turn off the breaker again. Double-check your wiring connections for any mistakes. Only proceed when the switch works properly and safely.
Attach Cover Plate
After confirming the switch works, attach the cover plate. This protects the wiring and gives a neat look. Align the cover plate over the switch carefully. Use a screwdriver to tighten the screws gently. Avoid overtightening, which can crack the plate. The cover plate should fit snugly against the wall. This final step completes the switch move and keeps everything safe.
Common Challenges
Moving a light switch may sound simple. Many face problems during the process. Knowing common challenges helps prepare better. It saves time and avoids mistakes. Two main challenges stand out in many projects.
Dealing With Old Wiring
Old wiring can cause serious issues. The wires may be brittle or damaged. Identifying which wire connects to what is tricky. Old wires lack clear color coding. They might not follow modern safety rules. Touching old wires without turning off power is dangerous. Sometimes, old wiring needs full replacement. This adds time and cost to the task.
Troubleshooting Switch Issues
Switch problems appear after moving or installing. The light may not turn on or flicker. Loose connections inside the switch can cause trouble. Finding the exact problem requires careful checking. Using a voltage tester helps spot issues fast. Sometimes, the switch itself is faulty. Replacing the switch may fix the problem. Testing before final installation avoids future headaches.
Credit: discover.hubpages.com
When To Call A Professional
Moving a light switch might seem simple. But some situations need a professional’s touch. Knowing when to call an expert can save time and prevent problems. It also protects your safety and home.
Complex Wiring Situations
Some homes have old or complicated wiring. Wires might run through walls in unusual ways. Multiple switches can control one light. These setups are tricky to handle alone.
Professionals understand wiring codes and layouts. They find the right wires safely. Mistakes can cause shorts or fires. Experts avoid these risks by following rules.
Ensuring Safety Compliance
Electric work must meet safety laws. Professionals know these rules well. They ensure wiring meets local codes. This prevents hazards and legal issues.
Correct grounding and circuit protection are vital. A professional checks these carefully. This keeps your home safe from shocks and fires. Safety is not a place to cut corners.
Frequently Asked Questions
How Difficult Is It To Move A Light Switch?
Moving a light switch is generally easy for those with basic electrical skills. It involves turning off power, removing the switch, relocating wiring, and installing the switch in a new spot. Proper tools and safety precautions are essential to avoid hazards.
What Tools Do I Need To Move A Light Switch?
You need a screwdriver, voltage tester, wire stripper, electrical tape, and a new switch box. These tools help ensure safe removal, wiring, and installation. Having the right tools makes the job faster and safer for beginners and pros alike.
Can I Move A Light Switch Without An Electrician?
Yes, if you follow safety guidelines and understand wiring basics. Turn off power at the breaker, test wires, and carefully disconnect and reconnect wiring. If unsure, consult a professional to avoid electrical hazards or code violations.
How Long Does It Take To Move A Light Switch?
Moving a light switch usually takes 30 to 60 minutes for a DIYer. Time varies depending on wall type, wiring complexity, and experience. Proper preparation and tools can speed up the process while ensuring safety.
Conclusion
Moving a light switch is not very hard. You just need some basic tools and safety steps. Turn off the power before you start. Follow simple instructions carefully. Taking your time helps avoid mistakes. If unsure, ask a professional for help.
This small task can improve your room’s look and function. With patience, anyone can do it safely. Give it a try and see how easy it feels.