Changing a light switch might seem tricky, but it’s actually easier than you think. Imagine being able to fix or upgrade your switches on your own, saving time and money.
Whether your switch is old, faulty, or you just want a new style, this simple task is something you can handle. You’ll discover clear, step-by-step instructions that anyone can follow. By the end, you’ll feel confident and ready to make the change yourself—no electrician needed.
Ready to get started? Let’s dive in and make your home brighter and safer.
Tools Needed
Changing a light switch is a simple task. Having the right tools makes the job easier and safer. Gather all needed tools before starting. This saves time and avoids frustration.
Basic Tools
You need a few basic tools to change a light switch. A screwdriver is essential. Usually, a flathead and a Phillips screwdriver work best. Wire strippers help remove insulation from wires. A voltage tester checks if the power is off. Needle-nose pliers help bend and hold wires. These tools make the switch replacement smooth and efficient.
Safety Gear
Safety gear protects you during the task. Insulated gloves prevent electric shocks. Safety goggles protect your eyes from dust and debris. Wear closed-toe shoes for added safety. Always turn off the power at the breaker before starting. Safety gear keeps accidents at bay and gives you confidence.

Credit: www.youtube.com
Turn Off Power
Turning off the power is the first step before changing a light switch. It keeps you safe from electric shocks. Never skip this step. Safety matters most in any electrical work.
Locate Circuit Breaker
Find your home’s circuit breaker panel. It is usually in the basement, garage, or a closet. Open the panel and look for the switch that controls the room’s power. The switches are labeled. Look for one named “lights” or the room where the switch is.
Flip the correct breaker to the off position. This cuts the electricity to the light switch you want to change. It might be a simple switch or a small lever. Make sure it stays in the off position.
Verify Power Is Off
Check if the power is really off. Use a non-contact voltage tester or a simple light bulb tester. Place the tester near the wires or switch. If there is no light or sound from the tester, the power is off.
Also, try turning on the light switch to see if the light stays off. If the light does not turn on, it means the power is off. Always double-check before you start working.
Remove Old Switch
Removing the old light switch is the first step in changing it. This process is simple and safe if done carefully. Start by making sure the power is off at the breaker. This prevents any electric shock while you work.
Next, you will take off the faceplate and disconnect the wires. These steps give you access to the switch and prepare it for the new one.
Unscrew Faceplate
Use a screwdriver to remove the screws holding the faceplate. Keep the screws safe for later use. Gently pull the faceplate away from the wall. This exposes the switch and wires behind it.
Disconnect Wires
Check the wires connected to the switch. Loosen the screws or release the clips that hold the wires. Carefully pull the wires away from the switch. Remember their positions or take a photo for reference. This helps during installation of the new switch.
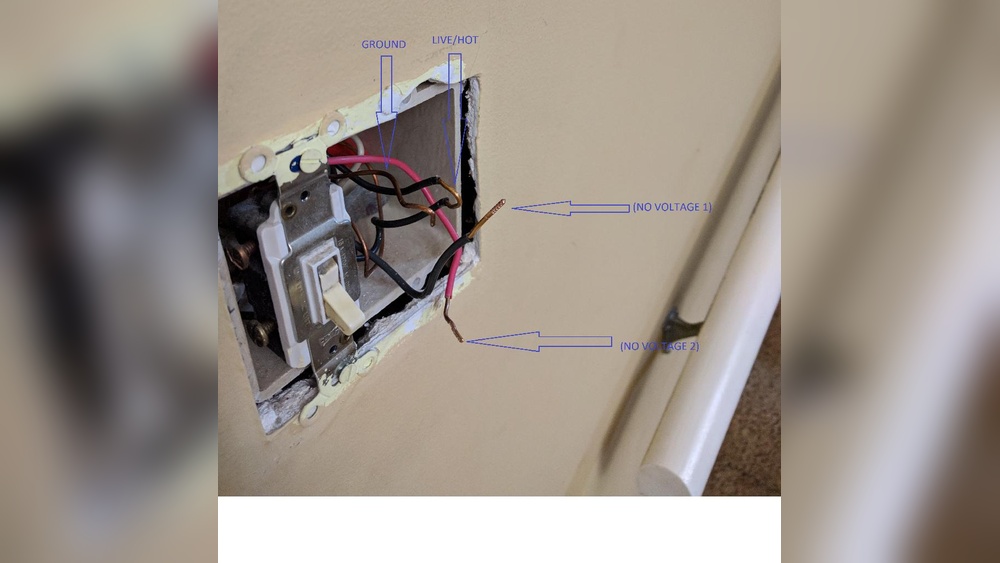
Identify Wire Types
Before changing a light switch, knowing the wire types is key. This helps keep you safe and the work correct. Wires carry electricity differently. Each has a role in your home’s electrical system. Learn to spot these wires by color and purpose.
Live Wire
The live wire carries electricity from the power source. It is often red or brown. This wire is dangerous to touch. It supplies power to the switch and light. Always turn off the power before handling it.
Neutral Wire
The neutral wire completes the electrical circuit. It usually has a blue or white color. This wire carries current back to the power source. It helps the light work correctly. Even if it feels safe, treat it with care.
Ground Wire
The ground wire protects you from electric shocks. It is green or bare copper. This wire directs electricity safely into the earth. It does not carry current under normal use. Connecting it properly is essential for safety.
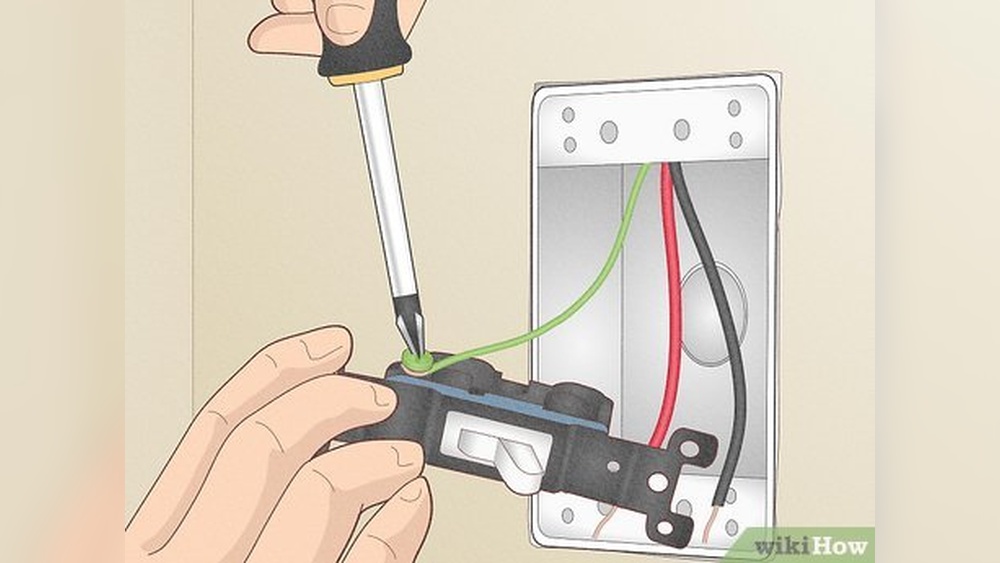
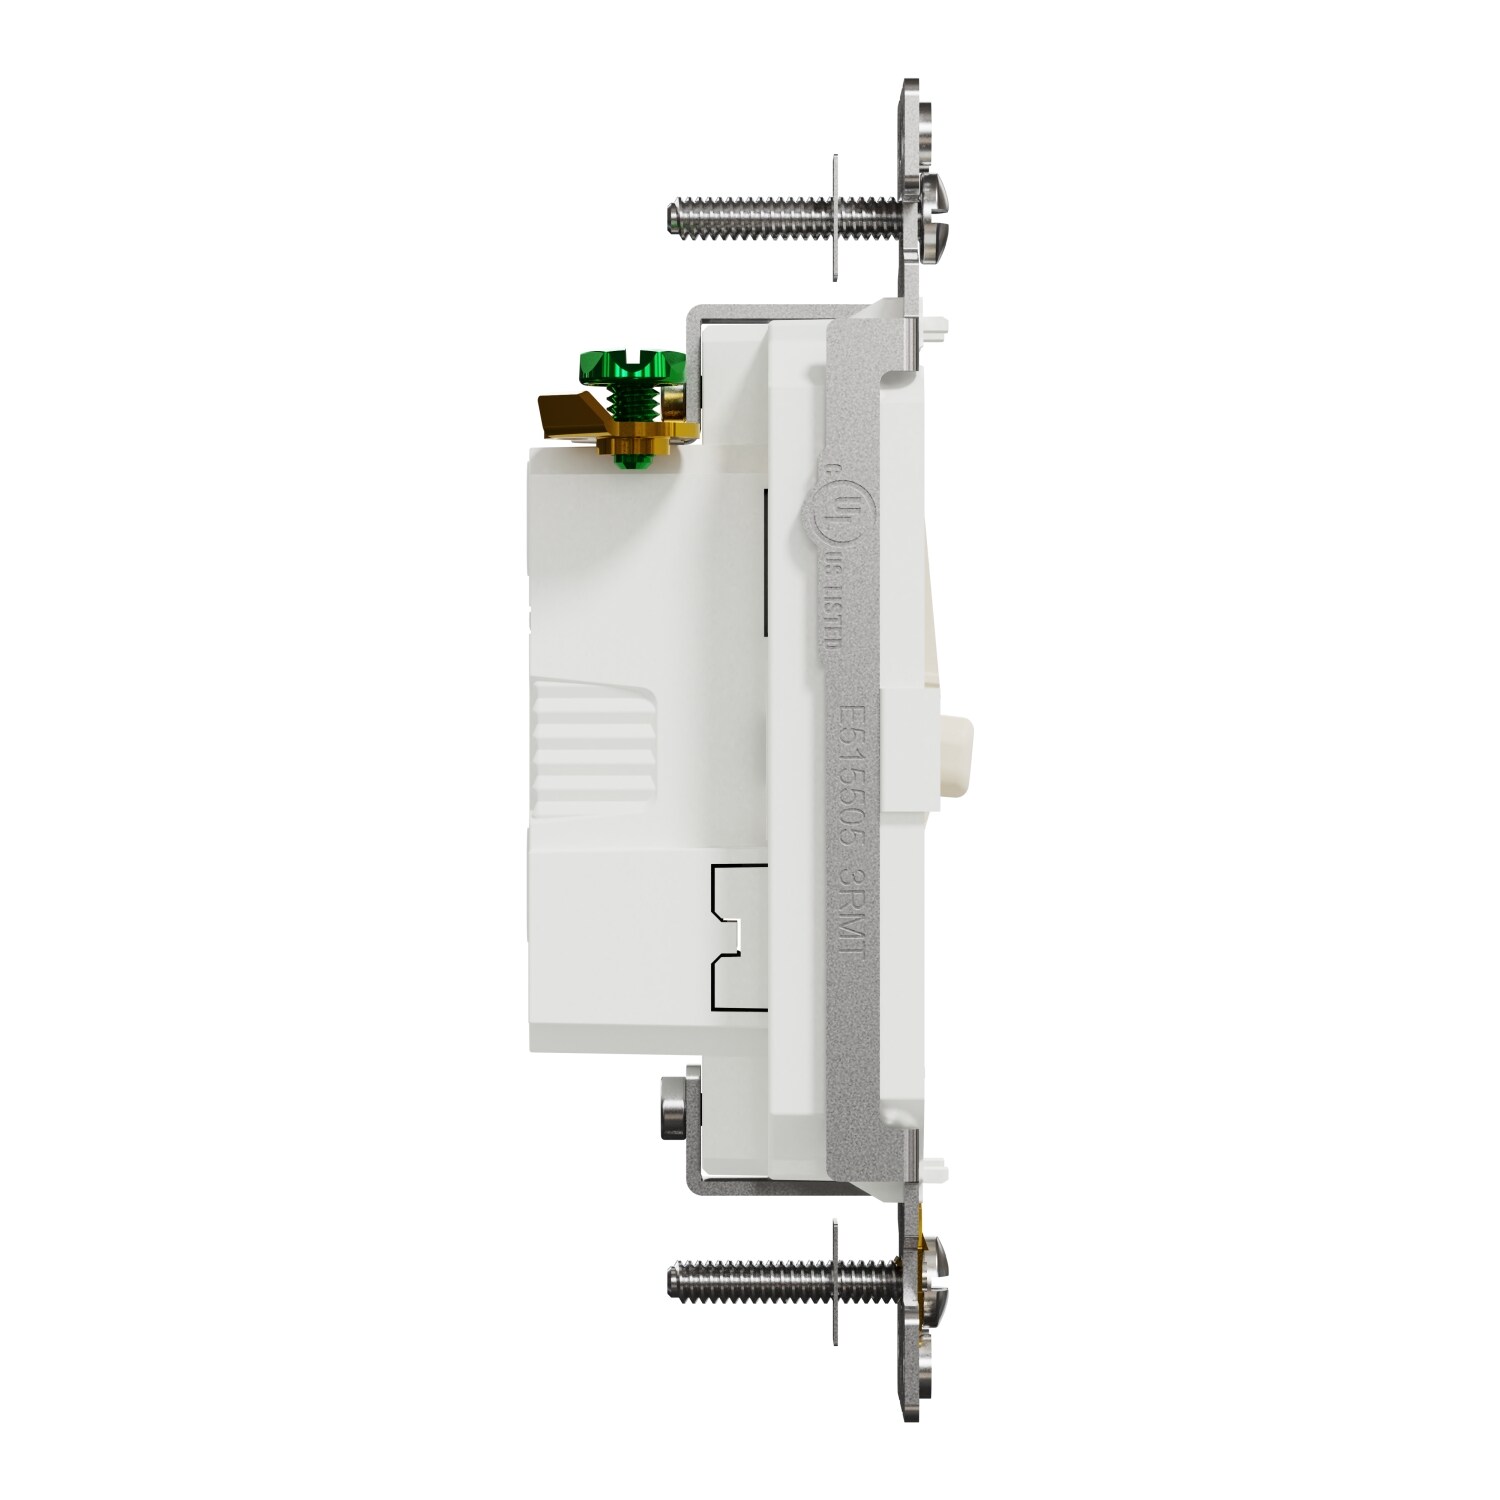
Connect New Switch
Connecting a new light switch is a key step in the replacement process. It requires careful attention to ensure safety and proper function. This section guides you through the easy steps to connect your new switch correctly.
Match Wire Connections
First, identify the wires on your old switch. Usually, there are three wires: live, neutral, and ground. Match each wire to the same terminal on the new switch. Check the colors: black or red is live, white is neutral, and green or bare is ground. Proper matching ensures the switch works safely.
Secure Wires Properly
After matching, wrap wires firmly around the terminals. Use a screwdriver to tighten the screws. Loose wires can cause sparks or failure. Make sure no copper is exposed outside the terminal. Tuck the wires neatly inside the switch box. This prevents damage when you close the cover.
Credit: maiamidwifery.com
Test The Switch
Testing the switch is a key step after installation. It confirms the switch works safely and correctly. Never skip this step for your safety and peace of mind.
Turn Power Back On
First, turn the power back on at the circuit breaker. This restores electricity to the switch. Make sure the breaker is fully switched to the ON position. This step is simple but very important.
Check Functionality
Next, test the switch by flipping it on and off. The light should respond immediately. If the light does not turn on, double-check your wiring connections. A properly working switch will control the light smoothly without flickering.
Troubleshooting Tips
Changing a light switch can seem simple, but problems may arise during or after the process. Troubleshooting helps identify and fix these issues quickly. Knowing common problems and when to seek help saves time and prevents danger.
Common Issues
A switch that does not turn on the light is a frequent problem. It may be due to loose wiring or a faulty switch. Flickering lights often point to poor connections or a bad bulb. Another issue is a switch that feels warm, which could mean electrical overload. Testing the switch with a voltage tester helps find wiring problems. Always turn off power before checking wires or parts.
When To Call A Professional
Call an electrician if you see sparks or smell burning. Strange noises from the switch or frequent breaker trips need expert attention. Avoid fixing complex wiring or damaged electrical boxes yourself. Professional help ensures safety and proper repairs. It is better to be safe than sorry with electrical work.
Credit: www.destinationlighting.com
Frequently Asked Questions
How Easy Is It To Change A Light Switch Yourself?
Changing a light switch is generally simple and safe for beginners. You only need basic tools and follow safety steps carefully. Turn off the power first, remove the old switch, connect the new one, and test it. It usually takes about 15-30 minutes.
What Tools Do I Need To Change A Light Switch?
You need a screwdriver, voltage tester, wire stripper, and new switch. A voltage tester ensures the power is off for safety. These tools help you remove the old switch and connect the new one properly and securely.
How Do I Ensure Safety When Changing A Light Switch?
Always turn off the circuit breaker before starting. Use a voltage tester to confirm no power is running. Wear insulated gloves and avoid touching wires directly. Follow instructions carefully and if unsure, consult a professional electrician for help.
Can I Upgrade To A Smart Switch When Changing?
Yes, you can upgrade to a smart switch easily. Make sure your wiring supports the smart switch requirements. Follow the manufacturer’s instructions carefully for installation. Smart switches offer remote control and automation features for convenience.
Conclusion
Changing a light switch is simpler than it seems. You just need basic tools and safety steps. Turn off the power, remove the old switch, and connect the new one. Take your time and check each wire carefully. This small task can improve your home easily.
Anyone can do it with clear instructions. Don’t hesitate to try—it’s a useful skill to have. Simple, quick, and safe.