Have you ever needed to safely cover a light switch you no longer use? Maybe you’re remodeling a room or just want to keep things tidy and secure.
Knowing how to cap off a light switch is a simple skill that can save you time, money, and even prevent accidents. In this guide, you’ll learn easy steps to handle the job yourself, without confusion or risk. Keep reading to discover how to make your home safer and cleaner with just a few straightforward moves.
Tools And Materials Needed
Before you start capping off a light switch, gather all necessary tools and materials. Having everything ready makes the job safer and faster. Using the right tools helps avoid damage and ensures a clean finish.
Essential Tools
- Screwdriver (flathead and Phillips)
- Wire stripper
- Voltage tester
- Needle-nose pliers
- Electrical tape
- Wire nuts
- Utility knife
Required Materials
- Blank wall plate cover
- Wire connectors
- Wire caps
- Electrical box (if needed)
- Insulated gloves (optional but recommended)
Safety Precautions
Safety is the top priority when capping off a light switch. Electrical work can be risky without proper care. Taking the right precautions protects you from shocks and accidents.
Always follow safety steps carefully. Small mistakes can cause serious harm. Use the right tools and check everything twice before starting.
Turning Off Power
Start by turning off power to the switch at the circuit breaker. Do not rely on the wall switch alone. Find the correct breaker and switch it off to stop electricity flow.
Use a label or tape to mark the breaker. This prevents someone from turning it back on by mistake. Confirm power is off before touching any wires.
Using A Voltage Tester
Use a voltage tester to check if wires still have power. Test all wires in the switch box carefully. A reliable tester shows if electricity is present.
Do not touch wires until the tester shows zero voltage. Test multiple times for safety. This tool is essential for avoiding shocks during electrical work.
Preparing The Light Switch Box
Preparing the light switch box is the first step to safely cap off a light switch. This process ensures the wiring is ready for the next steps. Proper preparation helps avoid hazards and makes the job easier.
Start by turning off the power to the switch at the circuit breaker. Never work on live wires. Safety is the priority.
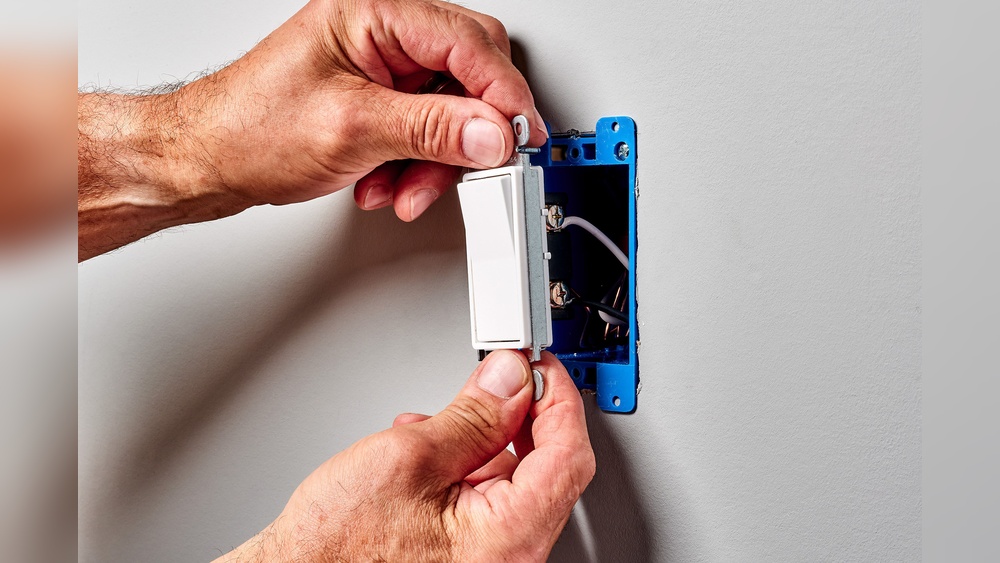
Removing The Switch
Remove the switch cover plate using a screwdriver. Then unscrew the switch itself from the box. Gently pull the switch out to expose the wires. Keep the screws and plate for later use or disposal.
Be careful not to tug on the wires. Loose or damaged wires can cause problems. Handle the wires with care to avoid injury.
Inspecting The Wiring
Look closely at the exposed wires in the box. Check for any signs of damage or fraying. Make sure the wires are clean and free of corrosion.
Note the number of wires and their colors. This helps identify which wires connect to the switch. Understanding the wiring will guide you in capping off the switch safely.

Credit: www.reddit.com
Capping The Wires
Capping the wires is a key step when you remove a light switch. It keeps the electrical wires safe and prevents shocks. Properly capping wires stops accidental contact and short circuits. This part of the task needs care and the right tools. Use wire nuts to seal off each wire securely. Make sure no bare wire is exposed after capping. Take your time to check each wire before covering.
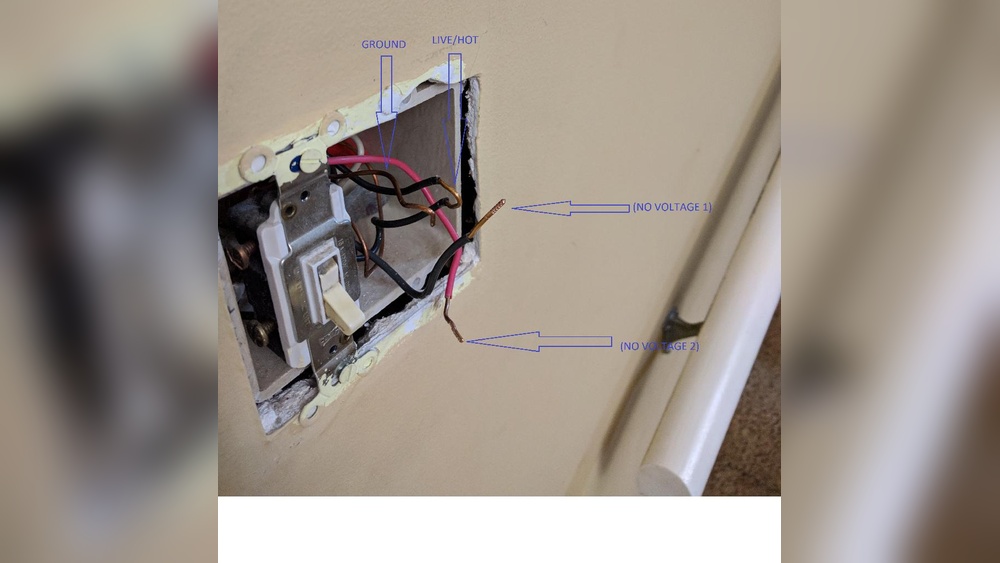
Identifying Wire Types
First, know what wires you have. Most light switches use three types: hot, neutral, and ground. The hot wire is usually black or red. It carries electricity to the switch. The neutral wire is white and completes the circuit. The ground wire is green or bare copper. It protects you from electric shocks. Identifying these wires helps you cap them correctly. Double-check the colors before handling wires.
Using Wire Nuts Correctly
Wire nuts are small plastic caps that twist onto wire ends. They keep the wires tight and covered. Pick the right size nut for the wire bundle. Twist the wires together before placing the wire nut. Turn the nut clockwise until it feels tight. Tug gently on the wires to test the connection. No wire should slip out. Wrap electrical tape around the nut for extra safety. Proper use of wire nuts prevents loose connections and hazards.
Securing The Capped Wires
Securing the capped wires is an important step after capping off a light switch. This process keeps the wires safe and prevents electrical hazards. Properly securing the wires helps avoid short circuits and accidental shocks. It also prepares the electrical box for a clean, finished look.
Tucking Wires Safely
Start by bending the wires gently into the electrical box. Make sure the capped ends face outward. This prevents the wire caps from loosening or falling off. Avoid overstuffing the box to keep space for the cover plate. Use your fingers to tuck wires neatly without damaging insulation.
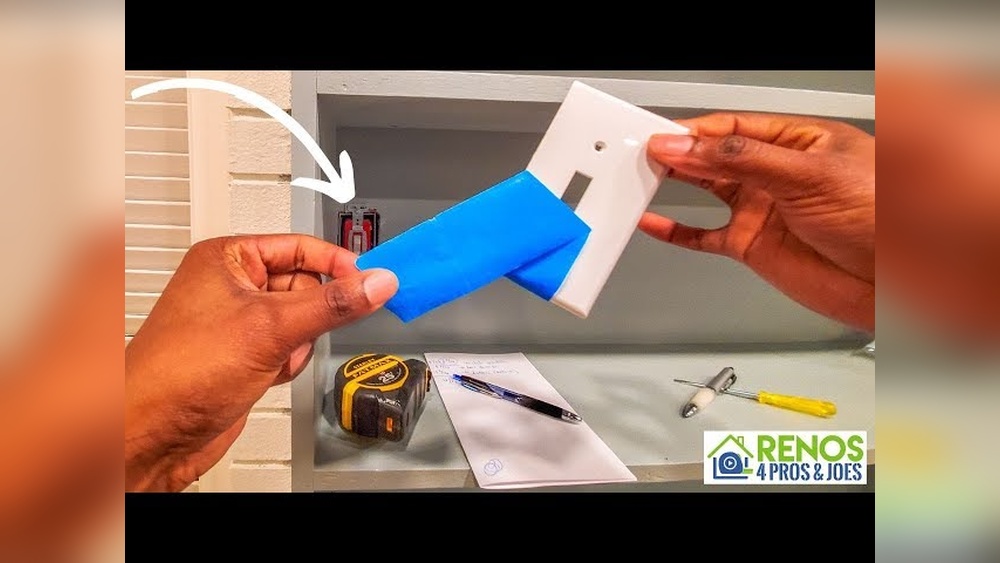
Installing A Blank Cover Plate
Choose a blank cover plate that fits your electrical box. Align it carefully over the wires and screw it in place. Tighten screws just enough to hold the plate firmly. Avoid overtightening to prevent cracking the plate. A blank cover plate keeps everything secure and looks tidy on the wall.

Credit: www.amazon.com
Final Safety Checks
Final safety checks are the last and most important step after capping off a light switch. These steps ensure your work is safe and ready for use. Never skip these checks. They protect your home and family from electrical hazards.
Restoring Power
First, turn the power back on at the circuit breaker. Make sure the breaker is fully switched on. This action restores electricity to the area you worked on. Be cautious and stand clear from the switch box. Check for any signs of sparks or unusual smells. If you notice anything strange, turn off the power immediately.
Testing For Proper Safety
Use a voltage tester to check the capped wires. The tester confirms no current flows through the capped wires. This step verifies your caps are secure and safe. Press the tester on each wire carefully. The tester should show no voltage. If the tester shows power, recheck your caps and wiring. Safety comes first. Do a final visual check to ensure all wires are neatly capped and no metal is exposed.
Common Mistakes To Avoid
Capping off a light switch seems simple but can lead to issues if done wrong. Many people make common mistakes that affect safety and function. Avoiding these errors ensures a safe and effective result.
Not Turning Off The Power
Always switch off the power at the circuit breaker. Leaving power on risks electric shock. Test the switch with a voltage tester before starting work.
Using Incorrect Wire Nuts
Choose wire nuts that fit the wires tightly. Loose connections cause sparks or shorts. Match wire nut size to the number and thickness of wires.
Failing To Secure Wires Properly
Do not leave wires loose inside the box. Twist wires together firmly before capping. Loose wires can cause poor connections or fire hazards.
Ignoring Electrical Codes
Follow local electrical codes strictly. Codes protect your safety and home. Check regulations before capping off any switch.
Not Using An Electrical Box Cover
Always cover the capped wires with a proper box cover. Leaving wires exposed risks shocks and damage. Use covers designed for electrical boxes.

Credit: www.reddit.com
Frequently Asked Questions
How Do You Safely Cap Off A Light Switch?
Turn off the power at the circuit breaker first. Remove the switch, disconnect the wires, and cap each wire with wire nuts. Secure the capped wires inside the electrical box and cover it with a blank wall plate for safety.
What Tools Are Needed To Cap Off A Light Switch?
You need a screwdriver, wire cutters, wire nuts, and a blank wall plate. A voltage tester is essential to ensure power is off. These tools help safely disconnect and secure the wires when capping off the switch.
Can I Cap Off A Light Switch Without An Electrician?
Yes, if you follow safety steps and local codes. Always turn off the power and test wires before touching them. If unsure about wiring, consult a professional to avoid electrical hazards and ensure a proper job.
Why Would I Need To Cap Off A Light Switch?
You might cap off a switch when removing or replacing it. This prevents live wires from exposure and keeps the circuit safe. It’s common during renovations or when a switch is no longer needed.
Conclusion
Capping off a light switch keeps your home safe and tidy. Always turn off the power before starting. Use the right tools and materials for the job. Double-check your work to avoid any issues later. This simple task protects wires and prevents accidents.
Taking a few minutes now saves time and trouble later. Stay careful and follow each step clearly. Your home will look neat and stay secure.