Are you ready to give your home bar a sleek, professional look? Mounting beer taps through glass is a smart way to showcase your setup while keeping everything clean and stylish.
But if you’ve never done it before, it might seem tricky. Don’t worry—this guide will walk you through every step, making it simple and stress-free. By the end, you’ll know exactly how to install your beer taps safely and securely, impressing your guests every time you pour a cold one.
Keep reading to unlock the secrets to a flawless glass-mounted beer tap!
Choosing The Right Glass
Choosing the right glass is key to mounting beer taps through glass safely and effectively. The glass must support the tap’s weight and resist damage. Knowing the right thickness and type of glass helps avoid cracks or leaks. Safety matters most to protect users and equipment.
Glass Thickness And Type
The glass should be thick enough to hold the tap firmly. Usually, 1/4 inch to 1/2 inch thick glass works best. Thinner glass may break under pressure. Tempered glass is a good choice because it is stronger and safer. It can handle impacts better than regular glass. Avoid using fragile or very thin glass.
Safety Considerations
Safety is vital when mounting taps through glass. Use tempered or laminated glass to reduce breakage risks. Always wear safety gloves and goggles during installation. Check that the glass edges are smooth and polished to prevent cuts. Secure the tap tightly but do not overtighten to avoid cracking the glass.
Gathering Necessary Tools
Mounting beer taps through glass requires the right tools for a smooth process. Proper tools ensure safety and a clean finish. Gather everything before starting to avoid interruptions. This saves time and prevents mistakes.
Drill And Bits
Use a drill with variable speed control. A diamond-tipped drill bit works best for glass. Choose the right size bit for the tap hole. Keep the drill steady to avoid cracks. Use water to cool the bit and glass during drilling.
Sealing Materials
Sealants prevent leaks and protect the glass edges. Silicone sealant is ideal for this task. It sticks well and stays flexible. Apply sealant around the tap hole after drilling. Let it dry fully before mounting the tap.
Mounting Hardware
Gather nuts, washers, and mounting brackets specific to the tap model. These parts secure the tap firmly to the glass. Check that all hardware fits the hole size. Tighten hardware gently to avoid glass damage.
Preparing The Glass Surface
Preparing the glass surface is a key step before mounting beer taps. Proper preparation ensures a secure fit and prevents damage to the glass. Take your time to get this step right. It sets the stage for a smooth installation process.
Cleaning And Marking
Start by cleaning the glass thoroughly. Remove all dirt, dust, and grease. Use a glass cleaner or rubbing alcohol with a soft cloth. A clean surface helps the tap mount stick better and prevents slipping.
Next, mark the exact spot where the tap will go. Use a non-permanent marker or painter’s tape. Double-check measurements to avoid mistakes. Accurate marking keeps the hole in the right place and prevents cracks.
Protecting The Area
Protect the surrounding glass area before drilling. Apply painter’s tape over the mark and around the spot. This tape reduces stress on the glass while drilling. It also catches glass dust and small chips.
Use a soft cloth or padding under the glass if possible. It stops the glass from moving and lowers the risk of breaking. Taking these precautions keeps your glass safe and ready for the taps.
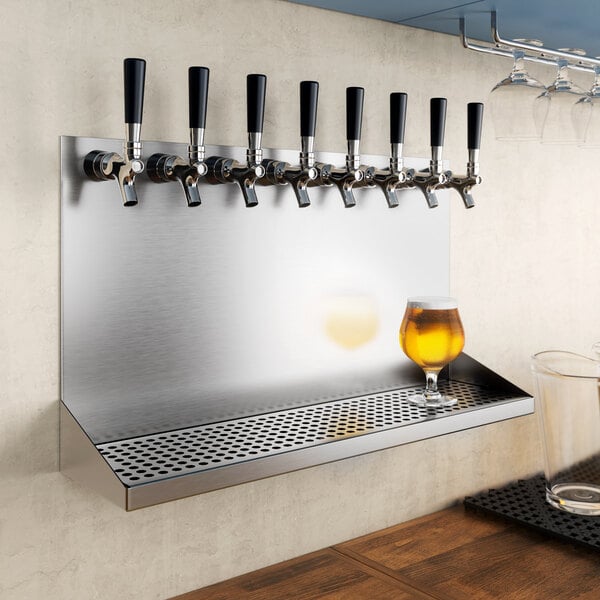
Credit: www.webstaurantstore.com
Drilling The Hole
Drilling a hole through glass is a delicate task. It requires care and the right tools to avoid cracks or breaks. This step is crucial for mounting beer taps securely. Proper drilling ensures the glass stays strong and safe. Follow the tips below for the best results.
Choosing Drill Speed And Pressure
Use a low drill speed to prevent overheating. High speed can cause the glass to crack. Apply gentle pressure. Pressing too hard may break the glass. Let the drill bit do the work slowly. Keep the drill steady and straight. This helps create a clean, smooth hole.
Cooling Techniques
Cooling the drill bit and glass is very important. Use water or a cooling gel to keep the area wet. This reduces heat and lowers the chance of cracks. Stop drilling occasionally to add more water. Keep the surface cool throughout the process. A cool drill bit lasts longer and cuts better.
Installing The Tap Assembly
Installing the tap assembly through glass requires careful steps for a secure fit. This process ensures the tap stays in place and works smoothly. Follow the steps carefully for a strong and leak-free setup.
Sealing The Mount
Start by applying a clear silicone sealant around the hole in the glass. This seal prevents water and air from leaking. Spread the sealant evenly to cover the entire edge of the hole. Let the sealant dry for at least 24 hours before proceeding. A good seal protects the glass and keeps the tap stable.
Securing The Tap
Place the tap assembly through the sealed hole carefully. Align it straight for best results. Tighten the mounting nut from the backside of the glass. Use a wrench but avoid over-tightening to prevent glass damage. Check the tap movement to confirm it is firm and steady. A secure tap ensures smooth pouring and long-term use.
Testing For Leaks
Testing for leaks is a key step after mounting beer taps through glass. Leaks can cause mess and waste beer. Checking carefully ensures a tight, secure fit. It saves time and money by avoiding damage and repairs.
Pressure Testing
Pressure testing helps find leaks inside the system. Use a pressure gauge to check the tap and connections. Apply low pressure first to avoid damage. Watch the gauge for drops in pressure. A drop means air or liquid is escaping. Check all joints and seals during the test. Fix any leaks before moving to the next step.
Adjusting Seals
Seals stop beer from leaking through the glass. Tighten or replace seals if leaks appear. Use rubber or silicone seals for a good fit. Make sure seals sit flat and cover all gaps. Avoid over-tightening, which can crack the glass. Test again after adjusting to confirm the leak is fixed.
Maintaining The Setup
Maintaining the setup of your beer taps through glass is essential for long-term use. Proper care keeps the taps working smoothly and preserves the glass’s look. Small steps can prevent big problems and keep your system fresh and clean.
Regular Cleaning
Clean the taps often to avoid buildup and clogs. Use warm water and mild soap to wash the tap handles and spouts. Rinse thoroughly to remove soap residue. Avoid harsh chemicals that might damage the glass or metal parts. Clean the inside lines regularly to keep the beer tasting fresh.
Inspecting For Damage
Check the glass and tap parts regularly for cracks or leaks. Look closely at the mounting area for any signs of wear. Tighten loose screws or fittings as needed. Replace damaged parts immediately to avoid bigger issues. Early inspection helps keep your setup safe and functional.

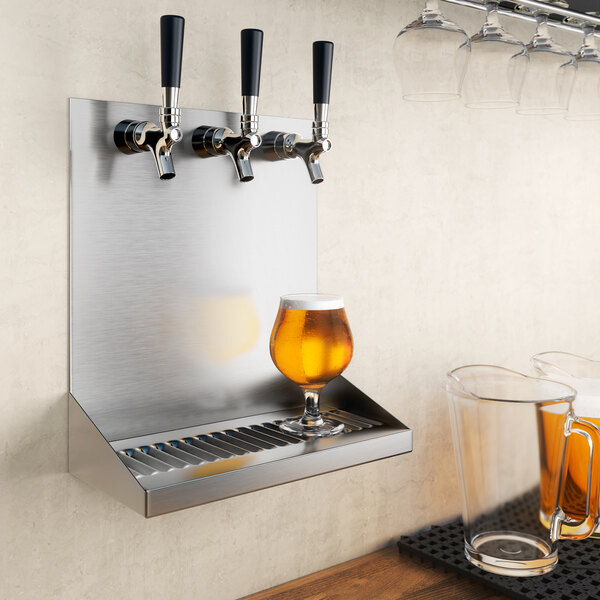
Credit: www.micromatic.com
Credit: www.webstaurantstore.com
Frequently Asked Questions
How Do You Mount Beer Taps Through Glass Safely?
To mount beer taps through glass safely, use a drill with a diamond hole saw. Measure carefully and protect the glass edges. Secure the tap with washers and gaskets to prevent leaks and damage.
What Tools Are Needed For Glass Beer Tap Installation?
You need a diamond hole saw, drill, tape measure, wrench, and plumber’s putty. These tools ensure precise holes, secure fitting, and leak prevention for your beer tap installation.
Can I Mount Beer Taps On Tempered Glass?
Mounting taps on tempered glass is risky because it can shatter easily. It’s best to use annealed glass or consult professionals for tempered glass installations to avoid damage.
How Thick Should The Glass Be For Beer Tap Mounting?
Glass should be at least 1/4 inch thick for mounting beer taps. Thicker glass offers better support and reduces the risk of cracking during installation.
Conclusion
Mounting beer taps through glass can be simple with the right steps. Take your time and measure carefully. Use proper tools to avoid damage. Secure the taps firmly to prevent leaks. Clean the glass before and after installation. This process adds style and function to your space.
Enjoy fresh beer served straight from your new taps. Practice makes perfect, so don’t rush. Soon, you’ll serve drinks like a pro. Cheers to easy and neat beer tap mounting!