Have you ever tried to remove a toggler wall anchor and found yourself stuck, unsure of what to do next? These anchors are great for holding heavy items securely, but taking them out can be tricky if you don’t know the right steps.
If you want to avoid damaging your wall and save time, this guide is for you. Keep reading to learn simple, effective methods that anyone can use to remove toggler wall anchors quickly and safely. Your walls will thank you!

Credit: www.hgtv.com
Tools Needed
Removing toggler wall anchors requires the right tools. Using proper tools makes the job easier and safer. Some tools are common and found in most homes. Others are specialized and may need to be bought or rented. Knowing what tools to have ready helps you finish the task quickly.
Common Household Tools
Start with basic tools found in many toolkits. A pair of pliers helps grip and pull out the anchor. A flathead screwdriver can pry the anchor loose gently. A utility knife may be needed to cut away wall material. A hammer can tap the anchor to loosen it carefully. These tools often handle small to medium-sized anchors.
Specialized Equipment
Some anchors need special tools for removal. A drill with a small bit can help remove stubborn anchors. A wall anchor removal tool is designed for this job. It grips the anchor firmly for easier pulling. For large or damaged anchors, a rotary tool may be useful. These tools make tough jobs simpler and reduce wall damage.
Identify The Toggler Anchor Type
Before removing a toggler wall anchor, identify its type. Knowing the exact type helps in choosing the right removal method. Toggler anchors mainly come in two types based on their wings: plastic and metal. Each type has a different structure and requires a specific approach for removal.
Plastic Wings
Plastic wings are lightweight and flexible. They expand behind the wall to hold the anchor firmly. These wings often fold flat when inserted and pop open inside the wall. The plastic material is less rigid, so it can sometimes break during removal. You may need gentle pulling or prying to remove this type without damaging the wall.
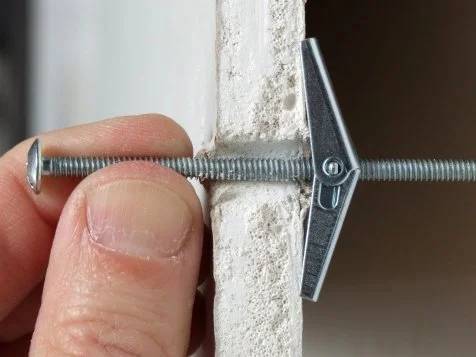
Metal Wings
Metal wings are strong and sturdy. They provide a tight grip inside the wall cavity. These wings fold inward during insertion and snap open once inside. The metal makes them harder to bend or break. Removing metal wing toggler anchors may require tools like pliers to squeeze and pull them out carefully.
Prepare The Wall
Preparing the wall before removing toggler wall anchors is important. It helps protect your wall and makes the process easier. Taking a few simple steps can save time and avoid damage.
Clear Surrounding Area
Remove furniture and items near the wall. This creates space to work freely. It also prevents accidental damage to your belongings. A clear area helps you focus on the task.
Protect The Wall Surface
Cover the wall surface around the anchor with painter’s tape. This shields the paint and drywall. Use a soft cloth or cardboard to protect the floor. These small steps keep your wall clean and safe.

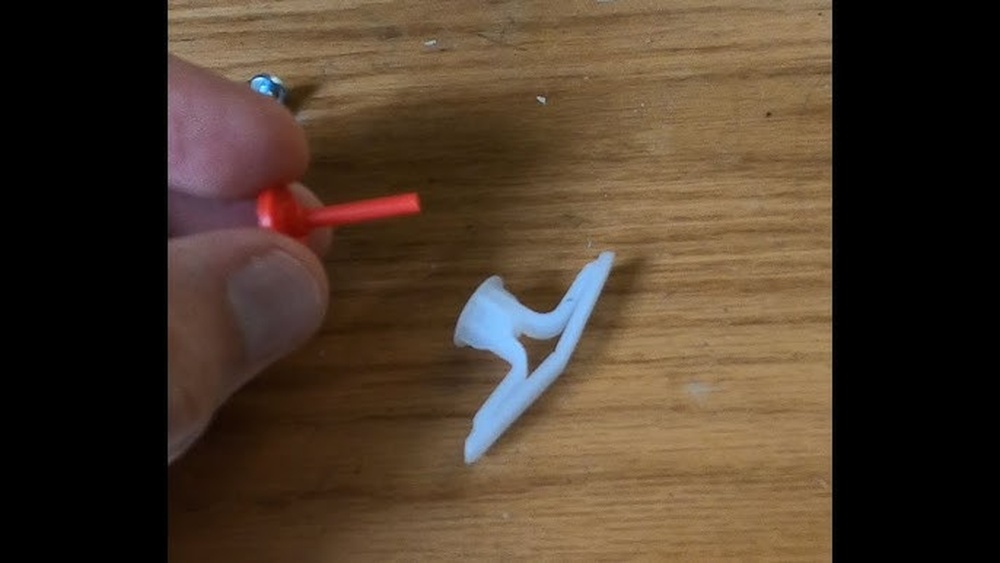
Credit: www.reddit.com
Remove The Screw
Removing the screw is the first step in taking out a toggler wall anchor. The screw holds the anchor in place. Pulling it out lets you remove the entire anchor easily. Focus on this step to avoid damage to your wall.
Using A Screwdriver
Choose a screwdriver that fits the screw head well. Place it firmly into the screw slot. Turn the screwdriver counterclockwise to loosen the screw. Apply steady pressure. Pull the screw out slowly once it is loose. Avoid rushing to prevent stripping the screw.
Handling Stripped Screws
Stripped screws are hard to remove with a regular screwdriver. Use a rubber band between the screwdriver and the screw. This gives extra grip. Press the screwdriver firmly and turn slowly. If the screw is still stuck, try pliers for better control. Work carefully to protect the wall surface.
Collapse The Anchor
Removing toggler wall anchors starts with collapsing the anchor inside the wall. This step frees the anchor from the drywall, making it easier to pull out. Collapsing the anchor means pushing its wings or flaps inward. This reduces the anchor’s size behind the wall.
Use simple tools and gentle pressure for this step. Avoid damaging the wall or the anchor’s surrounding area. Collapsing the anchor carefully helps keep the wall intact for repairs later.
Pushing The Wings Inward
Locate the wings of the toggler anchor behind the wall. Use a flat tool or screwdriver to push the wings inward. Press gently but firmly to fold the wings toward the anchor’s main body. This action reduces the anchor’s width inside the wall cavity.
Slow, steady pressure prevents the wings from snapping off inside. Once the wings collapse, the anchor becomes narrow enough to pull out easily. Avoid using too much force to protect your wall’s surface.
Using Pliers For Grip
After the wings are pushed inward, grip the anchor’s head with pliers. Choose needle-nose pliers for better control and precision. Hold the anchor firmly to prevent slipping during removal.
Pull the anchor straight out while keeping steady pressure. Wiggling slightly can help loosen the anchor if it resists. Pliers provide the necessary grip to collapse and remove the anchor safely.
Extract The Anchor
Extracting a toggler wall anchor can be tricky. The anchor is designed to hold tight inside the wall. Removing it carefully helps avoid damage. The right method depends on how stuck the anchor is. Some anchors come out with a gentle pull. Others need a drill to release them. Understanding these steps makes the job easier.
Pulling Out Gently
Start by gripping the anchor firmly. Use pliers for a better hold. Pull slowly and steadily. Avoid sudden jerks that can harm the wall. If the anchor moves, continue pulling gently. Stop if it resists too much. Forcing it may cause the wall to crack.
Using A Drill For Stubborn Anchors
Sometimes anchors won’t budge by hand. Use a drill with a bit slightly smaller than the anchor. Drill into the center carefully. This breaks the anchor’s grip inside the wall. After drilling, try pulling the anchor again. It should come out easier. Be cautious to avoid drilling too deep.
Repair The Wall
After removing toggler wall anchors, the wall will have visible holes. Repairing the wall is important to restore its smooth surface. This process involves filling the holes, sanding the area, and then painting over it. Doing this makes the wall look new again and ready for any decoration.
Filling Holes
Start by cleaning out any dust or loose material from the holes. Use a putty knife to apply spackling paste or wall filler. Press the filler firmly into the hole to fill it completely. Smooth the surface with the knife to make it even with the wall. Let the filler dry according to the product instructions before moving on.
Sanding And Painting
Once the filler is dry, sand the area lightly with fine-grit sandpaper. Sand until the surface is flat and blends with the rest of the wall. Wipe away any dust with a clean cloth. Finally, paint over the patched area with matching wall paint. Apply one or two coats for a seamless finish. Your wall will look smooth and fresh again.
Credit: www.hgtv.com
Prevent Future Damage
Removing toggler wall anchors can sometimes damage your walls. Preventing future damage helps keep your walls strong and neat. Using the right anchor and installing it properly reduces the risk of holes and cracks. These small steps save you time and money on repairs.
Choosing The Right Anchor
Select anchors that match the wall type and weight of the item. Drywall needs different anchors than concrete or plaster walls. Use plastic anchors for light items and metal anchors for heavier ones. The right anchor holds firmly without causing extra damage.
Proper Installation Tips
Drill a hole that fits the anchor size exactly. Too large a hole weakens the wall and makes the anchor loose. Push the anchor straight into the hole without forcing it. Tighten screws gently to avoid cracking or breaking the wall surface. Follow instructions carefully for the best results.
Frequently Asked Questions
What Tools Do I Need To Remove Toggler Wall Anchors?
You need pliers, a screwdriver, and a drill for removing toggler wall anchors. Pliers help grip the anchor. A screwdriver and drill assist in loosening and extracting the anchor safely.
Can Toggler Wall Anchors Be Reused After Removal?
No, toggler wall anchors cannot be reused. Once removed, the toggle mechanism deforms, losing its holding strength. Always use new anchors for secure installation.
How To Avoid Wall Damage When Removing Toggler Anchors?
Remove toggler anchors slowly and gently to avoid wall damage. Use pliers to pull them out straight. Patch any holes with spackle or wall filler after removal.
Is It Safe To Remove Toggler Anchors Without Professional Help?
Yes, removing toggler anchors is safe for DIYers. With proper tools and caution, you can do it without professional help. Follow step-by-step instructions to avoid wall damage.
Conclusion
Removing toggler wall anchors is easier with the right steps. Take your time and follow each part carefully. Use simple tools to avoid damage to your wall. Pull or push gently, depending on the anchor type. Fix any holes left behind with filler or paint.
This keeps your wall smooth and clean. Practice makes the process quicker and less stressful. Soon, you will handle anchors like a pro. Keep safety in mind and work patiently for best results.


