Have you ever taken apart your floor jack only to feel stuck when it’s time to put it back together? Reassembling a floor jack might seem tricky, but with the right steps, you can do it smoothly and safely.
In this guide, you’ll discover simple, clear instructions that make the process easy to follow. By the end, your floor jack will be ready to lift with confidence again. Keep reading, and you’ll learn exactly how to bring your tool back to life without any frustration.
Tools And Parts Needed
Reassembling a floor jack requires the right tools and parts. Having everything ready makes the process easier and faster. Missing tools or parts can cause delays or improper assembly.
This section lists the essential items you need. Preparing these in advance saves time and effort. Each tool and part plays a specific role in reassembling your floor jack correctly.
Basic Hand Tools
Wrenches and sockets are key to tightening bolts. A set of adjustable wrenches fits various sizes. Screwdrivers, both flathead and Phillips, help with screws. Pliers assist in holding small parts and springs. A rubber mallet can gently tap pieces into place.
Replacement Parts
Check for worn or broken parts before starting. Common parts include seals, O-rings, and pistons. Hydraulic fluid may need replacement for proper function. Springs and valves also wear out and require swaps. Using original parts ensures safety and performance.
Cleaning Supplies
Clean parts fit better and last longer. Use rags to wipe off dirt and grease. A brush helps remove stubborn grime from small areas. Brake cleaner or degreaser works well for heavy buildup. Clean parts reduce wear and improve sealing.
Lubricants And Fluids
Proper lubrication keeps parts moving smoothly. Use hydraulic oil designed for floor jacks. Light machine oil helps joints and screws turn easily. Avoid over-lubricating to prevent dirt buildup. Check the owner’s manual for recommended fluids.
Safety Precautions
Safety is the top priority when reassembling a floor jack. Taking the right precautions protects you and ensures the jack works properly. A floor jack holds heavy weight. Mistakes can cause serious injury or damage.
Follow safety steps carefully. Use the correct tools and work in a clean area. Wear protective gear like gloves and safety glasses. Keep children and pets away from the workspace.
Wear Protective Gear
Always wear gloves to protect your hands from sharp parts. Safety glasses shield your eyes from dust and debris. Avoid loose clothing that can get caught in moving parts.
Work On A Flat Surface
Place the floor jack on a flat, stable surface. This stops the jack from slipping or tipping over. Avoid working on uneven ground or slippery floors.
Use Proper Tools
Use the right tools for each part of the reassembly. Wrong tools can damage parts or cause injury. Keep tools organized to avoid mistakes and accidents.
Check For Damaged Parts
Inspect all parts before reassembly. Replace any worn or broken pieces. Using damaged parts weakens the jack and risks failure.
Follow Manufacturer Instructions
Read the manual carefully before starting. Follow the steps exactly as shown. Skipping steps can lead to unsafe assembly and poor jack performance.
Cleaning And Inspecting Components
Cleaning and inspecting the parts of your floor jack is an important step. It helps keep the jack safe and working well. Dirt, rust, and damage can stop the jack from working properly. Taking time to clean and check each part makes sure the jack will last longer and lift safely.
Careful inspection helps find problems early. Small issues can turn into big ones if missed. Cleaning removes grease and dirt that hide damage. This step makes reassembly easier and more accurate.
Cleaning The Metal Components
Use a clean cloth to wipe off dirt and dust. For tough grime, apply a mild cleaner or degreaser. Scrub gently with a brush to avoid scratches. Dry each part fully to stop rust from forming. Check for rust spots and remove them with sandpaper or a wire brush. Keep metal parts shiny and smooth.
Checking Seals And O-rings
Look closely at seals and O-rings for cracks or breaks. These small parts stop oil leaks and keep pressure. Replace any that look worn or damaged. Clean them with a soft cloth and mild soap. Avoid stretching or bending these parts too much during cleaning.
Inspecting Hydraulic Components
Examine the hydraulic cylinder and pump for leaks or dents. Look for oil residue around joints and seals. Wipe off all oil to see damage clearly. Test the cylinder for smooth movement. Any stiffness or noise may mean repair or replacement is needed.
Reviewing Bolts And Fasteners
Check all bolts, nuts, and screws for rust or damage. Tighten loose fasteners but do not over-tighten. Replace any stripped or bent bolts. Clean threads with a wire brush to ensure smooth fitting. Proper fastening keeps the jack stable and safe.

Credit: www.sviinternational.com
Reassembling The Hydraulic System
Reassembling the hydraulic system is a key step in fixing a floor jack. It controls the lifting action and must be put back correctly. Careful work here keeps the jack safe and working well.
Follow clear steps to install parts and check for leaks. This part requires patience and clean hands. Each piece fits into place to make the jack strong again.
Installing The Pump Assembly
Start by placing the pump assembly carefully into its spot. Align the pump with the base and secure it using bolts. Tighten bolts evenly to avoid damage. Ensure the pump handle moves smoothly after installation. This part moves the hydraulic fluid to lift the jack.
Reattaching The Hydraulic Cylinder
Next, connect the hydraulic cylinder to the pump assembly. Slide the cylinder into the housing carefully. Use the correct pins or bolts to fix it in place. Check that the cylinder moves freely without sticking. This allows the jack to raise and lower properly.
Checking Seals And O-rings
Inspect all seals and O-rings for any cracks or damage. Replace old or worn seals to prevent leaks. Apply a small amount of hydraulic fluid to help seals fit well. Proper seals keep the system airtight and strong. Skipping this step can cause the jack to lose pressure fast.
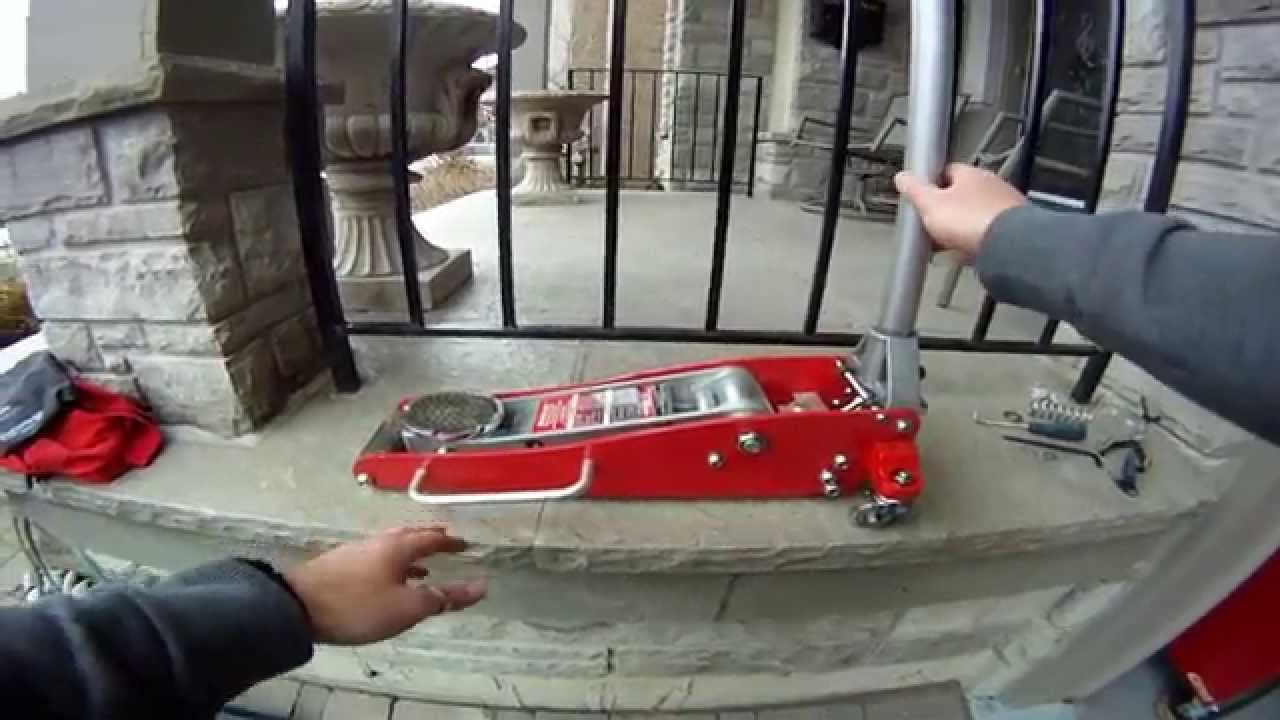
Reassembling The Frame
Reassembling the frame of a floor jack is a key step in its repair. This step ensures the jack works safely and smoothly. The frame holds all parts together. Taking care during reassembly helps avoid damage and accidents.
Start by positioning the main parts correctly. Check each piece for damage or dirt. Clean any grime before putting parts back. This keeps the jack in good shape.
Aligning The Base And Arm
Place the base flat on your workspace. Hold the arm above the base carefully. Match the holes on the arm with those on the base. Proper alignment is crucial. It lets the jack lift evenly and safely.
Move the arm slowly. Avoid forcing it into place. If parts do not fit, check for debris or bent pieces. Correct alignment reduces wear and tear later.
Securing Bolts And Pins
Once aligned, insert bolts through the holes. Add pins where needed to lock parts. Tighten bolts firmly but not too hard. Over-tightening can strip threads or crack parts.
Use the correct tools for each bolt and pin. Double-check every connection. Loose bolts cause unstable lifting and risk injury. Secure fasteners keep the jack working well over time.

Credit: www.instructables.com
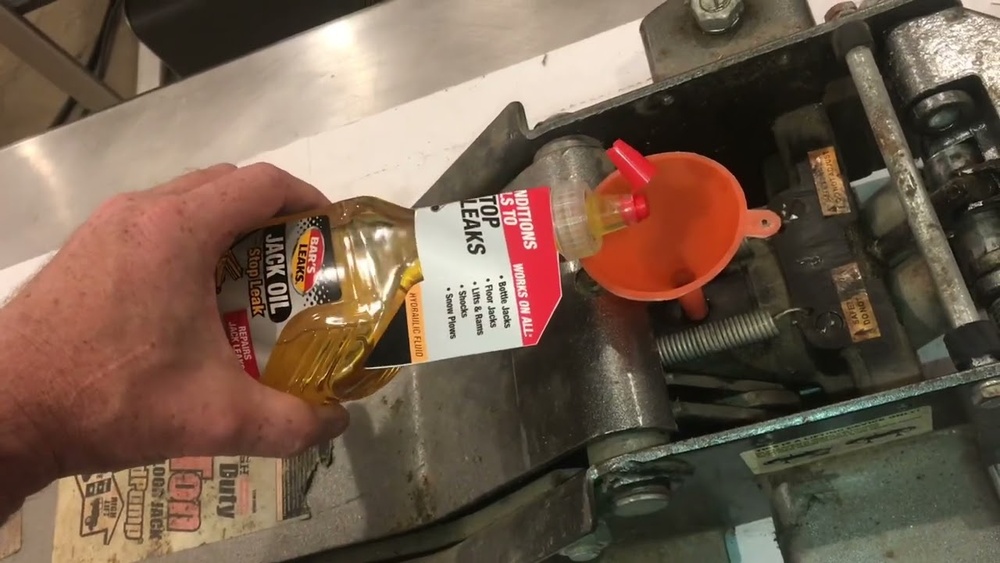
Refilling Hydraulic Fluid
Refilling the hydraulic fluid is a key step in reassembling a floor jack. This fluid helps the jack lift heavy loads smoothly and safely. Without the right amount and type of fluid, the jack won’t work properly.
Make sure to use the correct hydraulic fluid for your floor jack. Using the wrong fluid can cause damage and reduce performance. Always check the manufacturer’s instructions before refilling.
Locate The Hydraulic Fluid Reservoir
First, find the reservoir where the hydraulic fluid goes. It is usually a small cap or plug on the jack’s body. Clean around the cap to avoid dirt getting inside.
Check Fluid Level And Condition
Open the reservoir carefully. Look inside to see the fluid level. If the fluid is dark or dirty, it needs to be replaced. Clear fluid means the jack is in good condition.
Add The Hydraulic Fluid
Slowly pour the hydraulic fluid into the reservoir. Use a funnel to avoid spills. Fill it until the fluid reaches the recommended level, usually just below the opening.
Remove Air From The System
After refilling, pump the jack handle several times. This helps remove any air trapped inside. Air in the system can cause the jack to work poorly.
Close The Reservoir Securely
Put the cap or plug back tightly on the reservoir. Make sure it is sealed to prevent leaks. Wipe off any spilled fluid before testing the jack.
Bleeding Air From The System
Bleeding air from the floor jack is a key step in reassembly. Air trapped inside the hydraulic system can stop the jack from working well. The jack might not lift smoothly or might feel weak. Removing air ensures the hydraulic fluid flows properly. This makes the jack safe and reliable to use.
Identify The Bleed Valve
Locate the bleed valve on your floor jack. It is usually near the hydraulic cylinder. This valve lets air escape from the system. Use a wrench or screwdriver to open it gently. Be ready to catch any fluid that may leak out.
Release Air From The System
Open the bleed valve slowly. Pump the jack handle several times while the valve is open. This action pushes trapped air out through the valve. Watch for bubbles in the fluid. When bubbles stop, most air is out.
Close The Bleed Valve Securely
Once no more air escapes, close the bleed valve tightly. Use the wrench or screwdriver to avoid leaks. Check the fluid level in the reservoir. Top up if needed, but do not overfill. Tight sealing keeps air from coming back in.
Test The Floor Jack
Test the jack by pumping the handle again. It should lift smoothly and hold pressure. If it still feels weak, repeat the bleeding process. Proper bleeding improves jack performance and safety.
Testing The Floor Jack
Testing the floor jack is a key step after reassembly. It ensures the jack works safely and properly. A thorough check helps find any problems before use. Testing involves lifting, holding, and inspecting for leaks. This process protects you and your vehicle during repairs.
Checking Lift And Hold Functions
Start by placing the floor jack on a flat surface. Pump the handle to lift a heavy object, like a car tire. Watch how smoothly the jack raises the load. It should lift steadily without jerks or delays.
Next, check the hold function. Once lifted, the jack must hold the weight firmly. There should be no sudden drops or loss of pressure. This confirms the internal seals and valves work well.
Identifying Leaks Or Issues
Look closely at the floor jack for any oil leaks. Check around the hydraulic cylinder and seals. Even a small leak can reduce lifting power and cause failure.
Listen for unusual sounds like hissing or grinding. These noises indicate air trapped inside or mechanical damage. Address these issues before using the jack again. Proper maintenance extends the life of the tool.
Maintenance Tips For Longevity
Maintaining a floor jack properly helps it last longer and work better. Regular care prevents damage and keeps the jack safe to use. Simple steps can protect your tool from wear and tear.
Following easy maintenance tips saves money on repairs. It also ensures the jack lifts smoothly every time. Taking small actions after reassembly keeps your floor jack in top shape.
Cleaning After Use
Wipe the floor jack with a clean cloth after each use. Remove dirt, grease, and dust that can cause problems. Clean parts avoid rust and keep the jack moving freely.
Lubricating Moving Parts
Apply light oil or grease to all moving parts regularly. This reduces friction and prevents wear on the metal surfaces. Smooth movement means less effort and longer tool life.
Checking For Leaks
Inspect the hydraulic system for oil leaks often. Leaks reduce lifting power and can damage the jack. Fix leaks quickly to maintain safe and effective operation.
Storing Properly
Store the jack in a dry, clean place to avoid rust. Keep it off the ground to prevent moisture damage. Proper storage keeps the jack ready for the next use.
Testing Functionality
Test the jack’s lifting and lowering action before each use. Ensure it operates smoothly without strange noises or resistance. Early checks catch problems before they get worse.
Credit: www.youtube.com
Frequently Asked Questions
How Do I Start Reassembling A Floor Jack?
Begin by cleaning all parts thoroughly. Lay out components in order. Follow the manufacturer’s manual step-by-step for proper assembly and alignment.
What Tools Are Needed To Reassemble A Floor Jack?
Common tools include wrenches, screwdrivers, pliers, and a hydraulic fluid syringe. Check your jack’s manual for specific tool requirements.
How Do I Avoid Leaks When Reassembling A Floor Jack?
Ensure seals and O-rings are undamaged and properly seated. Tighten all fittings securely but avoid over-tightening to prevent damage.
How Long Does It Take To Reassemble A Floor Jack?
Reassembly typically takes 30 to 60 minutes depending on experience and complexity. Taking your time ensures correct and safe assembly.
Conclusion
Reassembling a floor jack takes patience and care. Follow each step slowly and double-check your work. Keep parts clean and organized during the process. Test the jack safely before using it again. This helps ensure your safety and the tool’s function.
Practice will make the task easier over time. You can handle this repair with confidence and care. Keep your floor jack ready for the next job. Simple steps lead to strong, lasting results.