Is your floor jack leaking oil and losing pressure? This can be frustrating, especially when you need it the most.
But don’t worry—you don’t have to buy a new one just yet. Fixing a leaking floor jack is easier than you think, and with a few simple steps, you can get it working like new again. You’ll learn exactly what causes leaks and how to repair them quickly and safely.
Keep reading, and you’ll save money, avoid hassle, and get back to your projects without delay.

Credit: www.jalopyjournal.com
Common Causes Of Floor Jack Leaks
Floor jack leaks can stop your tool from working correctly. Knowing common causes helps you fix the problem fast. Leaks often come from parts that wear out or get damaged. Understanding these causes saves time and money on repairs.
Worn Seals And O-rings
Seals and O-rings keep hydraulic fluid inside the jack. Over time, they wear out or crack. This wear lets fluid escape, causing leaks. Check these parts regularly and replace them if damaged.
Damaged Hydraulic Cylinder
The hydraulic cylinder moves the jack up and down. Damage like scratches or dents can cause leaks. A damaged cylinder may lose fluid through cracks or gaps. Inspect the cylinder and replace it if needed.
Loose Or Cracked Hoses
Hoses carry hydraulic fluid between parts. They can become loose or develop cracks. Loose connections let fluid drip out. Cracks cause slow leaks that reduce jack pressure. Tighten fittings and replace broken hoses to stop leaks.
Overfilled Hydraulic Fluid
Too much hydraulic fluid can cause leaks. Overfilling creates pressure that pushes fluid out. Check the fluid level and keep it within the recommended amount. Correct fluid levels help your jack work properly without leaks.
Tools And Materials Needed
Fixing a floor jack that leaks requires specific tools and materials. Having these items ready saves time and effort. Each part plays a key role in the repair process. Proper tools help you work safely and effectively.
Basic Hand Tools
You need simple hand tools like wrenches and screwdrivers. A set of pliers helps with gripping and pulling parts. A socket set is useful for removing bolts. Keep a hammer handy for light tapping if needed. These tools allow you to open and close the jack properly.
Replacement Seals And O-rings
Leaking often happens because seals or O-rings wear out. Buy replacement seals that fit your floor jack model. O-rings create a tight seal to stop fluid leaks. Using the right parts ensures a better fix and longer use. Avoid cheap or generic replacements for best results.
Hydraulic Fluid
Hydraulic fluid is essential for the jack to work smoothly. Choose the correct type for your floor jack. Clean fluid helps maintain pressure and prevents damage. Check the user manual or label for the right fluid. Refill or top up fluid only after fixing the leak.
Cleaning Supplies
Clean parts work better and last longer. Use rags or paper towels to wipe down surfaces. A small brush removes dirt from tight spaces. Use a mild cleaner or degreaser to remove old fluid and grime. Dry parts well before reassembly to avoid rust or damage.
Step-by-step Leak Repair
Fixing a floor jack that leaks requires careful steps. Each part must be handled with care. Follow the guide below to repair the leak effectively. This will help your floor jack work like new again.
Safety Precautions
Wear gloves and safety glasses to protect yourself. Work on a flat, stable surface. Keep children and pets away from the area. Release all pressure from the jack before starting. Never rely on the jack alone to hold a load.
Draining Old Hydraulic Fluid
Place a container under the jack to catch fluid. Open the drain plug or remove the fill plug. Let the old hydraulic fluid drain completely. Dispose of the fluid safely according to local rules. This step prevents contamination of new fluid.
Disassembling The Floor Jack
Remove the handle and other removable parts carefully. Use the correct tools to avoid damage. Keep small parts organized to avoid losing them. Take photos during disassembly for reference. This helps during reassembly later.
Inspecting And Replacing Seals
Check all seals and O-rings for cracks or wear. Replace any damaged seals with new ones of the same size. Clean the seal surfaces before installing new seals. Proper seals stop leaks and keep pressure stable.
Reassembling The Jack
Follow your photos and notes to put the jack back together. Tighten all bolts and screws securely but do not overtighten. Ensure the seals sit properly in their grooves. Check for smooth movement of all parts.
Refilling Hydraulic Fluid
Use the recommended hydraulic fluid for your floor jack. Pour fluid slowly to avoid air bubbles. Fill until the fluid reaches the proper level. Replace the fill plug tightly to prevent leaks.
Bleeding The Hydraulic System
Pump the handle slowly to remove trapped air. Open the release valve to let air escape if needed. Repeat until the jack lifts smoothly without sponginess. Proper bleeding restores full lifting power.
Testing The Floor Jack After Repair
Testing the floor jack after repair is a key step. It makes sure the jack works safely and does not leak anymore. Careful testing helps avoid accidents and saves time later. Follow simple checks to confirm your repair is successful.
Checking For New Leaks
Start by wiping the floor jack clean. Look closely around seals and joints for fresh oil spots. Pump the jack slowly and watch for any fluid dripping. Check under the jack for puddles or stains. If you see oil, the leak is not fixed yet. Repeat repair steps if needed. No oil means the seal holds well.
Ensuring Proper Lifting Function
Place the jack on a flat, hard surface. Pump the handle to lift the arm smoothly. The jack should lift steadily without jerks or noises. Hold the load for a few minutes to check if it stays up. Slowly release the pressure and watch the arm lower evenly. If lifting feels weak or uneven, check the hydraulic fluid level again. Proper lifting means the jack is safe to use.
Preventive Maintenance Tips
Preventive maintenance is key to keeping your floor jack in good shape. It helps stop leaks before they start. Regular care saves money and time. It also makes your jack safer to use. Simple steps done often prevent big problems.
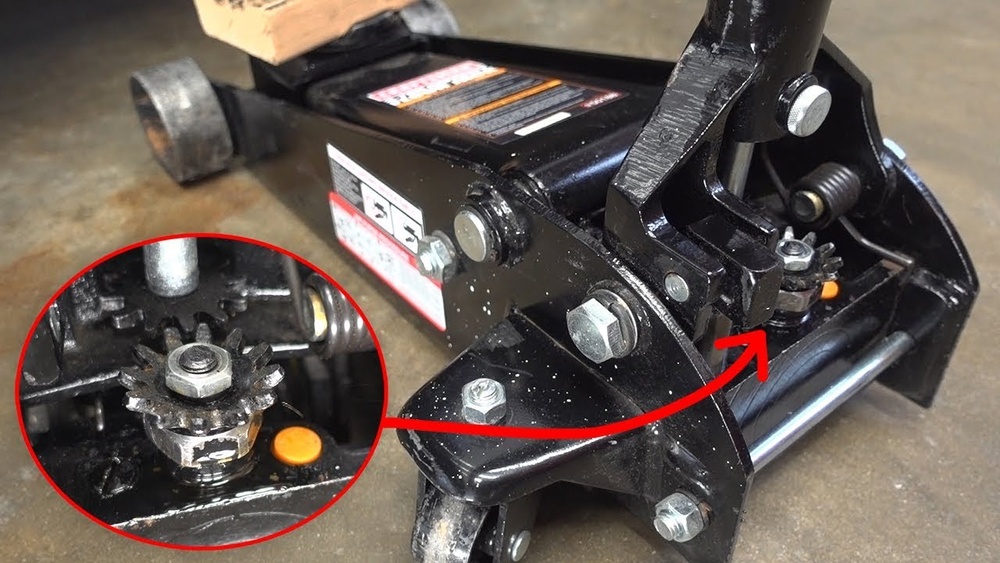
Regular Inspection
Check your floor jack often for any signs of wear. Look for cracks, rust, or oil spots. Small leaks start as tiny drops. Catch them early by inspecting seals and hoses. Tighten loose bolts and parts. Early fixes stop bigger leaks later.
Proper Storage
Store your jack in a dry, clean place. Keep it off the ground to avoid moisture. Cover it with a cloth or plastic to block dust. Avoid places with extreme heat or cold. Proper storage protects seals and metal parts from damage.
Routine Fluid Checks
Check the hydraulic fluid level regularly. Low fluid can cause leaks and poor lifting. Use the fluid type recommended by the manufacturer. Replace old fluid to keep the system clean. Clean fluid helps seals last longer and work well.
Credit: www.tooltally.com
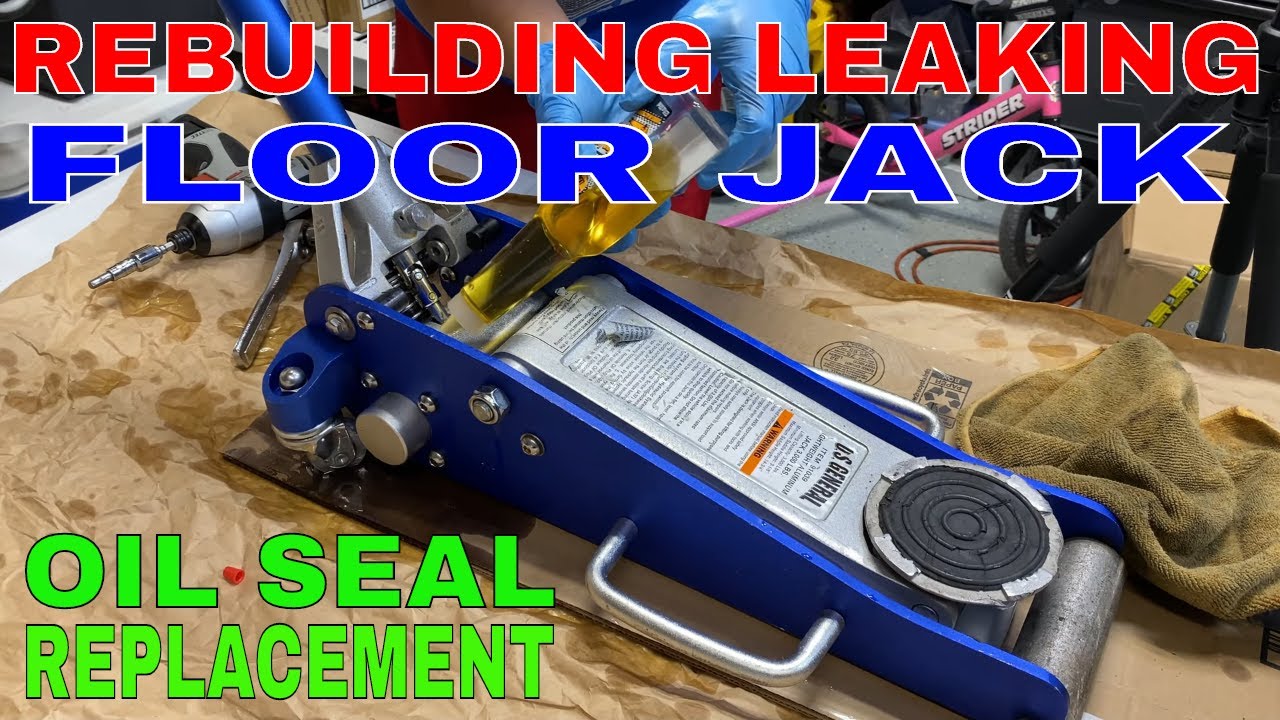
Credit: www.youtube.com
Frequently Asked Questions
How Do I Identify A Leak In My Floor Jack?
Check for oil puddles under the jack or oily residue on its body. A leaking floor jack often loses lifting power and may hiss when used. Inspect seals and valves for cracks or damage to pinpoint the leak source.
What Tools Are Needed To Fix A Leaking Floor Jack?
You will need wrenches, screwdrivers, a seal kit, hydraulic fluid, and a cleaning cloth. Ensure you have the correct replacement seals for your jack model. Proper tools help safely open and repair the jack without causing further damage.
Can I Fix A Floor Jack Leak Myself?
Yes, minor leaks like worn seals can be fixed at home. Follow safety guidelines, drain old fluid, replace seals, and refill with new hydraulic oil. For complex issues, consult a professional to avoid injury or equipment damage.
How Often Should I Maintain My Floor Jack To Prevent Leaks?
Regular maintenance every 6 to 12 months helps prevent leaks. Check fluid levels, clean the jack, and inspect seals and valves regularly. Proper care extends your jack’s lifespan and ensures safe operation.
Conclusion
Fixing a floor jack that leaks is easier than it seems. Check the seals and hydraulic fluid first. Tighten any loose parts carefully. Clean dirt and debris from the jack’s surface. Replace worn or broken seals to stop leaks. Test the jack after repairs to ensure safety.
Regular care helps the jack last longer. Keep your tools in good shape for smooth work. Simple steps can save you money and time. A working floor jack makes lifting tasks safer and easier.