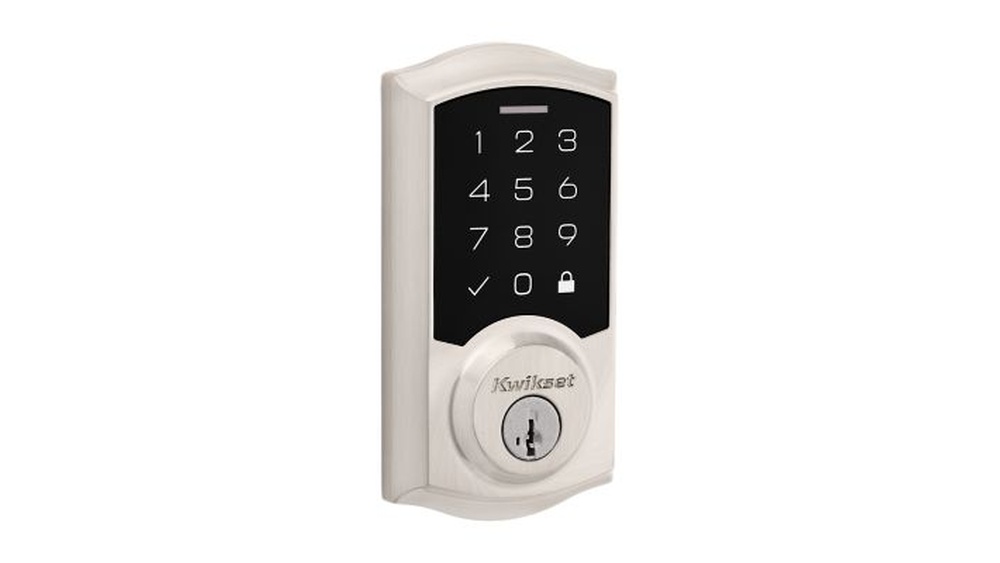
Are you ready to upgrade your home security with a smart and easy-to-use lock? Installing the Kwikset Touchpad Electronic Deadbolt can give you keyless entry and peace of mind.
But you might be wondering, “Is it hard to install on my own? ” Don’t worry—this step-by-step guide will walk you through the process in simple terms. By the end, you’ll have your new deadbolt working smoothly, making your home safer and more convenient.
Keep reading to discover how you can do it yourself, without any stress or confusion.

Credit: pacha-automation.com
Tools And Materials Needed
Before installing the Kwikset Touchpad Electronic Deadbolt, gather all the tools and materials. Having everything ready makes the installation smooth and quick.
Each item plays a key role in the process. Using the right tools helps avoid damage and ensures the deadbolt works well.
Basic Tools
- Phillips screwdriver
- Flathead screwdriver
- Power drill with drill bits
- Measuring tape
- Pencil or marker
- Level
Materials Included With Deadbolt
- Kwikset Touchpad Electronic Deadbolt
- Strike plate
- Mounting screws
- Batteries (usually AA)
- Latch mechanism
- Installation manual
Additional Supplies
- Wood filler (if needed)
- Sandpaper
- Masking tape
- Safety glasses
Preparing The Door
Preparing your door is the first step to install the Kwikset Touchpad Electronic Deadbolt. A smooth installation depends on a clean and properly aligned door. Taking time now saves frustration later. Follow these simple steps to get your door ready.
Removing Old Deadbolt
Start by removing the old deadbolt carefully. Use a screwdriver to take out the screws on the inside of the door. Pull the two parts of the lock apart gently. Remove the latch from the edge of the door. Keep all screws just in case you need them later.
Check the holes left behind. They should be clear of any dirt or debris. Wipe the area clean. This helps the new lock fit smoothly and work properly.
Checking Door Alignment
Next, check if your door is aligned well. Close the door slowly. Watch how the latch fits into the strike plate on the frame. It should slide in easily without force.
If the door sticks or the latch does not line up, adjust the strike plate. Loosen its screws and move it slightly. Tighten the screws again and test the door. Good alignment means the lock will work better and last longer.
Installing The Deadbolt Components
Installing the deadbolt components is the next step after preparing your door. This process involves attaching the parts that make the lock work smoothly. Each piece must fit right for security and ease of use. Follow each step carefully for a strong installation.
Attaching The Latch
Start by sliding the latch into the door edge hole. Make sure the curved side faces the door frame. Use screws to fix it tightly in place. Check that the latch moves freely by pushing it in and out.
Mounting The Exterior Keypad
Place the keypad on the outside of the door. Feed the connecting cable through the hole below the latch. Align the keypad with the screw holes. Secure the keypad with screws but do not overtighten.
Securing The Interior Assembly
Connect the cable to the interior assembly unit. Fit the unit over the screw holes inside the door. Insert and tighten the screws to hold it firmly. Test the thumb turn to ensure it turns smoothly.

Credit: kelloggsupplyco.com
Wiring And Battery Setup
Setting up the wiring and battery for your Kwikset Touchpad Electronic Deadbolt is simple. This step powers your lock and ensures smooth operation. Proper battery installation keeps the lock working without interruptions.
Follow clear instructions to connect batteries correctly. After connecting, test the power and connections to confirm everything runs well. This section guides you through these two important tasks.
Connecting The Batteries
Start by opening the battery compartment on the lock’s interior side. Use four AA alkaline batteries for the best performance. Insert each battery with the right polarity. The positive and negative ends must match the markings inside.
Push the batteries gently but firmly into place. Close the battery cover securely to avoid loose connections. Check that no batteries move or rattle inside the compartment.
Testing Power And Connections
Press any button on the touchpad to check the power. The keypad lights should turn on immediately. If the lights do not show, remove and reinsert the batteries.
Listen for any sounds from the lock motor. A soft beep means the lock is ready. If you hear no sound, check battery contacts for dirt or corrosion. Clean contacts with a dry cloth if needed.
Test the lock by entering your default code. The deadbolt should move smoothly without delay. If the lock does not respond, verify battery placement and connections again.
Programming The Keypad
Programming the keypad of your Kwikset Touchpad Electronic Deadbolt is a key step. It lets you control who can enter your home. You can set codes for yourself and others. Managing these codes keeps your home safe and secure.
Follow these simple steps to program the lock easily. The process is quick and does not require special tools.
Setting Master Codes
The master code controls all other codes. Start by entering the factory code. Press the program button on the interior side of the lock. Enter your new master code. Make sure it is easy for you to remember. This code should be private and not shared.
Adding User Codes
After setting the master code, add user codes. Press the program button again. Enter the new user code you want to add. User codes let family or friends enter without a key. You can add several user codes for different people. Each code should be unique and easy to recall.
Resetting Codes
Resetting codes clears old ones and adds new ones. To reset, press and hold the program button for 10 seconds. Wait for the lock to beep twice. This resets the lock to factory settings. You must set a new master code after this. Then add user codes as needed. Resetting helps if you lose your codes or want to start fresh.
Testing The Lock
Testing the Kwikset Touchpad Electronic Deadbolt ensures it works properly. This step confirms the lock is secure and responsive. Testing helps avoid future lockouts and problems.
Manual Lock And Unlock
Start by locking the door manually from inside. Turn the thumb turn to lock and unlock the deadbolt. Check that the bolt moves smoothly without resistance. Make sure the door closes fully before locking.
Next, try to open the door from outside using the key. Insert the key and turn it to unlock. The key should turn easily and the bolt should retract. This confirms the mechanical parts work well.
Using The Touchpad
Test the electronic function by entering your code on the touchpad. Press the buttons firmly and watch for the green light. The deadbolt should unlock with a click sound. Lock the door again using the touchpad to check the lock action.
Try incorrect codes to see if the lock denies access. The keypad should not unlock the door. This feature protects your home from unauthorized entry.
Troubleshooting Common Issues
If the lock does not respond, check the batteries first. Weak batteries often cause touchpad problems. Replace batteries with new ones and test again.
Ensure the lock is installed straight and aligned with the strike plate. Misalignment causes the bolt to stick or jam. Adjust screws or reposition the strike plate if needed.
Clean the keypad and lock with a soft cloth. Dirt or moisture might block button signals. Avoid using harsh chemicals that can damage the lock.
Maintenance Tips
Maintaining your Kwikset Touchpad Electronic Deadbolt helps it work smoothly for years. Regular care prevents problems and keeps your lock secure. Simple steps make a big difference in performance.
Cleaning The Touchpad
Use a soft, dry cloth to clean the touchpad surface. Avoid water or harsh chemicals that can damage it. Wipe gently to remove dust and fingerprints. Clean regularly to keep the touchpad responsive.
Checking The Batteries
Replace batteries when the low battery indicator shows up. Use only recommended battery types for best results. Remove batteries if you won’t use the lock for a long time. Keep spare batteries nearby to avoid lockouts.
Lubricating The Lock
Apply graphite-based lubricant to the keyhole and bolt annually. Avoid oil-based lubricants that attract dirt and dust. Lubrication keeps the bolt moving smoothly inside the door. Do this even if the lock feels fine.
Testing The Lock Functions
Test the lock monthly to ensure all parts work correctly. Check the touchpad, manual key, and bolt movement. Report or fix any issues right away. Regular tests help avoid surprises when you need the lock most.

Credit: www.youtube.com
Frequently Asked Questions
How Do I Install A Kwikset Touchpad Deadbolt?
First, remove the old deadbolt. Align the new deadbolt and secure it with screws. Attach the keypad and test functionality.
What Tools Are Needed For Kwikset Deadbolt Installation?
You need a screwdriver, drill, measuring tape, and pencil for proper installation. These tools ensure precise fitting and secure mounting.
How To Program The Kwikset Touchpad After Installation?
Press the program button inside the lock. Enter a new user code on the keypad. Test the code to confirm programming.
Can I Install Kwikset Deadbolt Without Professional Help?
Yes, it’s designed for easy DIY installation. Follow the instructions carefully, and use the right tools for best results.
Conclusion
Installing the Kwikset Touchpad Electronic Deadbolt is simple and quick. Follow each step carefully for best results. Test the lock to make sure it works well. This device adds security and ease to your home. Enjoy the convenience of keyless entry every day.
Stay safe with a reliable and modern lock. You can handle this project without special tools. A few minutes of work improves your home’s safety. Trust the process and take your time.