Are you tired of your coat rack wobbling or falling down every time you hang something heavy? Securing your coat rack to the wall is the simple fix you need.
But how do you do it right, so it stays strong and safe? In this guide, you’ll learn easy, step-by-step tips to anchor your coat rack firmly. By the end, you’ll have a sturdy setup that keeps your space tidy and your coats secure.
Let’s get started and make your walls work for you!

Credit: www.amazon.com
Choose The Right Spot
Choosing the right spot for your coat rack is important. It makes sure the rack stays strong and looks good. Picking a good place helps the rack hold all your coats safely. Think about space and the type of wall before you start.
Consider Wall Material
Different walls need different anchors. Drywall is common but weak for heavy racks. Use anchors made for drywall or find studs to screw into. Concrete or brick walls need special drill bits and anchors. Knowing your wall type helps pick the best fixings. This keeps the rack steady and safe.
Measure Height And Space
Measure the wall space before you hang the rack. Think about coat length and how many coats you have. Place the rack high enough to avoid hitting heads. Leave space around the rack for easy access. Proper measuring stops mistakes and saves time.

Credit: www.amazon.com
Gather Necessary Tools
Gathering the right tools is the first step to anchor a coat rack to the wall. Having everything ready makes the task easier and faster. It helps avoid interruptions and mistakes.
Before starting, make sure you have all the necessary items close by. This way, you can focus on the work and stay safe.
List Of Required Tools
- Drill with drill bits
- Screwdriver (Phillips or flathead)
- Wall anchors or toggle bolts
- Measuring tape
- Level
- Pencil for marking
- Stud finder
- Safety goggles
- Work gloves
Safety Precautions
Wear safety goggles to protect your eyes from dust and debris. Gloves protect your hands from sharp edges and tools.
Check for wires and pipes inside the wall before drilling. Use a stud finder for accurate detection.
Work in a well-lit area. Keep your workspace clean to avoid accidents.
Mark Anchor Points
Marking anchor points is a key step to hang your coat rack securely. You need to place these marks carefully. Correct marks ensure the rack stays level and stable on the wall. Take your time to get this right. It helps avoid mistakes and extra holes in the wall.
Use A Level
Start by holding the coat rack against the wall. Use a level to check if it is straight. Adjust the rack until the bubble in the level is centered. This shows the rack is perfectly horizontal. Mark the top edge of the rack lightly with a pencil. This line helps you position the anchor points evenly.
Mark Drill Spots
Next, find where the screws will go. Look for the holes or brackets on the coat rack. Hold the rack in place and mark each hole with a pencil. Double-check these marks to ensure they line up with the level line. These marks are your drill spots. Drill precisely on these spots for a secure hold.
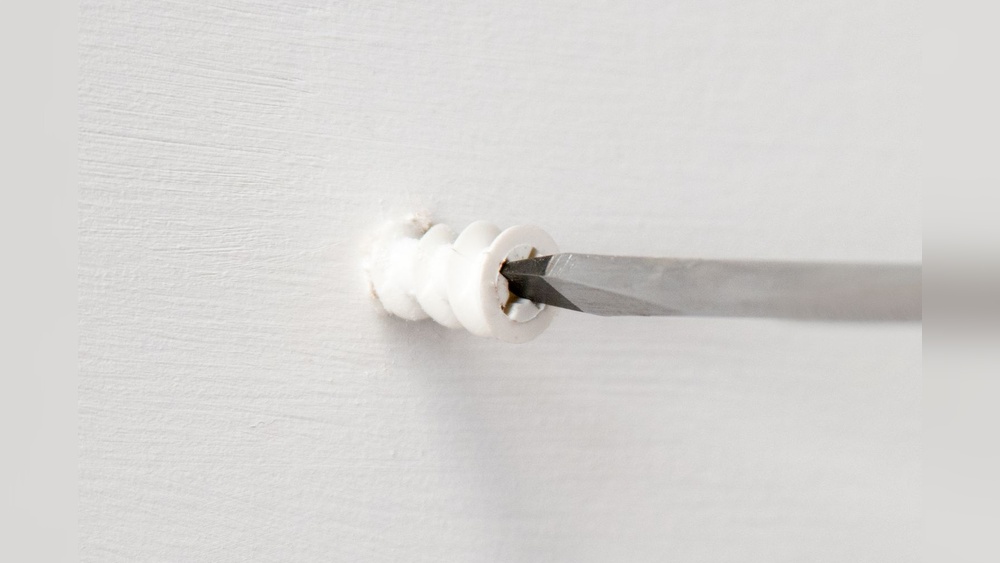
Select Suitable Anchors
Selecting the right anchors is key to securing your coat rack firmly. Different walls need different types of anchors. Choosing the correct anchor ensures safety and prevents damage to your wall. Here is a guide to help you pick the best anchor for your wall type.
Drywall Anchors
Drywall anchors work well for walls made of plaster or drywall. They hold screws tightly without needing to hit a stud. Plastic expansion anchors are common and easy to use. For heavier coats, metal or toggle anchors provide extra strength. These anchors spread the load behind the wall for better support.
Masonry Anchors
Masonry anchors are designed for brick, concrete, or stone walls. They require a special drill bit to make holes. Once inserted, they expand inside the hole to hold firmly. Sleeve anchors and wedge anchors are popular types. These anchors provide strong support for heavier racks on hard surfaces.
Stud Anchors
Stud anchors involve mounting directly into the wooden studs behind the wall. Use a stud finder to locate these solid supports. Screws driven into studs offer the strongest hold. This method is best for heavy coat racks or when you want maximum strength. No special anchors are needed if you screw directly into a stud.
Drill Pilot Holes
Drilling pilot holes is a crucial step to anchor a coat rack securely to a wall. It helps guide the screws and prevents the wall or wood from splitting. Taking time to drill pilot holes ensures a strong hold and a neat finish.
Choose Correct Drill Bit
Select a drill bit that matches the screw size. The bit should be slightly smaller than the screw’s diameter. This allows the screw to grip tightly in the hole. Use a wood bit for wooden studs and a masonry bit for brick or concrete walls.
Drilling Techniques
Mark the exact spots for pilot holes on the wall. Hold the drill steady and perpendicular to the surface. Drill slowly at first to avoid slipping. Increase speed once the bit has started the hole. Drill to the depth of the screw length for a secure fit.
Install Anchors
Installing anchors is a key step to secure your coat rack firmly to the wall. Anchors provide extra support, especially on drywall or hollow walls. They help hold screws tightly and prevent the rack from falling.
Choose the right type of anchor based on your wall material and the weight of the coat rack. Below are two common types that work well for most walls.
Insert Plastic Anchors
Start by drilling a small hole in the wall where you want to place the coat rack. The hole size should match the plastic anchor size.
Push the plastic anchor gently into the hole until it sits flush with the wall. If needed, tap it lightly with a hammer.
Once the anchor is in place, insert the screw through the coat rack bracket and tighten it into the anchor. The plastic expands inside the wall to hold the screw firmly.
Use Toggle Bolts
Toggle bolts work best for hollow walls and heavier coat racks. First, drill a hole large enough for the toggle to pass through.
Thread the screw through the coat rack bracket and attach the toggle wings. Squeeze the wings closed and push them into the hole.
When inside the wall, the wings open wide to spread the load. Pull the screw gently while tightening to lock the toggle firmly against the wall.
Attach Coat Rack
Attaching the coat rack to the wall is a key step in making it stable and useful. This part requires care to keep the rack strong and secure. Follow each step closely for the best results.
Start by aligning the coat rack with the wall anchors. This makes sure the screws go in the right spots. Then, tighten the screws firmly to hold the rack steady. Both steps help the rack stay safe and hold weight well.
Align Rack With Anchors
Hold the coat rack near the wall. Match the holes on the rack with the wall anchors. Check if the holes line up exactly. Adjust the rack position if needed. Proper alignment stops the rack from leaning or falling.
Secure Screws Firmly
Insert screws into the aligned holes. Use a screwdriver to turn them clockwise. Tighten each screw until it feels snug. Avoid over-tightening to stop damage. Firm screws keep the rack steady and safe for daily use.
Test Stability
Testing the stability of your anchored coat rack is a crucial step. It ensures the rack is safe and secure before full use. A stable rack prevents accidents and protects your walls from damage.
Start slowly and carefully during this phase. Watch for any signs of weakness or movement. This careful approach helps you fix issues early on.
Apply Weight Gradually
Begin by hanging a light item on the coat rack. Add weight step by step. This gradual increase helps the anchors adjust to the load.
Pause after each addition and observe how the rack holds up. This method reduces the risk of sudden failure.
Check For Movement
Gently wiggle the coat rack with your hand. Look closely for any shifts or loosening. Even small movements can signal weak anchoring.
Check the wall around the anchors for cracks or holes. If you see any, tighten or reposition the anchors immediately.
Tips For Maintenance
Keeping your coat rack firmly attached to the wall is key for safety and durability. Proper maintenance helps the rack stay strong and last longer. Simple care steps prevent damage and keep it looking good.
Regular Tightening
Check the screws and anchors often. Small movements can loosen them over time. Use a screwdriver to tighten any loose parts. This keeps the rack stable and safe to use. Regular tightening stops the rack from wobbling or falling.
Avoid Overloading
Do not hang too many heavy items on the rack. Each coat rack has a weight limit. Overloading can pull screws out or damage the wall. Spread out items evenly to reduce pressure. Keep the rack light for better support and longer life.

Credit: www.ebay.com
Frequently Asked Questions
How Do I Anchor A Coat Rack To Drywall?
Use wall anchors or toggle bolts to secure the coat rack to drywall. Locate studs if possible for better support. Drill pilot holes, insert anchors, and screw in the rack firmly for stability.
What Tools Are Needed To Mount A Coat Rack?
You need a drill, screwdriver, level, measuring tape, and wall anchors or screws. These tools help ensure accurate placement and secure installation of your coat rack.
Can I Install A Coat Rack On Plaster Walls?
Yes, use anchors suitable for plaster walls like molly bolts. Drill carefully to avoid cracking. Proper anchors provide a strong hold for your coat rack.
How To Find Studs For Anchoring A Coat Rack?
Use a stud finder or tap the wall to locate studs. Mark their positions for secure screw placement. Anchoring into studs ensures better weight support for the coat rack.
Conclusion
Anchoring a coat rack to the wall keeps it steady and safe. Choose the right tools and wall anchors for your wall type. Measure carefully and mark spots before drilling holes. Tighten screws firmly to hold the rack strong. This simple process saves space and organizes your room.
Enjoy a tidy area with your coat rack in place. Following these steps makes the task easy and effective. Now, your coats stay neat and your wall stays secure.