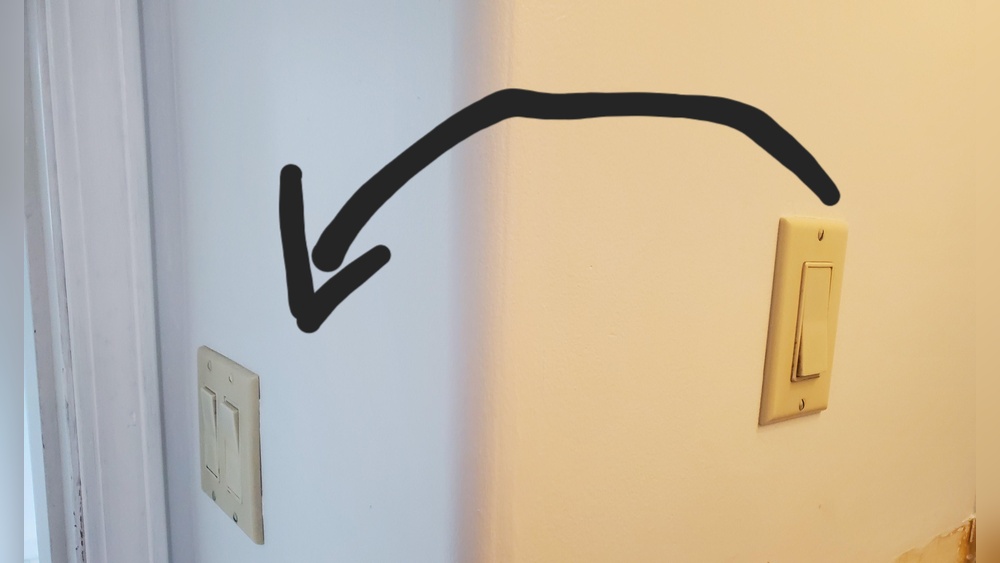
Have you ever wished you had an extra outlet right where your light switch is? Maybe you need a convenient spot to plug in your phone charger or a lamp without running cords across the room.
Creating an outlet from a light switch can be a smart and practical solution that saves space and adds convenience to your home. In this guide, you’ll discover simple steps to safely transform your light switch into a useful power source.
Keep reading, and you’ll learn how to do it right—no confusion, no fuss. Your home will thank you!
Credit: www.reddit.com
Tools And Materials Needed
Creating an outlet from a light switch needs some specific tools and materials. Having the right items makes the job safer and easier. This section lists all essentials for this task.
Basic Tools Required
Start with a screwdriver set. Both flathead and Phillips types help remove switch plates and screws. A voltage tester is important. It ensures the power is off before starting work. Wire strippers cut insulation from wires cleanly. Needle-nose pliers help bend and hold wires. A tape measure checks wire lengths precisely. Finally, a flashlight is useful in dark spaces.
Materials Needed
Use electrical outlet boxes designed for wall mounting. Choose a standard duplex outlet to replace the switch. Electrical wires, usually 14 or 12 gauge, connect the outlet. Wire nuts secure wire connections safely. Electrical tape adds extra protection to connections. Outlet covers finish the installation and protect wires.
Safety Gear
Wear insulated gloves for protection against shocks. Safety glasses shield eyes from dust or sparks. Use a sturdy ladder to reach higher switches. Clear the work area to avoid accidents. Safety first makes the project smooth and secure.
Safety Precautions
Working with electricity needs care and attention. Safety precautions protect you from shocks and accidents. Before creating an outlet from a light switch, follow these safety tips. They help keep the work safe and smooth.
Turn Off Power At The Breaker
Switch off the main power at the breaker box. This stops electricity from flowing to the switch. Use a voltage tester to check that power is off. Never skip this step.
Use Proper Tools And Equipment
Choose insulated tools made for electrical work. Avoid using damaged or worn tools. Wear rubber-soled shoes and safety glasses. These reduce risks of injury.
Follow Local Electrical Codes
Check local rules for electrical work. Codes ensure your outlet is safe and legal. Use correct wiring and outlets as per guidelines. This avoids problems with inspections later.
Double-check Connections
Make sure all wires are firmly connected. Loose wires can cause sparks or fires. Use wire nuts or connectors properly. Inspect your work before turning power back on.
Know When To Call A Professional
If unsure about any step, stop and ask for help. Electric work can be dangerous without experience. Hiring an electrician saves time and prevents hazards. Safety always comes first.
Turn Off Power
Turning off the power is the first step to create an outlet from a light switch safely. It stops electricity from flowing and keeps you safe. Never skip this step. Even a small shock can cause serious injury. Always treat electrical work with care and respect.
Before you touch any wires, make sure the power is off. This step protects you and prevents damage to your home’s electrical system. Safety first. Let’s see how to turn off power properly.
Locate The Circuit Breaker
Find your home’s circuit breaker box. It is usually in the basement, garage, or utility room. Look for a metal box on the wall with a door.
Inside, you will see switches labeled with room names or numbers. These are the circuit breakers. They control the electricity for different parts of your house.
Identify The Correct Breaker
Find the breaker that controls the light switch you want to change. Labels on the box help you. If labels are missing, you can test by turning off breakers one at a time. Check if the light switch loses power.
Switch Off The Breaker
Flip the correct breaker to the “off” position. This stops electricity to the light switch. You might hear a click. It means the power is off.
Verify Power Is Off
Use a voltage tester or multimeter to check the switch. Place the tester on the switch terminals. No reading means no power. Never trust just the breaker position. Always test for safety.
Remove The Light Switch
Removing the light switch is the first step to creating an outlet. This process lets you access the wiring behind the wall. Safety is very important. Always turn off the power before starting any electrical work.
Take your time and follow each step carefully. This helps avoid mistakes and keeps you safe.
Turn Off The Power
Find the circuit breaker that controls the light switch. Switch it off to cut the electricity. Use a voltage tester to make sure the power is off. Never work on live wires.
Remove The Switch Cover Plate
Use a screwdriver to take out the screws holding the cover plate. Gently pull the plate away from the wall. Set the screws and plate aside for later use.
Unscrew The Light Switch
Locate the screws that hold the switch to the electrical box. Unscrew them carefully. Pull the switch out slowly to see the wires behind.
Note The Wire Connections
Look closely at how the wires connect to the switch. Take a photo or write down their positions. This helps when you connect the new outlet.
Disconnect The Wires
Use a screwdriver to loosen the screws holding the wires. Gently pull each wire free. Keep the wires straight and untangled.
Identify Wiring Setup
Identifying the wiring setup is the first step in creating an outlet from a light switch. This step ensures safety and proper function. Knowing how wires connect helps avoid mistakes that cause damage or shocks.
Check the wires inside the switch box carefully. Different homes have different wiring styles. Recognizing these types is key to adding an outlet correctly.
Turn Off Power At The Breaker
Always switch off the power before touching any wires. Use the main breaker to cut electricity to the switch. This step protects you from electric shock.
Remove The Switch Cover Plate
Unscrew the cover plate gently. This exposes the switch and the wires behind it. Be careful not to damage the plate or wall.
Identify Wire Colors And Functions
Look for black, white, and green or bare copper wires. Black wires carry power. White wires are neutral. Green or bare wires are ground.
Check For A Neutral Wire
Find the neutral wire inside the box. It is necessary for creating a new outlet. Some older homes may not have a neutral wire here.
Use A Voltage Tester
Test each wire with a voltage tester. This confirms which wire has current. It helps to avoid dangerous mistakes.
Install The Outlet Box
Installing the outlet box is an important step when creating an outlet from a light switch. The box holds the new outlet securely and protects the wires inside. It fits into the wall where the light switch used to be or next to it, depending on your setup.
Choosing the right box and installing it properly ensures safety and easy access to the outlet. This step must be done carefully to avoid damage to the wall or electrical system.
Choose The Correct Outlet Box
Select a box that fits the space and meets electrical codes. Use a single-gang box for one outlet. If you want space for more outlets, choose a double-gang box.
Plastic boxes are easier to install and do not conduct electricity. Metal boxes are stronger but need grounding.
Turn Off The Power
Before any work, switch off power at the breaker. Test the wires with a voltage tester to confirm no electricity flows.
Safety first. Never skip this step.
Remove The Existing Switch And Box
Unscrew the light switch plate and take out the switch carefully. Disconnect wires and pull out the old box if needed.
Be gentle to avoid breaking the wall or wires.
Cut The Wall For The New Box
Mark the wall where the new outlet box will go. Use a drywall saw to cut the hole carefully.
Make the hole just big enough for the box to fit snugly.
Secure The Outlet Box In Place
Insert the box into the wall hole. Use screws or clamps to hold it tight against the wall.
Check that the box is level and flush with the wall surface.
Prepare The Box For Wiring
Remove any knockout holes for wires. Feed the wires through these openings.
Use cable clamps if the box has them to keep wires secure and protected.
Connect Wires To The Outlet
Connecting wires to the outlet is a key step in creating a new power source from a light switch. This process transfers electricity safely and effectively. Proper wiring ensures the outlet works well and prevents hazards.
Follow clear steps to attach each wire to the right terminal. Take care to handle wires with insulated tools and turn off power before starting.
Identify The Wires
Look at the wires coming from the switch box. Usually, you will see a black (hot), white (neutral), and green or bare copper (ground) wire. Knowing which wire is which is important for safe connections.
Attach The Hot Wire
Connect the black hot wire to the brass screw on the outlet. This wire carries electricity into the outlet. Tighten the screw firmly to hold the wire in place.
Attach The Neutral Wire
Connect the white neutral wire to the silver screw on the outlet. This wire completes the electrical circuit. Make sure the wire is wrapped around the screw correctly.
Attach The Ground Wire
Connect the green or bare copper ground wire to the green screw on the outlet. The ground wire protects from electrical shocks. Secure the wire tightly for safety.
Double-check Connections
Inspect all wires to ensure they are connected to the right terminals. Loose wires can cause shorts or fires. Tug gently to confirm each wire is secure.

Credit: www.youtube.com
Secure The Outlet And Cover Plate
Securing the outlet and cover plate is a vital step in creating an outlet from a light switch. It keeps everything safe and neat. Properly securing the outlet prevents electrical hazards and ensures the installation lasts long. This step also gives your project a finished, professional look.
Secure The Outlet To The Electrical Box
First, align the outlet with the electrical box. Use the screws that come with the outlet. Tighten the screws until the outlet fits snugly inside the box. Avoid over-tightening, which can crack the outlet. The outlet should sit flush with the wall surface.
Attach The Cover Plate
Next, place the cover plate over the outlet. The cover plate hides wires and sharp edges. Use the small screw in the center to attach the plate. Turn the screw until the plate is secure but not too tight. The plate should not wobble or move.
Check For Stability And Safety
Once secured, gently wiggle the outlet and cover plate. They should not move or feel loose. A stable outlet reduces the risk of electrical shock. Confirm no wires are visible or pinched. This ensures your installation is safe and reliable.
Restore Power And Test
Restoring power and testing your new outlet is a key step. It confirms the outlet works safely and correctly. Take time here to avoid future problems.
After wiring the outlet, turn the circuit breaker back on. This action restores electricity to the switch and outlet. Be careful during this step to prevent shocks.
Turn On The Circuit Breaker
Locate the breaker panel in your home. Find the switch that controls the power to your light switch circuit. Flip this switch to the ON position. This step brings power back to the outlet.
Use A Voltage Tester
Grab a voltage tester or a multimeter. Touch the tester’s probes to the outlet slots. A reading shows if power flows correctly. No voltage means a wiring problem.
Plug In A Device
Insert a small device like a lamp or phone charger. The device should turn on or charge. This simple test confirms the outlet works well and supplies power safely.
Check The Outlet For Heat
After use, feel the outlet cover gently. It should stay cool. Warm or hot outlets may indicate wiring issues. Turn off power and review your work if this happens.
Troubleshooting Tips
Troubleshooting is a key step when creating an outlet from a light switch. It helps find and fix common problems fast. This saves time and ensures safety. Follow these simple tips to solve typical issues easily.
Check The Power Supply
Start by turning off the main power. Use a tester to check if power reaches the switch box. No power means a circuit breaker might be off. Reset it and test again. Power must be off before touching wires.
Verify Wiring Connections
Loose or wrong wiring causes most problems. Confirm wires connect correctly to the switch and outlet terminals. Tighten any loose screws. Match wire colors to the diagram. Black or red usually means hot wire. White is neutral.
Test The Outlet With A Voltage Tester
Use a voltage tester to check the new outlet. It should show power when the switch is on. No power means a wiring error or a bad connection. Recheck all wires and test again. Safety first—always turn off power before fixing wires.
Look For Faulty Switch Or Outlet
Sometimes switches or outlets are damaged. Swap the switch or outlet with a new one. Test if the problem goes away. Faulty parts need replacement to keep the outlet working safely.
Ensure Proper Grounding
Ground wires prevent shocks. Check if the outlet and switch boxes have ground wires. Connect them tightly to the green grounding screws. No ground wire? Use a grounding clip or consult an electrician.

Credit: www.youtube.com
Frequently Asked Questions
How Do I Convert A Light Switch Into An Outlet?
To convert a light switch into an outlet, turn off power first. Remove the switch, connect outlet wires properly, then install the outlet. Always follow electrical codes and safety guidelines. Consult a professional if unsure to ensure safe installation.
What Tools Are Needed To Create An Outlet From A Switch?
You need a voltage tester, wire stripper, screwdriver, electrical tape, and wire nuts. Also, have a new outlet and cover plate ready. These tools help safely remove the switch and install the outlet without damaging wires.
Is It Safe To Replace A Light Switch With An Outlet?
Yes, it is safe if you turn off power and follow electrical codes. Use proper wiring techniques and ensure the circuit can handle the outlet’s load. When in doubt, hire a licensed electrician to avoid hazards.
Can I Use The Existing Wiring For The New Outlet?
Often, existing wiring can be reused if it meets outlet requirements. Check wire gauge and circuit capacity to ensure safety. Replace damaged wires and confirm proper grounding before installing the outlet.
Conclusion
Creating an outlet from a light switch can save space and add convenience. Always turn off the power before starting any work. Follow safety rules to avoid accidents or damage. Use the right tools and materials for a clean job.
Take your time and double-check each step. This simple upgrade can make your home more functional. Enjoy the ease of having an extra outlet where you need it most. Stay safe and confident while handling electrical tasks.