Are you ready to give your cabinets a fresh look without spending a fortune? Putting on old cabinet hardware is a simple way to add charm and character to your space.
But how do you do it right so everything fits perfectly and looks great? You’ll discover easy steps and insider tips that make the process smooth and stress-free. By the time you finish reading, you’ll feel confident to tackle this project yourself—and enjoy the satisfying transformation of your cabinets.
Let’s dive in and bring those vintage details back to life!
Gather Necessary Tools
Gathering the right tools is the first step to put on old cabinet hardware. Having everything ready saves time and avoids frustration. It helps you work smoothly and get better results. This section explains which tools you need and why each one is important.
Identify Required Hardware
Check the old hardware carefully. Find out if you have knobs, pulls, or hinges. Make sure you have screws that fit each piece. Match the size and style of the hardware. Using the correct parts makes installation easier and more secure.
Prepare Screwdrivers And Drills
Choose the right screwdriver for your screws. A Phillips or flathead screwdriver is common. Have a drill ready for faster work. Use drill bits that match the screw size. This prevents damage and helps screws go in smoothly.
Use Measuring Tools
Measure carefully before you start. Use a tape measure or ruler to mark holes. A level can help keep hardware straight. Mark spots lightly with a pencil. Accurate measuring ensures the hardware fits well and looks good.
Remove Old Hardware
Removing old cabinet hardware is the first step to updating your cabinets. It makes space for new handles or knobs. This process also helps you check the cabinet’s condition. Follow simple steps to remove the hardware safely and prepare the surface for new pieces.
Unscrew Existing Handles And Knobs
Find the screws holding the handles or knobs on the inside of the cabinet door or drawer. Use a screwdriver that fits well to avoid stripping the screws. Turn the screws counterclockwise until they come out. Keep the screws in a safe place if you plan to reuse them. Gently pull off the handles or knobs after unscrewing.
Clean Cabinet Surface
Remove dust, dirt, and old grease from the cabinet surface. Use a soft cloth with mild soap and water. Wipe the area where the hardware was attached. Dry the surface well to prevent water damage. Clean surfaces help new hardware stick better if adhesive is used.
Inspect For Damage
Look closely at the holes and surrounding wood. Check for cracks, chips, or worn areas. Small damage can be fixed with wood filler or putty. Let the filler dry before sanding it smooth. Repairing damage ensures the new hardware fits tight and looks good.
Match New Hardware To Old
Matching new cabinet hardware to old is important for a neat look. Old cabinets have specific sizes and styles. Choosing hardware that fits well saves time and effort. It also keeps the cabinet’s style consistent. Follow simple steps to match the new hardware perfectly.
Check Hole Alignment
Measure the distance between the holes on your old hardware. New hardware must have the same hole spacing. This avoids extra drilling and damage to the cabinet. Use a ruler or tape measure for accuracy. Aligning holes makes installation faster and easier.
Choose Compatible Screws
Old hardware may use screws of different lengths or thicknesses. Pick screws that fit the new hardware and the cabinet’s material. Using the wrong screws can cause loose fittings or damage. Keep the old screws as a reference when buying new ones.
Test Fit Before Installation
Place the new hardware on the cabinet without tightening screws. Check if it fits properly and looks right. Adjust placement if needed before final installation. Testing saves you from mistakes and extra work later. Make sure the hardware moves smoothly and sits flush.

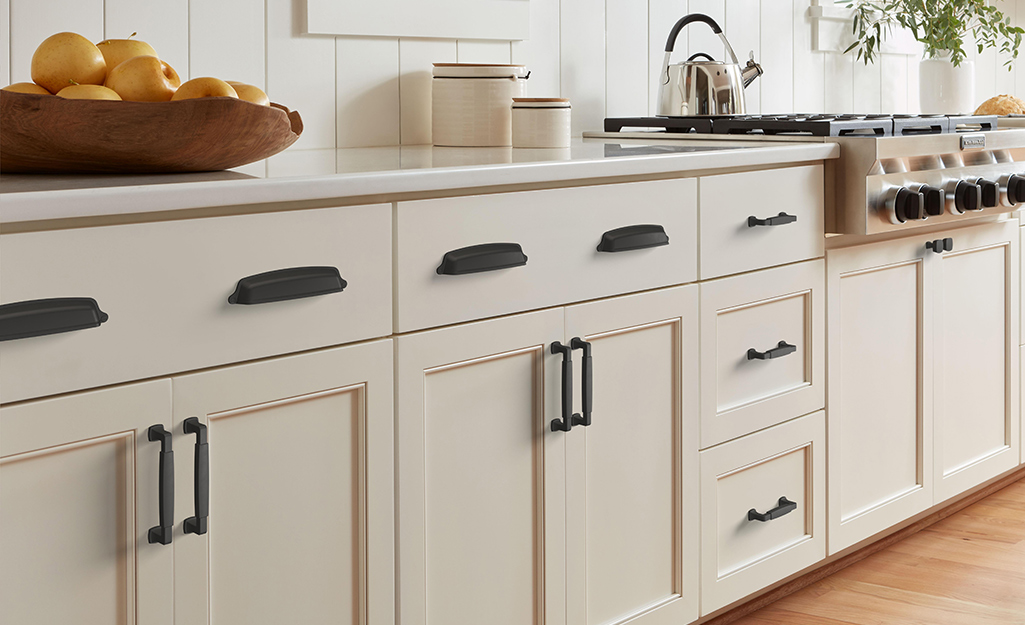
Credit: www.homedepot.com
Install New Hardware
Installing new hardware on old cabinets is a simple way to refresh your kitchen or bathroom. It gives cabinets a new look without replacing them. This step involves placing the handles and knobs in the right spots and securing them firmly. Follow these easy steps to install new hardware correctly.
Position Handles And Knobs
Start by aligning the handles or knobs with the existing holes. Use a tape measure to check the distance from the edges. Make sure the hardware sits straight and looks balanced. Mark the spots lightly with a pencil if you need to adjust. Proper positioning ensures the hardware is both functional and attractive.
Secure Screws Properly
Insert the screws through the inside of the cabinet door or drawer. Hold the handle or knob firmly in place. Turn the screws slowly to tighten them. Use a screwdriver that fits well to avoid stripping the screws. Tighten each screw evenly for a secure hold.
Avoid Over-tightening
Do not twist screws too hard. Over-tightening can crack the wood or damage the hardware. Stop tightening once the handle or knob feels stable. Check for any wobble and adjust if needed. A firm but gentle grip keeps your cabinets safe and looking good.
Adjust And Finalize Fit
Adjusting and finalizing the fit of old cabinet hardware is a key step. It ensures the handles or knobs sit correctly and work smoothly. Taking time now saves frustration later. This part of the process helps the hardware look its best and last longer.
Check Alignment And Function
Start by checking if the hardware lines up well on the cabinet. The screws should fit straight in the holes. Test if the knobs or handles turn or pull easily. Look for any wobbling or uneven gaps. Proper alignment means the hardware feels solid and looks neat.
Make Minor Adjustments
Use a screwdriver to tighten or loosen screws slightly. Shift the hardware a little to fix any misalignment. Adjusting helps the hardware sit flush against the wood. Do this carefully to avoid stripping screws or damaging the cabinet surface. Small changes improve the overall fit and function.
Polish And Clean Hardware
Once the fit feels right, clean the hardware gently. Use a soft cloth with mild soap or metal polish if needed. Remove any dust, dirt, or rust spots. Polishing brightens the finish and enhances the cabinet’s look. Clean hardware also lasts longer and feels nice to touch.

Credit: www.youtube.com
Troubleshoot Common Issues
Old cabinet hardware can bring charm to your space. Sometimes, fitting it back causes problems. These common issues can slow your project. Fixing them quickly helps keep your work smooth and neat.
Fix Misaligned Holes
Misaligned holes are a usual problem. They happen when old screws don’t match new holes. Use a drill to widen holes slightly. Check hardware fit before tightening screws. Align holes carefully to avoid damage.
Replace Stripped Screws
Stripped screws lose their grip and slip. Swap them for new screws of the same size. Use a screwdriver with a good grip. Turn screws slowly to avoid stripping again. This keeps hardware secure and steady.
Address Loose Hardware
Loose hardware wobbles and feels unsafe. Tighten screws firmly without forcing them. Add a small piece of wood or a toothpick in the hole. This fills gaps and gives screws a better hold. Test hardware for firmness before finishing.
Credit: www.homedepot.com
Frequently Asked Questions
How Do You Remove Old Cabinet Hardware Safely?
To remove old cabinet hardware, use a screwdriver to unscrew the fasteners carefully. Avoid damaging the cabinet surface by applying gentle pressure and working slowly. Keep screws and hardware organized for reuse or replacement later.
Can You Reuse Old Cabinet Hardware On New Cabinets?
Yes, you can reuse old cabinet hardware if it fits new cabinets. Ensure screws align with new holes. Clean and polish hardware before installation for a refreshed look. Reusing hardware saves money and preserves vintage charm.
What Tools Are Needed To Install Old Cabinet Hardware?
You need a screwdriver, measuring tape, pencil, drill, and screws. Measure and mark hole placements accurately. Drill pilot holes if necessary, then fasten hardware securely. These tools ensure a smooth and precise installation process.
How Do You Align Old Cabinet Hardware Correctly?
Measure and mark exact positions on cabinet doors or drawers. Use a template or ruler for consistency. Drill pilot holes if needed. Align hardware with marks and tighten screws evenly for a balanced look and proper function.
Conclusion
Putting on old cabinet hardware can bring charm back to your space. Take time to clean and check each piece well. Use the right tools to avoid damage. Align screws carefully for a firm fit. Enjoy the unique look old hardware adds to your cabinets.
Small steps make a big difference. You can refresh your cabinets without buying new ones. Try it yourself and see how much it improves your room. Simple, easy, and satisfying.