Are you struggling to install cabinet hardware perfectly every time? Using a cabinet hardware template can change the game for you.
It saves you time, reduces mistakes, and makes your cabinets look professional. But how do you use one correctly? This guide will walk you through the step-by-step process, with clear tips and tricks inspired by popular YouTube tutorials. By the end, you’ll feel confident and ready to upgrade your cabinets like a pro.
Keep reading to unlock the secret to flawless cabinet hardware installation!
Choosing The Right Template
Choosing the right cabinet hardware template is key for a smooth project. The right template helps place handles and knobs perfectly. It saves time and avoids mistakes. Picking the best template depends on your cabinet style and personal needs.
Types Of Cabinet Hardware Templates
Templates come in various types. Some have fixed hole patterns for standard handles. Others are adjustable to fit different hardware sizes. Some templates include measurements for spacing between holes. Choose one that matches your hardware type and cabinet design.
Materials And Durability
Templates are made from plastic, metal, or wood. Plastic templates are lightweight and easy to use. Metal templates last longer and stay accurate after many uses. Wooden templates are less common but can be sturdy. Consider how often you will use the template before choosing.
Where To Buy Templates
Cabinet hardware templates can be bought online or at local stores. Home improvement stores usually have a good selection. Online shops offer more variety and customer reviews. Check product details to ensure the template fits your hardware size.
Gathering Necessary Tools
Gathering the right tools is the first step to using a cabinet hardware template. Having the correct tools ensures accurate placement and a smooth process. Preparing your workspace with these tools saves time and avoids mistakes.
Basic Tools Required
Start with a tape measure to mark exact distances on cabinet doors and drawers. A pencil helps you make clear, light marks that you can erase if needed. Use a drill with the right drill bit size to make holes for screws. A screwdriver is necessary to attach the hardware securely. Lastly, keep the cabinet hardware template itself ready for precise hole placement.
Optional Tools For Precision
A level helps keep your hardware straight on all pieces. Clamps can hold the template steady while you mark or drill. A center punch creates a small dent, guiding the drill bit to prevent slipping. A ruler or square aids in double-checking measurements. These tools improve accuracy but are not mandatory for simple projects.
Preparing The Cabinet Surface
Preparing the cabinet surface is an important first step before installing cabinet hardware. A clean and well-measured surface helps ensure the hardware fits perfectly. This preparation saves time and prevents mistakes during installation.
Taking your time with this step makes the whole process smoother. It also helps keep your cabinets looking neat and professional.
Cleaning And Measuring
Start by cleaning the cabinet surface with a soft cloth. Remove dust, grease, and dirt. A clean surface helps the template stick better and gives accurate marks.
Next, measure the area where the hardware will go. Use a tape measure or ruler. Check both width and height carefully. Mark these points lightly with a pencil.
Measure twice to avoid errors. Accurate measurements make drilling holes easier and precise.
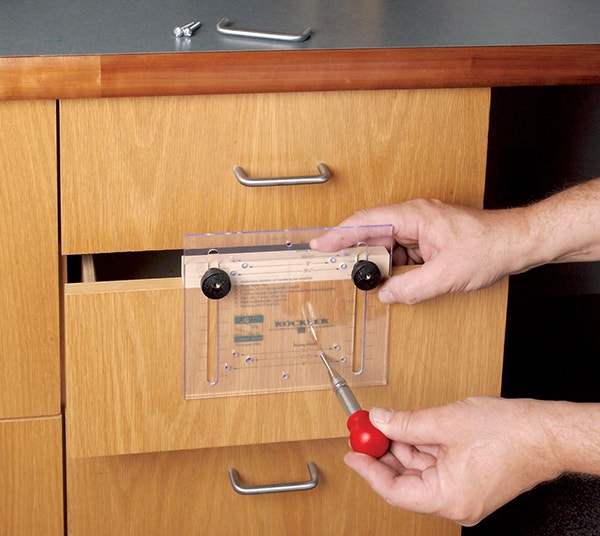
Marking Drill Points
Place the cabinet hardware template on the cleaned surface. Align it with your measured marks. Hold the template steady to prevent slipping.
Use a sharp pencil or awl to mark drill points through the template holes. These marks guide your drill and keep holes straight.
Check the marks before drilling. Clear and precise points help avoid mistakes and damage to the cabinet.
Credit: truepositiontools.com
Using The Template Step-by-step
Using a cabinet hardware template makes installing handles and knobs easier. Follow these clear steps to place the template correctly and drill holes in the right spots. This guide breaks down the process into simple tasks. You will learn how to align, secure, and drill safely using the template.
Aligning The Template
Start by placing the template on the cabinet door or drawer. Match the edges carefully with the cabinet’s surface. Check the measurements on the template to fit your hardware size. Make sure the template is straight and centered. This ensures the holes will line up perfectly with your handles or knobs.
Securing The Template
Hold the template firmly to prevent movement. Use painter’s tape or clamps to keep it in place. Avoid shifting while marking or drilling. Securing the template keeps the holes precise and consistent. Double-check the template position before moving to the next step.
Drilling Holes Safely
Use a drill bit that matches the hardware screws. Start with a small bit for a pilot hole if needed. Keep the drill steady and perpendicular to the cabinet surface. Drill slowly to avoid splintering the wood. Wear safety glasses and clear the area of dust. Take your time to make clean, accurate holes.
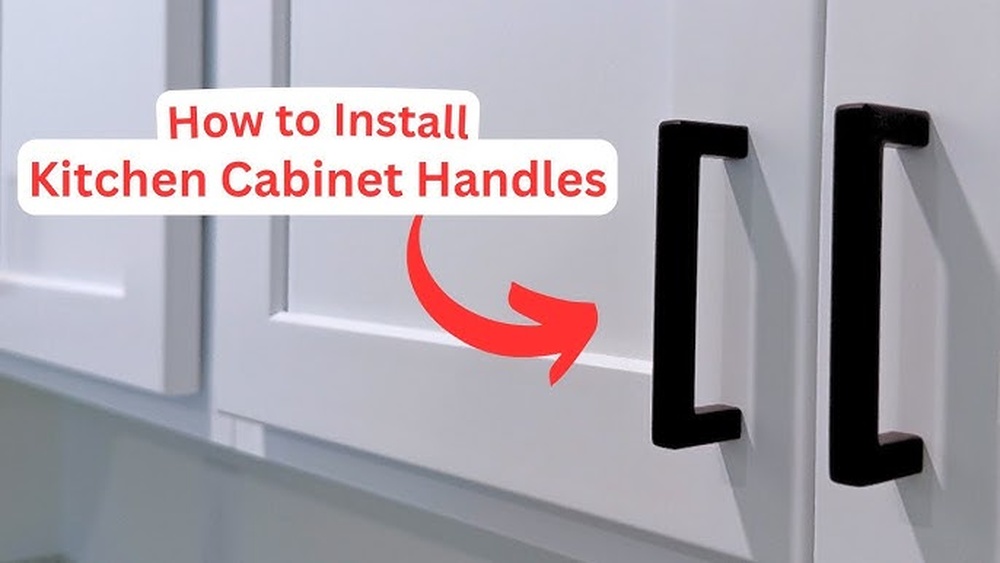
Installing Cabinet Hardware
Installing cabinet hardware can change the look of your kitchen or bathroom. It is a simple way to update old cabinets and add style. Using a cabinet hardware template helps you place handles and knobs perfectly. This makes the job easier and faster.
Follow these steps to install your cabinet hardware correctly. The right tools and careful measuring lead to great results. Let’s explore how to attach handles and knobs and ensure a proper fit.
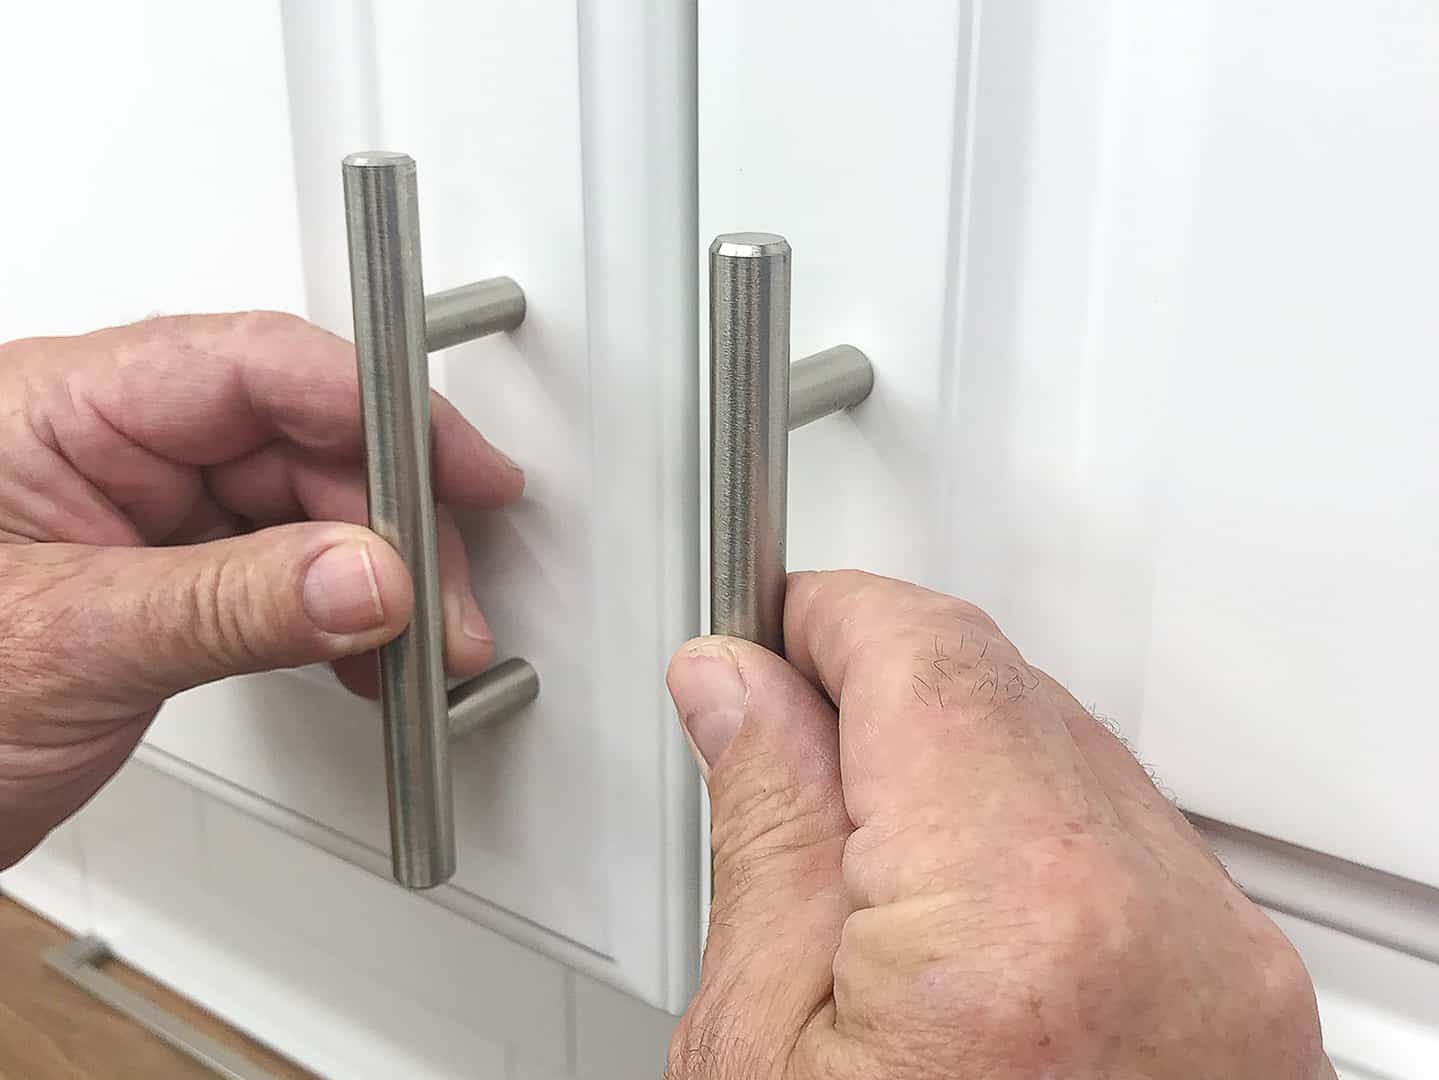
Attaching Handles And Knobs
First, choose the right hardware for your cabinets. Handles and knobs come in different shapes and sizes. Hold the template on the cabinet door or drawer front. Mark the holes with a pencil through the template. Use a drill to make holes where you marked. Then, insert screws from inside the cabinet. Attach the handle or knob on the front side. Tighten screws with a screwdriver until secure. Avoid overtightening to prevent damage.
Ensuring Proper Fit
Check that the hardware sits flat against the surface. Make sure the screws are straight and not loose. Test the handle or knob by pulling gently. It should feel sturdy and not wiggle. Adjust if needed by loosening screws slightly. Re-tighten when everything fits well. Proper fit ensures comfort and long-lasting use.

Credit: www.youtube.com
Tips For Best Results
Using a cabinet hardware template from YouTube can make your project easier and neater. To get the best results, follow some simple tips. These tips help you avoid mistakes and keep your cabinets looking uniform.
Avoiding Common Mistakes
Start by checking the template size before you use it. Measure twice to make sure holes line up. Use a sharp pencil to mark spots clearly. Avoid rushing the drilling process; slow and steady works best. Keep the template steady to prevent slips. Always test on a scrap piece of wood first. This prevents damage to your cabinets.
Maintaining Consistency Across Cabinets
Place the template in the same spot on each door or drawer. Use clamps to hold the template steady if possible. Mark all holes before drilling any. Double-check each mark for accuracy. Use the same drill bit size to keep holes uniform. Consistent placement makes your cabinets look professional and tidy.
Troubleshooting Common Issues
Using a cabinet hardware template on YouTube can simplify your project. Still, problems may arise during use. Common issues like misaligned holes and slipping templates can slow you down.
Understanding how to fix these problems saves time and improves your results. This section covers simple solutions to the most frequent troubles.
Fixing Misaligned Holes
Misaligned holes happen when the template shifts or is placed unevenly. This causes handles or knobs to look crooked or uneven.
To fix this, first double-check the template placement. Use a ruler or tape measure to confirm equal distances from edges. Mark spots lightly with a pencil before drilling.
If holes are already drilled and misaligned, use wood filler to patch the wrong holes. Let it dry, then sand smooth. Redrill carefully using the template to guide you.
Dealing With Template Slippage
Template slippage occurs when the template moves during marking or drilling. This can cause errors and uneven holes.
Prevent slippage by securing the template firmly. Use painter’s tape or clamps to hold it in place. Check that the template is flat against the cabinet surface.
Work slowly and press the drill or pencil down steadily. Avoid pressing too hard, which can cause the template to shift.
Credit: www.rockler.com
Additional Resources
Finding the right tools can make installing cabinet hardware easier. Additional resources help you learn tips and tricks. They also show different methods to use the cabinet hardware template.
These resources offer clear instructions and visual guides. They are good for beginners and those with some experience. Using them can save time and reduce mistakes.
Recommended Youtube Channels
YouTube has many channels focused on DIY and cabinet hardware. These channels show step-by-step videos on using templates. They explain how to measure, mark, and drill holes accurately.
Some channels also compare different templates and hardware types. Watching these videos helps you understand the process better. You can pause and replay parts to follow along easily.
Helpful Online Guides
Many websites offer free guides on cabinet hardware installation. These guides include pictures and simple instructions. They cover topics like choosing the right hardware and tool safety.
Online guides often include tips for common problems. They help you avoid errors and fix issues quickly. Reading these can build your confidence before starting the project.
Frequently Asked Questions
What Is A Cabinet Hardware Template On Youtube?
A cabinet hardware template on YouTube shows step-by-step guides for installing knobs and pulls accurately. These videos help avoid measuring errors and speed up the process.
How Do I Use A Cabinet Hardware Template Properly?
Place the template on the cabinet door or drawer front. Align holes with your hardware size, then mark drill points for precise installation.
Which Tools Are Needed With A Hardware Template?
You need a drill, screws, a pencil, and the hardware template. These tools ensure accurate hole placement and secure attachment.
Can I Customize Cabinet Hardware Placement With A Template?
Yes, templates often allow adjustable settings to fit your cabinet size and style. This customization ensures a perfect fit for your hardware.
Conclusion
Using a cabinet hardware template saves time and ensures accuracy. Follow the steps shown in the YouTube video carefully. Practice a few times before working on your cabinets. This method helps you place handles and knobs evenly every time. It makes your project look neat and professional.
Keep your tools ready and work in a clean space. Soon, you will feel more confident installing cabinet hardware yourself. Simple tools and clear instructions make the job easier. Try it today and enjoy a better DIY experience.