Are you tired of spending too much time searching for the right fasteners in SolidWorks? Imagine speeding up your design process while ensuring every bolt and screw fits perfectly.
Using smart fasteners in SolidWorks can transform the way you work, making your projects smoother and more efficient. You’ll discover simple steps to harness this powerful feature, saving you time and reducing errors. Ready to take your designs to the next level?
Keep reading to learn how smart fasteners can become your new secret weapon.

Credit: www.youtube.com
Smart Fasteners Basics
Smart fasteners simplify the design process in SolidWorks. They help add bolts, screws, and nuts quickly. These fasteners automatically fit the parts together. This saves time and reduces errors during assembly. Understanding the basics of smart fasteners is key to using them well.
Types Of Smart Fasteners
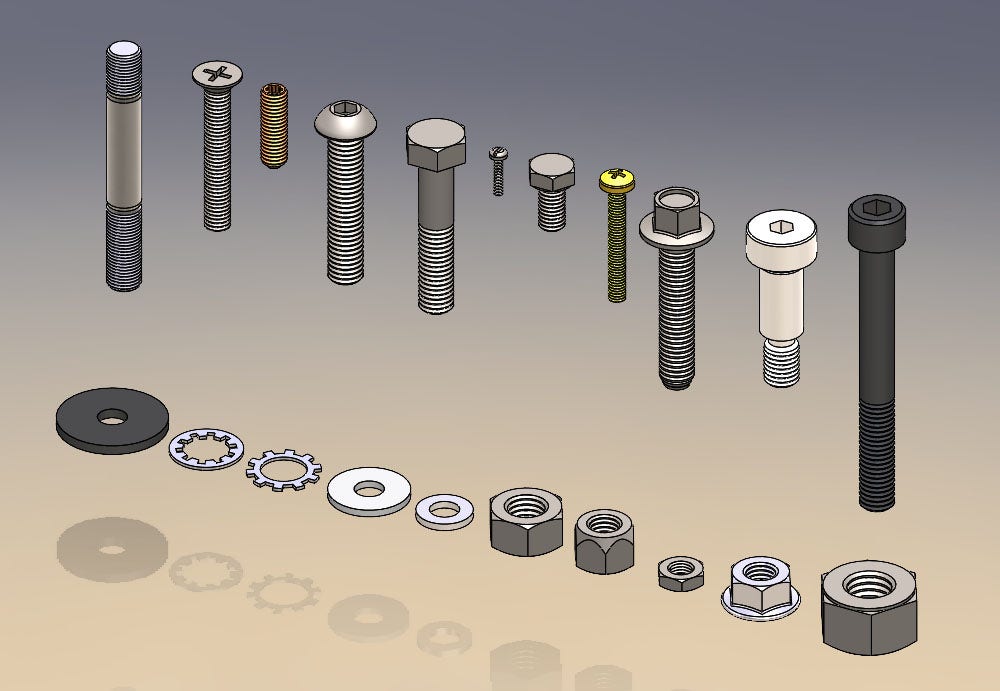
SolidWorks offers different smart fasteners for various needs. Common types include bolts, screws, and nuts. Each type fits specific holes or parts. You can also find washers and rivets. These fasteners adjust size based on the components. This flexibility helps build strong, accurate assemblies.
Benefits In Assembly Design
Smart fasteners speed up the assembly process. They reduce manual work and prevent mistakes. The fasteners automatically place and size themselves. This helps keep designs consistent and reliable. Designers can focus more on other details. It also improves collaboration among team members.
Compatibility With Solidworks
Smart fasteners work smoothly inside SolidWorks software. They integrate with the assembly environment. The fasteners update if you change parts or holes. This keeps the assembly accurate and up-to-date. You can also customize fasteners to fit specific standards. This makes them useful for many projects.
Setting Up Smart Fasteners
Setting up smart fasteners in SolidWorks is the first step to efficient assembly design. Proper setup saves time and reduces errors. It ensures fasteners fit correctly and meet your project needs. Follow simple steps to prepare the fasteners for your design.
Accessing Fastener Library
Open SolidWorks and go to the Toolbox tab. The fastener library stores many types of screws, bolts, and nuts. Choose the right fastener by size and type. The library updates automatically, so you get the latest options. Use the search box to find specific fasteners quickly.
Customizing Fastener Properties
Modify fastener properties to match your design. Change length, diameter, thread type, and material easily. Customization ensures compatibility with your parts. Save these settings for future use. It helps keep your designs consistent and accurate.
Managing Fastener Standards
SolidWorks supports various fastener standards like ISO, ANSI, and DIN. Select the correct standard for your project requirements. Managing standards keeps your design compliant with industry rules. Switch standards anytime without losing your custom settings. This flexibility improves your workflow and design quality.
Inserting Smart Fasteners
Inserting smart fasteners in SolidWorks speeds up your assembly process. These fasteners fit perfectly into holes and adapt to different part designs. You save time and reduce errors by using smart fasteners. Let’s explore how to insert them effectively.
Using Hole Wizard For Placement
Start by creating holes with the Hole Wizard tool. It helps you place holes in exact locations on your part. The holes are ready for smart fasteners without extra adjustments. This method ensures correct size and placement for fasteners.
Select the type of hole, size, and position. SolidWorks automatically sets parameters for fastener fit. This saves time and avoids mistakes during assembly.
Automatic Fastener Selection
SolidWorks can choose the right fastener for your hole. It matches size and type based on the hole’s specifications. The software picks screws, bolts, or nuts that fit perfectly.
This automatic selection reduces manual work. You get consistent and accurate fastener choices. This feature is helpful when working on complex assemblies.
Manual Insertion Techniques
Sometimes, you want to insert fasteners manually. This method gives full control over fastener type and placement. Use the Toolbox or Design Library to pick fasteners.
Drag and drop the fastener into the assembly. Adjust its position and orientation if needed. This approach works well for custom or unique fasteners.
Credit: hawkridgesys.com
Editing And Modifying Fasteners
Editing and modifying fasteners in SolidWorks helps fit your design needs perfectly. Fasteners often need changes to size, material, or placement after adding them. SolidWorks makes these updates simple and clear. You keep your model accurate and ready for production.
Adjusting Size And Length
Change the size of a fastener by selecting it in your assembly. Use the properties panel to set new diameter or length. This adjustment ensures the fastener fits holes and parts properly. Small changes can improve the strength and appearance of your model.
Changing Material And Finish
Update the material of a fastener to match your design requirements. Choose from metals like steel, aluminum, or brass. You can also change the finish to simulate paint or plating. These changes affect the weight and look of your assembly.
Replacing Fasteners In Assemblies
Replace a fastener without deleting the entire part. Select the fastener and use the replace command. Pick a new fastener from the toolbox or your custom library. This saves time and keeps all mates and positions intact.
Smart Fasteners In Assembly
Smart fasteners help simplify assembly design in SolidWorks. They automatically add bolts, screws, or nuts to your model. This saves time and reduces errors. Using smart fasteners makes your assembly look more realistic and works better.
These fasteners adjust to the parts they connect. They change size or type based on the holes or faces. This ensures the assembly fits well and moves properly.
Ensuring Proper Fit And Clearance
Smart fasteners check the space around them. They avoid clashes with other parts in the assembly. This helps prevent tight spots or overlaps. You can control clearance settings to match your needs. Proper fit means fewer problems during real-world assembly.
Fastener Pattern And Distribution
Patterns place fasteners evenly along edges or faces. Use linear, circular, or custom patterns to distribute fasteners. This keeps the assembly balanced and strong. Smart fasteners update automatically if you change the pattern size or shape. It saves time and keeps designs consistent.
Using Fasteners With Mates
Mates control how parts move or stay fixed. Smart fasteners work well with mates to lock parts in place. They help align holes and parts accurately. Use mates to limit movement and keep the assembly stable. This makes your model behave like the real object.

Credit: www.youtube.com
Advanced Tips And Tricks
Smart fasteners in SolidWorks save time and improve design accuracy. Advanced tips help you use these tools more effectively. These tricks make your work smoother and reduce errors. Understanding these features can boost your productivity.
Automating Fastener Updates
SolidWorks can update fasteners automatically as your design changes. Set the fasteners to adjust with hole size or part modifications. This avoids manual corrections and saves time. Use the design table or smart features to link updates. Automation keeps your assembly accurate without extra effort.
Integrating With Boms
Fasteners link directly to your Bill of Materials (BOM). SolidWorks can list all fasteners used in your project. This helps track quantities and types easily. Make sure the fastener properties are complete and consistent. Integration with BOMs improves inventory management and ordering.
Troubleshooting Common Issues
Fasteners may not appear or update correctly sometimes. Check mates and references if fasteners behave oddly. Confirm fastener libraries are installed and linked properly. Use rebuild and update commands to fix display problems. Clearing cache or restarting SolidWorks can solve many issues quickly.
Frequently Asked Questions
What Are Smart Fasteners In Solidworks?
Smart Fasteners automatically add standard fasteners to assembly holes. They save time by detecting hole types and sizes. This feature ensures accuracy and consistency in your designs. It simplifies the assembly process, especially for complex models.
How To Enable Smart Fasteners In Solidworks?
Go to the Assembly tab and click on Smart Fasteners. Enable the option to automatically add fasteners to holes. Adjust settings for hole detection and fastener types. This feature works best with standard hole features like countersinks and tap holes.
Can Smart Fasteners Be Customized In Solidworks?
Yes, you can customize Smart Fasteners by selecting preferred fastener types. Adjust size, length, and thread options as needed. You can also exclude certain holes from fastener insertion. Customization ensures your assembly matches design specifications perfectly.
Do Smart Fasteners Update With Assembly Changes?
Smart Fasteners automatically update when assembly holes change. If you add or remove holes, fasteners will adjust accordingly. This dynamic update saves manual effort and keeps your model accurate. It improves overall design efficiency.
Conclusion
Smart fasteners in SolidWorks save time and improve design accuracy. They fit easily into assemblies and reduce errors. Using them helps keep projects organized and consistent. Start with simple setups and explore more options as you go. Practice often to build confidence and skill.
Smart fasteners make your designs cleaner and easier to manage. Try these tips to enhance your SolidWorks experience today.

