Are you tired of dull cabinet hardware that drags down the look of your entire room? Imagine transforming your cabinets with a stunning gold finish that instantly adds warmth and elegance.
Painting your cabinet hardware gold is easier than you think, and you don’t need to hire a professional or spend a fortune. In this guide, you’ll discover simple steps to give your hardware a fresh, luxurious look that will make your space shine.
Ready to learn how to do it yourself and impress everyone with your stylish upgrade? Keep reading to unlock the secrets of painting cabinet hardware gold like a pro.
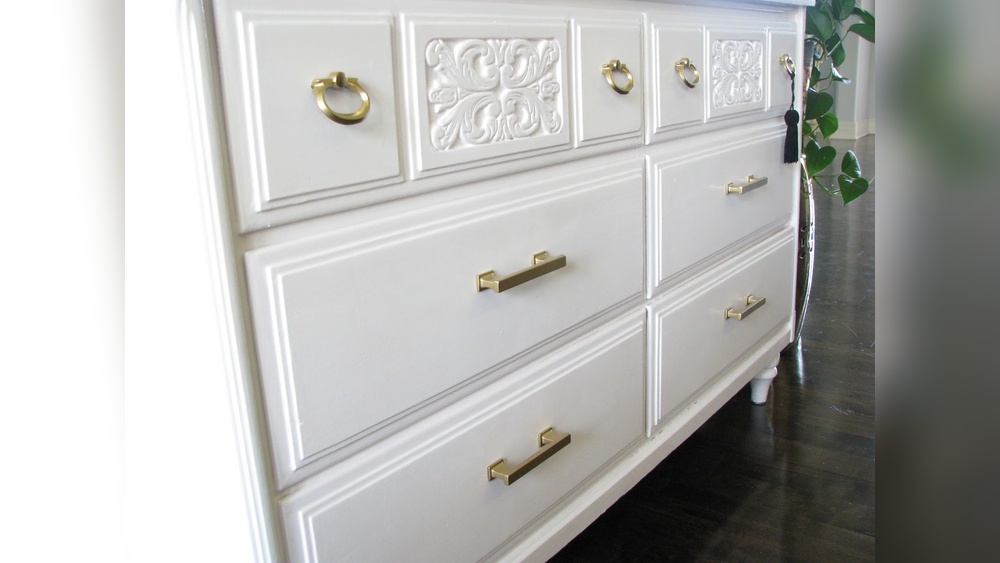
Choose The Right Hardware
Picking the right cabinet hardware makes a big difference. It sets the style and feel of your cabinets. The right pieces also ensure the paint sticks well and lasts long. Focus on materials, shapes, and sizes that suit your space and painting plan.
Choosing hardware with smooth surfaces helps the gold paint look shiny and clean. Avoid very textured or detailed hardware that might be hard to paint evenly. Consider the finish before painting. Some metals need extra prep to hold paint better.
Material Matters
Metal hardware works best for painting gold. Brass, zinc, or stainless steel handle paint well. Plastic or wood hardware may not hold paint as long. Choose metals that do not rust easily. This keeps the finish fresh and bright.
Simple Shapes Work Best
Pick hardware with simple shapes and clean lines. Round or square knobs and straight handles are easier to paint. Complex designs trap paint and cause uneven coverage. Simple shapes give a modern, neat look after painting.
Right Size For Your Cabinets
Measure your cabinet doors and drawers before choosing hardware. Small hardware suits small cabinets. Large handles fit bigger cabinets better. The right size keeps your cabinets balanced and stylish. Avoid hardware too big or too small for the space.
Credit: www.rustoleum.com
Gather Necessary Supplies
Gathering the right supplies is the first step to paint cabinet hardware gold. Having all tools ready makes the process smooth and fast. It also helps you get a neat and long-lasting finish.
Before starting, check each item carefully. Make sure you have everything needed. This prevents interruptions while painting.
Cleaning Materials
Clean hardware before painting. Use warm water and mild soap. A soft cloth or brush removes dirt and grease. Cleaning ensures paint sticks well.
Sandpaper
Lightly sanding the hardware helps paint adhere better. Use fine-grit sandpaper to avoid scratches. Sand all surfaces evenly for the best result.
Primer
Primer creates a smooth base for gold paint. Choose a primer made for metal surfaces. It prevents rust and improves paint durability.
Gold Spray Paint
Select a high-quality gold spray paint. Look for paint designed for metal. This gives a shiny and even finish.
Protective Gear
Wear gloves and a mask to stay safe. Gloves protect your hands from paint. A mask prevents inhaling fumes during spraying.
Drop Cloth Or Newspaper
Cover your work area with a drop cloth or newspaper. This keeps surfaces clean from paint overspray. It also makes cleanup easier.
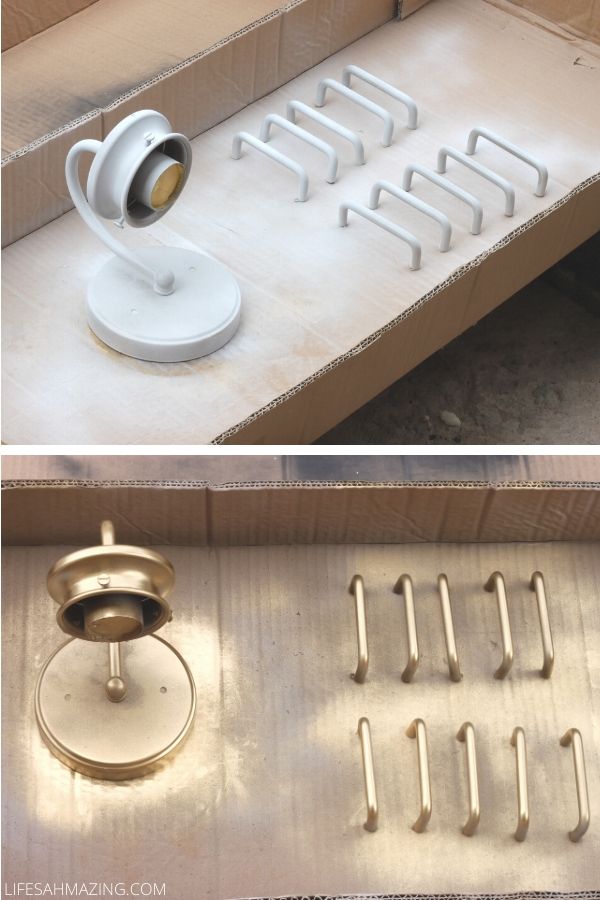
Prepare The Workspace
Preparing the workspace is the first step in painting cabinet hardware gold. A clean, organized space makes the job easier and the results better. This step helps avoid mess and damage to other surfaces. Focus on creating a safe and tidy area before starting the painting process.
Clear The Area
Remove all items near the cabinets. Clear countertops, drawers, and floors around your workspace. This prevents paint from getting on other objects. A clear area also gives you more room to work comfortably.
Protect Surfaces
Cover countertops and floors with a drop cloth or newspaper. Use painter’s tape on edges that need protection. This stops paint splatters and drips from ruining surfaces. Protecting surfaces saves time on cleanup later.
Gather Tools And Materials
Collect all painting supplies before you begin. Get sandpaper, primer, spray paint, gloves, and brushes ready. Having everything at hand keeps the process smooth and fast. No need to stop and search for tools mid-project.
Ensure Good Lighting And Ventilation
Set up bright lights to see details clearly. Open windows or use fans for fresh air. Proper lighting helps spot missed spots. Good airflow removes paint fumes, keeping the air safe to breathe.
Credit: www.lifesahmazing.com
Clean And Remove Old Finish
Cleaning and removing the old finish is the first step to paint cabinet hardware gold. It helps the paint stick better and last longer. Dirt, grease, and old paint or varnish must be removed for a smooth surface. This step prepares the hardware for a fresh, shiny gold look.
Gather Cleaning Supplies
Start by collecting all needed supplies. Use warm water, mild soap, a soft cloth, and a small brush. Have gloves and protective eyewear ready. Also, prepare a paint stripper if the old finish is thick or stubborn.
Remove Hardware From Cabinets
Take the hardware off the cabinets carefully. Unscrew handles or knobs and keep screws in a safe place. Removing hardware makes cleaning easier and prevents damage to cabinets.
Wash Hardware Thoroughly
Wash each piece using soap and warm water. Use a soft brush to scrub dirt and grease. Rinse well and dry completely with a clean cloth. This removes surface grime and oils.
Strip Old Finish
Apply paint stripper on hardware if old paint or varnish remains. Follow the instructions on the product label. Let it sit for the recommended time. Use a brush or scraper to remove loosened finish gently.
Sand The Surface
Lightly sand the hardware with fine-grit sandpaper. Sanding removes leftover finish and smooths the surface. Wipe off dust with a damp cloth and let dry.
Sand The Hardware
Start by sanding the hardware gently to remove old paint and shine. This helps the new gold paint stick better and last longer. Sanding creates a smooth surface for a nice, even finish.
Why Sanding Is Important
Sanding cabinet hardware prepares the surface for paint. It removes old finish and smooths rough spots. This helps the paint stick better and last longer. Without sanding, the paint can peel or chip easily.
Tools You Will Need
Use fine-grit sandpaper or a sanding sponge. These tools gently roughen the hardware surface. Avoid coarse sandpaper that can scratch or damage the metal. A small sanding block can help reach tight spots.
How To Sand The Hardware
Start by wiping the hardware clean from dust and dirt. Rub the sandpaper in small circles or back and forth. Focus on all sides, edges, and crevices. Sand just enough to dull the shine and create a rough texture.
Cleaning After Sanding
After sanding, wipe the hardware with a damp cloth. Remove all dust and particles. Let it dry completely before painting. Clean hardware ensures smooth, even paint coverage.
Apply Primer
Applying primer is a key step before painting cabinet hardware gold. It helps the paint stick better and last longer. Without primer, the paint may peel or chip easily. Primer also gives a smooth base for the gold paint to shine.
Taking time to apply primer correctly ensures a neat, professional look. It protects the hardware from rust and wear. This step is especially important for metal surfaces like cabinet handles and knobs.
Choose The Right Primer
Pick a primer made for metal surfaces. Look for one that says it works on metal or is multipurpose. A spray primer is often easier for small hardware. It covers all the tiny spots well.
Clean And Dry Hardware Before Priming
Remove dirt and grease first. Use soap and water or rubbing alcohol. Let the hardware dry completely. Clean surfaces help the primer stick better and prevent bumps.
Apply Primer In Thin, Even Coats
Spray or brush the primer lightly. Thin coats dry faster and avoid drips. Hold the spray can about 6-8 inches away. Let each coat dry before adding another one.
Let Primer Dry Fully
Wait at least 30 minutes after priming. Check the label for exact drying times. Dry primer creates a strong base for your gold paint. Don’t rush this step to keep the finish smooth.
Select The Perfect Gold Paint
Selecting the perfect gold paint is key for painting cabinet hardware. The right paint brightens your hardware and lasts longer. It also helps you match your home’s style easily.
Choosing gold paint needs care. Many options exist. Some have a shiny finish, while others are more matte or brushed. Picking the best one makes your hardware look professional and fresh.
Types Of Gold Paint
Gold paint comes in spray, brush-on, and metallic liquid forms. Spray paint is quick and smooth. Brush-on paint offers more control. Metallic liquids add extra shine and depth. Pick the type that fits your skill and project size.
Finish Options For Gold Paint
Gold paint finishes vary from glossy to matte and satin. Glossy finishes reflect more light and feel bright. Matte finishes are softer and less shiny. Satin finishes balance shine and softness. Choose a finish that matches your room’s look.
Choosing Paint For Durability
Cabinet hardware faces touch and wear. Use paint designed for metal surfaces. Look for paints with rust protection and long-lasting formulas. Durable paint keeps hardware looking good over time and reduces the need to repaint.
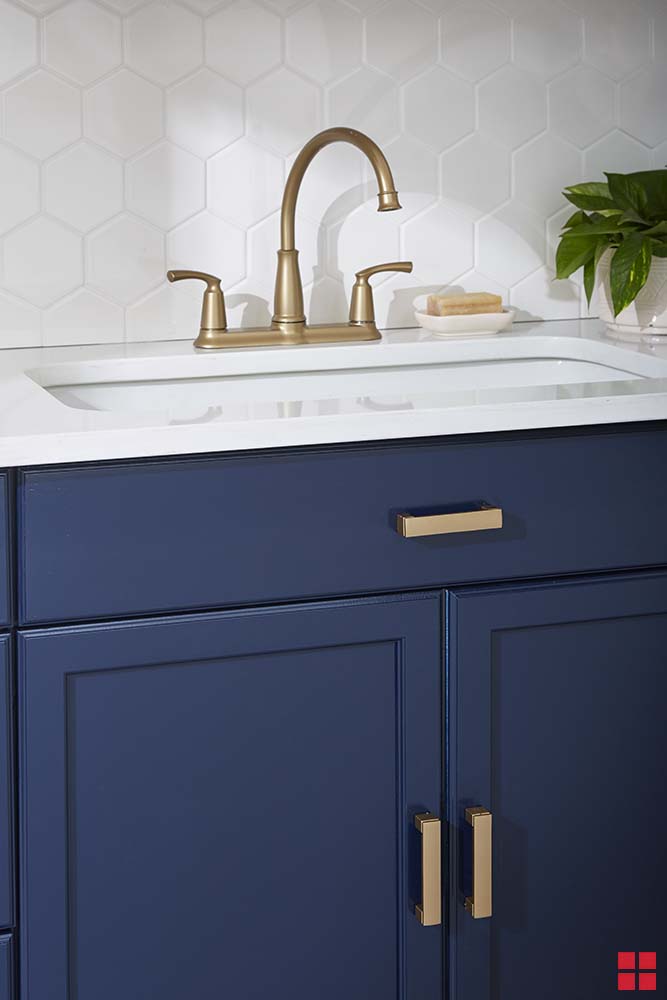
Matching Gold Shades To Your Decor
Gold shades range from bright yellow to warm antique tones. Warm golds give a classic feel. Bright golds add modern sparkle. Consider your room’s colors and style. Pick a shade that blends well with your cabinets and walls.
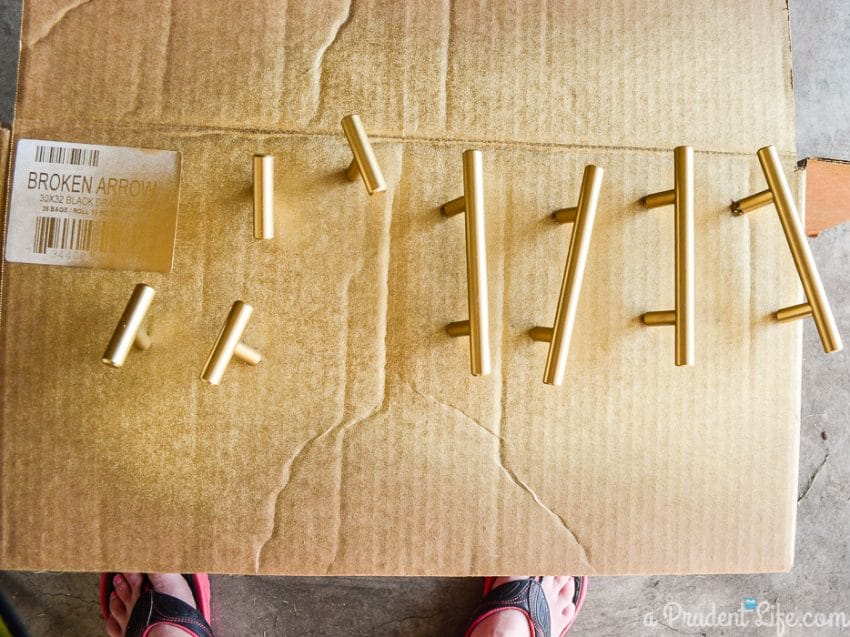
Paint The Hardware
Painting cabinet hardware gold is a great way to refresh your space. It gives old knobs and pulls a fresh, elegant look. Before painting, make sure the hardware is clean and dry. This step helps the paint stick better and last longer.
Apply paint carefully. The right technique makes a big difference. Follow these tips to get a smooth, even finish on your hardware.
Use Thin Coats
Apply paint in thin layers. Thick coats cause drips and uneven texture. Thin coats dry faster and look smoother. Use a small brush or spray for better control. Let each coat dry before adding the next one. This method helps build a strong, shiny surface.
Allow Proper Drying Time
Give the paint enough time to dry fully. Rushing can ruin the finish. Drying time depends on the paint type and room temperature. Wait at least 20 to 30 minutes between coats. After the last coat, let the hardware dry for several hours. Proper drying makes the gold paint last longer and look its best.
Apply Protective Clear Coat
Applying a protective clear coat is a key step after painting cabinet hardware gold. It seals the paint and keeps the shine bright. This layer stops scratches and wear from daily use. Without it, the paint may chip or fade quickly.
The clear coat also adds a smooth, glossy finish. It helps the hardware look new for a long time. This step takes only a few minutes but makes a big difference.
Choose The Right Clear Coat
Select a clear coat made for metal surfaces. Look for options labeled as durable and resistant to scratches. Matte, satin, or glossy finishes are available. Pick one that matches your style and kitchen look.
How To Apply The Clear Coat
Make sure the gold paint is dry before applying. Use a clean brush or spray for even coverage. Apply thin, light layers instead of one thick coat. Let each layer dry fully before adding the next.
Drying And Curing Time
Allow the clear coat to dry in a dust-free area. It usually takes about 1 to 2 hours to dry. Full curing may take 24 hours or longer. Avoid touching or installing hardware too soon.
Credit: www.polishedhabitat.com
Reattach Hardware To Cabinets
Reattaching hardware to cabinets is the final step in your painting project. It brings your cabinets back to life with a fresh, gold finish. This step needs care to keep your new paint intact and show off your shiny hardware.
Take your time during reattachment. Proper handling prevents scratches and keeps everything tight and secure. Follow these simple steps to ensure your hardware looks great and works well.
Prepare The Cabinet Surface
Before attaching, clean the cabinet surface well. Remove dust and grease with a soft cloth. This helps the hardware sit flat and hold firmly. Avoid using harsh cleaners that might damage the paint.
Align The Hardware Correctly
Match the hardware to the original holes. Check that screws line up perfectly. Misaligned hardware can scratch the paint or not fit properly. Use a gentle touch to avoid chipping the gold finish.
Use The Right Screws
Use screws that came with the hardware or similar size. Too long or short screws can cause damage or loosen over time. Screw them in slowly and stop once snug. Over-tightening can crack the paint or wood.
Check For Stability
After attaching, gently test the hardware by pulling or twisting. It should feel firm and not move. Loose hardware needs tightening, but be careful not to harm the paint. Secure hardware keeps cabinets functional and stylish.
Maintain Painted Hardware
Maintaining painted cabinet hardware is key to keeping its gold finish bright and fresh. Proper care helps the paint last longer and prevents chips or scratches. Small steps can protect your hardware and keep it looking new.
Clean Hardware Gently
Use a soft cloth to wipe the hardware regularly. Avoid harsh chemicals or abrasive cleaners. Mild soap with water works well. Dry the hardware completely after cleaning. This stops water spots and paint damage.
Avoid Excessive Moisture
Keep the hardware dry as much as possible. Water can cause paint to peel or fade. After cleaning, always dry the handles and knobs. In kitchens, wipe any spills quickly to protect the finish.
Handle With Care
Be gentle when opening and closing cabinets. Rough use can chip the paint. Try not to bang or scrape the hardware. Soft touches extend the life of the gold paint.
Touch Up When Needed
Keep some gold paint for small repairs. Fix chips or scratches soon after they appear. Lightly sand the spot before painting. This keeps the hardware looking smooth and shiny.
Apply A Clear Topcoat
Use a clear sealant to protect the paint. A topcoat adds extra shine and durability. Reapply the topcoat every few months for best results. This step helps keep the gold finish bright.
Frequently Asked Questions
How Do I Prep Cabinet Hardware For Gold Paint?
Clean hardware with soap and water, then dry it completely. Lightly sand the surface to remove any finish. Wipe off dust before painting to ensure better paint adhesion.
What Type Of Paint Is Best For Gold Hardware?
Use spray paint designed for metal surfaces. Choose a gold metallic or brass finish for a realistic look. Spray paint provides smooth, even coverage and dries quickly.
Can I Paint Cabinet Hardware Without Removing It?
Removing hardware is recommended for even coverage and easier painting. However, you can paint in place by taping around hardware carefully to protect cabinets. Removing hardware yields better, longer-lasting results.
How Many Coats Of Gold Paint Should I Apply?
Apply 2-3 thin coats of paint, allowing each to dry fully. Thin layers prevent drips and create a smooth finish. Finish with a clear topcoat for durability.
Conclusion
Painting cabinet hardware gold adds a fresh, stylish look to any room. The process is simple and affordable. With the right tools and steps, anyone can do it. Take your time to prep and paint carefully. Let the hardware dry fully before using it again.
This small change can brighten up your cabinets quickly. Enjoy the new shine and elegance in your space. Try this easy project to refresh your home today.


