Are you looking to control several LED lights with just one switch? It might sound tricky, but it’s easier than you think.
Imagine turning on all your lights with a single flick—no more running around the room or installing multiple switches. In this guide, you’ll learn simple steps to connect multiple LED lights to one switch safely and effectively. Keep reading, and by the end, you’ll have the confidence to brighten up your space exactly the way you want.

Credit: diy.stackexchange.com
Choosing The Right Led Lights
Choosing the right LED lights is important for a smooth setup. The type of LED light affects brightness and energy use. Picking the right voltage and wattage helps avoid electrical problems. Understanding these details keeps your lights working well and safe.
Types Of Led Lights
LED lights come in many forms. Common types include strip lights, bulbs, and panels. Strip lights are flexible and good for decoration. Bulbs replace old bulbs in lamps and fixtures. Panels spread light evenly for rooms or workspaces. Choose the type that fits your space and style. Each type has different brightness levels and power needs.
Voltage And Wattage Considerations
LED lights use specific voltage and wattage. Voltage is the electric force that powers the light. Wattage shows how much energy the light uses. Check that all LED lights match the power source. Using the wrong voltage can cause flickering or damage. Wattage helps calculate how many lights a switch can handle. Know these numbers before connecting multiple LEDs to one switch. This prevents overload and keeps lights safe.

Credit: www.youtube.com
Selecting The Appropriate Switch
Choosing the right switch is key to controlling multiple LED lights easily. A good switch makes your lighting setup safe and efficient. You must understand switch types and ratings before starting your project. This knowledge helps avoid electrical issues and ensures smooth operation.
Single-pole Vs. Three-way Switches
A single-pole switch controls lights from one location. It is simple and common for most rooms. Use it when you want to turn all LED lights on or off from one place.
A three-way switch lets you control lights from two different spots. Good for hallways or large rooms with two entrances. It requires special wiring but adds convenience. Choose based on how many control points you need.
Switch Ratings And Compatibility
Check the switch’s voltage and current ratings before buying. The switch must support the total wattage of your LED lights. Using a switch with low ratings can cause overheating or failure.
LED lights need compatible switches to avoid flickering or damage. Some switches are designed for LED loads. Look for “LED-compatible” or “electronic low voltage” on the label. This ensures smooth and safe light control.
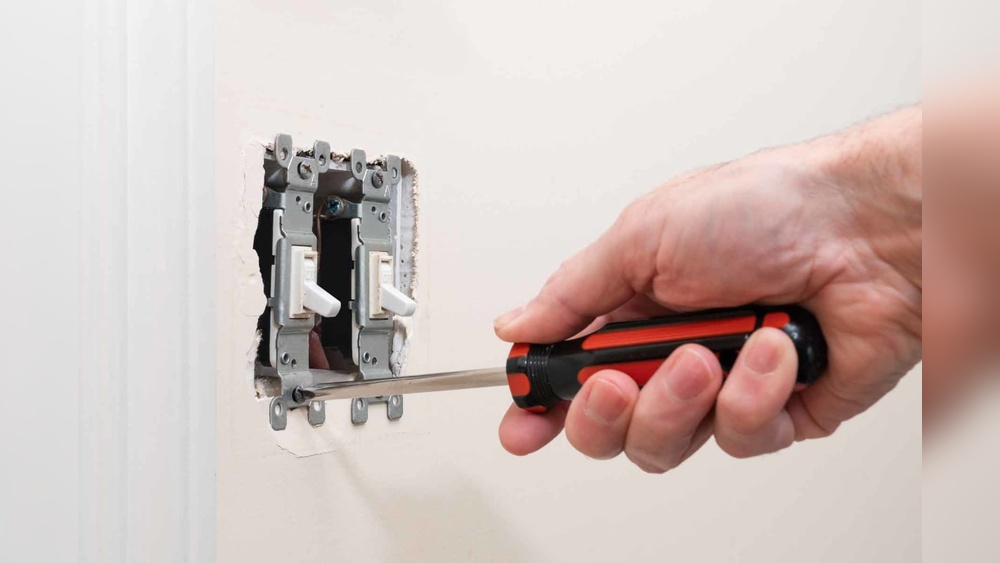
Gathering Necessary Tools And Materials
Starting a project to connect multiple LED lights to one switch needs preparation. Gathering the right tools and materials is the first step. This makes the work easier and safer. Each tool and material has a role in the process. Knowing what you need helps avoid delays and mistakes.
Essential Wiring Tools
To connect LED lights, you need some basic wiring tools. A wire stripper helps remove insulation from wires. This allows for good connections. A screwdriver is needed to tighten screws on the switch and light fixtures. Wire cutters trim wires to the right length. A voltage tester checks if wires carry current. This ensures the power is off before working. Electrical tape insulates wire joints. Wire connectors join multiple wires securely.
Safety Equipment
Safety is important when working with electricity. Wear insulated gloves to protect from shocks. Safety glasses protect your eyes from sparks or debris. Use a sturdy ladder if working on ceilings or high walls. Keep a flashlight nearby in case of power outages. Make sure the work area is dry and clean. Avoid loose clothing that might catch on tools or wires.
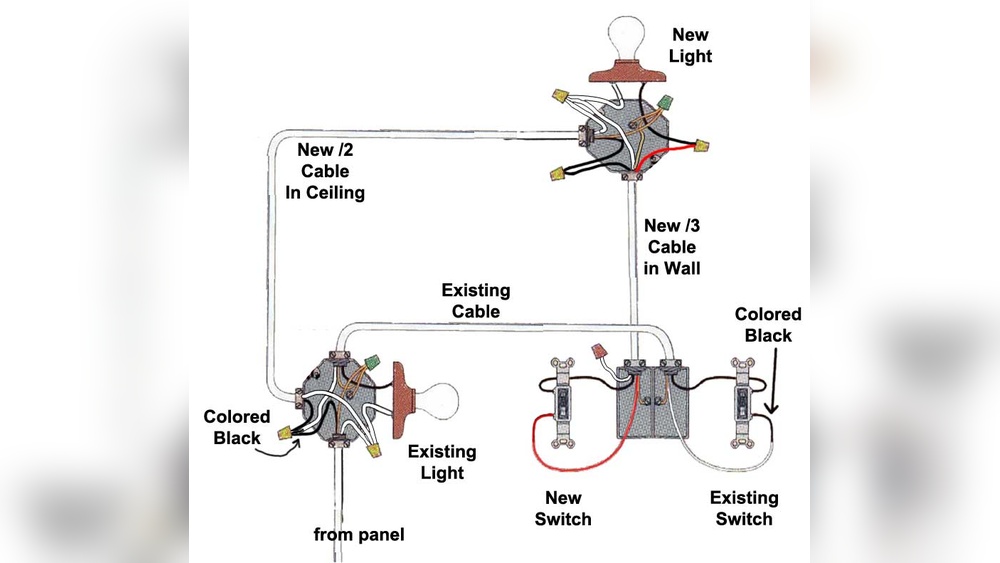
Planning The Wiring Layout
Troubleshooting common issues helps keep your LED lights working well. Problems like lights not turning on or flickering can be frustrating. Knowing basic fixes saves time and effort.
Leds Not Lighting Up
Check if the switch is on and connected properly. Look for loose wires or poor connections. Make sure the bulbs are not burnt out. Test the bulbs in another socket to confirm. Ensure the power source is active and working fine.
Flickering Or Dim Lights
Flickering often means a bad connection. Tighten all wire connections and terminals. Dim lights can be due to low voltage. Check if your power supply matches the LED requirements. Replace old or worn-out bulbs for better brightness.
Overloaded Circuits
Too many LEDs on one switch can overload the circuit. This causes tripping or damage. Calculate the total wattage of all LEDs first. Compare it with your switch and circuit capacity. Use multiple switches or circuits for many lights.
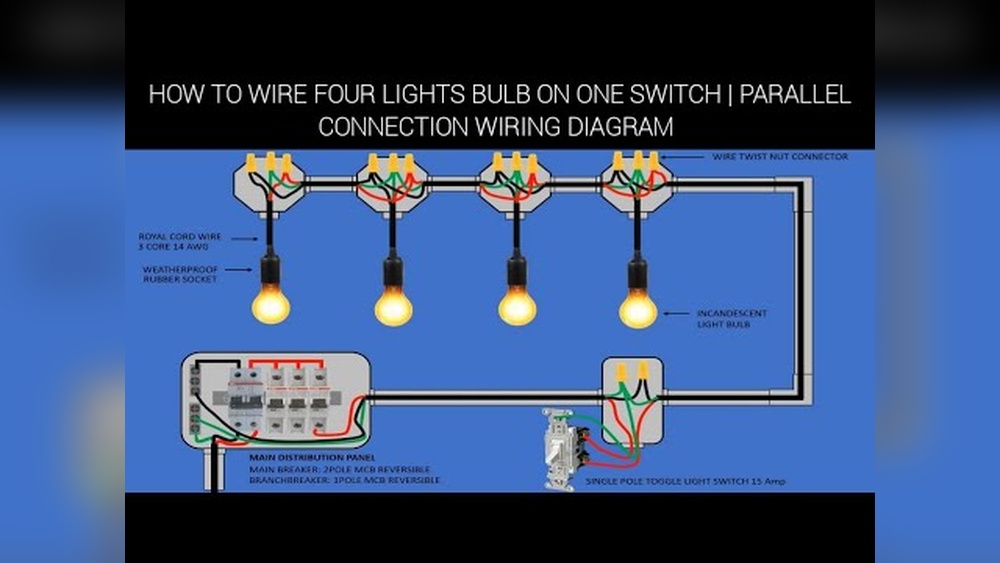
Step-by-step Wiring Process
Enhancing your LED setup makes your space more functional and stylish. It lets you control light levels and create the right mood. You can also add more lights without extra switches. These improvements make your lighting system smarter and easier to use.
Using Dimmers And Controllers
Dimmers help you adjust the brightness of your LED lights. You can make the room bright or soft with a simple turn of a knob or press of a button. Controllers allow you to change colors or set timers for your lights. They give you full control over your lighting without needing to change wiring.
Expanding The Lighting System
You can add more LED lights to one switch safely. Use splitters or connectors designed for LED setups. This keeps the power balanced and prevents overload. Expanding lets you light up bigger areas or different rooms with the same switch. It saves money and reduces clutter from multiple switches.
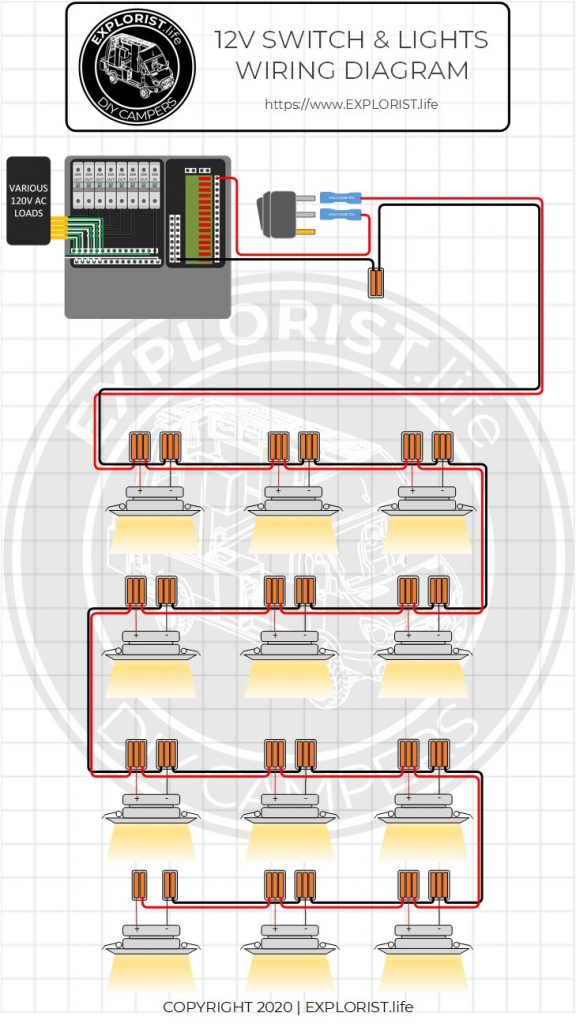
Credit: explorist.life
Troubleshooting Common Issues
Working with electrical projects requires care and attention. Safety is important to avoid accidents and damage. This section covers essential safety tips for connecting multiple LED lights to one switch. Follow these tips to keep yourself and your home safe.
Avoiding Electrical Hazards
Always turn off the power before starting any electrical work. Use a voltage tester to check that wires have no current. Wear insulated gloves to protect your hands. Avoid working in wet or damp areas. Use tools with insulated handles to prevent shocks. Double-check all connections before turning the power back on. Keep wires neat to avoid short circuits. Use proper wire connectors and do not twist wires loosely. Never overload the switch or circuit with too many lights.
When To Consult A Professional
Seek help from a licensed electrician for complex wiring tasks. If you see damaged wires or signs of burning, stop work immediately. Contact a professional to inspect and fix the problem. Call an expert if your home’s electrical system is old or unsafe. Hire a professional if local codes require permits for your project. When unsure about any step, consulting a professional prevents accidents and costly repairs.
Frequently Asked Questions
How Do I Wire Multiple Led Lights To One Switch?
Connect all LED lights in parallel to the switch. Use proper gauge wire for safety and ensure the power source matches the lights’ voltage. This setup allows simultaneous control of all LEDs with one switch.
Can I Use One Switch For Different Led Light Types?
Yes, you can use one switch for different LED types if they share the same voltage and current requirements. Ensure the switch’s rating supports the total load to prevent electrical issues.
What Wire Gauge Is Best For Multiple Led Lights?
Use 14 or 16-gauge wire for typical household LED lighting circuits. Thicker wires reduce voltage drop and ensure safety when connecting multiple LED lights to one switch.
Is It Safe To Connect Many Leds To A Single Switch?
Yes, it’s safe if the total current does not exceed the switch’s rating. Proper wiring and circuit protection devices like fuses or breakers are essential for safety.
Conclusion
Connecting multiple LED lights to one switch is easy with the right steps. First, plan your wiring carefully to ensure safety. Use the correct wires and tools for a secure connection. Test the lights before finalizing everything. This setup saves space and makes controlling lights simple.
You can brighten up your room with just one switch. Remember, safety always comes first when handling electrical work. With patience and care, your LED lights will work perfectly together. Give it a try and enjoy the convenience it brings.