Have you ever looked at a wall hook and wondered how to take it down without leaving a mess? Removing a wall hook might seem simple, but if done wrong, it can damage your walls and leave you with extra work.
You want a smooth, clean wall and an easy process—right? In this guide, you’ll discover the best tips and tricks to remove a wall hook quickly and safely. Keep reading, and you’ll save time, avoid frustration, and get your walls looking perfect again.
Tools You’ll Need
Removing a wall hook requires the right tools. Having these tools makes the task easier and protects your walls. Some tools you probably have at home. Others might be helpful for tricky hooks.
Common Household Items
A flathead screwdriver is great for lifting hook edges gently. A pair of pliers helps pull out stubborn hooks. Use a putty knife to slide under the hook base. A hairdryer softens any paint or adhesive around the hook. Keep a cloth handy to clean up any dust or debris.
Specialized Tools For Stubborn Hooks
For tough hooks, a stud finder detects nails or screws behind walls. A wall anchor removal tool makes pulling anchors easier. A small pry bar can lift hooks that are deeply set. Use safety goggles to protect your eyes during removal. These tools help avoid wall damage and ease removal.
Preparing The Area
Preparing the area before removing a wall hook makes the process easier and safer. Taking time to get ready helps prevent damage and keeps the space clean. Follow simple steps to protect your wall and surroundings.
Clear The Surroundings
Remove any furniture or objects near the wall hook. This gives you plenty of space to work freely. Clear the floor below to catch any falling debris. Keep pets and children away to avoid accidents. A tidy area helps you focus on the task.
Protect The Wall Surface
Place a soft cloth or painter’s tape around the hook. This shields the wall from scratches and marks. Use a drop cloth on the floor to catch dust or paint chips. Take care not to press too hard on the wall. Protecting the surface saves you time on repairs later.
Removing Different Types Of Hooks
Removing wall hooks can be simple or tricky, depending on the type. Each hook has a different way to come off without damaging your wall. Knowing the right method saves time and keeps your walls clean.
Adhesive Hooks
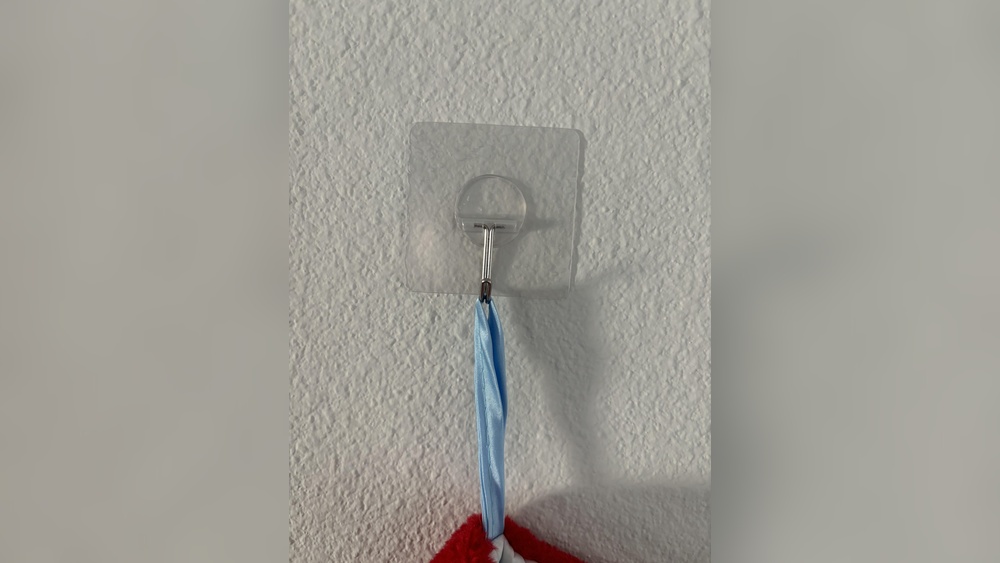
Adhesive hooks stick with a strong glue strip. To remove, gently pull the hook away from the wall. Do not yank it hard. Instead, hold the hook and slowly stretch the adhesive strip downwards. This pulls the glue off without breaking the paint or wall surface.
If the hook is hard to remove, use a hairdryer. Warm the glue for a few seconds to soften it. Then try pulling the hook again. This method works well on smooth walls.
Nail And Screw Hooks
Nail and screw hooks use small metal pieces to hold weight. To remove, grab the hook and pull it out gently. If the hook has a screw, use a screwdriver to turn it counterclockwise until it comes free.
After removal, you may see small holes. Fill them with wall putty or spackle. Let it dry and then sand it smooth. This prepares the wall for painting or new hooks.
Command Strips
Command strips are popular for damage-free hanging. To remove, hold the hook and find the strip tab at the bottom. Slowly pull the tab straight down, stretching it along the wall. This loosens the adhesive and lets the strip come off cleanly.
Do not pull the strip out or sideways. This can damage the paint or wall surface. Pulling straight down is key to safe removal.

Credit: www.youtube.com
Techniques For Damage-free Removal
Removing a wall hook without damaging the paint or wall surface takes care and the right methods. Using proper techniques helps avoid holes, tears, or leftover marks. It also keeps your wall clean and ready for new decor. Below are three easy ways to remove a wall hook gently and safely.
Using Heat To Loosen Adhesive
Heat helps soften the glue or tape behind the hook. Use a hairdryer on low heat and aim it at the hook. Warm the area for about 30 seconds. The heat makes the adhesive easier to pull off. Be careful not to burn the wall or the hook. Once warm, gently try to pull the hook away.
Slow And Steady Pulling
Pulling the hook slowly reduces wall damage. Hold the hook firmly and pull it straight out. Avoid quick or hard yanks. If it feels stuck, stop and try heating it first. Slow pulling helps avoid paint peeling or drywall damage. Take your time and be patient.
Prying Gently With Tools
Use a flat tool like a butter knife or plastic scraper. Insert it carefully under the hook base. Pry the hook away from the wall slowly. This method helps separate the adhesive without ripping paint. Work bit by bit around the hook. Avoid sharp tools that can dig into the wall.
Fixing Minor Wall Damage
Removing a wall hook often leaves small marks or holes. Fixing this minor damage helps your wall look smooth and clean again. The process is simple and does not need special skills. You can restore your wall’s surface with a few easy steps. This section covers how to fill holes, sand the area, and touch up paint for a neat finish.
Filling Small Holes
Use a small amount of spackling paste or wall filler. Apply it directly into the hole with a putty knife. Press firmly to fill the hole completely. Remove extra filler by scraping it off gently. Let the filler dry as per the package instructions. Drying usually takes 30 minutes to a few hours.
Sanding And Smoothing
After the filler dries, sand the spot lightly. Use fine-grit sandpaper for best results. Sand in a circular motion to blend the repair with the wall. Make sure the surface feels even and smooth. Wipe away dust with a clean, dry cloth. This step prepares the wall for painting.
Touch-up Painting Tips
Choose paint that matches your wall color. Use a small brush or roller for precise application. Apply a thin layer over the repaired area. Let the paint dry completely before adding another coat. Two coats often give the best coverage. Blend the edges carefully to avoid visible lines.
Credit: www.reddit.com
Preventing Future Wall Damage
Preventing damage to your walls is important when using hooks. Small holes and marks can spoil your room’s look. Taking care during hook selection and installation helps keep walls smooth and clean. This saves time and effort on repairs later.
Choosing The Right Hook
Select hooks made for your wall type. Plastic or metal hooks work well on drywall. Use adhesive hooks for tile or glass surfaces. Avoid heavy hooks on weak walls. Match hook size to the item’s weight. This reduces pressure and prevents holes.
Proper Installation Tips
Clean the wall before installing a hook. Dirt or dust weakens the hold. Follow instructions on the hook package. Use a level to place hooks straight. Press hooks firmly but gently. Avoid forcing nails or screws. This keeps the wall intact.
Credit: www.youtube.com
Frequently Asked Questions
How Do I Safely Remove A Wall Hook?
To safely remove a wall hook, first loosen the screws or nails. Gently pull the hook away from the wall. Use a putty knife to ease stubborn hooks. Avoid damaging the wall by working slowly and carefully.
What Tools Do I Need To Remove A Wall Hook?
Common tools include a screwdriver, pliers, and a putty knife. A hairdryer can help soften adhesive hooks. For painted walls, use gentle tools to avoid damage. Having these tools ensures a smooth and safe removal process.
How Can I Repair The Wall After Hook Removal?
Fill holes with spackle or wall filler using a putty knife. Sand the area smooth once dry. Repaint the patched spot to match the wall color. This restores the wall to its original look efficiently.
Can I Reuse A Wall Hook After Removal?
Yes, if the hook is undamaged, you can reuse it. Clean any adhesive residue before reapplying. Ensure new mounting surfaces are stable. Reusing hooks saves money and reduces waste effectively.
Conclusion
Removing a wall hook does not have to be hard. Take your time and use the right tools. Gently pull or twist the hook to avoid damage. Fill any holes with putty for a smooth finish. Sand the area lightly before painting.
This keeps your wall looking fresh and clean. Small steps make a big difference. Try these tips next time you want to remove a wall hook. Simple and careful work saves you time and effort.