Is your floor jack making that annoying lick sound when you use it? It’s frustrating, especially when you need it to work smoothly and safely.
You might wonder what’s causing the noise and how to fix it quickly without spending a fortune. In this guide, you’ll discover simple steps to stop that floor jack lick and get your tool back to perfect working order. Keep reading—you’ll be surprised how easy it can be to solve this common problem yourself.
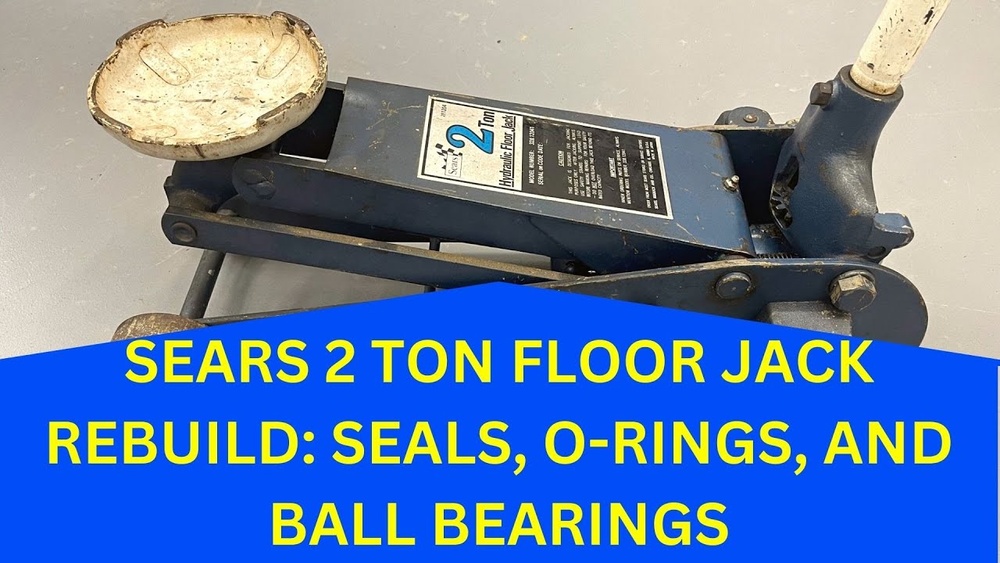
Common Causes Of Floor Jack Leak
Floor jacks are essential for lifting vehicles safely. A leak in the floor jack can cause it to lose pressure. This stops the jack from working properly. Knowing the common causes of a floor jack leak helps you fix it fast. Here are the main reasons your floor jack might leak hydraulic fluid.
Worn Seals And Gaskets
Seals and gaskets keep the hydraulic fluid inside the jack. Over time, they wear out or crack. This wear allows fluid to escape. Dirt and debris can also damage these parts. Replacing worn seals and gaskets often stops leaks quickly.
Damaged Hydraulic Cylinder
The hydraulic cylinder moves the fluid to lift the jack. Scratches or dents on the cylinder cause leaks. Rust and corrosion weaken the cylinder walls. A damaged cylinder means fluid leaks outside. Repair or replace the cylinder to restore the jack’s power.
Loose Or Damaged Fittings
Fittings connect hoses and parts inside the jack. Loose fittings let fluid drip out. Damaged fittings may crack or break. Check all fittings for tightness and condition. Tighten or replace any faulty fittings to stop leaks.
Tools And Materials Needed
Fixing a floor jack leak requires the right tools and materials. Without these, the repair may not work well or could cause more damage. Prepare all items before starting the repair to save time and avoid frustration.
Basic Hand Tools
Start with simple hand tools. A wrench set helps loosen and tighten bolts. Screwdrivers are necessary for removing covers or panels. A clean cloth is useful for wiping off dirt and oil. Pliers can grip small parts or pins. These tools are common and easy to find in most toolkits.
Hydraulic Fluid Types
Floor jacks use hydraulic fluid to operate smoothly. Choose the right type for your jack. Most require a specific hydraulic oil, often labeled as ISO 32 or 46. Avoid using motor oil or other liquids, as they can damage seals. Check the user manual or product label for the correct fluid type.
Replacement Parts
Leaks often happen because seals or gaskets wear out. You may need new rubber seals or O-rings. Some jacks also need a new pump or valve kit. Purchase parts that match your jack model exactly. Using the wrong parts can cause poor performance or more leaks.
Steps To Identify The Leak Source
Finding the source of a floor jack leak is the first step to fixing it. This process involves careful checking and simple tests. Each step helps narrow down where the fluid escapes. Identifying the leak spot saves time and money on repairs.
Visual Inspection
Look closely at the floor jack for wet spots or stains. Check around seals, valves, and the hydraulic cylinder. Dirt or grease buildup can hide leaks. Clean the jack first, then inspect again. Mark any areas that look suspicious.
Pressure Testing
Pressurize the jack by pumping it up. Watch the marked areas for new fluid or drips. Use a piece of paper or cloth to catch small leaks. Pressure forces fluid out if there is a crack or loose seal. This step helps find hidden leaks not visible at rest.
Checking Fluid Levels
Open the fluid reservoir and check the oil level. Low oil often means a leak is present. Refill to the correct level if needed. Monitor the fluid level over a day or two. A drop in level confirms a leak and how fast it is leaking.

Credit: www.reddit.com
Repairing Worn Seals And Gaskets
Repairing worn seals and gaskets is key to fixing a leaking floor jack. These parts stop hydraulic fluid from escaping. Over time, seals and gaskets wear out due to pressure and use. Replacing them restores the jack’s strength and safety.
Work carefully. Small parts must fit perfectly. The process involves removing old seals, cleaning parts, and installing new seals. Each step matters for a proper fix.
Removing The Old Seals
Start by lowering the jack fully. Remove any screws or bolts covering the seals. Use a flat tool to pry out old seals gently. Avoid damaging the metal parts. Old seals may be brittle or sticky. Dispose of them properly.
Cleaning The Components
Clean all parts where seals sit. Use a clean cloth and a mild solvent. Remove dirt, grease, and leftover seal material. Clean surfaces ensure new seals stick well. Let parts dry before moving on.
Installing New Seals
Choose seals that match your floor jack model. Place each seal carefully into its slot. Press them evenly to avoid gaps. Check for proper fit and alignment. Tighten screws or bolts securely. Test the jack for leaks after assembly.
Fixing Hydraulic Cylinder Issues
Fixing hydraulic cylinder issues is crucial for a floor jack to work safely and well. The hydraulic cylinder controls the lifting and lowering action. Problems here cause leaks or poor lifting power. Understanding how to fix these parts saves time and money.
Disassembling The Cylinder
Start by removing the hydraulic cylinder from the floor jack. Clean the outside to avoid dirt inside. Use a wrench to loosen bolts and screws. Carefully pull apart the cylinder components. Keep track of small parts and seals. Take pictures if needed for easier assembly.
Replacing Damaged Parts
Check all parts for cracks or wear. Look closely at seals, O-rings, and pistons. Replace any worn or broken pieces with new ones. Use parts made for your floor jack model. Avoid using old or damaged seals to stop leaks. Lubricate seals lightly before installing.
Reassembling And Testing
Put the cylinder parts back together in the right order. Tighten all bolts firmly but do not over-tighten. Reinstall the cylinder onto the floor jack. Pump the handle slowly to check for leaks or unusual sounds. Test the jack by lifting a small load. Repeat the test to ensure smooth operation.

Credit: www.lowes.com
Tightening And Replacing Fittings
Tightening and replacing fittings is a key step in fixing a floor jack leak. Loose or damaged fittings can cause hydraulic fluid to escape. This lowers the jack’s efficiency and can lead to failure. Checking and fixing these parts ensures the jack works safely and smoothly.
Locating Loose Connections
Start by inspecting all fittings and joints on the floor jack. Look for signs of fluid or dirt buildup around connections. These spots often show where leaks happen. Gently wiggle each fitting to check for looseness. Tighten any that move without force. Pay close attention to hoses and valves, as they often loosen first.
Proper Torque Techniques
Use the right tools to tighten fittings carefully. Over-tightening can damage threads or seals. Under-tightening leaves leaks. Follow the manufacturer’s torque specifications. If unsure, tighten snugly by hand, then use a wrench for a slight turn. Avoid forcing fittings. This method keeps the parts secure and leak-free.
Replacing Faulty Fittings
If a fitting is cracked, rusted, or damaged, replace it immediately. Remove the faulty fitting carefully using proper tools. Match the new fitting to the original’s size and type. Clean the connection area before installing the new part. Tighten the new fitting using correct torque steps. Test the jack to confirm the leak is fixed.
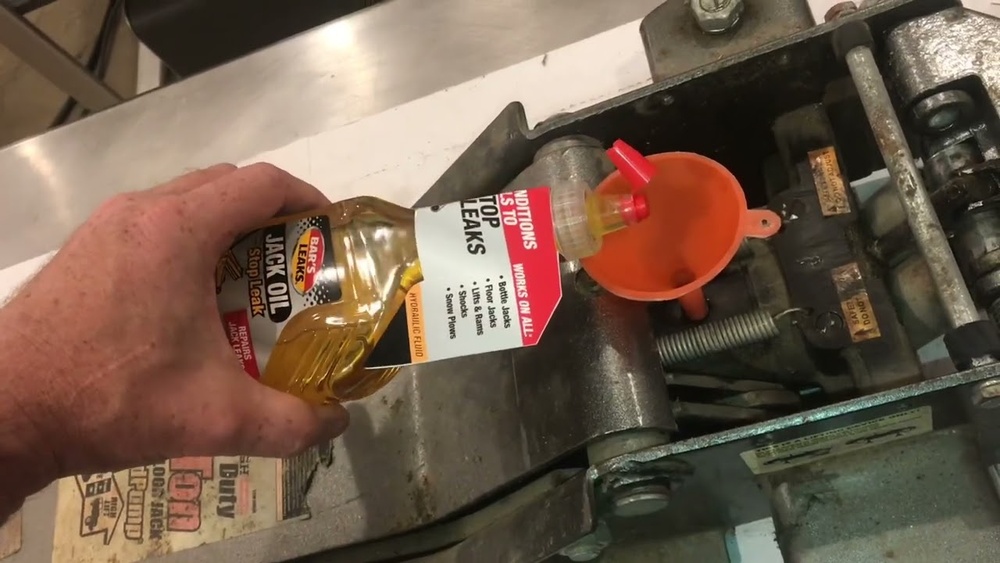
Refilling And Bleeding The Jack
Refilling and bleeding your floor jack is essential for smooth operation. Over time, hydraulic fluid can leak or become contaminated. This causes the jack to lose pressure and perform poorly. Refilling ensures the jack has enough fluid to work. Bleeding removes trapped air that stops the jack from lifting properly. Follow these steps carefully to restore your jack’s power and safety.
Choosing The Right Hydraulic Fluid
Select the correct hydraulic fluid for your floor jack. Check the owner’s manual for the recommended type. Using the wrong fluid can damage the seals and reduce performance. Most jacks use a specific hydraulic oil. Avoid using brake fluid or motor oil. These fluids can cause leaks and corrosion.
Filling Procedures
Start by placing the jack on a level surface. Locate the fill plug on the jack’s body. Remove the plug carefully. Use a clean funnel to pour the hydraulic fluid. Fill slowly until the fluid reaches the recommended level. Do not overfill, as this can cause problems. Replace the fill plug securely before testing the jack.
Removing Air From The System
Air trapped inside the jack reduces lifting power. Open the release valve to let air escape. Pump the handle slowly several times. Watch for bubbles or fluid leaks. Close the release valve and test the jack lift. Repeat the bleeding process if the jack still feels weak. Removing air ensures strong and steady lifting force.

Credit: manypets.com
Preventive Maintenance Tips
Preventive maintenance keeps your floor jack working well for a long time. Small care steps stop big problems. These tips save time and money. Follow them to avoid jack leaks and failures. Regular checks and good habits protect your tool.
Regular Inspection Schedule
Check your floor jack often. Look for oil leaks and cracks. Tighten loose parts quickly. Note any strange noises or movements. Early finds help fix small issues fast. Set a day each month for inspection.
Proper Storage Practices
Store the jack in a dry place. Avoid wet or dusty areas. Keep it off the ground on a shelf or pallet. Lower the jack fully before storing. Cover it to stop dirt and moisture.
Avoiding Overloading
Know your jack’s weight limit. Do not lift more than it can handle. Overloading causes leaks and damages seals. Use the right jack for heavy jobs. Safety comes first with correct use.
Frequently Asked Questions
What Causes A Floor Jack To Start Leaking?
Floor jack leaks usually happen due to worn seals or damaged hydraulic fluid lines. Dirt and corrosion can also cause leaks. Regular maintenance helps prevent these issues and extends the jack’s life.
How Can I Fix A Leaking Floor Jack Myself?
First, clean the jack thoroughly. Then, replace worn seals or O-rings. Check hydraulic fluid levels and refill if needed. Always use manufacturer-approved parts for best results.
Is Hydraulic Fluid Replacement Necessary For A Leaking Floor Jack?
Yes, replacing hydraulic fluid is important. Old or contaminated fluid can cause leaks and reduce jack efficiency. Drain the old fluid and refill with fresh, recommended hydraulic oil.
Can A Leaking Floor Jack Be Dangerous To Use?
Yes, leaks reduce lifting power and may cause sudden failure. This can lead to accidents or injury. Always repair leaks before using the jack to ensure safety.
Conclusion
Fixing a floor jack leak takes patience and care. Check all seals and replace worn parts. Keep the jack clean and well-lubricated. Small leaks can turn into big problems fast. Regular checks help catch issues early. A working floor jack keeps you safe while working.
Follow these steps to avoid costly repairs. Stay careful and use your tools right. Your floor jack will last longer and work better. Simple fixes save time and money in the long run.