If you want to boost your home’s security, installing a deadbolt is one of the best steps you can take. But before you get started, you need to know how to drill the deadbolt hole in your door frame correctly.
Doing it wrong can lead to a weak lock or damage to your door. Don’t worry—this guide will walk you through every step, making the process simple and stress-free. By the end, you’ll have the skills to secure your home like a pro.
Keep reading to learn exactly what you need to do!
Tools And Materials Needed
To drill a deadbolt hole in a door frame, gather the right tools and materials. This step is important for a clean, accurate cut. Using proper tools makes the job faster and safer.
Prepare everything before starting. This helps avoid delays and mistakes. Each tool has a specific role in the process.
Drill And Drill Bits
A power drill is essential for making holes. Choose a drill with variable speed control. Use a hole saw bit sized for the deadbolt. Also, have a spade bit for the latch hole.
Measuring Tools
A tape measure ensures precise placement of holes. A pencil marks drilling spots clearly. A combination square helps keep lines straight and level.
Safety Gear
Wear safety glasses to protect your eyes from debris. Use ear protection to reduce noise. Work gloves protect your hands from splinters and sharp edges.
Additional Materials
Masking tape prevents wood from splintering. A wood chisel helps clean up the hole edges. Sandpaper smooths rough surfaces after drilling.
Choosing The Right Location
Choosing the right location for your deadbolt hole is a key step. It ensures the lock fits well and works properly. A poorly placed hole can weaken the door frame. It can also make the lock hard to use. Take your time and measure carefully. This part guides you through measuring and marking the door frame.
Measuring The Height
Start by measuring the right height on the door frame. Most deadbolts fit about 6 to 12 inches above the door handle. Use a tape measure to find this spot. Mark the height clearly with a pencil. Double-check the measurement. The lock should be comfortable to reach and strong in position.
Marking The Door Frame
Next, mark the exact spot for the hole on the door frame. Use a square tool to keep your marks straight. Mark the center where the deadbolt will go. Make sure the mark lines up with the door’s edge. This step helps drill the hole in the perfect place. Accurate marks lead to a neat and secure lock installation.
Preparing The Door Frame
Preparing the door frame is the first step to drill a deadbolt hole safely and accurately. Proper preparation ensures a clean cut and prevents damage to the door or frame. Taking time to prepare makes the installation easier and the lock more secure.
Checking For Obstructions
Look closely at the door frame before drilling. Check for nails, screws, or metal reinforcements inside the wood. These can damage your drill bit or cause the drill to slip.
Use a stud finder or small metal detector to find hidden objects. Mark areas to avoid on the surface. Confirm there is enough space for the deadbolt without hitting anything inside.
Protecting The Surface
Cover the door frame with painter’s tape around the drill area. This prevents splintering and keeps the wood clean. The tape also helps mark the exact spot to drill.
Place a scrap piece of wood behind the door frame if possible. This stops the drill bit from breaking through too quickly. Protect nearby surfaces from dust by using a drop cloth.
Selecting The Drill Bit
Selecting the right drill bit is key to a clean and precise deadbolt hole. A wrong bit can cause damage or make the hole uneven. Choose a drill bit that fits your door frame material and the size of the deadbolt. This helps the lock fit perfectly and work well.
Size And Type
Pick a drill bit size that matches the deadbolt’s diameter. Usually, a 1-inch hole is needed for the main hole. The type of bit matters too. For wood doors, use a spade or auger bit. For metal frames, choose a high-speed steel or cobalt bit. The right size and type prevent cracking or splintering.
Using A Hole Saw Bit
A hole saw bit works best for making the large, round hole for the deadbolt. It cuts clean edges and fits the lock snugly. Use a drill with enough power to handle the hole saw bit smoothly. Drill slowly to avoid splintering wood or overheating metal. This bit saves time and gives a professional finish.
Drilling The Deadbolt Hole
Drilling the deadbolt hole is a key step in installing your lock. It requires care and precision to ensure the deadbolt fits well. Use the right tools and follow clear steps to avoid mistakes. This process helps make your door secure and functional.
Starting The Pilot Hole
Mark the spot for the deadbolt hole on the door frame. Use a pencil for a clear, visible mark. Choose a drill bit smaller than the final hole size. This bit will create a pilot hole to guide the larger drill bit. Hold the drill steady and start drilling slowly. Keep the drill straight to avoid angled holes. Stop once the pilot hole goes through the frame.
Drilling Through The Frame
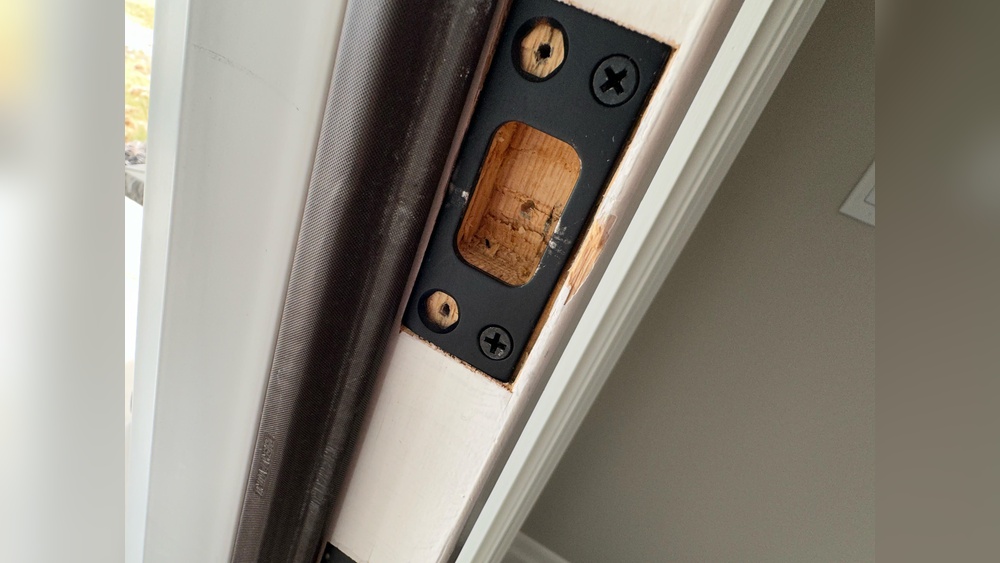
Switch to the larger drill bit for the deadbolt size. Place the bit in the pilot hole for accuracy. Drill through the door frame with steady pressure. Keep the drill level and straight during drilling. Go slow near the end to avoid splintering wood. Clear out any wood chips from the hole. Test fit the deadbolt to check the hole size.

Credit: www.reddit.com
Creating The Latch Mortise
Creating the latch mortise is a key step in installing a deadbolt. This step ensures the latch fits perfectly into the door frame. A well-made mortise keeps the deadbolt secure and flush with the frame. It requires careful marking and precise chiseling. Follow the steps below to create a clean, accurate mortise.
Marking The Latch Outline
Start by placing the deadbolt latch against the door frame. Align it where the deadbolt will sit when locked. Use a pencil to trace around the latch faceplate. Mark all edges clearly for easy chiseling. Double-check the marks for accuracy. A precise outline prevents mistakes during chiseling.
Chiseling The Mortise
Use a sharp chisel and hammer for this task. Begin by scoring the outline with the chisel’s edge. Tap gently to create a shallow groove along the pencil marks. Remove wood inside the outline gradually. Work slowly to avoid cutting beyond the lines. Test the latch faceplate frequently for fit. Stop chiseling when the latch fits flush with the frame.
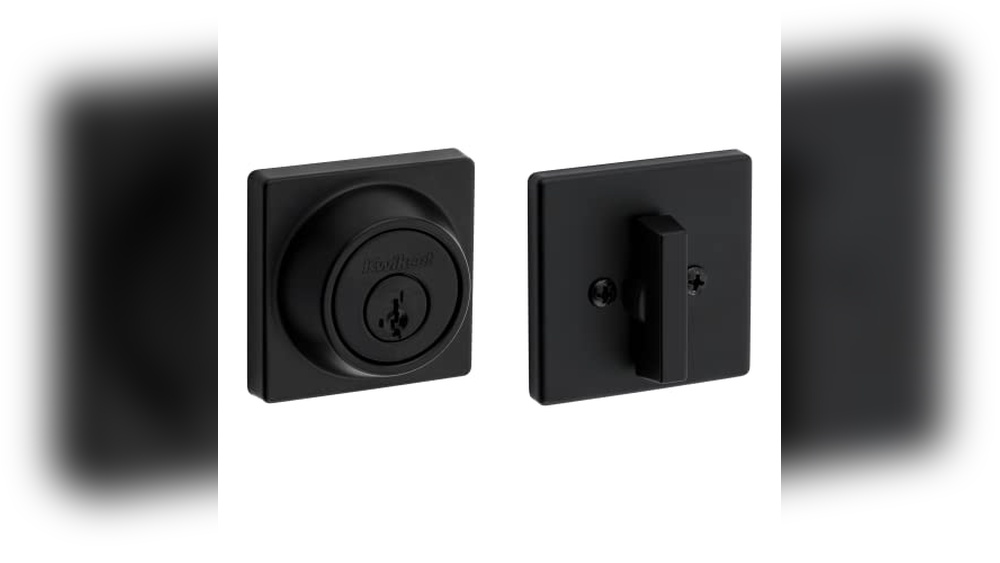
Installing The Deadbolt
Installing the deadbolt is the next step after drilling the hole in your door frame. This process secures your door and adds extra safety to your home. Follow these steps carefully to fit the deadbolt and secure it firmly.
Fitting The Deadbolt Assembly
Start by placing the deadbolt into the hole you drilled. Make sure the bolt slides smoothly in and out. Align the faceplate with the door edge so it sits flush. Check that the bolt extends fully when turned. Adjust the position slightly if it sticks or is loose.
Securing With Screws
Once the deadbolt fits well, use screws to hold it in place. Insert screws through the faceplate into the door frame. Tighten them evenly to avoid shifting. Do not overtighten as it may damage the door. Test the deadbolt operation after securing the screws.
Testing The Deadbolt Function
Testing the deadbolt function is a vital step after drilling the hole in the door frame. It ensures the lock fits well and works properly. Skipping this step can cause problems with security and convenience. Take time to check the deadbolt carefully before finishing the installation.
Checking Alignment
First, check if the deadbolt aligns with the strike plate on the door frame. The bolt should slide easily into the hole without force. Close the door slowly and watch how the bolt fits. If it sticks or misses the hole, adjust the strike plate or the hole position. Proper alignment avoids damage and ensures security.
Ensuring Smooth Operation
Next, turn the key or thumb turn to test the deadbolt’s movement. It should move smoothly without resistance or jamming. Try locking and unlocking several times. Listen for unusual sounds like grinding or clicking. If the deadbolt feels stiff, apply a small amount of lubricant. Smooth operation improves the lock’s lifespan and ease of use.
Tips For A Clean Finish
Drilling a deadbolt hole can leave rough edges and marks on your door frame. A clean finish improves your door’s look and helps protect it from damage. Simple steps after drilling make a big difference. Taking time to sand and paint keeps the frame smooth and fresh. Maintaining the frame ensures your door stays strong and neat for years.
Sanding And Painting
Start by sanding the drilled hole edges with fine sandpaper. This removes splinters and smooths the surface. Sand lightly to avoid removing too much wood. Wipe away dust with a dry cloth before painting. Use paint that matches your door frame color. Paint seals the wood and protects it from moisture and wear. Let the paint dry completely before using the door.
Maintaining The Door Frame
Check the frame regularly for chips or cracks. Touch up paint any small damages quickly to stop further wear. Keep the frame clean by wiping dust and dirt. Avoid using harsh cleaners that can damage paint or wood. Proper maintenance keeps your door frame strong and looking new. It helps your deadbolt work smoothly and lasts longer.

Credit: www.familyhandyman.com

Credit: www.youtube.com
Frequently Asked Questions
How Do I Measure For A Deadbolt Hole In Door Frame?
Measure the door frame thickness and mark the hole location. Use a template or tape measure for accuracy. Ensure the hole aligns with the door lockset for proper installation.
What Drill Bit Size Is Needed For A Deadbolt?
Use a 1-inch spade or hole saw drill bit for the main hole. For the latch hole, a 7/8-inch bit works best. Always check your deadbolt instructions for exact sizes.
Can I Drill A Deadbolt Hole Without Damaging The Door?
Yes, use painter’s tape on the drilling spot. Drill slowly and steadily to avoid splintering. A sharp drill bit and steady hands help maintain door integrity.
How Deep Should I Drill The Deadbolt Hole?
Drill through the door thickness completely for the bolt hole. For the latch hole on the frame, drill about 1 inch deep. Always follow your deadbolt’s installation guide for specifics.
Conclusion
Drilling a deadbolt hole in a door frame is simple with the right steps. Measure carefully and mark the spots clearly before drilling. Use the correct drill bit size to avoid mistakes. Take your time and drill slowly for a clean hole.
This helps ensure your deadbolt fits well and works properly. Following these tips will make your door more secure and safe. Practice patience and stay focused to get the best results. You can do this yourself without hiring help.