Are you tired of struggling with messy nails, screws, or drills when trying to hang things outside? Outdoor mounting tape might be the simple solution you’ve been searching for.
It’s strong, weather-resistant, and easy to use—perfect for securing items without damage or hassle. In this guide, you’ll discover exactly how to use outdoor mounting tape to get your projects done quickly and confidently. Keep reading to learn the tips and tricks that will make your outdoor mounting tasks a breeze!
Choosing The Right Outdoor Mounting Tape
Choosing the right outdoor mounting tape is important for strong and lasting results. Different tapes suit different surfaces and conditions. Picking the best type ensures your items stay put without damage. This guide helps you find the perfect tape for your project.
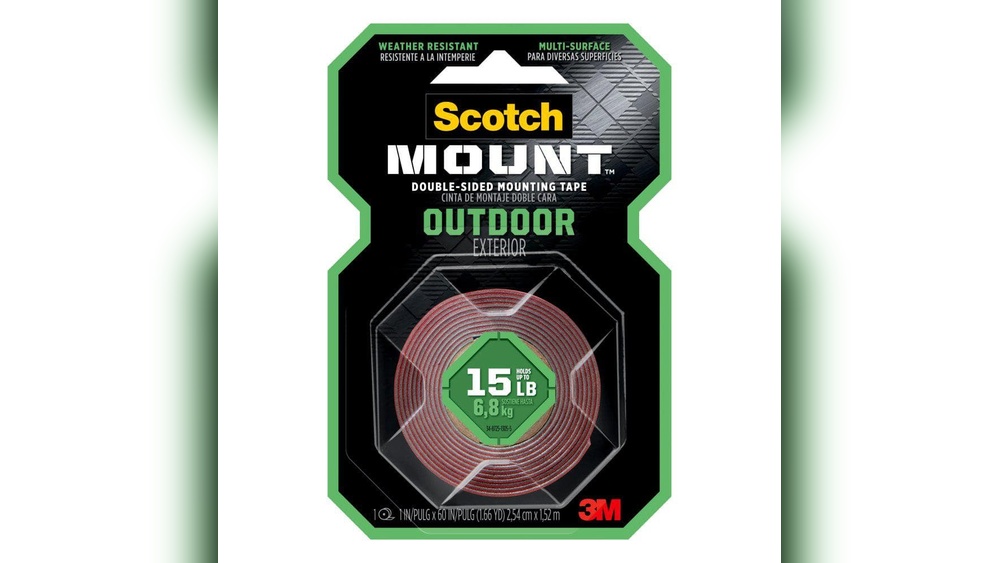
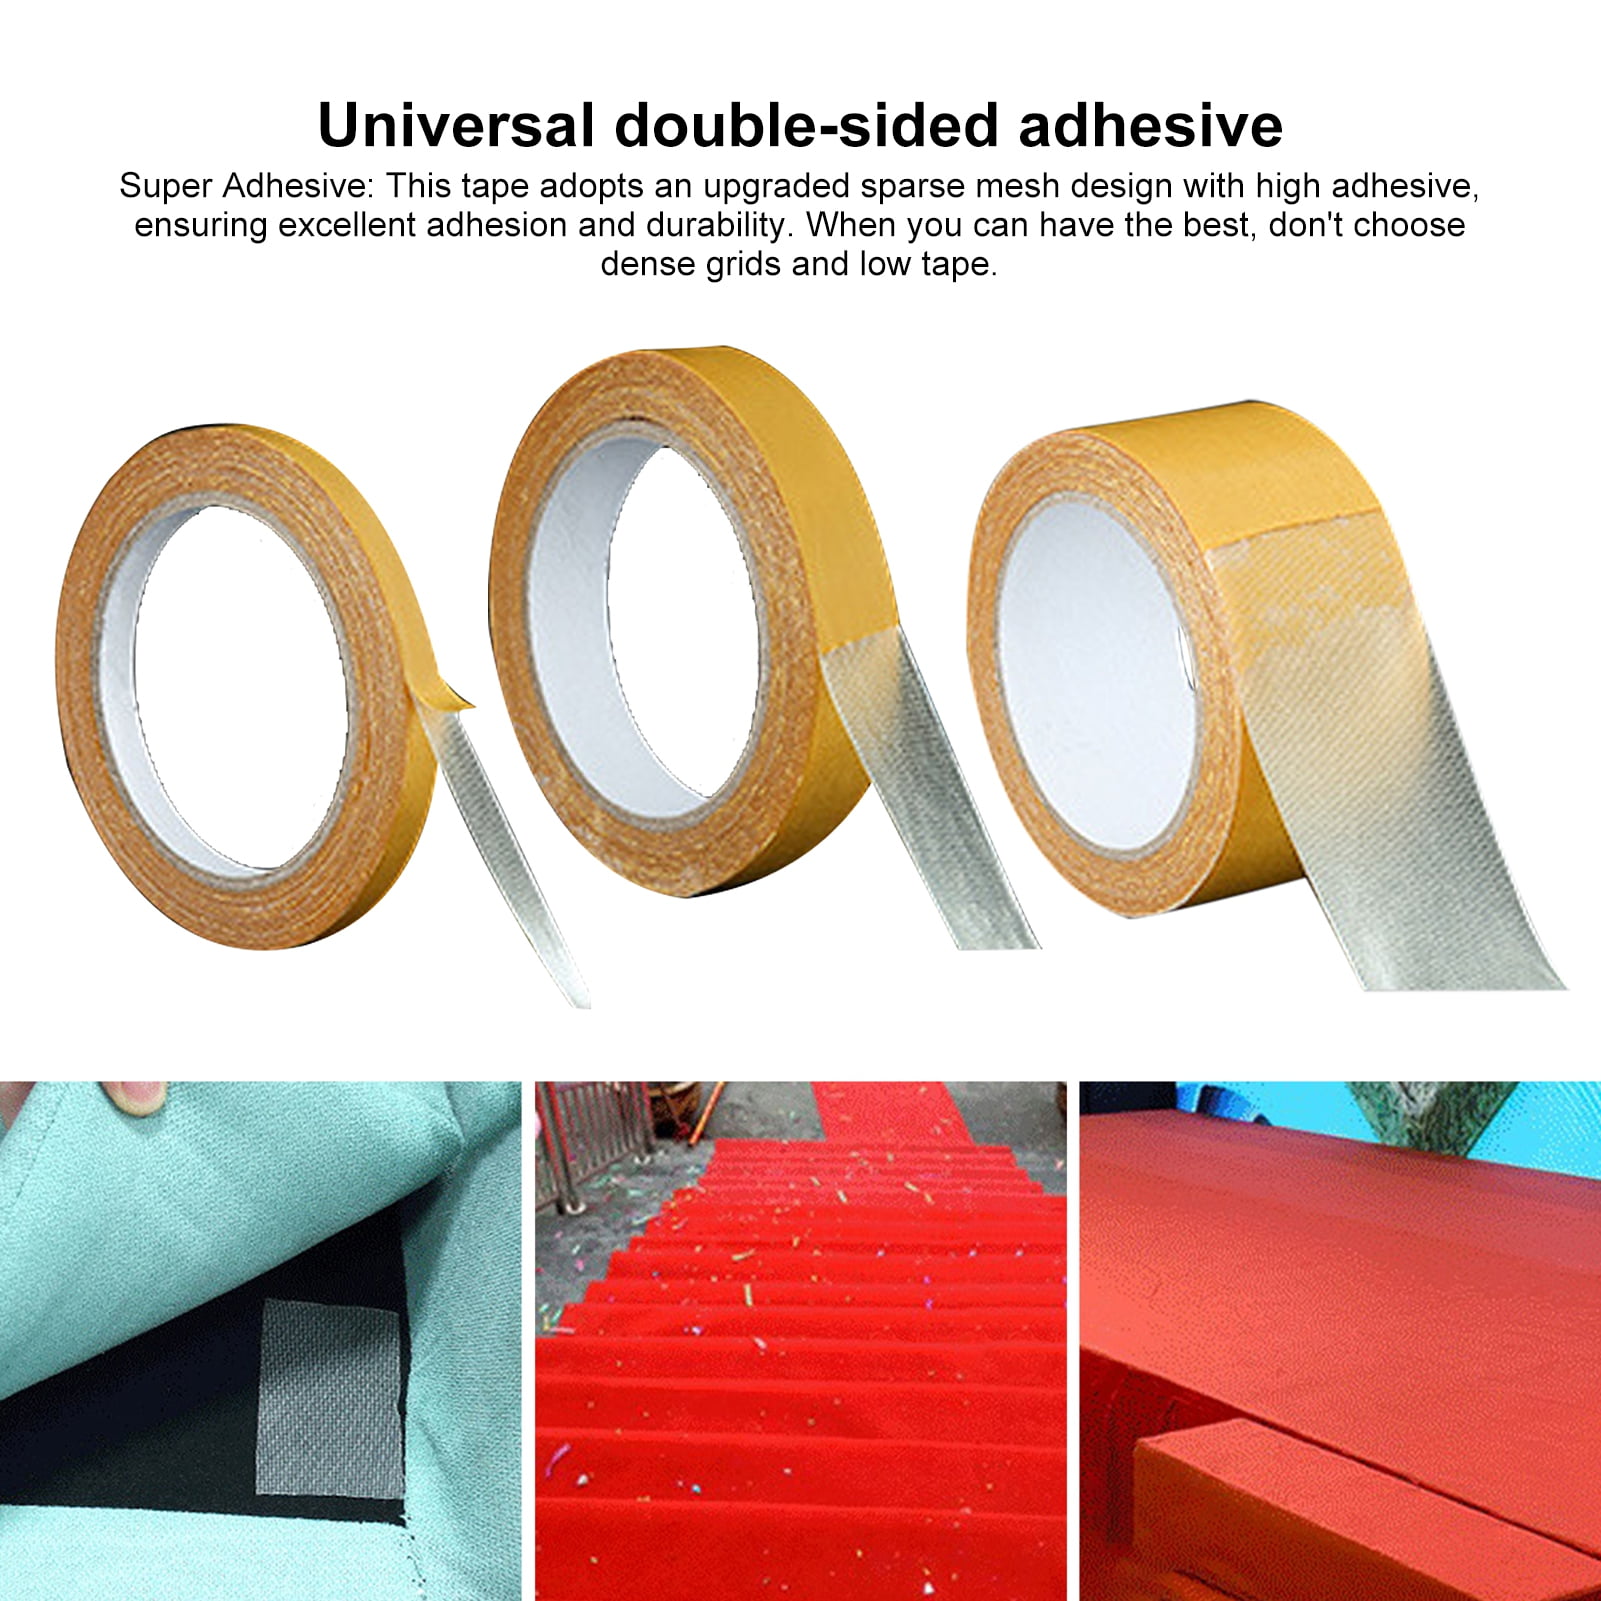
Types Of Outdoor Mounting Tape
There are several types of outdoor mounting tape. Double-sided foam tape offers strong hold and cushions vibrations. Clear acrylic tape is weatherproof and dries invisible. Heavy-duty rubber tape resists moisture and heat. Each type serves different needs and environments.
Key Features To Look For
Choose tape with strong adhesive power for secure mounting. Weather resistance is a must to handle rain, sun, and cold. UV resistance prevents tape from breaking down in sunlight. The tape should also resist water and temperature changes for durability.
Surface Compatibility
Check the tape’s compatibility with the surface material. Some tapes work well on rough surfaces like brick or wood. Others stick best on smooth surfaces like glass or metal. Clean and dry surfaces improve the tape’s grip and lifespan. Match tape type to your surface for best results.
Credit: www.kgcountry.com
Preparing Surfaces For Best Adhesion
Preparing surfaces for outdoor mounting tape is key for strong, lasting bonds. Dirt, dust, and moisture can stop the tape from sticking well. Clean, dry surfaces help the tape hold tight. Taking time to prepare surfaces ensures your tape works as it should.
Cleaning Techniques
Start by wiping the area with a clean cloth. Use soap and water to remove dirt and grease. Avoid oily or waxy residues, as they block adhesion. For stubborn grime, use rubbing alcohol on a cloth. Let the surface feel smooth and clean before applying tape.
Drying And Temperature Considerations
Make sure the surface is fully dry before sticking the tape. Moisture weakens the adhesive and causes peeling. Apply tape when temperatures are between 50°F and 100°F (10°C to 38°C). Cold or hot surfaces can reduce tape strength. Working in mild weather helps the tape bond well.
Step-by-step Application Process
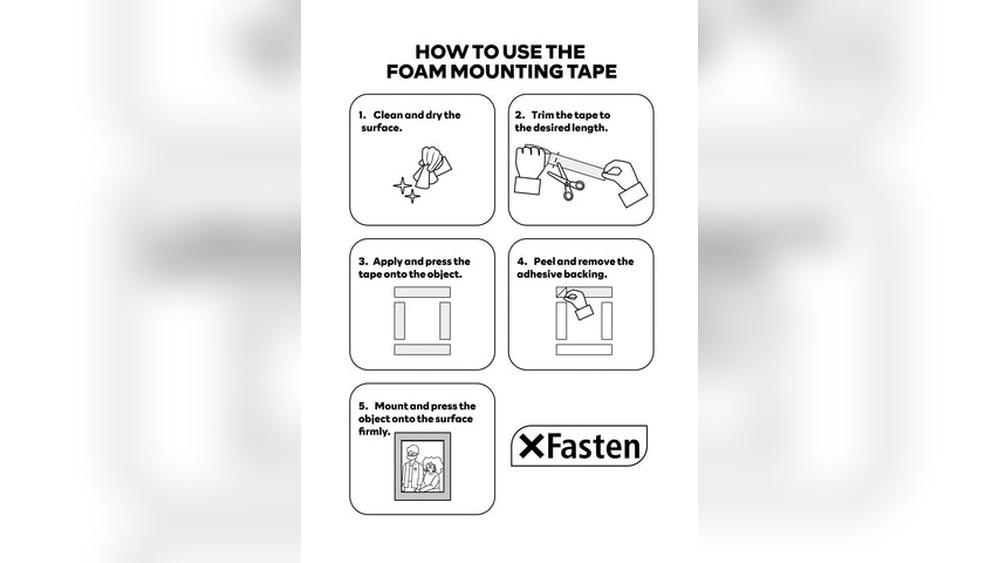
Using outdoor mounting tape properly ensures strong and lasting adhesion. Follow these clear steps to apply the tape correctly. Each step helps you prepare and secure your items outdoors without hassle.
Measuring And Cutting Tape
First, measure the length needed for your project. Use a ruler or tape measure for accuracy. Cut the tape with scissors or a utility knife. Cut straight for better sticking and a clean look. Avoid cutting too short or too long.
Applying Tape To Surfaces
Clean both surfaces before applying tape. Dirt or dust can weaken the bond. Peel off the tape’s backing carefully. Place the tape on one surface slowly. Avoid touching the sticky side with fingers. Press it lightly to hold in place.
Pressing And Securing The Tape
Press the tape firmly for at least 30 seconds. Use your palm or a flat tool. Apply steady pressure to remove air bubbles. This step ensures a tight bond between surfaces. Let the tape set before moving or hanging items.
Maximizing Tape Strength And Durability
Maximizing the strength and durability of outdoor mounting tape ensures your items stay firmly in place. Proper use improves the tape’s hold and helps it last longer. Small steps can make a big difference in performance.
Optimal Pressure And Curing Time
Press the tape firmly against the surface. Apply steady pressure for about 30 seconds. This helps the adhesive bond well with the surface. Wait at least 24 hours before stressing the tape. This curing time allows the adhesive to set fully. Avoid rushing this step to keep the tape strong.
Avoiding Common Mistakes
Clean the surface before applying the tape. Dirt and dust reduce stickiness. Do not stretch the tape while applying. Stretching weakens the adhesive. Avoid touching the adhesive side with your fingers. Oils from skin can reduce adhesion. Use tape only on dry surfaces to prevent failure.
Handling Extreme Weather Conditions
Choose tape rated for outdoor use and weather resistance. Heat can soften the adhesive, reducing hold. Cold temperatures make tape brittle and less sticky. Protect the tape from direct sunlight when possible. Check the tape regularly for signs of wear. Replace it if it starts to peel or lose grip.
Removing Outdoor Mounting Tape Safely
Removing outdoor mounting tape safely protects your surfaces and keeps things clean. This process requires care to avoid damage to walls, glass, or wood. Using the right tools and methods helps you remove tape without leaving marks or residue. Follow these simple steps for a smooth removal.
Tools And Techniques
Gather a hairdryer, plastic scraper, rubbing alcohol, and soft cloth. Warm the tape with a hairdryer on low heat. Heat softens the adhesive, making removal easier. Slowly peel the tape using the plastic scraper. Avoid metal tools to prevent scratches. Use rubbing alcohol on a cloth to clean sticky residue. Wipe gently until the surface is clean.
Preventing Surface Damage
Test heat and alcohol on a small spot first. This check ensures no discoloration or damage. Pull tape slowly at a low angle to avoid peeling paint. Keep the hairdryer moving to stop overheating. Use soft cloths to avoid scratches. Patience reduces risks and keeps surfaces intact. Proper care means your walls stay smooth and clean.

Credit: treefruitresearch.org
Creative Uses For Outdoor Mounting Tape
Outdoor mounting tape is more than just a simple adhesive. It can hold many things firmly outside your home. This tape works well on rough or smooth surfaces. It resists weather, water, and sunlight. You can use it for many creative projects around your house and garden.
Home And Garden Applications
Use outdoor mounting tape to hang decorations without nails. Attach solar lights to fences or walls. Secure garden tools on wooden boards for easy access. Fix outdoor signs or nameplates on doors. Mount bird feeders on poles or trees without damage. Tape works well for lightweight pots on patios. It holds holiday lights in place along gutters and eaves. Use it to fix loose tiles or small cracks temporarily. This tape helps keep outdoor cushions or mats from sliding.
Temporary Vs Permanent Solutions
Choose outdoor mounting tape for temporary fixes during events. It holds banners and posters without leaving marks. Use tape to secure party decorations on windy days. For permanent uses, select heavy-duty tape designed for strong bonds. This tape can hold heavier objects like hooks or small shelves. Remember, some tapes may lose stickiness over time outdoors. Test a small area before applying for a long period. Replace tape often for the best hold in harsh weather. Temporary tape offers easy removal without surface damage.
Credit: www.lowes.com
Frequently Asked Questions
What Surfaces Work Best With Outdoor Mounting Tape?
Outdoor mounting tape adheres well to clean, dry, and smooth surfaces like metal, glass, plastic, and painted wood. Avoid rough, dusty, or porous surfaces for the best hold and durability in outdoor conditions.
How Long Does Outdoor Mounting Tape Last Outdoors?
High-quality outdoor mounting tape can last from 6 months to several years. Its lifespan depends on weather exposure, surface type, and proper application.
Can Outdoor Mounting Tape Hold Heavy Objects?
Yes, outdoor mounting tape can hold medium-weight objects if applied correctly. Check the product’s weight limit and ensure surfaces are clean and dry before use.
Is Outdoor Mounting Tape Waterproof And Weather Resistant?
Most outdoor mounting tapes are waterproof and resist UV rays, rain, and temperature changes. Always verify product specifications for specific weather resistance.
Conclusion
Outdoor mounting tape sticks well to many surfaces. It holds items securely in place. Clean surfaces before applying the tape. Press firmly for best results. Avoid using tape on wet or dusty areas. Check the tape regularly to ensure it stays strong.
This tape is a simple and fast way to mount items outside. Use it for decorations, signs, or small tools. With these tips, your outdoor projects will stay neat and safe. Easy to use and effective every time.