Are you ready to take control of your home lighting and save money by doing it yourself? Fitting a light switch might sound tricky, but with the right steps, you can easily handle it yourself.
Imagine flipping a switch you installed and instantly brightening up your space—how satisfying would that feel? In this guide, you’ll discover simple, clear instructions that make fitting a light switch straightforward and safe. Keep reading, and by the end, you’ll have the confidence to upgrade your lighting like a pro.
Tools And Materials Needed
Fitting a light switch needs some basic tools and materials. Having the right items makes the job easier and safer. This section lists what you need before starting.
Essential Tools
You need a screwdriver, usually a flathead and a Phillips. A voltage tester helps check if wires have power. Wire strippers remove insulation from wires. Needle-nose pliers help bend and hold wires. A tape measure ensures accurate placement. Keep a small flashlight handy for dark areas.
Choosing The Right Switch
Select a switch that fits your home’s wiring. Single-pole switches work for one light and one switch. Three-way switches control a light from two places. Check the switch’s voltage and current rating. Pick a switch with clear markings for easy wiring. Match the switch design with your room style.
Safety Gear
Safety glasses protect your eyes from dust and sparks. Insulated gloves reduce shock risk when handling wires. Wear clothes that cover your arms and legs. Use a sturdy ladder for reaching high switches. Keep a first-aid kit nearby for emergencies. Always turn off power before starting work.
Preparing The Work Area
Preparing the work area is the first step to fit a light switch safely. This stage helps avoid accidents and makes the job easier. A clean, safe space lets you focus on the task. Follow these simple steps to get ready.
Turning Off Power
Start by turning off the power at the main circuit breaker. This stops electricity from flowing to the switch. It keeps you safe from electric shocks. Double-check the breaker label to find the right one. Never skip this step.
Clearing The Space
Clear the area around the switch. Remove furniture, rugs, or any items nearby. This gives you space to work comfortably. A tidy area reduces the risk of accidents. Good lighting helps you see the switch box clearly.
Testing For Electricity
Use a voltage tester to check the wires. Touch the tester to each wire to see if power is still running. The tester should show no electricity. This confirms the power is off. Safety first. Always test before touching wires.
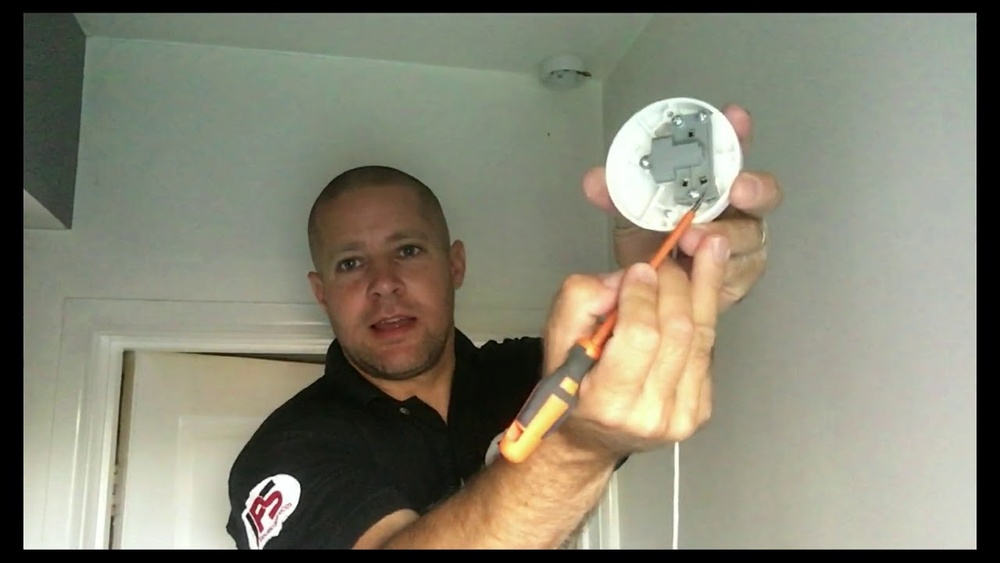
Removing The Old Switch
Removing the old light switch is the first step in fitting a new one. It helps prepare the space and ensures safety. Follow these simple steps carefully. Take your time and work safely to avoid any risks.
Unscrewing The Cover Plate
Start by turning off the power from the main switchboard. This stops any electricity from flowing to the switch. Use a screwdriver to remove the screws on the cover plate. Keep the screws safe for later use. Gently pull the cover plate away from the wall. This exposes the switch and wires behind it.
Disconnecting Wires Safely
Check again that the power is off. Use a voltage tester to be sure. Loosen the screws holding the wires to the switch. Carefully pull the wires away from the switch. Avoid touching the wire ends together or to metal parts. Place the wires where they will not fall back inside the wall. Now, the old switch is free and ready to be removed.

Credit: blueskysparky.com
Wiring The New Switch
Wiring the new light switch is a key step in the installation process. It ensures your switch works safely and correctly. This part requires care and attention to detail. Understanding the wires and making secure connections is essential. Follow these steps to wire your new switch properly.
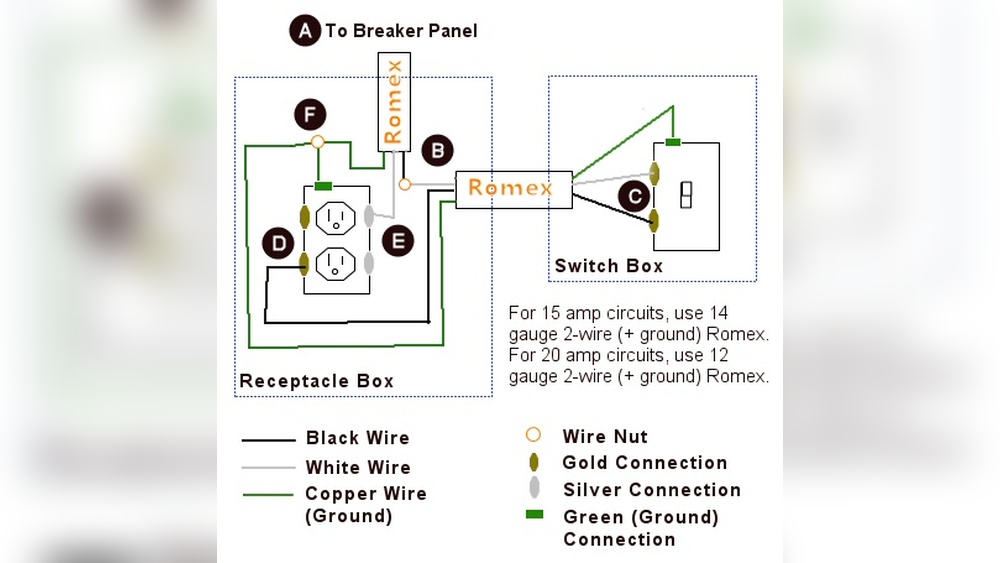
Identifying Wire Types
Start by recognizing the wires in your switch box. Usually, there are three types: live, neutral, and earth. The live wire carries electricity from the power source. It is often red or brown. The neutral wire returns electricity to the source and is usually blue or black. The earth wire is green, yellow, or green-yellow striped. It provides safety by grounding the circuit.
Connecting Wires Correctly
Match each wire to the right terminal on the switch. The live wire connects to the common terminal. The neutral wire may not connect to the switch but to the terminal block. The earth wire must connect to the earth terminal or metal box. Tighten the screws firmly but avoid damaging the wires. Ensure no copper is visible outside the terminals.
Securing Wire Connections
Check all wire connections for tightness and security. Loose wires can cause sparks or switch failure. Use electrical tape to cover exposed copper if needed. Push the wires neatly into the back box without crowding. Finally, attach the switch to the wall box and fix the faceplate. Your new switch is now wired and ready for use.
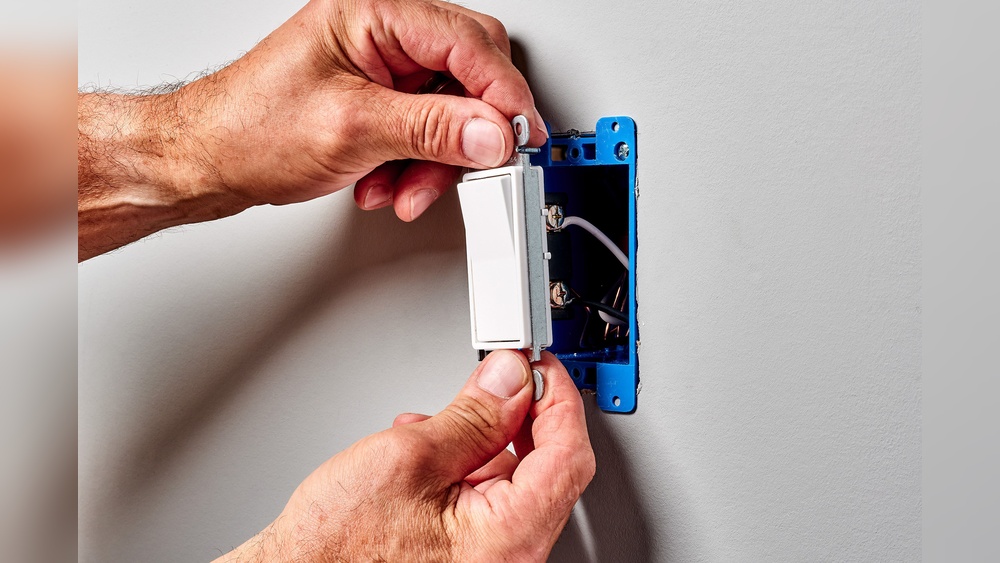
Installing The Switch
Installing the switch is a key step in fitting a light switch. It needs care and attention to ensure safety and functionality. Follow each step carefully to make sure the switch works well and looks neat.
Mounting The Switch
Start by placing the switch into the wall box. Align it carefully with the screw holes. Use a screwdriver to fix the switch in place. Tighten the screws, but do not over-tighten. The switch should sit flat and firm against the wall. Check the switch moves smoothly and fits well.
Attaching The Cover Plate
Next, position the cover plate over the switch. It should cover the wall box completely. Align the screw holes on the cover plate with the switch. Insert the screws and tighten them gently. The plate should be secure but not cracked. A clean, tight fit gives a good finish to your work.

Credit: www.dummies.com
Testing The Installation
Testing the installation is a key step after fitting a light switch. It ensures the switch works safely and correctly. Skipping this step can cause problems or risks later. Follow simple checks to confirm the switch is ready to use.
Restoring Power
First, turn the power back on at the circuit breaker. This lets electricity flow to the switch. Always switch off the breaker before fitting the switch. Now, turn it on carefully to avoid shocks. Use a voltage tester to check the power is live at the switch.
Checking Switch Functionality
Press the switch to see if the light turns on and off. The light should respond immediately to each press. Test both positions of the switch, if it is a two-way type. Listen for any unusual sounds like buzzing or clicking. If the light flickers or does not work, check your wiring again. Make sure all connections are tight and correct.
Troubleshooting Common Issues
Troubleshooting common issues can save time and prevent damage. Knowing simple fixes helps keep your light switch working well. This section covers frequent problems and easy solutions.
Switch Not Working
Check if the power is off before starting. Test the circuit breaker to see if it tripped. Make sure the switch is properly connected to the wires. Replace the switch if it looks worn or damaged. Confirm the bulbs are not burnt out. Use a voltage tester to see if electricity reaches the switch.
Flickering Lights
Loose or poor connections often cause flickering. Tighten all wire screws on the switch. Replace old or damaged wires to prevent sparks. Make sure the bulb fits the socket correctly. Try using a bulb with the right wattage. Flickering can also come from a faulty switch. Consider replacing the switch if flickering continues.
Loose Connections
Loose wires can cause the switch to fail. Turn off the power before checking connections. Use a screwdriver to tighten all wire terminals. Look for signs of corrosion or burning on wires. Replace damaged wires to ensure safety. Secure wires inside the switch box to avoid movement. Proper connection keeps your switch safe and reliable.

Credit: www.wikihow.com
Safety Tips For Future Maintenance
Safety is important for future maintenance of your light switch. Proper care helps avoid electrical problems and keeps your home safe. Simple checks and knowing when to get help can save time and money.
Regular Inspections
Check your light switch regularly for signs of damage. Look for cracks, loose parts, or flickering lights. These signs may show the switch is not working properly. Test the switch by turning it on and off a few times. Listen for any strange sounds like buzzing or clicking. Clean the switch gently to remove dust and dirt. Turn off the power before cleaning to avoid shocks.
When To Call A Professional
Call an electrician if you find any serious problems. Do not try to fix broken wires or sparks yourself. If the switch feels hot or smells burnt, stop using it immediately. Professional help is needed for faulty wiring or repeated switch failures. Experts can safely repair or replace the switch. They also check the whole circuit to prevent future risks.
Frequently Asked Questions
How Do I Safely Fit A Light Switch?
Turn off the power at the circuit breaker before starting. Use a voltage tester to ensure no electricity flows. Follow manufacturer instructions and use insulated tools for safety.
What Tools Are Needed To Fit A Light Switch?
You need a screwdriver, wire stripper, voltage tester, and electrical tape. These tools help in removing the old switch and connecting wires safely and securely.
Can I Fit A Light Switch Without Electrical Experience?
Basic knowledge helps, but it’s best to hire a professional if unsure. Incorrect wiring can cause shocks or fire hazards. Always prioritize safety when working with electricity.
How Do I Connect Wires To A New Light Switch?
Match wires by color: live (usually brown or black), neutral (blue), and earth (green/yellow). Secure each wire under the correct terminal screw tightly to ensure a stable connection.
Conclusion
Fitting a light switch can be simple with the right steps. Always turn off power before starting work. Follow the instructions carefully to avoid mistakes. Take your time and check all connections. A properly fitted switch keeps your home safe and bright.
Practice makes the task easier next time. Now, you can confidently change or install a light switch yourself. Small tasks like this save money and build your skills. Keep safety first and enjoy your well-lit space.