Are you ready to make your home smarter and save energy effortlessly? Learning how to program your Lutron motion sensor light switch is easier than you think.
With just a few simple steps, you can control your lights to turn on and off automatically, giving you convenience and peace of mind. Imagine never having to fumble for a switch in the dark again or worrying about leaving lights on by mistake.
Keep reading, and you’ll discover how to set up your Lutron motion sensor light switch quickly and confidently—no technical skills needed. Your smarter, more efficient home is just a few clicks away.

Credit: support.lutron.com
Choosing The Right Lutron Motion Sensor
Choosing the right Lutron motion sensor is key to a smooth installation and effective performance. The right sensor fits your needs and works well with your lighting system. Understanding different types and compatibility helps you avoid common mistakes.
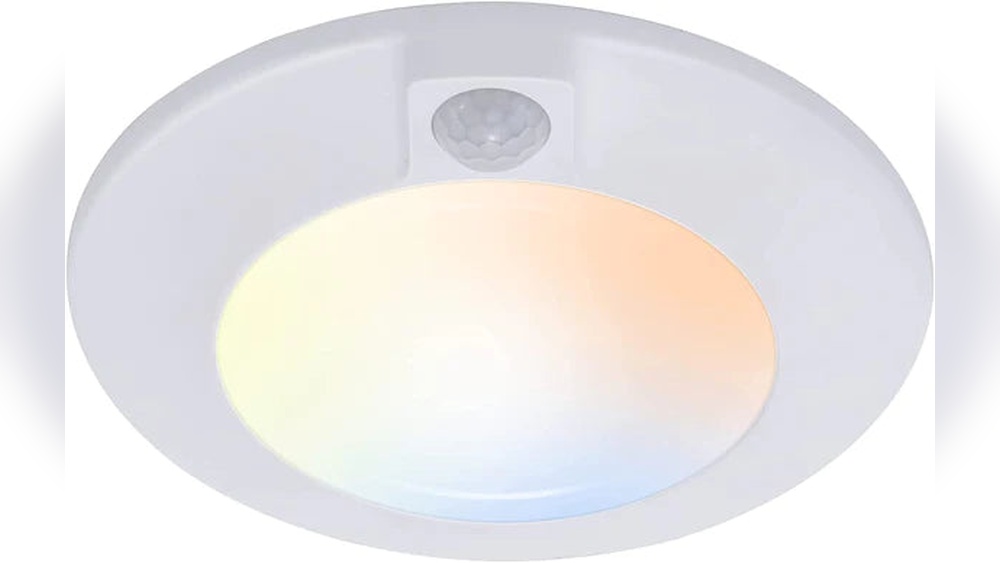
Types Of Lutron Motion Sensors
Lutron offers several motion sensor types. Some detect motion using infrared technology. Others use ultrasonic waves to sense movement. Some models combine both methods for better accuracy. You can find sensors for indoor or outdoor use. Some are designed for small rooms, others for large spaces. Choose a sensor that matches your room size and use.
Compatibility With Your Lighting System
Not all Lutron sensors work with every lighting system. Check if your lights support dimming or only on/off control. Some sensors work only with LED or incandescent bulbs. Others may need a neutral wire in your switch box. Confirm your existing wiring before buying. Matching sensor and lighting system ensures proper function and safety.
Tools And Materials Needed
Before you start programming your Lutron motion sensor light switch, gather all the tools and materials. Having everything ready makes the process smooth and safe. It also helps avoid interruptions during installation. Below is a list of what you need to get started.
Essential Tools
Get a screwdriver set with both flathead and Phillips heads. A voltage tester is important to check if the power is off. Wire strippers help remove the insulation without damaging wires. Needle-nose pliers make it easier to twist wires together. Have electrical tape ready to secure wire connections.
Safety Equipment
Wear safety glasses to protect your eyes from sparks or debris. Use insulated gloves to avoid electrical shocks. Make sure your work area is dry and well-lit. Turn off the main power switch before touching any wires. Keep a fire extinguisher nearby just in case.
Preparing For Installation
Preparing to install your Lutron motion sensor light switch is an important first step. It ensures safety and makes the process smooth. Take your time to get ready before starting the installation.
Gather your tools and clear the area around the switch. This helps you work comfortably and avoid mistakes.
Turning Off The Power
Safety is the top priority. Turn off the power at the circuit breaker. Do not rely only on the wall switch. Use a tester to confirm there is no electricity running to the wires. This step protects you from electric shock.
Removing The Existing Switch
Remove the faceplate by unscrewing it carefully. Then, unscrew the existing switch from the electrical box. Gently pull the switch out without touching the wires. Note how the wires connect to the switch. Take a picture if needed. This helps when attaching the new switch.
Wiring The Motion Sensor Switch
Wiring the Lutron motion sensor switch is an important step for proper functioning. It involves identifying the existing wires in your wall and connecting them to the sensor switch correctly. Proper wiring ensures the sensor detects motion and controls the light as intended.
Take your time to check each wire carefully. Safety is key. Turn off the power at the breaker before you start. Use a voltage tester to confirm the power is off. Ready to connect wires? Let’s begin.
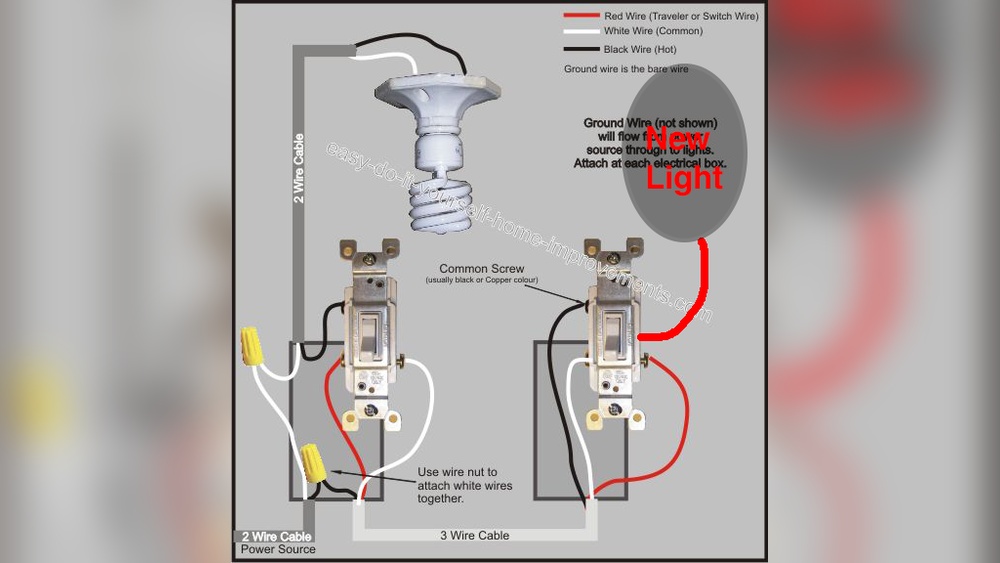
Identifying Wires
Most homes have three main wires in the switch box: line, load, and ground. The line wire carries power from the circuit panel. The load wire goes to the light fixture. The ground wire is for safety and is usually green or bare copper.
Sometimes, a neutral wire is present. It is white and completes the circuit for electronic devices. Check the switch box for this wire. Use a wire tester to identify each wire accurately. Label wires with tape for easy reference.
Connecting The Sensor Wires
Match the wires from the sensor to the wires in the wall. Connect the black wire from the sensor to the line wire. Attach the red wire to the load wire. Connect the green or bare wire from the sensor to the ground wire.
If there is a neutral wire, connect it to the white wire from the sensor. Use wire nuts to secure each connection tightly. Wrap the connections with electrical tape for safety. Push the wires back into the box carefully.
After wiring, attach the sensor switch to the wall. Restore power and test the sensor. The light should turn on when motion is detected.
Programming The Motion Sensor
Programming the Lutron motion sensor light switch allows you to customize how it detects movement. You can change settings to fit your room’s needs. Adjusting sensitivity, time delays, and light detection ensures the switch works perfectly. This section explains how to set these options step-by-step.
Setting Sensitivity Levels
The sensitivity level controls how much motion the sensor detects. Higher sensitivity picks up small movements. Lower sensitivity ignores minor actions to avoid false triggers. Use the switch’s buttons or the Lutron app to adjust sensitivity. Test different levels to find the best fit for your space.
Adjusting Time Delays
Time delay sets how long the light stays on after no motion is detected. Short delays save energy by turning off lights quickly. Longer delays keep lights on for comfort. Change the delay using the switch controls or app. Choose a delay that matches your daily habits.
Configuring Ambient Light Settings
Ambient light settings prevent the light from turning on during daylight. The sensor measures room brightness before activating. Adjust the threshold to decide when the light stays off. This feature saves power and extends bulb life. Modify ambient light settings through the Lutron app or switch panel.
Testing The Motion Sensor
Testing the motion sensor of your Lutron light switch is an important step. It ensures the sensor works correctly and responds to movement. Proper testing helps avoid false triggers or failure to turn on lights when needed. Follow these steps to verify your sensor is active and troubleshoot common problems.
Verifying Sensor Activation
Stand within the sensor’s detection range. Move slowly in front of the sensor. Watch if the light turns on immediately. The sensor should detect motion within a few seconds. Test the sensor from different angles for better accuracy. Make sure no obstacles block the sensor’s view. Adjust the sensor’s position if needed. Confirm the light stays on for the set time after motion stops.
Troubleshooting Common Issues
If the sensor does not activate, check the power supply. Ensure the switch is correctly wired and powered. Clean the sensor lens to remove dust or dirt. Verify the sensor’s sensitivity settings are not too low. Avoid placing the sensor near heat sources or direct sunlight. Reset the switch if it behaves erratically. Consult the user manual for specific error codes or lights.
Maintaining Your Motion Sensor Switch
Maintaining your Lutron motion sensor switch helps it work well for years. Regular care keeps the sensor accurate and the switch responsive. Small steps can prevent common issues and extend the device’s life.
Check the switch often to catch dirt or software problems early. Proper upkeep ensures your lighting stays smart and energy-efficient.
Cleaning Tips
Turn off the power before cleaning the switch. Use a dry, soft cloth to wipe the sensor and switch surface. Avoid wet cloths or sprays near the sensor. Dirt or fingerprints can block the sensor’s view. Clean the area gently to keep the sensor sensitive.
Updating Firmware If Applicable
Some Lutron switches support firmware updates. Check the model to see if yours does. Use the Lutron app or website to find updates. Follow the instructions carefully during the update process. Firmware updates fix bugs and improve performance. Keep the switch connected to Wi-Fi during updates.

Credit: device.report
Credit: support.lutron.com
Frequently Asked Questions
How Do I Program A Lutron Motion Sensor Switch?
To program, press and hold the “Setup” button until the LED blinks. Use the buttons to set sensitivity, timeout, and mode. Save settings by pressing “Setup” again. Always consult the manual for model-specific steps.
Can I Adjust The Motion Sensor Sensitivity?
Yes, sensitivity can be adjusted during programming. Increasing sensitivity detects smaller movements, while decreasing avoids false triggers. Use the switch buttons to customize it to your room’s activity level.
How To Set The Timeout Duration On Lutron Switches?
Timeout duration controls how long the light stays on after no motion. During setup, select the desired timeout from options. It ranges from seconds to minutes, depending on your model.
Will The Switch Work With All Bulb Types?
Most Lutron motion sensor switches support LED, CFL, and incandescent bulbs. Check your model’s compatibility to ensure proper function and avoid flickering or sensor errors.
Conclusion
Programming your Lutron motion sensor light switch is simple and quick. Follow each step carefully to avoid mistakes. Test the switch to make sure it works well. Adjust settings to fit your needs and save energy. Enjoy hands-free lighting that improves safety and convenience.
Keep the manual nearby for future reference. Small effort, big comfort.