Is your ceiling fan’s light switch acting up and leaving you in the dark? You’re not alone, and fixing it might be easier than you think.
Imagine flipping the switch and having your room brighten instantly—no frustration, no hassle. In this guide, you’ll discover simple, step-by-step ways to troubleshoot and repair your ceiling fan’s light switch yourself. By the end, you’ll save time, avoid costly repairs, and enjoy your well-lit space again.
Ready to take control and fix that switch? Let’s get started.
:max_bytes(150000):strip_icc()/broken-fan-pull-chain-switch-4775179-hero-31f04775f34f41678f94d62e4bbfab77.jpg)
Credit: www.thespruce.com
Tools And Materials Needed
Fixing a light switch on a ceiling fan requires the right tools and materials. Having everything ready makes the job easier and safer. This section lists the essential items you need before starting.
Essential Tools
- Screwdriver set (flathead and Phillips)
- Voltage tester
- Wire stripper
- Needle-nose pliers
- Electrical tape
- Flashlight or portable light
Required Materials
- Replacement light switch compatible with your fan
- Wire nuts (connectors)
- Electrical box cover (if needed)
- Insulated gloves for safety

Credit: www.wikihow.com
Safety Precautions
Fixing a light switch on a ceiling fan needs care. Safety must be the first step. Taking the right precautions prevents accidents and injuries. Follow these safety tips before starting your repair work.
Power Shutdown
Turn off the power to the ceiling fan at the main breaker box. Do not rely on just the wall switch. Use a voltage tester to confirm no electricity flows to the fan. This step stops shocks and electrical hazards.
Proper Gear
Wear insulated gloves to protect your hands from electric shocks. Use safety glasses to guard your eyes from dust and debris. Choose tools with insulated handles made for electrical work. Proper gear keeps you safe during the repair process.
Identifying The Problem
Fixing a light switch on a ceiling fan starts with finding the problem. This step saves time and effort. Knowing what causes the issue helps you fix it correctly. Look carefully at the switch and fan before doing anything else. Sometimes the problem is simple and easy to spot. Other times, it needs a bit of testing to understand.
Check the switch for any visible damage. Listen to sounds when you flip the switch. Notice if the fan or light reacts or stays still. These clues point to where the problem lies. Don’t rush. Take time to observe and think about what you see and hear.
Common Issues
Many problems come from worn-out switches. Dirt or dust inside can stop the switch from working well. Loose wires often cause the switch to fail. Sometimes, the problem is with the fan or light, not the switch. A broken bulb or motor might seem like a switch problem. Knowing these common issues helps you decide what to check first.
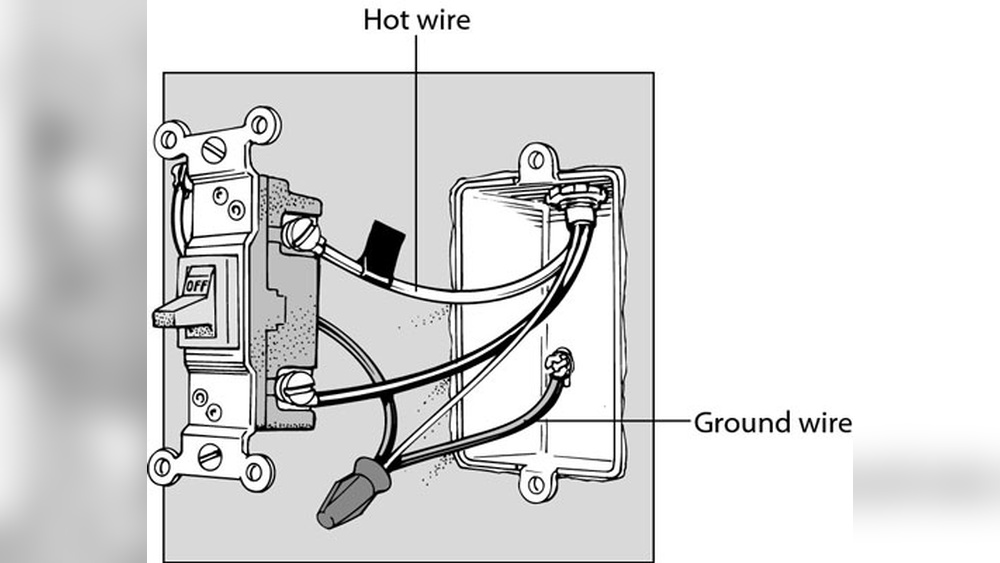
Testing The Switch
Use a voltage tester to check the switch’s power. Turn off the main power before doing this. Remove the switch cover gently to see the wires. Test the switch by flipping it on and off. The tester should show power flow when on. No power means the switch might be broken. Test twice to be sure. Always be careful and avoid touching wires with bare hands.

Credit: www.youtube.com
Removing The Old Switch
Removing the old switch from a ceiling fan is the first step in fixing it. This part controls the fan’s power and light. Taking it out carefully helps you avoid damage to the fan or wiring. Follow these simple steps to remove the switch safely and correctly.
Accessing The Switch
Turn off the power at the circuit breaker to stay safe. Use a ladder to reach the fan comfortably. Remove the fan’s light kit or cover. This lets you see the switch inside the fan housing. Unscrew the switch plate or cover to access the switch itself. Keep screws in a safe place for later use.
Disconnecting Wires
Look at the wires connected to the switch. Take a picture or note which wire goes where. This helps during installation of the new switch. Use a screwdriver or pliers to loosen the wire connectors. Gently pull the wires off the switch terminals. Avoid pulling on the wires themselves to prevent damage.
Installing The New Switch
Installing the new switch on your ceiling fan is the next step after removing the old one. This part is important for the fan to work properly. Take your time and follow the steps carefully. Use the right tools and keep safety in mind.
Wiring The Switch
First, connect the wires to the new switch. Match the colors of the wires to the switch terminals. Usually, black wires go to brass screws, and white wires to silver screws. Tighten the screws to hold the wires firmly. Avoid loose connections to prevent problems.
Securing The Switch
Push the wires gently back into the switch box. Place the switch into the box carefully. Use the screws that came with the switch to fix it in place. Make sure the switch sits flush with the wall or ceiling plate. Tighten the screws until the switch does not move.
Testing The Repair
Testing the repair is a key step after fixing a light switch on a ceiling fan. It helps ensure the switch works safely and properly. Careful testing avoids problems and keeps your home safe.
Restoring Power
Turn the power back on at the circuit breaker. Make sure you do this carefully. Avoid touching wires or metal parts. Use a voltage tester to check the switch box for power. This confirms the electricity flows correctly.
Verifying Functionality
Flip the switch to test the fan light. Watch the light turn on and off smoothly. Check the fan speed controls too. Make sure the fan runs at all speeds. Listen for any strange sounds or flickering lights. Test a few times to confirm the fix works well.
Troubleshooting Tips
Troubleshooting a light switch on a ceiling fan can save time and money. The problem might be simple or a bit tricky. Follow these tips to find the cause and fix it safely. Always turn off the power before checking the fan or switch. Use a tester to make sure no electricity flows.
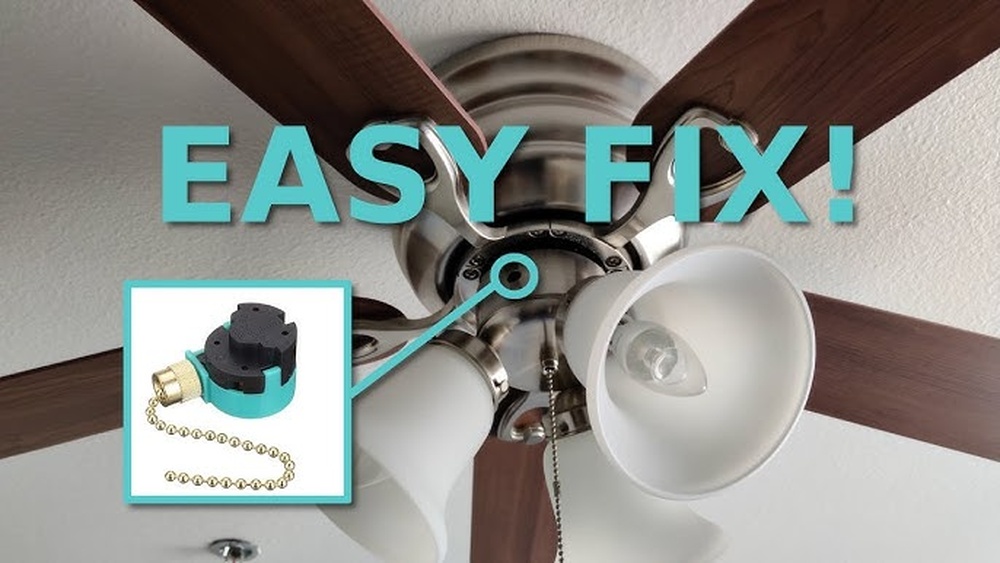
If The Switch Doesn’t Work
Check if the switch feels loose or stuck. A faulty switch often stops the light from turning on. Remove the switch cover and look for burned or broken parts. Tighten any loose wires connected to the switch. Replace the switch if it looks damaged or old. Use the same type of switch for safety.
Other Possible Issues
Sometimes the problem is not the switch. The light bulb might be burnt out or loose. Try changing the bulb with a new one. The fan’s wiring inside the ceiling box could be loose or disconnected. Look for damaged wires or loose connections. The fan’s remote control or wall control might have dead batteries. Check these controls if your fan uses them. The circuit breaker could be off. Reset it if needed. Testing each part helps find the exact problem fast.
Maintaining Your Ceiling Fan Switch
Maintaining your ceiling fan switch is key to keeping your fan working well. A well-kept switch helps avoid sudden failures. It also extends the fan’s life and saves money on repairs. Simple care routines make a big difference in performance and safety.
Regular Checks
Check the switch often for any signs of wear. Look for loose parts, cracks, or dirt build-up. Test the switch by turning the fan on and off. Listen for strange sounds or feel for unusual heat. These signs show the switch might need attention.
Clean the switch gently with a dry cloth. Avoid using water or harsh chemicals. Dust and dirt can block the switch and cause it to fail. Regular checks catch problems early and keep the fan running smoothly.
Preventive Measures
Turn the fan off before changing the switch or doing repairs. Use the right tools to avoid damaging the switch. Avoid pulling on the fan chain or switch hard. Gentle use reduces wear and tear.
Keep the fan and switch dry. Moisture can cause rust and electrical problems. Use a cover if the fan is in a humid area. Proper care prevents many common switch issues.
Frequently Asked Questions
How Do I Fix A Faulty Light Switch On A Ceiling Fan?
Turn off power, remove switch cover, test wires with a voltage tester, replace the switch, and reconnect wires securely.
Why Is My Ceiling Fan Light Switch Not Working?
A faulty switch, loose wiring, or blown fuse can cause the light switch to fail on your ceiling fan.
Can I Replace A Ceiling Fan Light Switch Myself?
Yes, with basic electrical knowledge and safety precautions, you can replace the light switch on your ceiling fan.
What Tools Do I Need To Fix A Ceiling Fan Light Switch?
You need a voltage tester, screwdriver, wire stripper, replacement switch, and electrical tape to fix the switch.
Conclusion
Fixing a light switch on a ceiling fan is easier than it seems. Follow each step carefully and stay safe. Turn off the power before starting any work. Check the wiring and replace the faulty switch. Test the fan and light after repair.
Small problems can cause big issues if ignored. Taking time to fix it saves money later. Keep tools and instructions nearby for a smooth process. Now, your ceiling fan light switch should work well again. Simple repairs can make your home more comfortable.