Are your brake lights not working properly? This can be a serious safety issue for you and other drivers on the road.
One common cause is a faulty brake light switch. But how do you know if the switch is the problem? Testing your brake light switch yourself is easier than you might think. You’ll learn simple steps to check your brake light switch quickly and accurately.
Keep reading to find out how to keep your brakes—and your safety—in top shape.
Brake Light Switch Basics
The brake light switch is a small but important part of your car’s safety system. It controls the brake lights that warn other drivers when you slow down or stop. Understanding how this switch works helps you keep your vehicle safe and avoid accidents.
Testing the brake light switch is simple once you know its basics. This section explains what the switch does, the common types, and signs that it may be faulty.
What The Switch Does
The brake light switch activates the brake lights when you press the brake pedal. It sends an electrical signal to turn on the lights at the rear. This alert tells drivers behind you to slow down. It also helps in disabling cruise control in some cars. Without a working switch, brake lights may not turn on, increasing crash risk.
Common Switch Types
Two main types of brake light switches exist: mechanical and electronic. Mechanical switches use a plunger triggered by the brake pedal. Electronic switches use sensors to detect pedal movement. Both types perform the same function but work differently. Knowing your car’s switch type helps in proper testing and replacement.
Signs Of A Faulty Switch
Brake lights that do not turn on or stay on constantly indicate a bad switch. Other signs include cruise control problems and the brake warning light on the dashboard. If your brake lights flicker or work irregularly, the switch may be failing. Detecting these signs early helps prevent accidents and costly repairs.

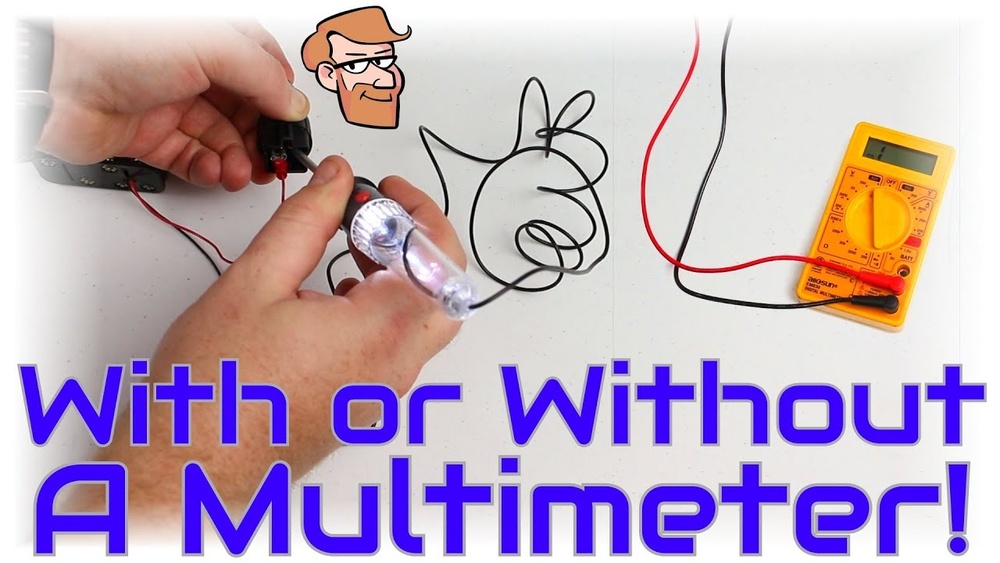
Credit: www.youtube.com
Tools You’ll Need
Testing a brake light switch requires the right tools to get accurate results. Using proper equipment helps you check the switch safely and quickly. Prepare all tools before starting the test to avoid delays.
Essential Testing Tools
A multimeter is the most important tool for this job. It measures electrical current and voltage in the switch. You will also need a set of screwdrivers to access the switch. A test light helps to check if power reaches the brake light switch. Basic pliers can assist in removing clips or connectors. Keep a flashlight nearby for better visibility in tight spaces.
Safety Gear Recommendations
Wear safety glasses to protect your eyes from debris. Gloves keep your hands safe from sharp parts and dirt. Use closed-toe shoes to avoid injuries from dropped tools. Avoid loose clothing that could get caught in moving parts. Always work in a well-lit, ventilated area to stay safe and comfortable.
Locating The Brake Light Switch
Finding the brake light switch is the first step in testing it. This small device plays a key role in vehicle safety. It signals the brake lights to turn on when you press the pedal. Knowing where to find it saves time and frustration during testing.
Typical Switch Positions
The brake light switch usually sits near the brake pedal. It is attached to the brake pedal arm or the pedal bracket. In most cars, it is just above the pedal, near the top of the pedal arm. The switch often looks like a small box with a plunger or button that the pedal presses.
Some vehicles have the switch mounted on the brake pedal bracket. Others place it slightly to the side or behind the pedal. The switch connects to the vehicle’s wiring harness. This allows the brake lights to receive power when the pedal is pressed.
Access Tips
Accessing the brake light switch can be tight and tricky. The area under the dashboard near the pedals is often cramped. Sitting in the driver seat and looking up helps locate the switch. Use a flashlight to see better in the dark space.
Removing a panel or cover beneath the dashboard may be necessary. This gives more room to work and view the switch. Wear gloves to protect your hands from sharp edges. Take your time and be gentle when handling the switch and wires.
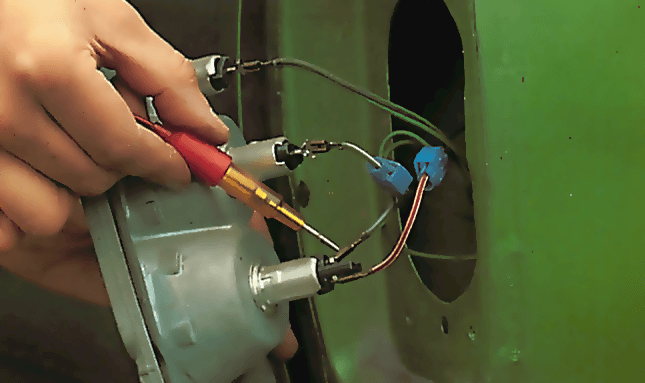
Credit: www.howacarworks.com
Testing Methods
Testing a brake light switch helps ensure your vehicle’s safety. There are simple ways to check if the switch works properly. Each method gives clear results and requires basic tools. Choose the one that suits your skills and tools.
Visual Inspection
Start by examining the brake light switch closely. Look for broken parts or loose connections. Check if wires are worn or disconnected. Dirt or corrosion can also cause problems. Cleaning the switch and connectors might fix minor issues. This method is quick and needs no special tools.
Using A Multimeter
A multimeter tests the switch’s electrical function. Set it to measure continuity or resistance. Disconnect the switch from the vehicle’s wiring. Connect the multimeter leads to the switch terminals. Press the brake pedal and watch the meter. The reading should change when the pedal moves. No change means the switch might be faulty.
Checking With A Test Light
A test light checks if power reaches the switch. Connect the test light clip to the vehicle’s ground. Touch the test light probe to the switch terminals. Press and release the brake pedal. The light should turn on and off accordingly. No light means no power or a bad switch. This method is simple and effective for quick checks.
Step-by-step Testing Process
Testing a brake light switch is essential for safe driving. This step-by-step process helps check if the switch works properly. Follow these clear steps to test the brake light switch on your vehicle. No special tools are needed, just some basic knowledge and care.
Preparing The Vehicle
Park the vehicle on a flat surface. Turn off the engine and set the parking brake. Locate the brake light switch under the dashboard near the brake pedal. Make sure the area is well-lit for easy access. Gather a multimeter or test light to help with the testing.
Performing The Test
Press the brake pedal slowly and hold it down. Use the multimeter to check for voltage at the switch terminals. Look for a change in the reading when the pedal is pressed and released. Alternatively, use a test light to see if it lights up when the pedal is pressed. Test both the power supply and the output side of the switch.
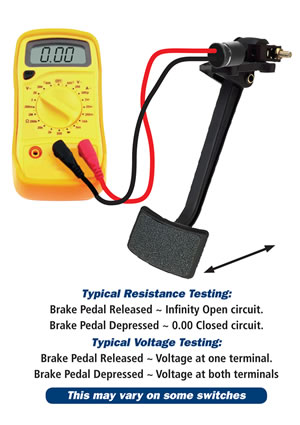
Interpreting Results
If the multimeter shows voltage only when the pedal is pressed, the switch works. No voltage or constant voltage means the switch may be faulty. A test light that does not illuminate indicates a problem. Replace the brake light switch if readings are inconsistent. Proper testing ensures brake lights respond correctly for safety.
Troubleshooting Common Issues
Testing a brake light switch often reveals common problems that are easy to fix. These issues usually involve the switch itself or the wiring connected to it. Understanding how to spot and solve these problems helps keep your brake lights working properly. This section covers simple steps to troubleshoot and fix brake light switch issues.
Switch Adjustment
The brake light switch can sometimes be out of alignment. This causes the lights to stay on or not turn on at all. Check the switch’s position near the brake pedal. Adjust it so the switch activates only when the pedal is pressed. Small movements can make a big difference. Ensure the switch clicks when the pedal moves. Proper adjustment often solves the problem quickly.
Wiring Problems
Wiring problems are a common cause of brake light failure. Look for loose or broken wires around the switch. Corroded or damaged connectors stop the signal from reaching the lights. Use a multimeter to test if power reaches the switch. Repair or replace any faulty wires or connectors. Fixing wiring issues restores the brake light’s function.
Replacing The Switch
Sometimes the brake light switch is faulty and must be replaced. Signs include brake lights that never turn off or do not light up at all. Find the switch near the brake pedal and remove it carefully. Install a new switch that fits your vehicle model. Test the brake lights after replacement to confirm the fix. Replacing the switch often solves persistent problems.
Preventive Maintenance Tips
Preventive maintenance helps keep your brake light switch working well. It stops problems before they start. Small efforts now save big repairs later. Follow these simple tips to maintain your brake light switch.
Regular Inspections
Check the brake light switch often. Look for loose wires or worn parts. Make sure the switch clicks when you press the brake. Testing regularly catches problems early. Fix issues before they cause brake light failure.
Cleaning And Lubrication
Dirt and dust can block the switch from working. Clean the switch carefully with a soft cloth. Avoid wetting electrical parts. Use a small amount of lubricant on moving parts. This keeps the switch smooth and stops rust. Clean switches last longer and work better.
Credit: premierautotrade.com.au
Frequently Asked Questions
How Do I Know If My Brake Light Switch Is Faulty?
A faulty brake light switch causes brake lights to stay off or on constantly. Test by pressing the brake pedal and checking if the lights respond. Use a multimeter to check for electrical continuity through the switch when pressed.
What Tools Are Needed To Test A Brake Light Switch?
You need a multimeter to test electrical continuity and a screwdriver to access the switch. Additionally, having a vehicle manual helps locate the brake light switch precisely. These tools ensure accurate and safe testing.
Can I Test The Brake Light Switch Without Removing It?
Yes, you can test the switch in place by checking for voltage changes with a multimeter. Press the brake pedal and measure if the switch sends power to the brake lights. This method avoids removing the switch.
How Long Does It Take To Test A Brake Light Switch?
Testing a brake light switch usually takes 10 to 15 minutes. This includes locating the switch, performing continuity checks, and verifying brake light responses. It’s a quick and simple diagnostic process.
Conclusion
Testing a brake light switch helps keep your car safe. It shows if the switch works or needs fixing. Use simple tools like a multimeter or test light for this check. Regular checks stop brake light problems while driving. Knowing how to test it saves time and money.
Stay alert and keep your brake lights bright. This small step protects you and others on the road. Easy, quick, and important.