Are you tired of struggling to hang heavy items on your walls without them falling down? Getting anchors into your wall the right way is the secret to a strong, secure hold that lasts.
Whether you’re putting up shelves, mirrors, or artwork, knowing how to install anchors correctly can save you time, frustration, and damage to your walls. In this guide, you’ll discover simple steps and insider tips that make the process easy—even if you’ve never done it before.
Keep reading, and soon you’ll feel confident tackling any wall project like a pro.
Types Of Wall Anchors
Wall anchors help hold screws tightly in walls. They stop screws from pulling out. Different anchors work best for different walls and weights. Knowing the right type helps keep things secure.
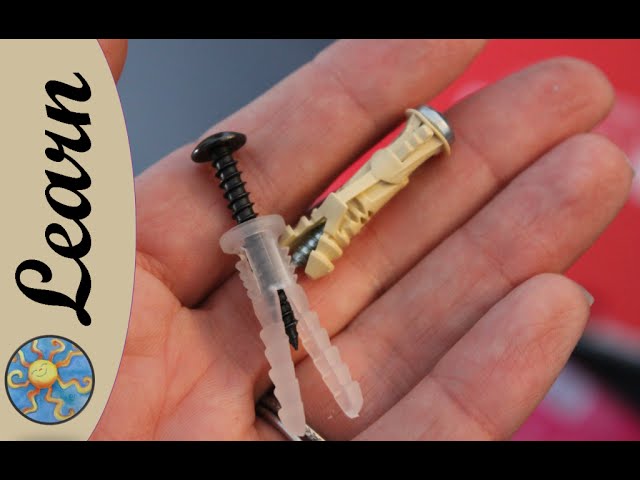
Plastic Expansion Anchors
Plastic expansion anchors are common and easy to use. Drill a hole, push in the anchor, then insert the screw. The anchor expands inside the wall, gripping firmly. Best for light to medium loads in drywall or plaster.
Toggle Bolts
Toggle bolts have wings that open inside the wall. They spread the load over a bigger area. Great for heavy items on drywall or hollow walls. Requires a larger hole but offers strong support.
Molly Bolts
Molly bolts have metal sleeves that expand behind the wall. They create a strong hold in drywall or plaster. Ideal for medium to heavy loads. The sleeve locks tight as you tighten the screw.
Self-drilling Anchors
Self-drilling anchors do not need pre-drilling. You screw them directly into drywall. They have threads that grip the wall as you turn. Good for light to medium weight items. Easy and fast to install.
Credit: www.youtube.com
Tools You Need
Getting anchors into the wall needs a few basic tools. Each tool helps make the job easier and more precise. Having the right tools saves time and avoids damage to the wall.
Drill And Drill Bits
A drill makes holes for anchors quickly and cleanly. Use the right drill bit size for your anchor. Too big or too small can cause problems. Choose a drill bit that matches the anchor diameter. A power drill works best, but a hand drill can also do the job.
Screwdriver
A screwdriver helps insert screws into anchors. Use a screwdriver that fits the screw head perfectly. This prevents slipping and stripping of screws. Both flathead and Phillips screwdrivers are common. Choose one based on the screws you have.
Hammer
A hammer is useful to tap anchors into the wall. Light taps push anchors gently without cracking the wall. Avoid heavy hits that can damage surfaces. Use a hammer with a comfortable grip for better control.
Measuring Tape And Pencil
Measuring tape helps mark exact spots for anchors. Accurate measurements keep your project level and balanced. Use a pencil to mark points lightly. This avoids permanent marks on your wall. Measuring and marking first prevents mistakes later.
Choosing The Right Anchor
Choosing the right anchor is key for strong and safe wall mounting. The anchor must fit the wall type, hold the needed weight, and match the screw size. Picking the wrong anchor can cause damage or failure.
Consider Wall Material
Different walls need different anchors. Drywall, concrete, brick, and plaster all have unique properties. Use plastic anchors for drywall. Use metal or sleeve anchors for concrete or brick. Always match the anchor to the wall type for best hold.
Weight Capacity
Check the weight the anchor can support. Light anchors hold small items like picture frames. Heavy-duty anchors hold shelves, TVs, or cabinets. Choose an anchor with a weight rating above your item’s weight.
Anchor Size
Anchor size must match the screw size and hole drilled. Too small anchors may not hold well. Too large anchors can damage the wall. Follow the anchor package instructions for correct drill bit and screw size.
Credit: www.bobvila.com
Preparing The Wall
Preparing the wall is a key step before inserting anchors. This process helps ensure the anchors fit tightly and hold well. A properly prepared wall prevents damage and keeps your items secure. Follow these simple steps to get the wall ready for anchors.
Marking The Spot
Start by marking the exact spot where you want the anchor. Use a pencil or marker for a clear, visible mark. Measure carefully to avoid mistakes. Marking helps guide your drill and keeps the hole in the right place.
Drilling The Hole
Choose a drill bit that matches your anchor size. Drill straight into the marked spot with steady pressure. Avoid pushing too hard to prevent cracking the wall. Drill to the correct depth for a secure fit.
Cleaning The Hole
Remove dust and debris from the hole using a brush or blower. Clean holes help anchors grip better and hold firmly. Avoid leaving loose particles inside the hole. A clean hole makes the anchor work as it should.
Installing The Anchor
Installing the anchor correctly is key to a strong hold in your wall. Different anchors suit different wall types and weights. Knowing how to install each one helps ensure your fixture stays secure. Follow these simple steps for common types of wall anchors.
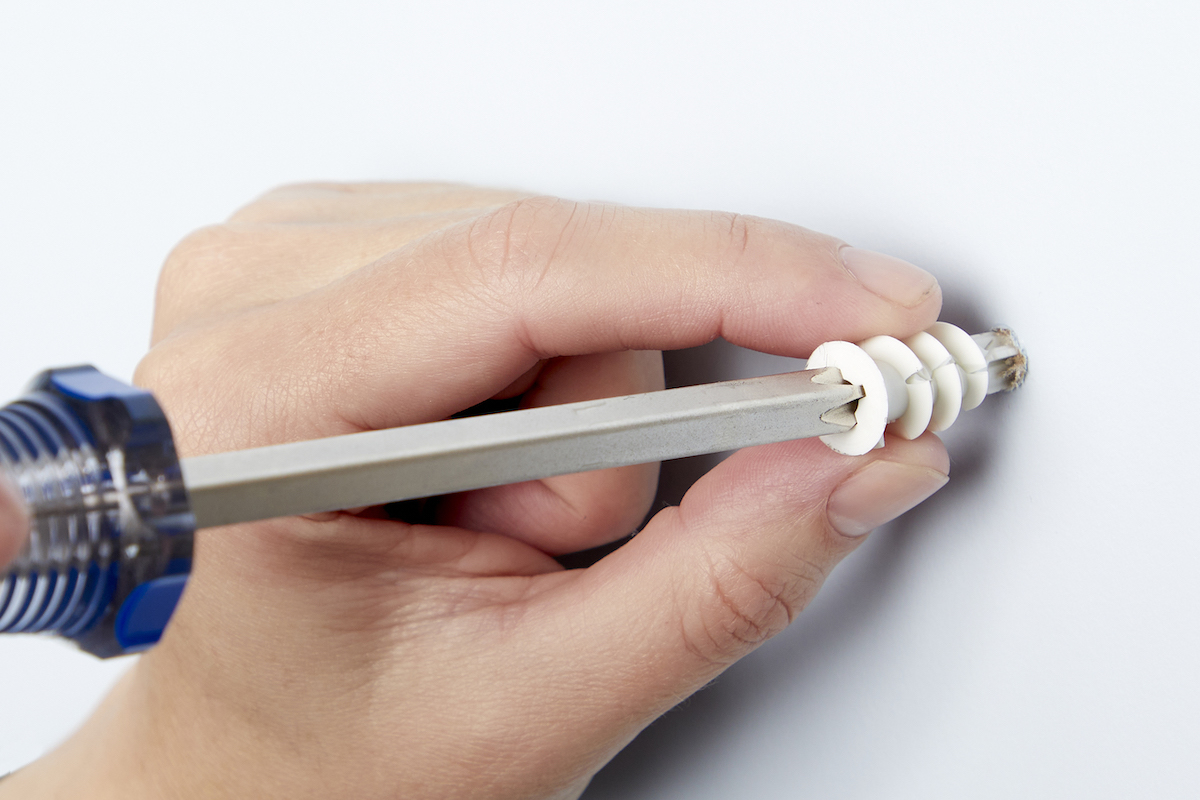
Inserting Plastic Expansion Anchors
Start by drilling a hole in the wall that matches the anchor size. Push the plastic anchor into the hole until it is flush. Tap it lightly with a hammer if needed. Screw your fastener into the anchor carefully. The plastic will expand inside the wall, holding tight.
Using Toggle Bolts
Drill a hole large enough for the folded toggle wings. Insert the toggle bolt with wings closed into the hole. Once inside, the wings open behind the wall. Pull the bolt gently toward you to lock the wings in place. Tighten the screw to secure your object firmly.
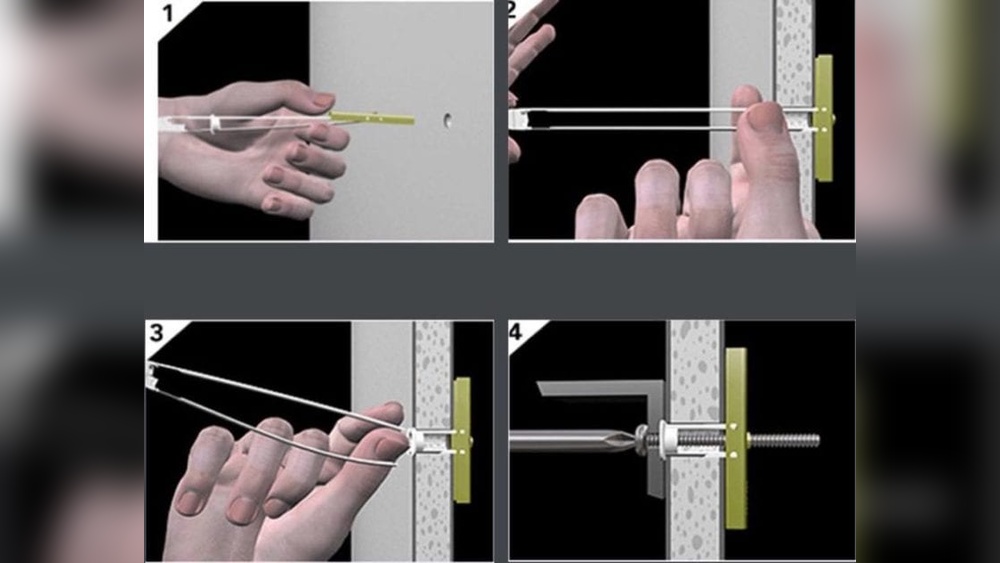
Setting Molly Bolts
Drill a hole slightly smaller than the molly bolt’s diameter. Push the molly bolt into the hole until the flange rests on the wall. Tighten the screw slowly. This action expands the bolt legs behind the wall. Remove the screw to hang your item, then replace the screw.
Installing Self-drilling Anchors
Place the tip of the anchor on the wall surface. Use a screwdriver or drill to turn the anchor clockwise. The anchor drills directly into drywall without pre-drilling. Continue turning until the flange sits flat on the wall. Insert the screw into the anchor for a firm grip.

Credit: www.reddit.com
Securing The Screw
Heavy loads need strong support. Using anchors for heavy items requires care and smart techniques. Follow these tips to keep your wall safe and secure.
Using Multiple Anchors
Spread the weight by using more than one anchor. This helps balance the load across the wall. Space the anchors evenly for the best hold. It reduces stress on any single point.
Reinforcing The Wall
Strengthen the wall before adding heavy anchors. Use wooden boards or metal plates behind drywall. This provides a firm base for anchors. It prevents damage and keeps heavy items steady.
Professional Help
Ask an expert for large or tricky jobs. Professionals know the right anchors and tools to use. They can check the wall’s condition. This ensures safety and long-lasting support.
Frequently Asked Questions
What Tools Are Needed To Install Wall Anchors?
You need a drill, drill bit, hammer, screwdriver, and the correct anchors. These tools ensure precise holes and secure anchor placement for strong support.
How Do You Choose The Right Wall Anchor Type?
Select anchors based on wall material and load weight. Use plastic anchors for light loads, metal for heavy items, and toggle bolts for drywall.
Can I Install Anchors Without A Drill?
Yes, small plastic anchors can be tapped into drywall with a hammer. However, a drill provides more accuracy and is recommended for heavier anchors.
How Deep Should I Drill For Wall Anchors?
Drill a hole slightly deeper than the anchor length. This allows the anchor to fit fully and ensures a secure hold.
Conclusion
Getting anchors into walls is easier than it seems. Choose the right anchor for your wall type. Use the correct drill bit size to make a hole. Insert the anchor carefully without forcing it. Tighten screws slowly to avoid damage.
These simple steps help secure items safely. Practice makes the process smoother each time. Soon, you will hang pictures, shelves, and more with confidence. Keep tools handy and work patiently for best results.