Are you ready to upgrade your home lighting but not sure where to start? Installing a new light switch might seem tricky, but with the right steps, you can do it yourself quickly and safely.
Imagine controlling your lights exactly how you want, adding convenience and style to your space. In this guide, you’ll discover simple, clear instructions that make the process easy—even if you’re not an expert. Keep reading, and by the end, you’ll have the confidence to tackle your light switch installation like a pro.
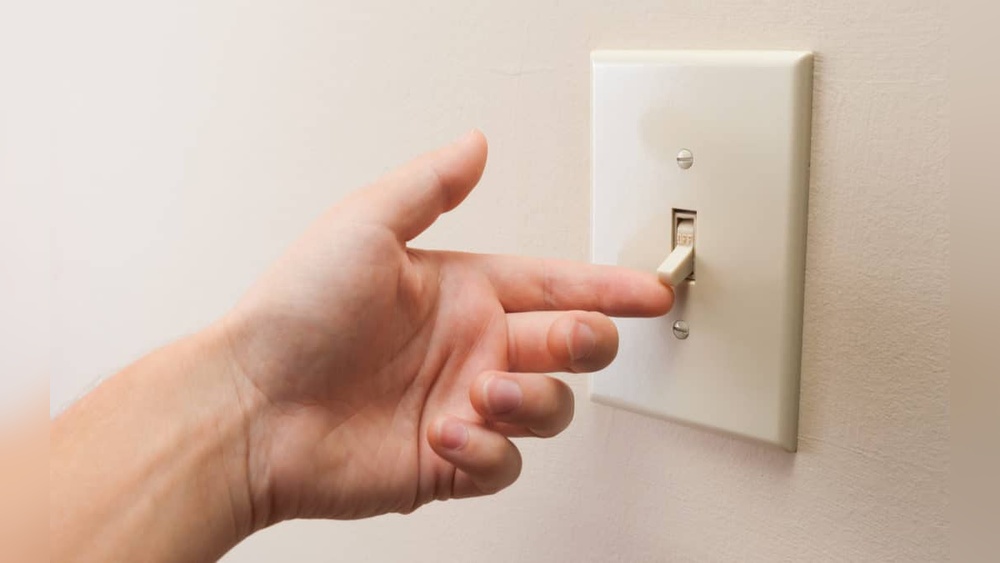
:max_bytes(150000):strip_icc()/how-to-wire-and-install-single-pole-switches-1152330-05-2de77af170364a6fb3846f30634a5cd3.jpg)
Credit: www.thespruce.com
Tools And Materials Needed
Installing a new light switch requires some basic tools and materials. Having the right items makes the job easier and safer. This section lists everything you need before starting.
Basic Tools List
You will need a screwdriver, usually flathead and Phillips. A voltage tester helps check if the power is off. Wire strippers are useful for removing insulation from wires. Needle-nose pliers help twist wires together. A utility knife can cut electrical tape or wire sheathing. Keep a flashlight nearby for better visibility.
Choosing The Right Switch
Select a switch that fits your home’s wiring and style. Single-pole switches control one light from one place. Three-way switches control one light from two locations. Dimmer switches adjust light brightness. Check the switch’s voltage and current ratings. Match the switch color with your room decor.
Safety Gear Essentials
Wear safety gloves to protect your hands from cuts. Use safety goggles to shield your eyes from dust and debris. Avoid working in wet conditions to prevent electric shock. Turn off the circuit breaker before starting any electrical work. Keep a fire extinguisher nearby just in case.

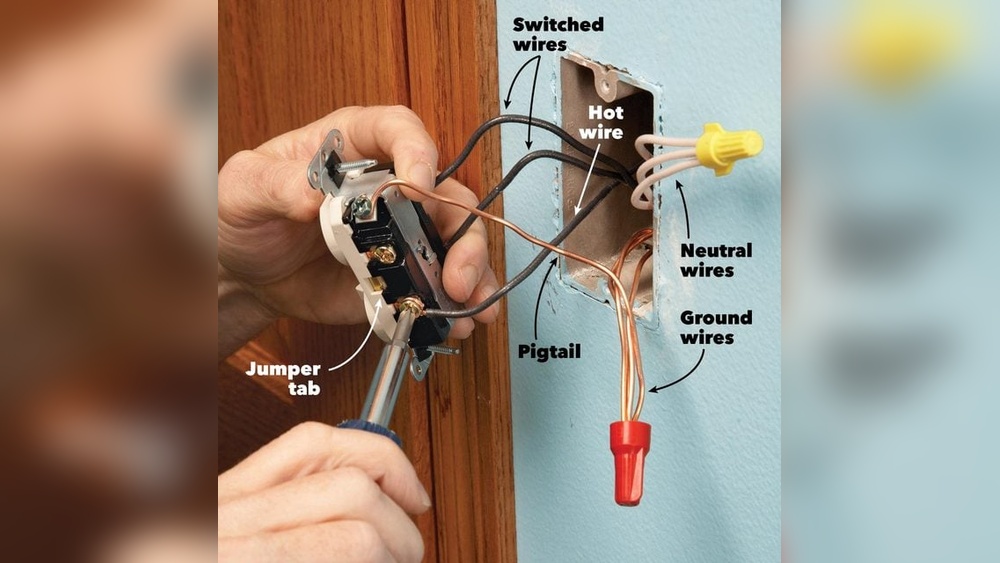
Credit: www.dummies.com
Preparing For Installation
Preparing to install a new light switch is important for safety and success. Take time to get ready before starting the work. This will help avoid mistakes and keep the process smooth. Follow simple steps to prepare your workspace and tools. Clear the area around the switch for easy access. Have a screwdriver and voltage tester ready. Safety is the top priority. Understanding the wiring is key to a proper installation.
Turning Off Power Safely
Always turn off the power before touching any wiring. Go to your circuit breaker panel and find the switch for the room. Flip the breaker to the off position. Use a voltage tester to check the switch wires. Confirm no electricity flows through them. This step prevents electric shocks and injury. Never skip this safety check.
Removing The Old Switch
Remove the switch cover plate first. Use a screwdriver to take out the screws. Gently pull the old switch from the wall box. Note how the wires connect to the switch terminals. Take a photo for reference. Carefully disconnect the wires by loosening the screws. Keep the wires separated to avoid contact.
Inspecting Wiring
Look closely at the wires for damage or wear. Check for frayed insulation or loose connections. Tighten any loose screws on wire terminals. Replace damaged wires before installing the new switch. Proper wiring ensures the switch works well and safely. Clean the area inside the wall box if needed. Clear wiring means a safer, easier installation.
Wiring The New Switch
Wiring the new switch is a crucial step in installing it safely and correctly. This part requires careful attention to detail to ensure the switch works as expected. Understanding the wires and how to connect them helps avoid problems later.
Identifying Wire Types
Start by recognizing the different wires in the box. Typically, you will see a black (hot) wire, a white (neutral) wire, and a green or bare copper (ground) wire. The black wire carries electricity to the switch. The white wire returns electricity to the panel. The ground wire protects against electrical shock.
Check the wires carefully. Make sure they are not damaged or frayed. If you find any damaged wires, replace them before proceeding.
Connecting Wires Correctly
Connect the black wire to the brass or dark-colored screw on the switch. Attach the white wire to the silver screw if your switch requires it. Some switches do not connect to the neutral wire. The ground wire goes to the green screw or the metal box if grounded.
Match the wires with the correct screws. Tighten the screws firmly to prevent loose connections. Loose wires cause flickering lights or electrical shorts.
Securing Wire Connections
Use wire nuts to cap any exposed wire ends. Twist wires together before placing wire nuts on them. This ensures a strong connection.
Wrap electrical tape around the wire nuts and screws for extra safety. Push the wires neatly back into the box. Avoid overcrowding to reduce the risk of damage.
Mounting The Switch
Mounting the switch is a key step in installing a new light switch. It ensures the switch fits well and works safely. This step includes placing the switch box correctly, securing the switch, and covering it with a plate. Careful mounting keeps the switch steady and looks neat.
Aligning The Switch Box
Start by placing the switch box into the wall opening. Make sure it fits tightly without gaps. The box should sit flush with the wall surface. Check that the switch holes align with the box openings. Proper alignment helps the switch fit easily and work well.
Fastening The Switch
Use screws to fasten the switch to the box. Tighten screws evenly to avoid tilting the switch. Do not over-tighten; it may crack the plastic. The switch must be secure but still flush with the wall. Proper fastening keeps the switch stable and safe.
Attaching The Cover Plate
Place the cover plate over the mounted switch. Align the screw holes of the plate with the switch. Insert screws and tighten gently. The cover plate hides wires and gives a clean look. Make sure the plate sits flat and does not stick out.
Testing The Installation
Testing the installation of a new light switch is a key step. It ensures safety and proper function. You confirm the wiring is correct and the switch works as expected. This part should be done carefully to avoid electrical issues.
Restoring Power
Turn the power back on at the circuit breaker. Do it slowly to avoid shocks. Use a voltage tester to check the switch box. Make sure electricity flows safely before proceeding.
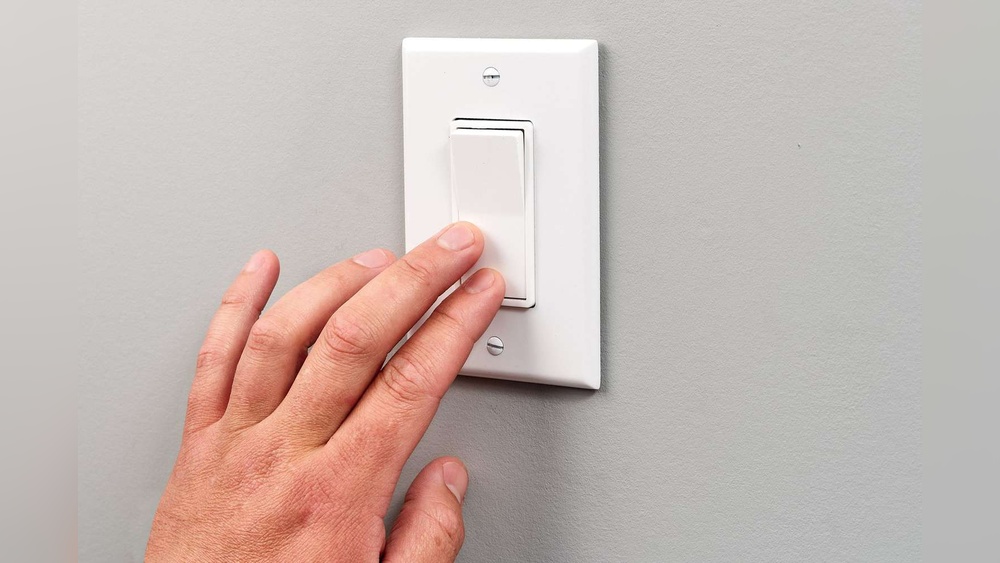
Checking Switch Function
Flip the switch up and down. Check if the light turns on and off. Test several times to confirm steady operation. If the light flickers or stays off, double-check your wiring.
Troubleshooting Common Issues
If the light does not work, check the wires again. Look for loose or disconnected wires. Tighten screws if needed. Ensure the switch is compatible with your light fixture.
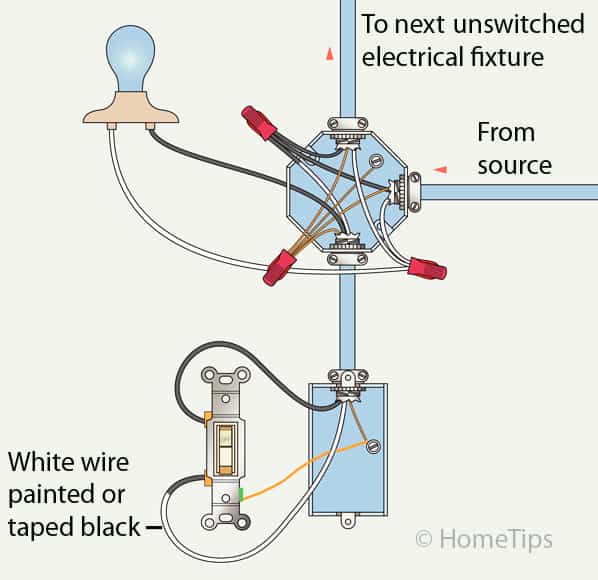
Credit: www.hometips.com
Safety Tips For Diy Electrical Work
Working on electrical projects at home can save money and boost confidence. Safety is the top priority for any DIY electrical work. Simple precautions help prevent accidents and damage. Understanding safety tips ensures a smooth installation of your new light switch.
Avoiding Common Mistakes
Always turn off the power at the breaker box before starting. Use a voltage tester to confirm no electricity flows to the switch. Avoid touching wires with wet hands or metal tools. Never force wires into terminals; this can cause loose connections. Follow the wiring diagram carefully to connect wires correctly. Avoid skipping steps or rushing through the process.
When To Call A Professional
Call an electrician if unsure about wiring or power off status. Complex wiring or old electrical systems need expert handling. If your home has aluminum wiring, professional help is safer. Notice signs like burning smells or flickering lights. Stop work immediately and get expert advice in such cases.
Maintaining Electrical Safety
Use insulated tools designed for electrical work. Wear rubber-soled shoes to reduce shock risk. Keep the work area dry and well-lit. Replace damaged wires or switches promptly. Test the switch after installation to ensure it works properly. Regularly check your electrical fixtures to prevent hazards.
Frequently Asked Questions
How Do I Safely Turn Off Power Before Installing A Switch?
Always turn off the circuit breaker to cut power. Use a voltage tester to confirm no electricity flows. This ensures safety while working on the light switch installation.
What Tools Are Needed To Install A New Light Switch?
You need a screwdriver, voltage tester, wire stripper, electrical tape, and the new light switch. These tools help you complete the installation correctly and safely.
How Do I Connect Wires To A New Light Switch?
Connect the black (hot) wire to the switch terminal. Attach the white (neutral) wires together with a wire nut. Finally, connect the ground wire to the green screw.
Can I Install A Light Switch Without Electrical Experience?
Basic knowledge helps, but safety is crucial. If unsure, hire a licensed electrician. Incorrect installation can cause shocks or fire hazards.
Conclusion
Installing a new light switch is easier than it seems. Take your time and follow the steps carefully. Always turn off the power before starting any work. Use the right tools and double-check your connections. Safety matters most in any electrical project.
With patience, you can do this yourself. Enjoy the satisfaction of fixing your home. Keep learning and improving your skills bit by bit. Simple tasks like this build confidence. Now, your light switch works perfectly and safely.