Are you tired of struggling with a flickering light or a switch that just won’t work on your ceiling fan? Changing the light switch might seem tricky, but it’s easier than you think—and you don’t need to call an electrician.
In this guide, you’ll learn simple, step-by-step instructions to replace your ceiling fan’s light switch safely and quickly. Imagine having full control over your fan’s light again, without any hassle. Keep reading, and you’ll be able to fix it yourself in no time!
Tools And Materials Needed
Changing the light switch on a ceiling fan needs the right tools and materials. Having them ready makes the job easier and safer. This list covers everything you need to complete the task.
Safety Gear
Wear safety goggles to protect your eyes from dust or sparks. Use insulated gloves to avoid electric shocks. Safety first.
Basic Tools
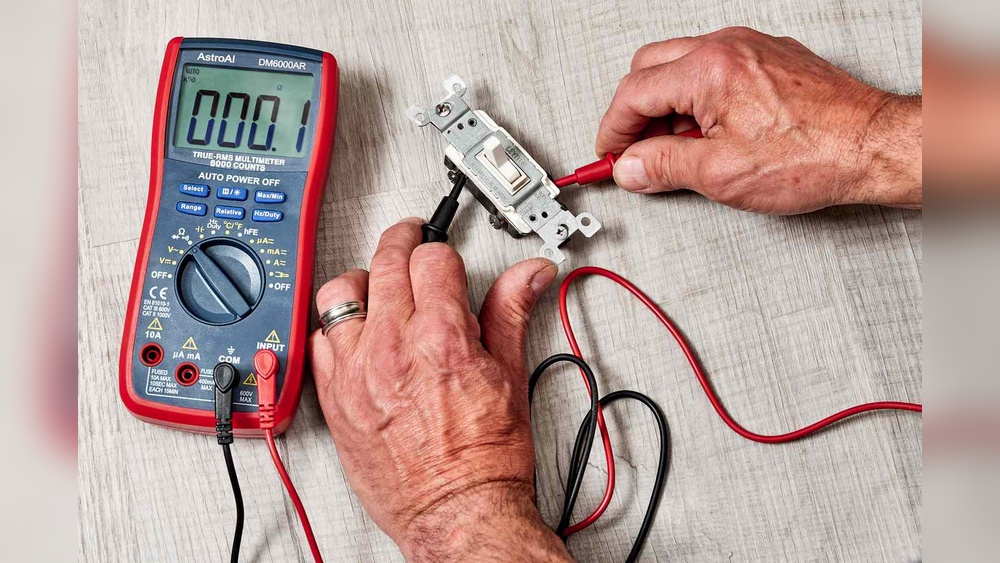
You need a screwdriver set with flathead and Phillips heads. A voltage tester helps confirm the power is off. Wire strippers make handling wires easier.
Replacement Parts
Get a new light switch that matches your ceiling fan’s model. Use electrical tape to secure wire connections. Have wire nuts for safe wiring joins.
Additional Supplies
Keep a flashlight handy for better visibility. Use a ladder that is stable and the right height. A small container can hold screws and parts during work.
Safety Precautions
Safety is the top priority when changing a light switch on a ceiling fan. Electrical work can be dangerous without proper precautions. Taking simple steps can protect you from shocks and injuries.
Before starting, prepare your workspace and tools carefully. Follow these safety rules strictly to avoid accidents. Never rush the process.
Turn Off The Power
Switch off the power at the circuit breaker. Do not rely on the wall switch only. Use a voltage tester to confirm no electricity flows to the fan. This step is crucial to prevent electric shock.
Use Insulated Tools
Choose tools with insulated handles. They reduce the risk of electric shock. Avoid metal tools without insulation. This small step adds a strong layer of protection.
Wear Safety Gear
Wear rubber-soled shoes to avoid grounding yourself. Use safety glasses to protect your eyes from dust or debris. Gloves designed for electrical work improve grip and safety.
Work In A Dry Area
Ensure the room is dry and free of moisture. Water increases the risk of electric shock. Avoid working in damp conditions or with wet hands.
Double Check Your Work
After installation, double check all connections. Loose wires can cause shorts or fires. Test the switch carefully before restoring full power.
Turn Off Power
Turning off the power is the most important step before changing a light switch on a ceiling fan. It keeps you safe from electric shocks. Always treat electricity with respect. Never skip this step, even if you think the power is off.
Power can be off at the switch but still live at the wiring. This can cause serious injury. To avoid danger, turn off the power at the main breaker box. This stops electricity from flowing to the fan and switch.
Locate The Circuit Breaker
Find your home’s circuit breaker box. It is usually in the basement, garage, or utility room. Look for a metal box with a door. Inside are switches labeled for different parts of the house.
Switch Off The Correct Breaker
Identify the breaker that controls the ceiling fan. It may be labeled “Fan” or “Living Room.” Flip this breaker switch to the OFF position. This cuts power to the light switch and fan.
Confirm Power Is Off
Use a voltage tester or a non-contact tester near the switch wires. No light or beep means power is off. Double check with a second tool if you have one. Safety first.
Inform Others
Tell everyone in the house that the power is off. This prevents someone from turning the breaker back on by mistake. Keep the breaker off until you finish the work.
Remove Existing Switch
Removing the existing switch from a ceiling fan is the first step to changing it. This task requires care and attention to safety. Make sure to cut power to the fan at the circuit breaker before starting. This prevents electric shock and keeps you safe.
Once the power is off, you can begin removing the switch cover and switch itself. Follow the steps below for a smooth process.
Turn Off Power At The Circuit Breaker
Locate the breaker that controls the ceiling fan’s power. Flip it to the off position. Test the switch to confirm no power flows to the fan. This step is crucial for safety.
Remove The Switch Cover Plate
Use a screwdriver to remove the screws holding the cover plate. Keep the screws safe for reinstallation. Gently pull the cover plate away from the wall.
Unscrew The Existing Switch
Find the screws that hold the switch in the electrical box. Loosen and remove these screws. The switch will come out slightly from the wall.
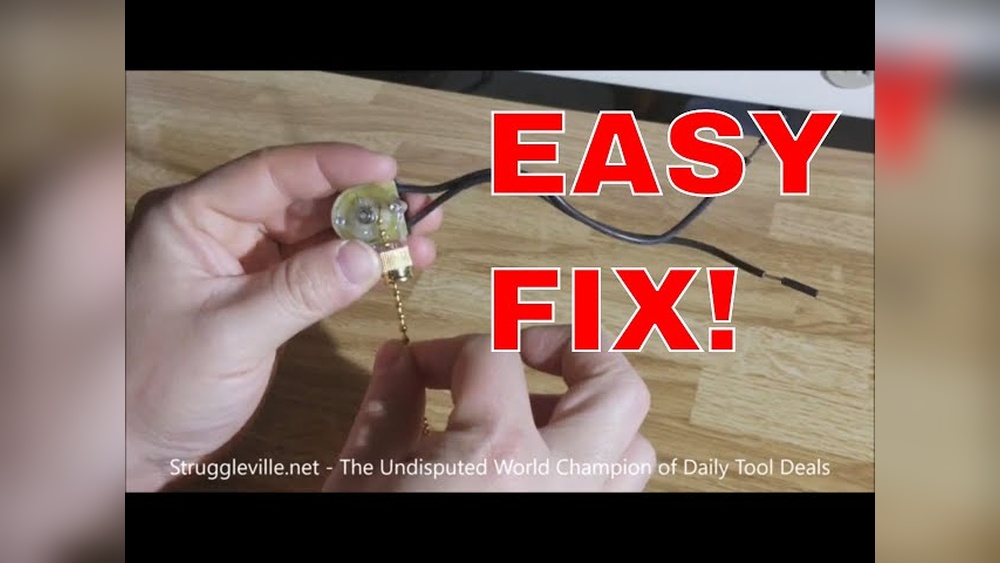
Disconnect The Switch Wires
Note how the wires connect to the switch. Take a picture or label the wires for reference. Use a screwdriver to loosen the terminal screws. Carefully detach the wires from the switch.
Identify Wiring
Before changing the light switch on your ceiling fan, identify the wiring carefully. Understanding the wires helps you connect the new switch safely. This step avoids confusion and prevents electrical problems later.
Switch off the power at the circuit breaker. This stops electricity from flowing. Use a tester to check the wires are not live. Safety is the top priority.
Remove Switch Cover
Unscrew the switch cover plate. Gently pull out the switch from the wall box. Look closely to see the wires attached to the switch.
Identify Wire Types
Find the black or red wire. This is usually the hot wire. The white wire is the neutral. The green or bare wire is the ground.
Label Each Wire
Use tape or markers to label wires. Mark the hot, neutral, and ground wires. This makes it easier to connect the new switch correctly.
Note Wire Connections
Take a photo or draw a diagram of the wire setup. Record which wire connects to each terminal. This guide helps during reinstallation.

Credit: www.youtube.com
Install New Switch
Changing a light switch on a ceiling fan is simple and quick. Turn off the power, remove the old switch, and connect the new one carefully. Make sure wires are secure before restoring power.
Prepare The Wiring For The New Switch
Start by turning off the power at the circuit breaker. Safety first. Remove the old switch carefully. Check the wires for any damage or wear. Strip about half an inch of insulation from each wire end. This helps create a good connection with the new switch. Make sure the wires are straight and clean for easy attachment.
Connect The New Switch Wires
Match the wires from the ceiling fan to the new switch terminals. Usually, black or red wires are for the switch. Attach the wires to the screws on the switch. Tighten the screws securely, but don’t over-tighten. Loose connections can cause flickering or failure. Use wire nuts if needed to join wires safely. Double-check all connections before moving on.
Secure The New Switch In The Box
Carefully fold the wires back into the electrical box. Position the new switch flat against the box. Use screws to fasten the switch firmly in place. Avoid pinching any wires. Attach the switch cover plate to finish. This keeps everything neat and protected. Restore power at the breaker and test the new switch. The fan should respond smoothly to the switch controls.
Reconnect Wiring
Reconnecting the wiring is a key step to change the light switch on your ceiling fan. It ensures the fan and light work safely and correctly. Careful attention is needed to avoid any electrical problems.
Follow each step slowly. Double-check connections before moving forward. Safety first.
Turn Off Power Supply
Start by switching off the power at the circuit breaker. This stops electricity from flowing while you work. Use a voltage tester on wires to confirm power is off.
Match Wire Colors
Identify wires by their color. Black or red wires usually carry power. White wires are neutral. Green or bare wires connect to the ground. Match the new switch wires to the same colors.
Connect Wires Securely
Twist wires together tightly. Use wire nuts to cover each connection. Tug gently on wires to ensure they do not come loose. Loose wires can cause sparks or faults.
Attach Switch To Wall Box
Push wires neatly into the wall box. Screw the new switch in place. Make sure it fits snugly without pinching wires.
Turn the circuit breaker back on. Test the switch by turning the fan light on and off. Check if both fan and light respond correctly.
Secure Switch And Cover Plate
Securing the switch and cover plate is a key step in changing the light switch on a ceiling fan. It keeps everything safe and neat. A properly fixed switch avoids loose wiring and accidental shocks. The cover plate also protects wires from dust and damage.
Careful securing adds to the ceiling fan’s overall look. It gives a clean and finished appearance. This step ensures the switch works smoothly without interruption.
Check Switch Alignment
Place the switch gently into the box. Make sure the switch fits straight and tight. The switch should not tilt or move. Proper alignment makes the next steps easier and safer.
Tighten Switch Screws
Use a screwdriver to tighten the switch screws. Secure the switch firmly but do not over-tighten. Over-tightening can crack the switch or strip the screws. Hold the switch steady while tightening for best results.
Attach Cover Plate
Align the cover plate over the switch. Match the screw holes on the plate with those on the switch. Press the plate flush against the wall or ceiling. This helps protect and cover the switch completely.
Secure Cover Plate Screws
Insert the screws into the cover plate holes. Tighten the screws slowly and evenly. Avoid overtightening to prevent cracking the plate. The plate should fit snugly without gaps.
Restore Power And Test
After changing the light switch on your ceiling fan, restoring power is the next important step. This step helps check if the switch works correctly and if the fan and lights respond as expected. Always take safety seriously by ensuring the wiring is secure before turning the power back on.
Testing the switch confirms that your work was successful. It also helps spot any issues early, so you can fix them before using the fan normally.
Turn On The Circuit Breaker
Go to your home’s electrical panel. Find the breaker that controls the ceiling fan circuit. Flip the switch to the ON position. This action restores power to the fan and light. Be careful and make sure your hands are dry.
Check The Light Switch Function
Stand near the fan and press the new switch. The fan’s light should turn on or off smoothly. Test the switch multiple times to ensure it works every time. Listen for any strange sounds from the fan.
Test The Ceiling Fan
Use the fan control to turn the blades on. Check if the fan runs at all speeds. Watch for any flickering lights or unusual noises. Confirm that the switch change did not affect the fan’s motor.
Ensure Safety And Final Checks
Look over the switch and fan for loose wires or sparks. Make sure the switch is firmly mounted in the wall. If everything looks good, your switch change is complete. If you see problems, turn off power and review your work.

Credit: community.smartthings.com
Troubleshooting Tips
Troubleshooting can save time and frustration during a light switch change on a ceiling fan. Simple checks often fix common issues fast. It helps to know basic tips before starting the project. This section guides you through easy steps to find and solve problems.
Check The Power Supply
Make sure the power is off at the circuit breaker. Use a voltage tester to confirm no electricity flows to the switch. A live wire can cause shocks or damage. Double-checking power safety is essential before handling wires.
Inspect The Wiring Connections
Look for loose or disconnected wires in the switch box. Tighten any loose screws holding wires in place. Correct wiring ensures the switch controls the fan light properly. Wrong connections can prevent the light from turning on or off.
Test The Light Switch
Use a multimeter to test if the switch works correctly. Replace the switch if it shows no continuity. A faulty switch is a common cause of light issues. Testing saves time by identifying if the switch itself is broken.
Check The Ceiling Fan Light Bulbs
Remove and inspect the bulbs for damage or burnout. Replace any bulbs that do not light up. Sometimes the problem is only the bulb, not the switch or wiring. Always use the correct bulb type for your fan.
Examine The Fan’s Internal Wiring
Look inside the fan housing for loose connections. Secure any wires that seem disconnected or frayed. Internal wiring problems can stop the light from working. Carefully handling these wires prevents further damage.
Verify The Dimmer Or Remote Controls
Check if the fan uses a dimmer or remote control. Test these controls for proper function. Replace batteries or reset remotes if needed. Faulty controls can interfere with the light switch’s operation.

Credit: diy.stackexchange.com
Frequently Asked Questions
How Do I Safely Turn Off Power Before Changing A Ceiling Fan Switch?
Always switch off the circuit breaker to cut power completely. Use a voltage tester to confirm no electricity flows. This prevents electric shocks during the switch replacement process.
What Tools Are Needed To Change A Light Switch On A Ceiling Fan?
You typically need a screwdriver, voltage tester, wire stripper, and replacement switch. These tools help safely remove the old switch and install the new one securely.
How Can I Identify The Correct Wires To Connect?
Look for black (hot), white (neutral), and green or bare (ground) wires. Use the fan’s manual or label wires before disconnecting for accurate reconnection.
How Long Does It Take To Replace A Ceiling Fan Light Switch?
Replacing the switch usually takes about 15 to 30 minutes. The time depends on your experience and the fan’s wiring complexity.
Conclusion
Changing a light switch on a ceiling fan is simple and safe. Turn off the power first. Use the right tools and follow steps carefully. Take your time and check all connections. A working switch improves your fan’s function. This small fix saves money and effort.
You can enjoy better lighting quickly. Try it yourself and see the difference.