Have you ever wished your lights could turn off automatically, saving you money and hassle? Setting a timer on your light switch is an easy way to control when your lights come on and go off without lifting a finger.
Whether you want to boost home security, reduce energy bills, or just add convenience, knowing how to put a timer on a light switch can make a big difference. In this guide, you’ll discover simple steps to get it done quickly and safely.
Keep reading to find out how you can take control of your lighting with just a few easy changes.
Choosing The Right Timer
Choosing the right timer for your light switch is important for ease and efficiency. The right timer helps save energy and controls lighting automatically. You want a timer that fits your needs and works with your home setup. Consider the types, features, and compatibility before buying.
Types Of Light Switch Timers
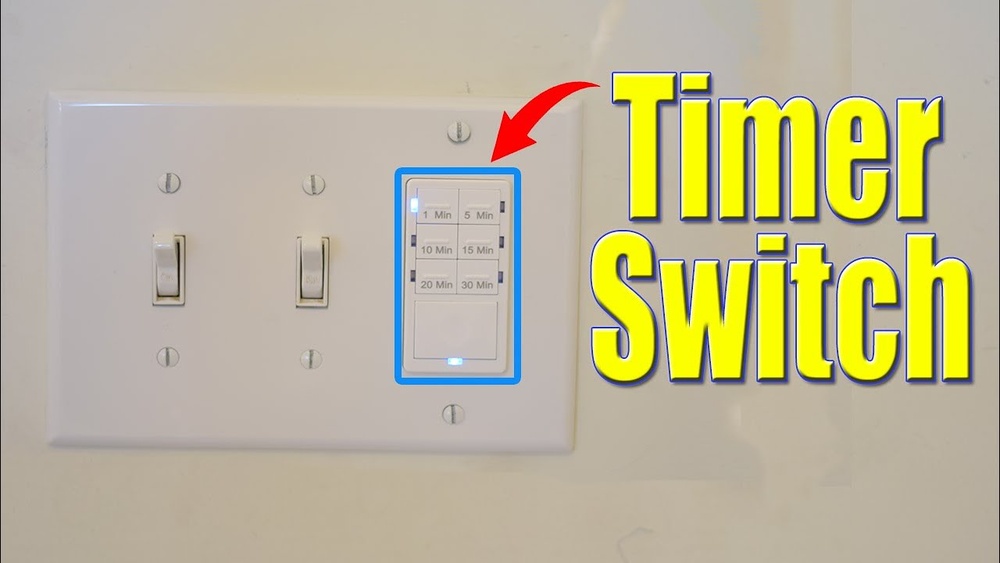
There are several types of timers for light switches. Mechanical timers use a dial to set the on and off times. Digital timers offer precise control with buttons and displays. Smart timers connect to your phone or home system for remote control. Each type has benefits depending on your lifestyle and budget.
Features To Consider
Look for easy programming options. Some timers let you set multiple on/off cycles per day. Battery backup is useful to keep settings during power outages. Check if the timer has a manual override switch for instant control. Energy-saving modes and countdown timers add flexibility.
Compatibility With Your Fixtures
Ensure the timer works with your light type, like LED, CFL, or incandescent bulbs. Some timers only support certain wattages. Check the voltage and current ratings to match your electrical system. Also, see if the timer fits your wall switch size and style. Proper compatibility avoids damage and ensures smooth operation.

Credit: www.youtube.com
Tools And Materials Needed
Installing a timer on a light switch needs certain tools and materials. These items help make the job easier and safer. Preparing all the necessary tools before starting saves time and avoids interruptions.
Essential Tools
Basic tools include a screwdriver, wire stripper, and voltage tester. A screwdriver helps remove and tighten screws on the switch plate. Wire strippers cut and strip electrical wires cleanly. Voltage testers check if the power is off before touching wires.
Safety Equipment
Safety must come first. Use insulated gloves to protect your hands from electric shocks. Safety goggles shield your eyes from dust or sparks. Turn off the power at the breaker box to prevent accidents. A non-contact voltage tester gives extra safety assurance.
Timer Models And Accessories
Choose a timer that fits your needs. Mechanical timers are simple and easy to use. Digital timers offer more options and precision. Check if your timer includes mounting screws and wire connectors. Some timers need a neutral wire, so know your switch wiring.
Preparing For Installation
Before installing a timer on your light switch, proper preparation is key. This helps keep the process safe and smooth. Understanding each step lowers risks and makes installation easier.
Start by making sure the power is off. Next, remove the old switch carefully. Then, check the wiring to confirm it matches the timer’s needs. These steps set a good foundation.
Turning Off Power Safely
Locate your home’s main electrical panel. Switch off the circuit breaker controlling the light switch. Use a voltage tester to confirm no power flows to the switch. Never skip this step to avoid electric shock.
Removing The Existing Switch
Unscrew the switch plate cover. Remove the screws holding the switch in place. Gently pull the switch out from the wall. Note how wires connect to the switch. Take a photo to help with reinstallation.
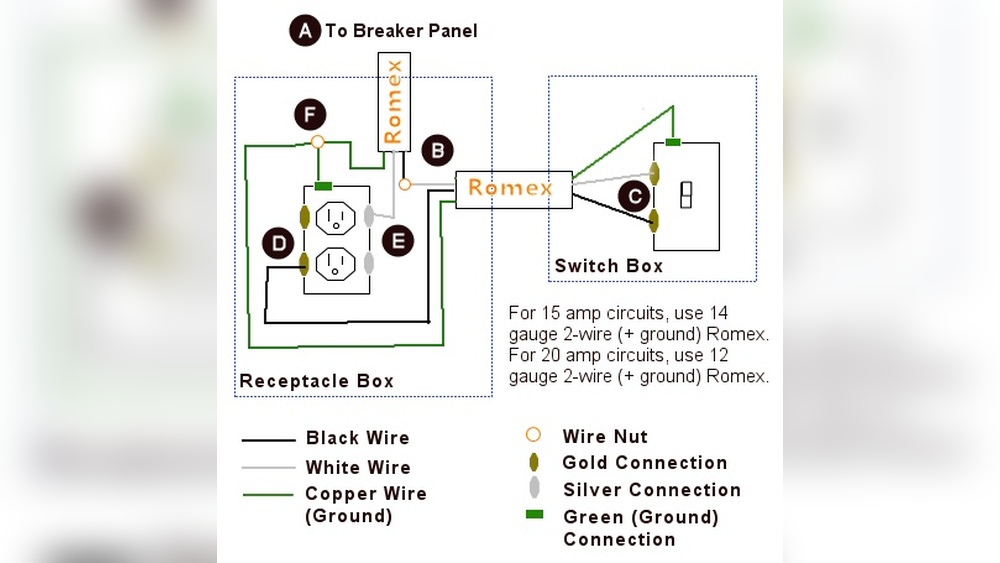
Checking Wiring Setup
Identify the wires: live, neutral, and ground. Match these with the timer switch instructions. Look for any damaged or loose wires. Fix or replace wires before installing the timer. Proper wiring ensures the timer works correctly and safely.

Credit: www.ifixit.com
Step-by-step Installation
Installing a timer on a light switch is a practical way to save energy and improve convenience. This step-by-step guide simplifies the process. Follow each step carefully for a safe and proper installation. No special skills are needed, just basic tools and caution.
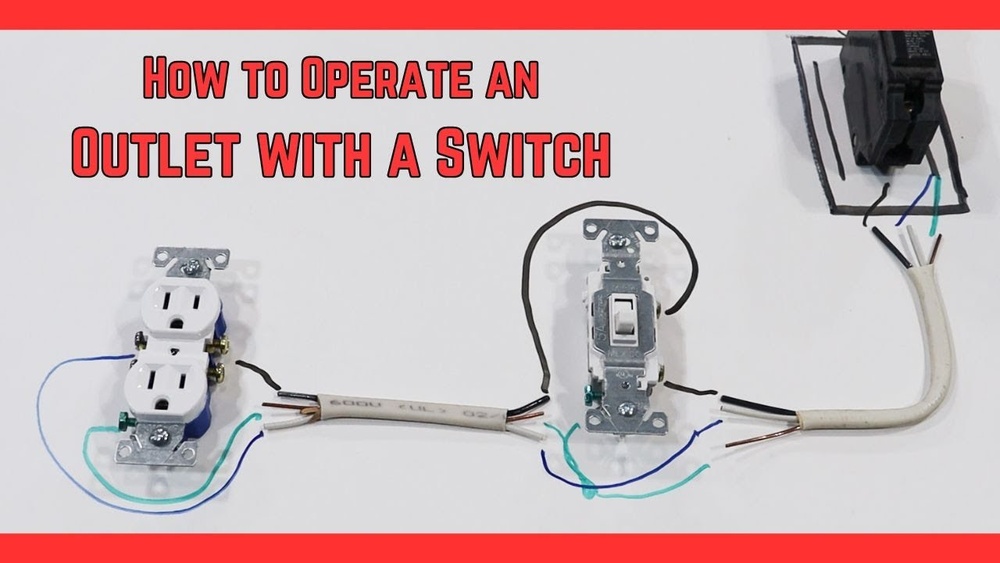
Wiring The Timer Switch
First, turn off the power at the circuit breaker. Use a tester to confirm the power is off. Remove the existing switch cover and switch. Note the wires connected to the old switch. Typically, you will see a live wire, a load wire, and a ground wire. Connect the timer switch wires to the matching wires in the box. Usually, black to black, red to red, and green or copper to ground. Use wire nuts to secure each connection. Make sure no copper wire is exposed.
Securing The Timer In Place
Carefully push the wires back into the electrical box. Align the timer switch with the screw holes. Use a screwdriver to tighten the screws and hold the timer firmly. Avoid overtightening to prevent damage. Attach the switch cover plate. Check that the timer is flush with the wall.
Restoring Power And Testing
Turn the circuit breaker back on. Press the timer’s reset or test button if it has one. Set the timer to the desired time. Flip the switch to check if the light responds correctly. Watch the light turn off automatically at the set time. If it doesn’t work, turn off the power and recheck the wiring.
Programming Your Timer
Programming your timer is an important step to control your light switch automatically. It lets you set when lights turn on and off. This saves energy and makes your home safer. Follow simple steps to set your timer right.
Setting On And Off Times
Start by pressing the program button on your timer. Use the hour and minute buttons to select the time lights should turn on. Then, set the off time the same way. Make sure to choose AM or PM correctly. Save your settings by pressing the confirm or save button. Your timer will now control the light based on these times.
Adjusting For Different Schedules
Change your timer settings to fit different days or routines. Some timers let you set separate programs for weekdays and weekends. Adjust the on and off times for each day as needed. This helps match your light schedule to your lifestyle. Check your timer manual for options to customize your schedule.
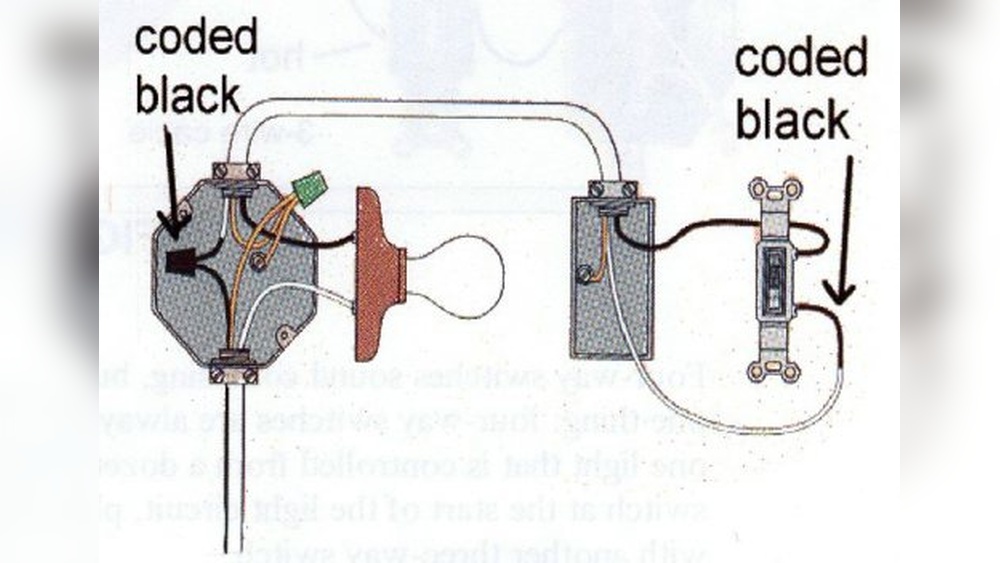
Troubleshooting Common Issues
If your timer does not work, check the power supply first. Ensure the timer is properly installed and connected. Reset the timer if it shows incorrect time or does not respond. Replace batteries if your timer uses them. Consult the manual for error codes or flashing lights. These steps fix most common problems quickly.

Credit: diy.stackexchange.com
Safety Tips And Precautions
Installing a timer on a light switch can save energy and add convenience. Safety is very important during this process. Taking the right precautions prevents accidents and damage. Always prepare carefully before starting any electrical work.
Handling Electrical Components
Turn off the power at the circuit breaker before touching wires. Use a voltage tester to confirm no electricity flows. Handle wires with care to avoid cuts or shocks. Keep metal tools away from live wires. Follow the timer switch instructions closely for wiring steps.
When To Call A Professional
Call an electrician if you feel unsure about any step. Complex wiring or old switches may need expert help. Do not risk injury or damage by guessing connections. Professionals ensure safe and correct installation. They can also check your home’s electrical system for safety.
Maintaining Your Timer Switch
Regularly check the timer switch for wear or damage. Clean the switch gently to avoid dust buildup. Replace batteries if the timer needs them. Test the timer function every few months. Proper care helps your timer work longer and safer.
Benefits Of Using A Timer Switch
Using a timer switch for your lights offers many benefits. It helps save energy, improves home security, and adds convenience. These advantages make timer switches a smart choice for any home. Below are the key benefits explained.
Energy Savings
Timer switches turn lights off automatically after a set time. This prevents lights from staying on unnecessarily. Reducing wasted electricity lowers your energy bills. Saving energy also helps protect the environment. Small changes like this make a big difference over time.
Enhanced Security
Lights that turn on and off at scheduled times can deter burglars. A home that looks lived-in is less likely to be targeted. Timer switches create the illusion someone is home, even when you are away. This simple step can improve your home’s safety.
Convenience And Automation
Timer switches simplify daily routines by automating lighting. No need to remember to turn off lights before leaving. They provide hands-free control that fits your lifestyle. Automation adds comfort and ease to your home environment.
Frequently Asked Questions
How Do I Install A Timer On A Light Switch?
Turn off power at the breaker. Remove the switch cover. Connect the timer wires to the switch wires. Secure the timer and restore power. Follow the timer’s manual for specific wiring instructions.
What Types Of Timers Work With Light Switches?
Mechanical, digital, and smart timers all work well. Mechanical timers are simple and affordable. Digital timers offer precision settings. Smart timers connect to Wi-Fi for remote control.
Can I Use A Timer On Any Light Switch?
Most standard switches can use a timer. Ensure the timer matches your switch type. Some timers need neutral wires, not found in older homes. Always check compatibility before purchasing.
Are Timer Switches Energy-efficient?
Yes, timer switches save energy by limiting light usage. They prevent lights from staying on unnecessarily. This reduces electricity bills and extends bulb life. Timers help automate energy-saving habits easily.
Conclusion
Adding a timer to your light switch saves energy and adds convenience. It helps control lights automatically without extra effort. You can pick a timer that fits your needs and skill level. Installing it is simple with basic tools and instructions.
This small change can make your home smarter and safer. Try it today and enjoy the benefits of timed lighting.