Are you tired of staring at a dark screen while working in Microsoft Word? Switching to Light Mode can make your documents easier to read and your workspace feel brighter and more inviting.
If you’ve been wondering how to make this simple change, you’re in the right place. You’ll discover step-by-step instructions to switch Microsoft Word to Light Mode quickly and effortlessly. Keep reading to transform your writing experience and reduce eye strain with just a few clicks!
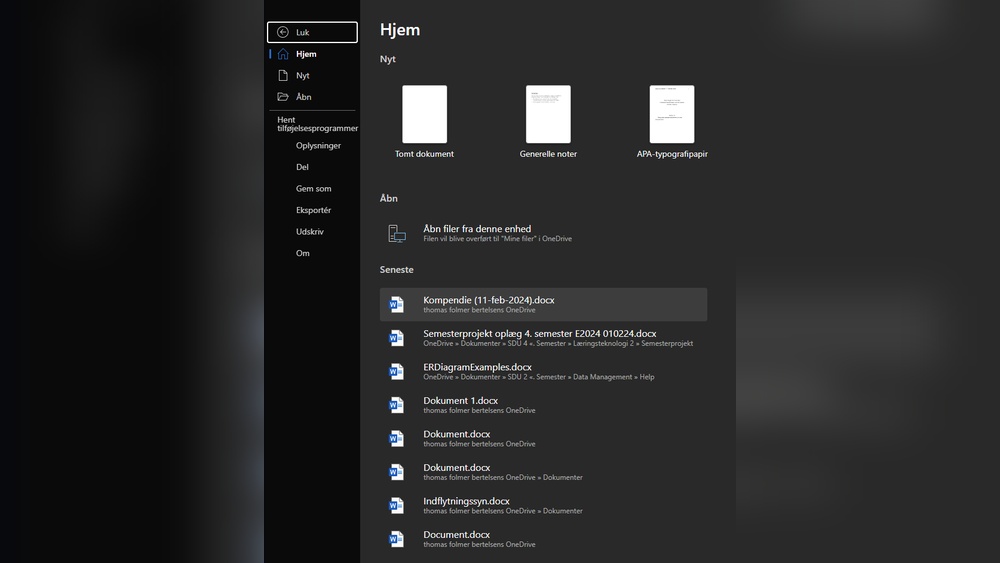
Credit: www.how2shout.com
Microsoft Word Color Modes
Microsoft Word offers different color modes to suit various user preferences. These modes change the background and text colors in the app. They help reduce eye strain and improve focus. Users can switch between dark mode and light mode anytime.
Each mode has its unique benefits. Choosing the right mode can improve your comfort while working. Understanding these modes helps you decide which fits your needs best.
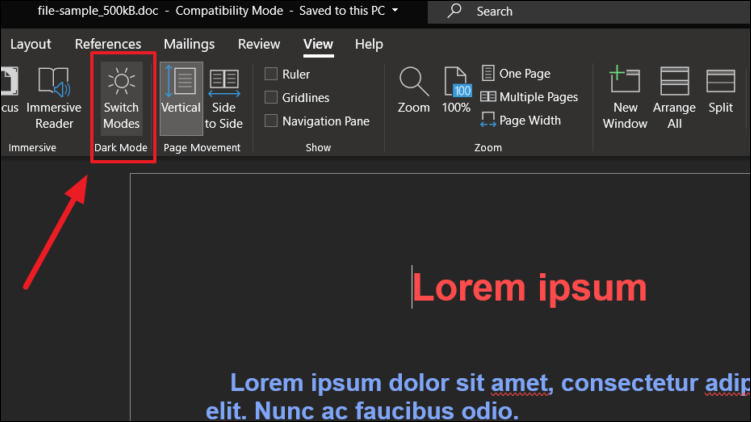
Dark Mode Benefits
Dark mode uses a dark background with light text. It reduces glare from the screen. This mode is gentle on your eyes, especially in low light. It helps prevent eye fatigue during long work hours. Dark mode can also save battery life on devices with OLED screens.
Light Mode Advantages
Light mode uses a white or light background with dark text. It offers clear visibility in bright environments. This mode feels familiar and easy to read for many users. It helps colors stand out, which is useful for editing images or graphics. Light mode works well in well-lit rooms or daylight settings.

Credit: softwareg.com.au
Accessing Word Settings
Changing Microsoft Word to Light Mode starts with accessing the right settings. You must find where the theme options are inside the program. This helps you control how Word looks and feels.
Knowing where to look in Word settings saves time. It makes switching themes easy and quick.
Navigating To Options
Open Microsoft Word on your computer. Look at the top left corner for the “File” tab. Click on it to open a new menu. Scroll down and find “Options” at the bottom. Click “Options” to open the Word settings window.
Finding Personalization Settings
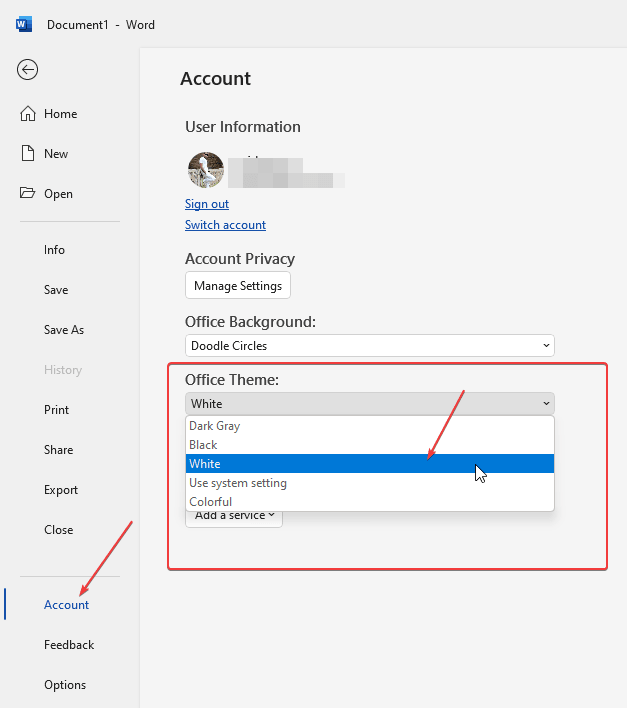
Inside the Word settings window, find the “General” tab. It should open by default. Look for “Personalize your copy of Microsoft Office.” This section controls the theme. Click the drop-down menu next to “Office Theme.” Choose “White” or “Colorful” for Light Mode.
Switching To Light Mode
Switching Microsoft Word to Light Mode helps reduce eye strain in bright environments. It also makes the interface look cleaner and easier to read. Changing the theme is quick and requires just a few steps.
Changing Office Theme
Open Microsoft Word and click on the File tab. Select Options at the bottom of the menu. In the Word Options window, find the General section. Look for the “Personalize your copy of Microsoft Office” area. Click the dropdown menu next to Office Theme. Choose the Light option from the list.
Applying And Saving Changes
After selecting the Light theme, click OK to save changes. Word will immediately switch to Light Mode. The new setting applies to all Office apps linked to your account. You do not need to restart Word. Your eyes will thank you for the brighter, clearer display.
Troubleshooting Display Issues
Troubleshooting display issues in Microsoft Word can be simple. Sometimes, the theme does not change as expected. Other times, the settings may not match your Windows preferences. Understanding these problems helps fix them quickly.
Theme Not Changing
Microsoft Word may stay in dark mode even after switching to light mode. Restarting Word can solve this problem. Make sure you save your work before closing the app. Check for updates as older versions may have bugs. Updates often fix theme problems.
Try changing the theme from Word settings again. Go to File > Options > General > Personalize your copy of Microsoft Office. Select the Light theme and click OK. If the theme still does not change, try restarting your computer.
Compatibility With Windows Settings
Word’s theme sometimes follows the Windows system theme. If Windows is in dark mode, Word may stay dark. Check your Windows theme settings to ensure they are set to light mode. Go to Settings > Personalization > Colors and set the mode to Light.
If you want Word to have a different theme than Windows, disable the “Use system setting” option in Word. This option can be found in the same personalization menu inside Word. This helps keep Word’s theme separate from Windows.
Enhancing Your Workspace
Enhancing your workspace in Microsoft Word helps you work better and faster. A clean, bright workspace keeps your focus sharp. Simple changes can make your screen easier on the eyes and your tools easier to find. Small tweaks improve comfort during long work hours.
Switching to light mode is just the start. You can adjust colors and tool layouts to suit your style. These changes create a workspace that feels natural and helps you stay organized.
Adjusting Background Colors
Changing the background color improves screen visibility. A white or light gray background reduces eye strain. You can find background settings in the Word options menu. Choose a color that feels soft and clear. Avoid harsh colors that distract from your writing.
Light backgrounds work well in bright rooms. They make text stand out sharply. This helps you catch mistakes and read easily. Adjust the page color and the overall window background separately for best results.
Customizing Ribbon And Toolbar
The ribbon and toolbar hold your most used commands. Customize these to keep your favorite tools handy. Remove buttons you don’t use to reduce clutter. Add shortcuts for tasks you do often. This saves time and keeps the workspace neat.
Change the ribbon color to match the light mode. A simple, light color fits well with the bright background. Keep icons clear and easy to see. Customizing these elements creates a workspace that works with you, not against you.
Credit: allthings.how
Frequently Asked Questions
How Do I Change Microsoft Word To Light Mode?
Open Word, go to File > Options > General. Under “Personalize your copy,” select “White” from the Office Theme dropdown. Click OK to apply light mode instantly.
Can I Switch Between Light And Dark Modes Easily?
Yes, you can toggle modes anytime through Word’s options. Just repeat the steps and select your preferred theme. Changes apply immediately without restarting Word.
Does Light Mode Affect Document Content Or Formatting?
No, switching to light mode only changes the interface colors. Your document content and formatting remain unchanged and unaffected by the theme.
Is Light Mode Available On All Microsoft Word Versions?
Light mode is available on Word 2016 and later versions, including Office 365. Older versions may not support this feature fully or at all.
Conclusion
Switching Microsoft Word to Light Mode is quick and simple. You just need a few clicks to change the theme. Light Mode can help reduce eye strain during the day. It also makes your document look bright and clear. Try changing it anytime you want a fresh look.
Remember, you can switch back to Dark Mode whenever you like. Enjoy working in the mode that feels best for you. Keep your settings easy and comfortable for better focus.