Is your house floor uneven or sagging? You’re not alone, and the good news is, you don’t have to live with it.
Learning how to jack a house floor can save you thousands in repairs and keep your home safe and sturdy. In this guide, you’ll discover simple, step-by-step methods to lift and level your floor like a pro—even if you’ve never done it before.
Ready to take control of your home’s foundation? Keep reading, because fixing your floor starts right here.
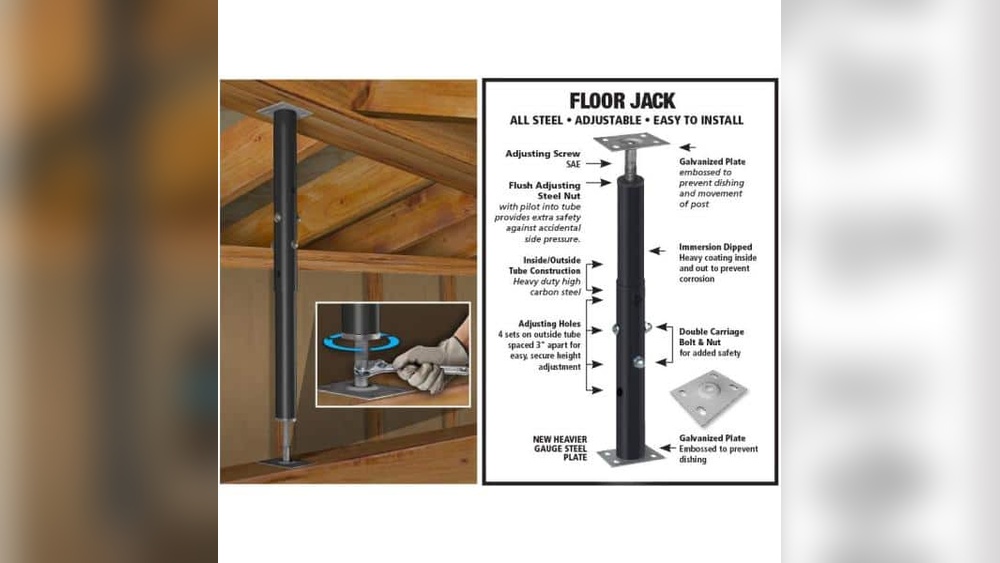
Credit: www.homedepot.com
Preparing For Floor Jacking
Preparing for floor jacking is a crucial step. It helps ensure the process goes smoothly. Proper preparation also reduces risks and damage. This section guides you through the key steps to get ready for jacking your house floor.
Assessing Floor Damage
Start by checking the floor’s condition. Look for cracks, sagging, or uneven spots. Note areas that need lifting or repair. Understanding the damage helps plan the jacking process. It also tells you how much lift is needed.
Gathering Tools And Materials
Collect all necessary tools before starting. You will need floor jacks, wooden blocks, and a level. Also, have protective gear like gloves and safety glasses. Having everything ready saves time and prevents interruptions.
Ensuring Safety Measures
Safety is the top priority. Clear the work area of furniture and debris. Check that the floor jacks are in good condition. Use sturdy wooden blocks to support the floor during lifting. Work slowly and carefully to avoid accidents.
Credit: www.youtube.com
Locating Jack Points
Finding the right spots to place jacks under a house floor is very important. It helps to lift the floor safely and avoid damage. You need to know where the strong points are. These points hold the weight of the house. Knowing these spots makes the job easier and safer.
Careful steps will guide you to find these jack points. Start by looking at the structure below the floor. Then, mark where you will set the jacks. This process protects the floor and keeps the house steady.
Identifying Support Beams
Support beams are thick wooden or metal parts under the floor. They carry the weight of the house. Find these beams first before placing any jack. Use a flashlight to see under the floor clearly. Tap gently to hear solid wood sound. Avoid weak or damaged areas. Strong beams give firm support to the jacks.
Marking Jack Positions
After finding support beams, mark where jacks will go. Space marks evenly along the beams. Keep distance between jacks about 4 to 6 feet. Use a pencil or chalk to draw spots. These marks guide you to set the jacks straight. Correct marking helps lift the floor without causing cracks or shifts.
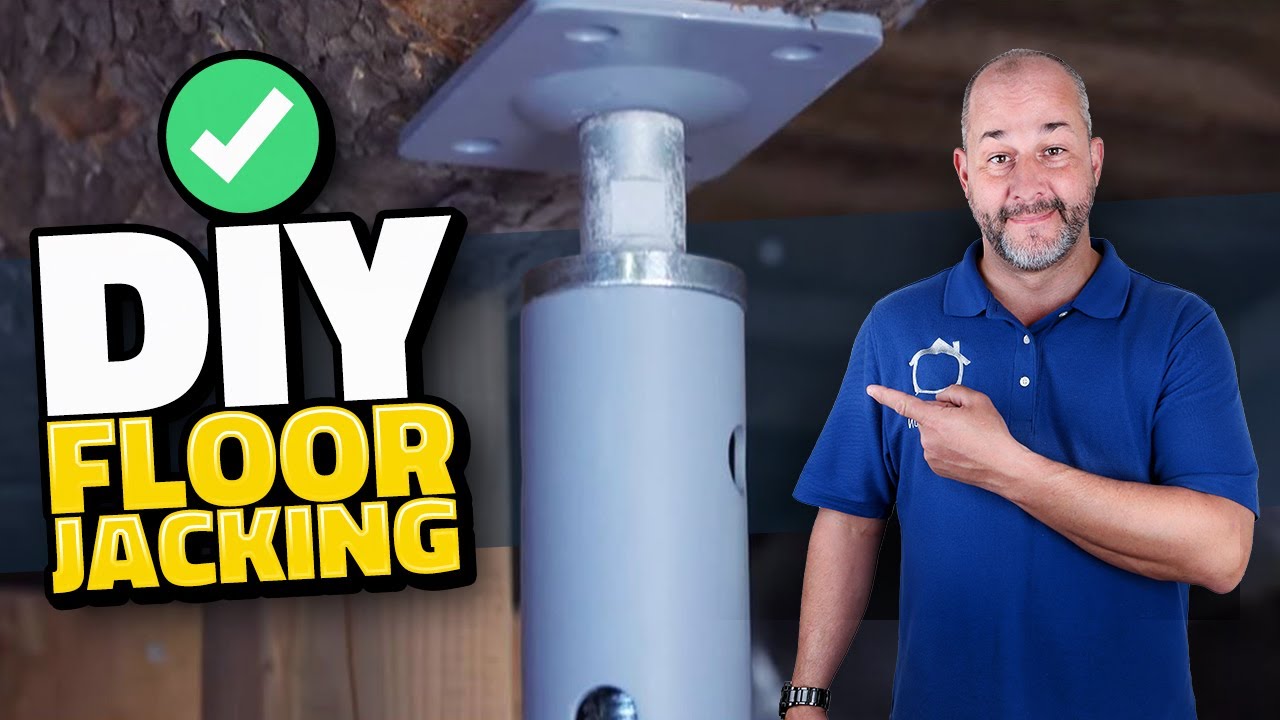
Setting Up The Jack
Setting up the jack is a key step in jacking a house floor. It requires care and attention. You must prepare the area and the tools before lifting. Proper setup ensures safety and success. Follow the steps carefully to avoid damage or injury.
Choosing The Right Jack
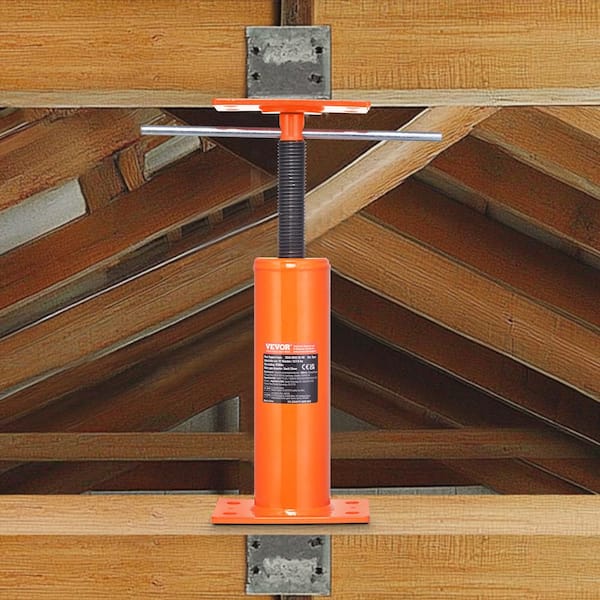
Select a jack that matches the weight and size of your house floor. A hydraulic bottle jack or a floor jack works well for this job. Check the jack’s weight capacity. It should hold more than the expected load. Using the wrong jack can cause accidents or damage to the house.
Positioning The Jack Safely
Place the jack on a solid, level surface. Avoid soft or uneven ground. This prevents the jack from slipping or sinking. Position the jack under a strong support beam or floor joist. Ensure the jack head fits snugly against the beam. Always use wooden blocks between the jack and the beam for better grip and protection.
Lifting The Floor
Lifting the floor is a crucial step when jacking up a house floor. It requires care and patience to avoid damage. This process raises the floor to the desired level safely. Proper lifting helps fix uneven floors and structural issues.
Operating The Jack Slowly
Move the jack handle slowly and steadily. Sudden movements can cause damage. Small, gradual lifts reduce stress on the floor joists. Stop often to check the progress. Slow operation keeps the structure safe.
Monitoring Floor Movement
Watch the floor closely while lifting. Look for cracks or shifts in the walls and ceiling. Use a level to check the floor height. Mark the floor to track changes. Monitoring helps catch problems early.
Avoiding Common Mistakes
Do not lift too fast or too high at once. Avoid placing the jack on unstable surfaces. Never jack only one spot; spread the load evenly. Check the jack’s condition before use. These steps prevent accidents and damage.
Securing The Lifted Floor
Securing the lifted floor is a key step after jacking a house floor. This step keeps the floor stable and safe during repairs. Without proper support, the floor could slip or collapse.
Taking time to secure the floor helps avoid accidents. It also ensures the repair work goes smoothly. Use strong, reliable materials for support to hold the weight evenly.
Installing Temporary Supports
Place strong beams or posts under the lifted floor. Use solid wood or steel jacks for better strength. Position these supports close to the jacked area.
Make sure the supports sit firmly on a stable base. Adjust the height carefully to fit snug under the floor. This prevents any movement during repairs.
Checking Stability
After installing supports, test the floor’s stability. Gently push or press the floor in different spots. If it wobbles or shifts, add more supports.
Double-check all supports for tightness and balance. A stable floor keeps you safe and helps work progress faster. Keep checking stability throughout the project.

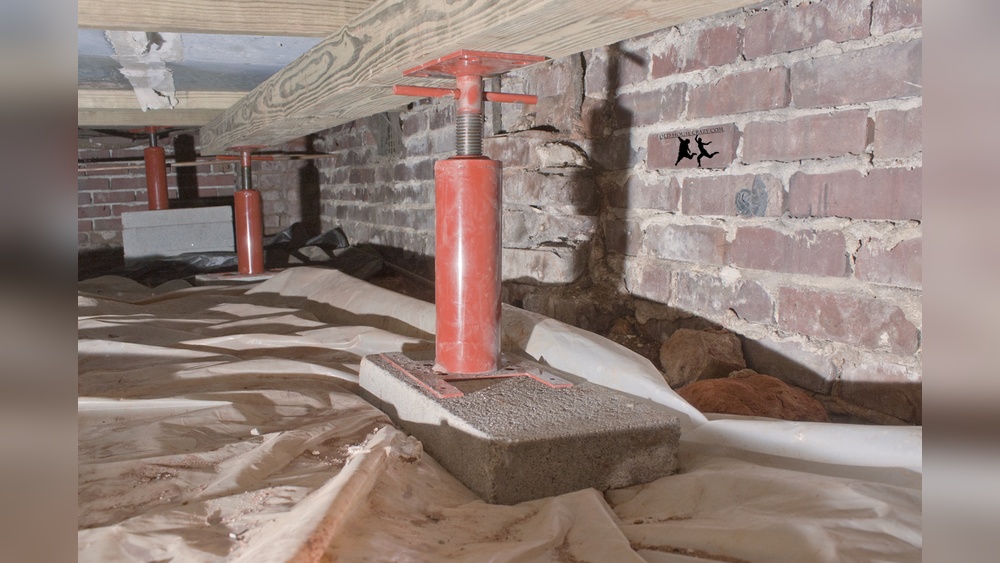
Credit: oldhousecrazy.com
Lowering And Finishing
Lowering and finishing the house floor is a critical step after jacking. It requires care and attention to keep everything stable and safe. This phase ensures the house settles evenly on its new foundation height.
Patience is key. Taking small, steady steps prevents damage and keeps the structure secure. Proper finishing also prepares the floor for further work, such as repairs or new flooring installation.
Releasing The Jack Safely
Start by checking that all supports hold the house firmly. Slowly turn the jack handle to lower the house. Do this in small increments to avoid sudden drops.
Watch closely for any shifting or uneven movement. Stop immediately if you notice any problems. Keep the area clear of people and objects during this process.
Never rush. Lower the house until it rests fully on the foundation or support beams. Remove the jack only after confirming the structure is stable and secure.
Final Inspections
Inspect the entire floor area for cracks or gaps. Look under the house to check the supports and beams. Make sure everything sits level and solid.
Use a level tool to confirm the floor’s evenness. Check for any signs of stress on walls or floors. Fix any issues before moving on to the next steps.
Final inspections protect your home’s safety and durability. They help catch problems early and ensure the floor is ready for finishing touches.
Frequently Asked Questions
What Tools Are Needed To Jack Up A House Floor?
You need a hydraulic jack, wooden cribbing blocks, a level, and a pry bar. Safety gear like gloves and goggles is essential. These tools ensure a stable and secure lifting process for the house floor.
How Do You Safely Jack Up A House Floor?
Place the jack on a solid foundation under a strong beam. Lift slowly and evenly, using cribbing blocks to support the floor. Never rush, and always check stability before working under the lifted floor.
When Should You Jack Up A House Floor?
Jack up a house floor when repairing foundation damage, leveling uneven floors, or replacing rotten joists. Early intervention prevents further structural issues. Always assess the floor condition before starting the jacking process.
Can I Jack Up A House Floor Myself?
Yes, but only if you have experience and proper tools. Safety is crucial; improper jacking can cause collapse or injury. For complex jobs, consult a professional to ensure the work is done correctly.
Conclusion
Jacking a house floor takes care and the right tools. Always check your work step by step. Safety must stay your top priority throughout the process. Small lifts can fix many floor problems quickly. Take your time to avoid damage or injury.
With patience, you can improve your home’s stability. Remember, proper jacking helps keep your floor strong. Try to learn from each project you do. This skill can save money and improve living space. Keep practicing and stay careful for the best results.