Have you ever faced a sagging ceiling or noticed uneven floors above? Knowing how to jack a ceiling with a floor jack can save you time, money, and stress.
This simple skill lets you safely lift and support your ceiling to fix structural issues or prepare for repairs. In this guide, you’ll discover clear, step-by-step instructions to do the job right. By the end, you’ll feel confident handling this task on your own, protecting your home and avoiding costly mistakes.
Keep reading to learn exactly what you need to do to lift your ceiling safely and effectively.

Credit: www.missistem.co.rs
Tools And Materials Needed
Jacking a ceiling with a floor jack requires the right tools and materials. These help you work safely and effectively. Using proper equipment makes the task easier and prevents damage. Prepare all items before you start. This saves time and reduces risk.
Types Of Floor Jacks
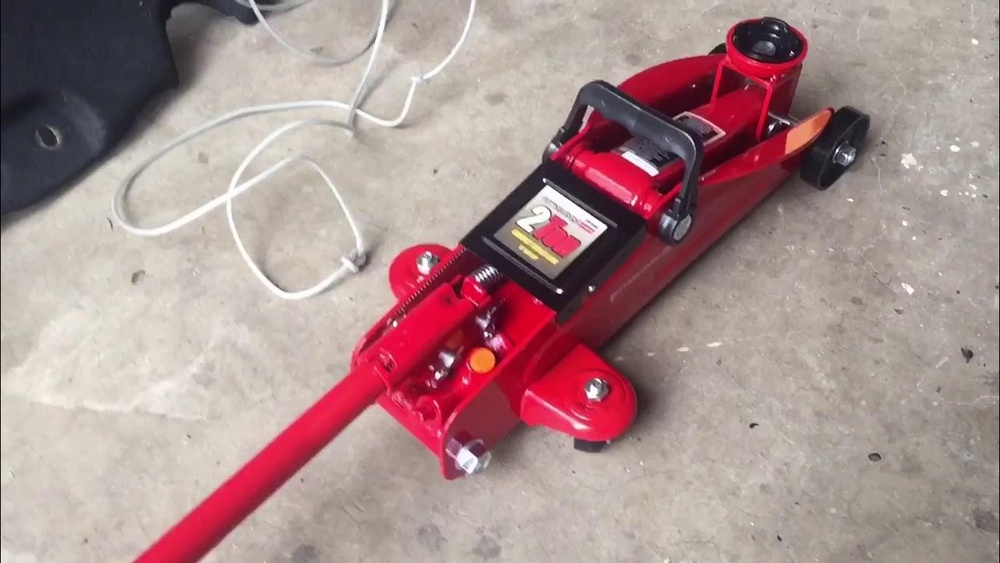
Choose a floor jack with enough capacity for your ceiling weight. Hydraulic floor jacks are common. They lift heavy loads smoothly. Scissor jacks work but have less capacity. Bottle jacks are compact and strong. Pick a jack that fits your space and weight needs. Check the maximum lifting height too.
Safety Gear Essentials
Wear safety glasses to protect your eyes from dust and debris. Gloves keep your hands safe and improve grip. Use a hard hat if the ceiling is unstable. Wear sturdy shoes to protect your feet. Avoid loose clothing that can get caught. Safety gear prevents injuries during the jacking process.
Additional Supplies
Use wooden blocks or steel plates to distribute the jack’s pressure. This protects the ceiling and jack. Have a measuring tape to check height changes. Use a flashlight for better visibility. Keep a level handy to monitor ceiling alignment. Keep a buddy nearby for help and safety.
Preparing The Work Area
Preparing the work area is a key step before jacking a ceiling with a floor jack. It ensures safety and smooth operation. A clean, secure, and well-planned space reduces risks and helps you work faster. Follow these steps carefully to get ready.
Clearing The Space
Remove all furniture and objects near the work area. This prevents damage and gives you more room to move. Clear the floor of any tools or debris. A tidy space helps you focus and avoid accidents.
Securing The Environment
Turn off electrical power in the work zone. This stops any risk of shocks or sparks. Keep pets and children away from the area. Make sure lighting is bright enough to see clearly. Use protective gear like gloves and safety glasses.
Locating Support Points
Find strong beams or joists in the ceiling. These support the weight and prevent damage. Use a stud finder or tap to locate solid spots. Avoid weak or damaged areas. Mark the points clearly to guide your jack placement.
Setting Up The Floor Jack
Setting up the floor jack correctly is crucial for safely jacking a ceiling. This step ensures the jack supports the weight properly. A stable and secure setup prevents accidents and damage. Follow these simple instructions to prepare your floor jack for the job.
Positioning The Jack
Place the floor jack directly under the ceiling beam you want to lift. The jack should be centered to spread the weight evenly. Avoid placing the jack on weak or uneven spots. Use a solid, flat surface for the jack base. This helps keep the jack from slipping or tipping over.
Adjusting The Height
Start by lowering the jack to its minimum height. Slowly raise the jack handle to lift the saddle close to the beam. Stop before the jack touches the ceiling beam. Make small height adjustments to find the perfect fit. The jack should support the beam without forcing it too much.
Checking Stability
Check if the jack stands firmly on the floor. Make sure the jack saddle grips the beam securely. Push gently on the jack to test for movement or wobbling. Adjust the jack position if it feels unstable. Never operate the jack if it does not feel safe and steady.
Jacking The Ceiling Safely
Jacking the ceiling safely is the key step in any repair or adjustment. It needs careful attention and slow movements. This avoids damage to your home’s structure and keeps everyone safe. Using a floor jack requires patience and steady actions. You must watch how the ceiling reacts as you lift it. Support blocks help keep the ceiling stable during the process. Follow these tips for a smooth and safe ceiling jacking.
Slow And Steady Lifting
Raise the ceiling slowly using the floor jack. Small, steady turns on the jack handle work best. Quick movements can cause cracks or sudden shifts. Give the ceiling time to adjust to the pressure. Pause often to check for any signs of stress. This method protects the ceiling and the jack from damage.
Monitoring Structural Response
Watch the ceiling closely while lifting. Look for new cracks or changes in old ones. Listen for unusual sounds like creaking or popping. Stop if anything seems wrong. Check the surrounding walls and beams for any shifts. Monitoring helps catch problems early. It keeps the project safe and under control.
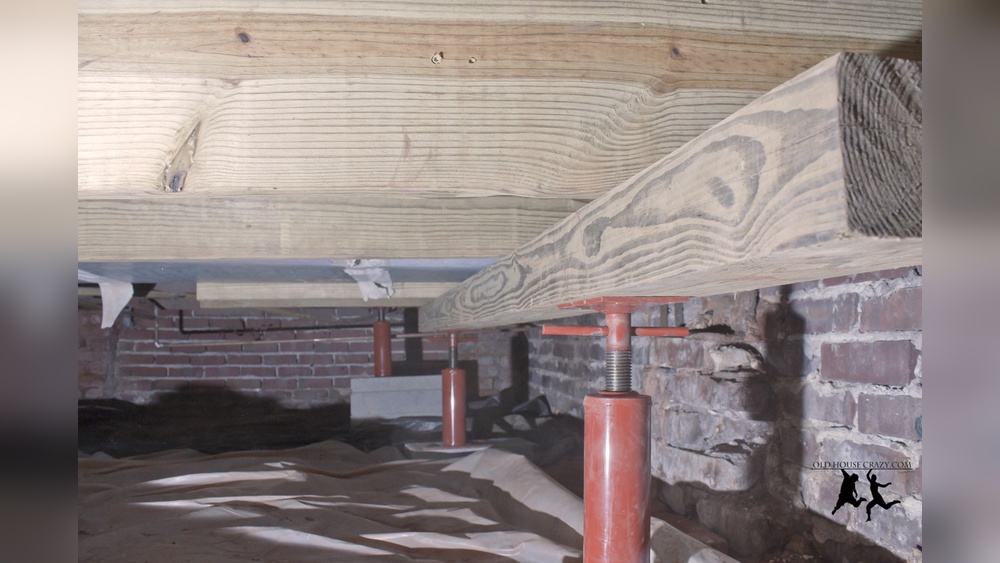
Using Support Blocks
Place sturdy support blocks under the ceiling after lifting. These blocks hold the ceiling in place and share the weight. Use strong wood or metal blocks that fit well. Position them evenly to avoid uneven pressure. Never rely on the jack alone for support. Support blocks provide extra safety and stability throughout the work.
Finishing And Securing
Finishing and securing the ceiling after jacking it up with a floor jack is a critical step. It ensures the ceiling stays in place and the structure remains safe. Taking time to lock the jack, add permanent support, and then remove the jack properly will keep your work stable and strong.
Locking The Jack In Place
Once the ceiling reaches the desired height, lock the floor jack carefully. Most jacks have a locking mechanism or a pin. Engage it firmly to prevent any movement or slipping. Double-check the lock to confirm it holds the weight securely. This step avoids sudden drops and keeps the ceiling steady.
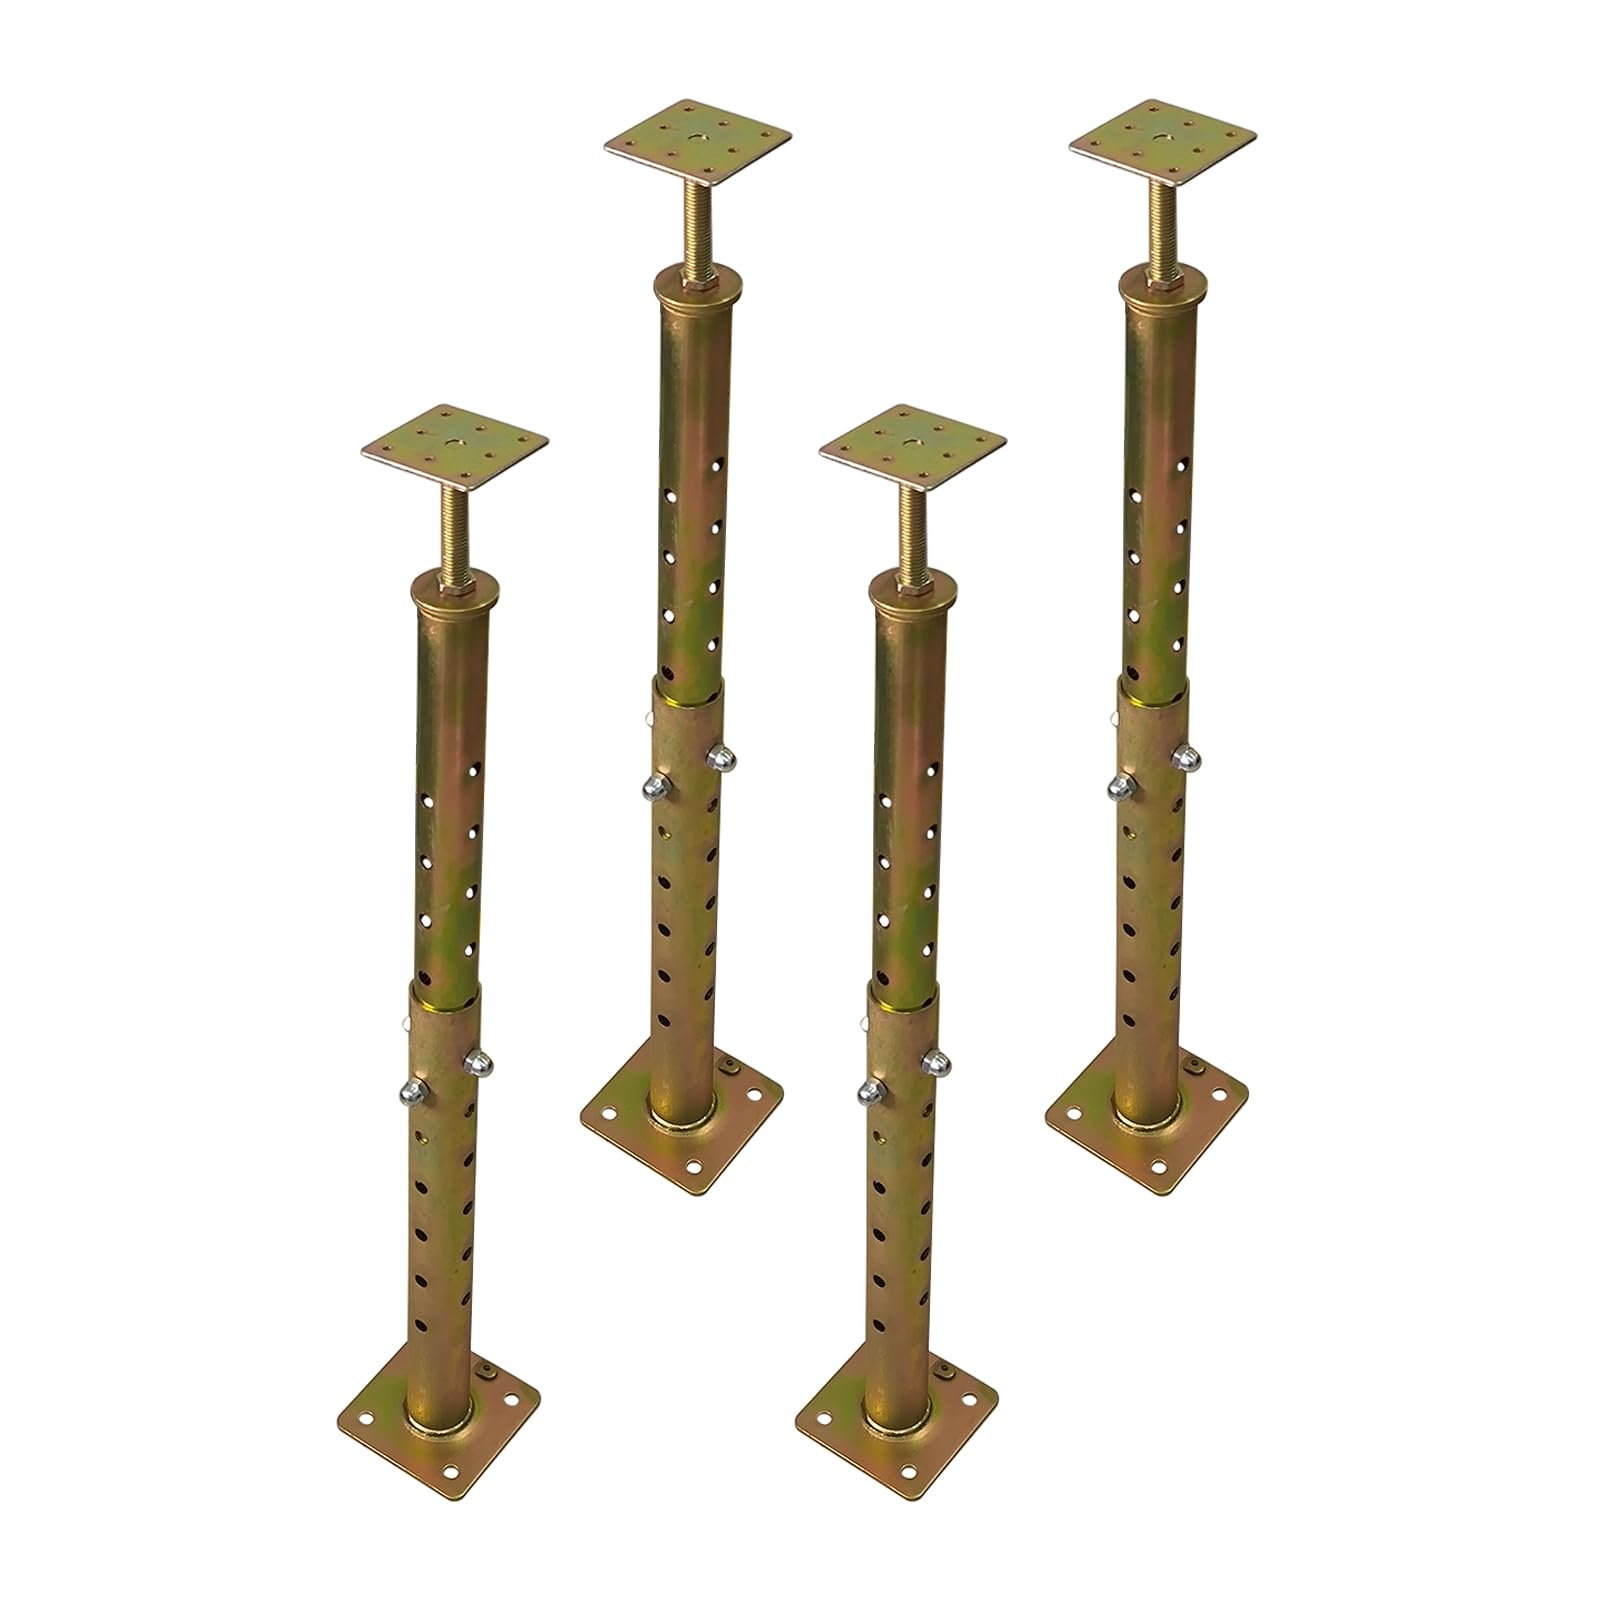
Adding Permanent Support
Temporary support from the floor jack is not enough. Add permanent supports such as wooden beams or metal braces. Place them tightly between the ceiling joists and floor above. Secure these supports with nails or screws for stability. This step shares the load and reduces pressure on the jack.
Removing The Jack
After installing permanent support, lower the jack slowly. Release the lock carefully while watching the ceiling. Lower the jack just enough to take the load off. Remove the jack completely once the ceiling rests fully on the new supports. Check the ceiling for any movement or gaps after removal.
Credit: www.g-locbrakes.com
Common Mistakes To Avoid
Jacking a ceiling with a floor jack requires care and attention. Mistakes can cause damage or injury. Avoiding common errors helps you finish the job safely and correctly.
Overloading The Jack
Every floor jack has a weight limit. Exceeding this limit can cause the jack to fail. Always check the jack’s capacity before starting. Do not try to lift more than the jack can handle. Overloading puts you and the structure at risk.
Ignoring Safety Precautions
Safety is vital when using a floor jack. Never skip wearing protective gear like gloves and safety glasses. Ensure the area around the jack is clear of objects and people. Always use jack stands to support the load after lifting. Never rely on the jack alone to hold the ceiling.
Improper Jack Placement
Placing the jack in the wrong spot can cause slipping or damage. Find a solid, stable point on the ceiling to lift. Avoid soft or weak areas that might collapse. Position the jack pad flat and level under the load. Double-check placement before applying pressure.

Credit: toolpro.com
Frequently Asked Questions
How Do You Safely Jack A Ceiling With A Floor Jack?
To safely jack a ceiling, place the floor jack under a strong support beam. Use a wooden block to distribute pressure. Raise the jack slowly and monitor the ceiling for any movement or cracks. Always wear safety gear and work with a helper.
What Tools Are Needed To Jack A Ceiling With A Floor Jack?
You need a sturdy floor jack, wooden blocks, a level, and safety gear. Optional tools include a flashlight and measuring tape. These help stabilize the jack and ensure accurate lifting without damaging the ceiling.
Can A Floor Jack Lift A Ceiling Without Damage?
Yes, if used correctly. Distribute pressure with wooden blocks and lift slowly. Avoid sudden movements and monitor the ceiling continuously. Proper technique prevents damage and ensures safe lifting.
How High Can A Floor Jack Lift A Ceiling?
Most floor jacks lift between 6 to 20 inches. Check your jack’s maximum height before starting. Ensure the ceiling and support beams can handle the lift without stress or damage.
Conclusion
Jacking a ceiling with a floor jack takes care and patience. Always check your tools and the ceiling’s condition first. Place the jack carefully to avoid damage. Lift slowly and watch for any changes. Safety matters most, so never rush the job.
With these steps, you can do it safely and effectively. Remember, steady work leads to good results. Keep these tips in mind for your next ceiling repair.