Are you struggling to remove those pesky plastic hollow wall anchors from your walls? You’re not alone.
These small anchors can be tricky to take out without damaging your wall or leaving a mess behind. But don’t worry—removing them doesn’t have to be a frustrating task. You’ll discover simple, effective methods to get those anchors out quickly and safely.
Keep reading, and you’ll learn exactly how to handle this common problem like a pro.

Credit: www.fmwfasteners.com
Tools Needed
Removing plastic hollow wall anchors requires a few basic tools. These tools help you safely and easily take out the anchors without damaging the wall. Having the right tools on hand makes the job faster and cleaner.
Most of these tools are common in home toolkits. You do not need special or expensive equipment. Below are the essential tools needed for this task.
Phillips Head Screwdriver
A Phillips head screwdriver is key for removing screws from the anchor. It fits the cross-shaped screw heads well. Use it to unscrew and loosen the anchor from the wall.
Pliers
Pliers help you grip the anchor firmly. They are useful to pull the anchor out after loosening the screw. Needle-nose pliers work best for small or tight spaces.
Utility Knife
A utility knife can cut the plastic anchor flush with the wall. This helps if the anchor is stuck or hard to remove. Be careful to avoid cutting the wall surface.
Putty Knife
A putty knife is useful to gently pry the anchor from the wall. It can help lift the anchor without causing damage. Use it with slow, steady pressure.
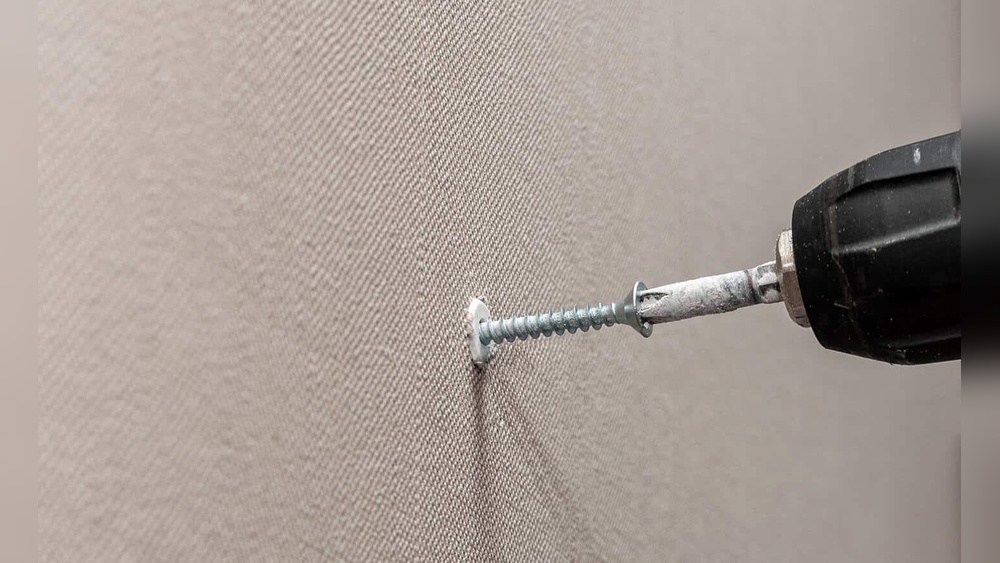
Drill With Small Drill Bit
A drill with a small bit can widen the hole inside the anchor. This makes it easier to remove or break the anchor. Use a slow speed to avoid wall damage.

Credit: www.youtube.com
Identify Anchor Type
Identifying the type of plastic hollow wall anchor is the first step in removing it correctly. Different anchors have different shapes and functions. Knowing your anchor type helps you choose the right removal method. This saves time and avoids damage to your wall.
Look closely at the anchor’s head and body. Note its size, shape, and material. Some anchors have wings, some expand, and others are simple plugs. Each type needs a slightly different approach.
Plastic Expansion Anchors
These anchors expand inside the wall when a screw is inserted. They usually have a smooth or ribbed body. You will see the anchor’s collar flush with the wall surface.
Check if the anchor looks hollow or solid inside. Expansion anchors are often hollow to allow expansion.
Winged Plastic Anchors
Winged anchors have small “wings” that open behind the wall. These wings hold the anchor firmly in place. The wings fold flat when inserting the anchor.
Look for protruding parts or flaps on the anchor body. These help confirm if it is a winged type.
Threaded Plastic Anchors
Threaded anchors have ridges or threads on their body. They screw into the wall like a large screw. The threads grip the drywall tightly.
Notice the spiral pattern along the anchor. This design helps it stay in place without a screw.
Remove With Pliers
Removing plastic hollow wall anchors can be simple with the right tool. Pliers work well to pull out these anchors from the wall. This method avoids damage to the wall if done carefully. Follow the steps below to remove the anchors using pliers safely and easily.
Grip And Twist
First, use needle-nose pliers or regular pliers to grip the anchor firmly. Hold the anchor close to the wall surface. Twist the anchor gently back and forth to loosen it. This helps break the anchor’s hold inside the wall. Keep the grip steady and avoid squeezing too hard to prevent breaking the anchor.
Pull Straight Out
After loosening, pull the anchor straight out with steady force. Avoid pulling at an angle to reduce wall damage. If the anchor resists, twist it slightly while pulling. This motion helps release it from the hollow wall. Once removed, check the hole for any leftover debris or anchor pieces.
Use A Screwdriver
Using a screwdriver is a simple way to remove plastic hollow wall anchors. This method works best for anchors that are not deeply embedded. A screwdriver can grip the anchor and help pull it out without damaging the wall.
Choose a screwdriver that fits the anchor slot well. This gives you better control and prevents slipping. The process involves either unscrewing the anchor or pushing and pulling it gently to remove it.
Insert And Unscrew
First, place the screwdriver tip into the anchor slot. Turn the screwdriver counterclockwise to unscrew the anchor. This loosens the anchor from the wall. Keep turning slowly to avoid breaking the anchor inside the wall. Once loose, pull the anchor out by hand or with the screwdriver.
Push And Pull Method
Insert the screwdriver into the anchor slot. Push the screwdriver gently while pulling the anchor outward. This action helps to loosen the anchor grip inside the wall. Repeat pushing and pulling until the anchor slides out. Be careful not to push too hard to avoid wall damage.
Drilling Out The Anchor
Drilling out plastic hollow wall anchors is a quick way to remove them without damaging the wall. It involves using a drill to break the anchor into small pieces. This method works well for anchors that are stuck or hard to pull out by hand.
Careful drilling helps clear the hole for a new anchor or patch. It also prevents cracks or holes from getting bigger. Follow the right steps to get the best results safely.
Choose The Right Drill Bit
Select a drill bit slightly larger than the anchor’s inner diameter. A bit too small will not remove the anchor fully. One too large may damage the wall around the hole. A standard twist bit or a spade bit works well for most plastic anchors.
Use a drill bit made for wood or drywall. Avoid metal bits, as they may cause rough edges. Ensure the bit is sharp for smooth drilling. This reduces the chance of tearing the wall surface.
Drill Carefully
Remove the drill and check the hole. Clear out any plastic bits with a small tool or vacuum. Avoid drilling deeper than needed to protect the wall. Take your time to keep the hole clean and ready for repair.
Credit: stonedesignbysantos.com
Patch And Repair Wall
After removing plastic hollow wall anchors, the wall will have small holes. These holes need to be fixed to restore a smooth surface. Patching and repairing the wall is a simple process. It helps the wall look clean and ready for painting or decoration.
Fill The Hole
Start by cleaning the hole from dust and loose pieces. Use a putty knife to apply wall filler or spackle. Press the filler firmly inside the hole. Smooth the surface so it is level with the wall. Let the filler dry completely. Drying time depends on the product, usually 1 to 2 hours.
Sand And Paint
Once the filler is dry, gently sand the patch. Use fine sandpaper to make the surface smooth. Wipe off dust with a damp cloth. Now, paint over the patched area with matching wall paint. Apply thin layers for better coverage. Let the paint dry fully between coats. This process hides the repair well and blends it with the wall.
Prevent Future Damage
Preventing future damage to your walls is key after removing plastic hollow wall anchors. Walls can weaken or crack if anchors are not chosen or installed right. Taking simple steps can keep your walls strong and safe for future use.
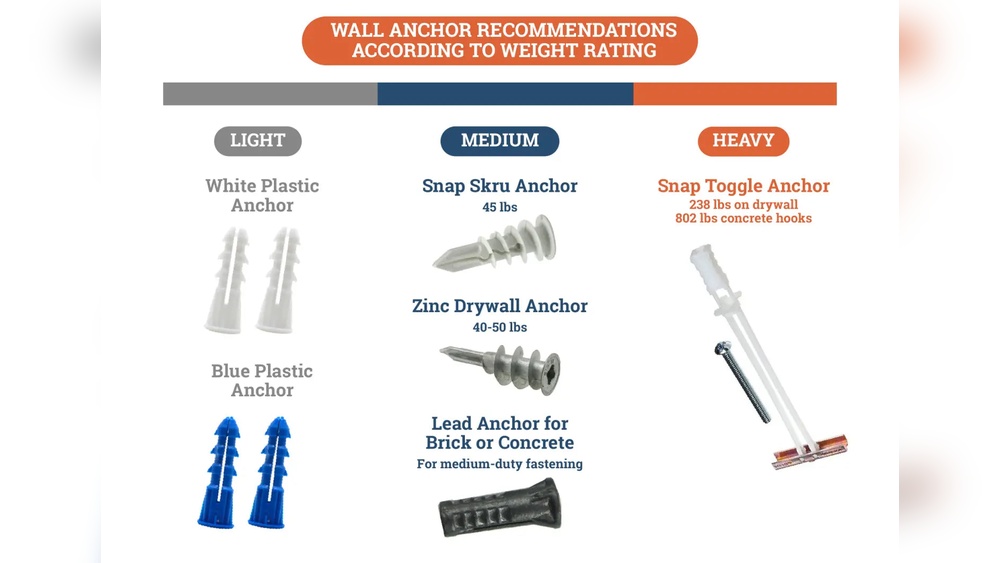
Choose Proper Anchors
Select anchors based on the wall type and weight of the item. Use anchors made for drywall if your walls are hollow. Metal anchors often hold better than plastic for heavy objects. Avoid using anchors that are too large or too small for the hole. Correct size anchors reduce stress on the wall and prevent cracks.
Correct Installation Tips
Drill a hole slightly smaller than the anchor size. This helps the anchor grip the wall firmly. Insert the anchor gently to avoid breaking it inside the wall. Tighten screws slowly and stop when secure. Over-tightening can damage the wall or the anchor. Always test the anchor by pulling lightly before hanging heavy items.
Frequently Asked Questions
What Tools Do I Need To Remove Plastic Hollow Wall Anchors?
You need pliers, a screwdriver, and a utility knife. These tools help you grip, pry, or cut the anchor safely. Having them ready makes removal quick and damage-free.
How To Safely Remove Hollow Wall Anchors Without Damage?
Use pliers to gently twist and pull the anchor. If it resists, use a screwdriver to push it through carefully. Avoid excessive force to prevent wall damage.
Can I Reuse Plastic Hollow Wall Anchors After Removal?
No, plastic hollow wall anchors usually deform during removal. It’s best to replace them with new anchors for secure fixing and safety.
What Is The Easiest Method To Remove Hollow Wall Anchors?
Twisting the anchor out with pliers is easiest. If stuck, push it inside the wall cavity using a screwdriver. This avoids wall surface damage.
Conclusion
Removing plastic hollow wall anchors is easier than it seems. Start by loosening the anchor carefully. Use the right tools to avoid wall damage. Patience helps prevent extra repairs. After removal, patch the hole smoothly. A clean wall looks fresh and neat.
Practice these steps for better results next time. You can handle this task confidently. Keep your walls safe and strong. Simple tips make home projects less stressful.