Changing the keys to your Kwikset deadbolt lock might sound tricky, but it’s easier than you think. Whether you’ve lost your keys, moved into a new home, or want to boost your security, rekeying your lock gives you control without buying a new one.
In this guide, you’ll learn simple, step-by-step instructions that anyone can follow. By the end, you’ll save money, feel safer, and know exactly how to handle your lock like a pro. Ready to take charge of your home’s security? Let’s get started.

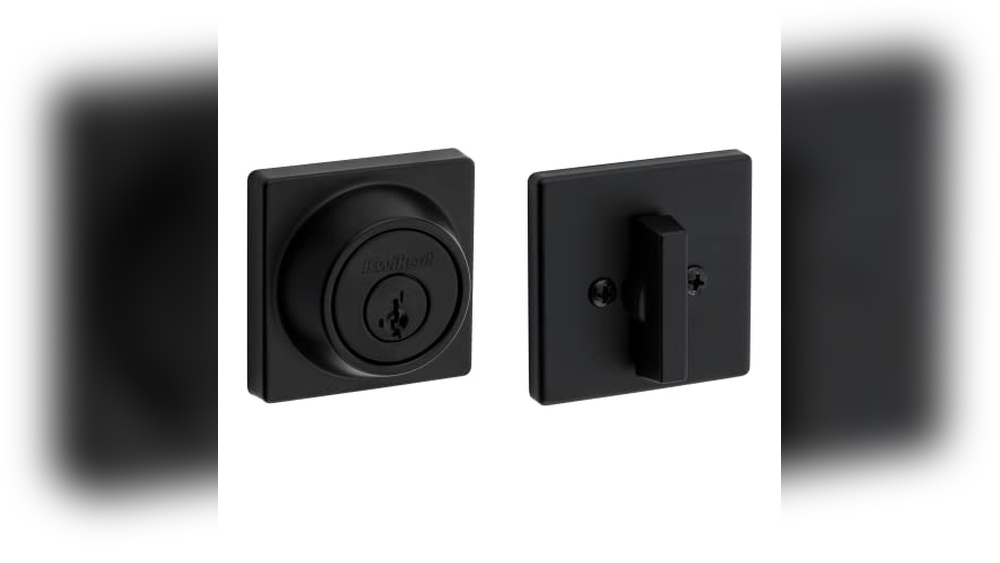
Credit: www.ifixit.com
Tools Needed
Rekeying a Kwikset deadbolt lock requires a few simple tools. Having the right tools makes the process easier and faster. These tools help you remove the lock, change the pins, and put it back together. Prepare these items before starting to avoid interruptions.
Phillips Head Screwdriver
This screwdriver removes screws from the lock. Most Kwikset deadbolts use Phillips screws. A medium-sized screwdriver works best. It fits well and avoids damaging the screws.
Kwikset Rekeying Kit
Buy a rekeying kit made for Kwikset locks. It includes new keys, pins, and a special tool. The kit helps you match new pins to your key. This tool makes rekeying simple and precise.
Flat Head Screwdriver Or Pry Tool
Use a flat head screwdriver or pry tool to remove the lock cylinder. It helps to gently lift parts without breaking them. This tool is useful for small adjustments during rekeying.
Tweezers Or Needle-nose Pliers
Tweezers or needle-nose pliers help handle tiny pins inside the lock. They offer better grip and control. Use them to place pins correctly without dropping them.
Clean Cloth
A clean cloth keeps your workspace tidy. It wipes dust and dirt from the lock parts. Clean parts work smoothly and last longer.
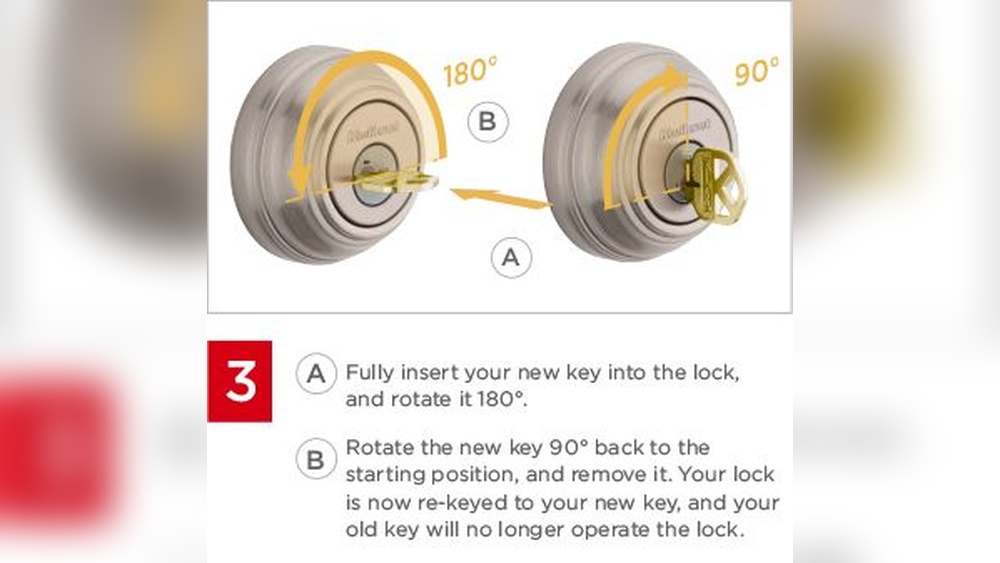
Credit: www.youtube.com
Removing The Deadbolt
Removing the deadbolt is the first step in rekeying your Kwikset lock. This process lets you access the inner parts safely. Take your time. Follow each step carefully to avoid damage.
Unscrewing The Exterior Plate
Start by locating the screws on the outside plate of the lock. Use a screwdriver to remove these screws. Keep them in a safe place to use later. Gently pull the exterior plate away from the door. Sometimes, it may need a slight wiggle to come free. Do not force it hard. The plate should come off easily if screws are fully removed.
Taking Off The Interior Mechanism
Next, focus on the inside of the door. Find the screws holding the interior mechanism. Use your screwdriver to remove these screws carefully. After removing, pull the interior part off the door. This exposes the deadbolt and cylinder inside. Handle all parts gently. Keep all pieces organized for reassembly. Now you are ready to proceed with rekeying.
Extracting The Cylinder
Extracting the cylinder is a key step in rekeying a Kwikset deadbolt lock. This part holds the pins and springs that match your key. Removing it allows you to change the pins inside. This process needs care and the right tools to avoid damage.
Follow each step closely to safely remove the cylinder and prepare for rekeying.
Locating The Retaining Clip
Start by finding the retaining clip on the back of the lock. This small metal piece holds the cylinder in place. Look inside the hole where the key goes. The clip is usually a C-shaped or circular ring.
Use a flashlight if the area is dark. Knowing its exact spot makes removal easier.
Removing The Cylinder
Use a small flathead screwdriver or clip remover tool to pry off the retaining clip gently. Be careful not to bend or lose it. After removing the clip, pull the cylinder straight out from the lock body.
Keep the cylinder steady and pull slowly to avoid breaking any parts. Now the cylinder is free, and you can start rekeying it.
Changing The Pins
Changing the pins is a key step in rekeying your Kwikset deadbolt lock. Pins inside the lock cylinder control which key fits and turns the lock. By replacing these pins, you set the lock to match a new key. This process keeps your home secure without replacing the entire lock.
Each pin has a specific size. It must match the cuts on your new key. The pins lift to the right height when the key is inserted. This allows the lock to turn smoothly.
Using The Key Decoder
A key decoder helps find the right pin sizes quickly. It reads the cuts on your new key. Each cut corresponds to a pin size number.
Place the new key in the decoder. Slide it to see the depth of each cut. Write down the numbers you see. These numbers tell you the size of each pin you need.
The decoder saves time and reduces mistakes. It makes sure you use the correct pins for your new key.
Replacing Old Pins With New Ones
Start by removing the lock cylinder from the deadbolt. Use a follower tool to push the plug out. Keep all parts steady to avoid losing pins or springs.
Remove the old pins from the plug. Match each slot with the new pin size from the key decoder notes. Insert the new pins carefully into each slot.
Double-check that each pin fits flush with the plug surface. Too tall or short pins will stop the lock from working properly. After replacing pins, reassemble the lock and test it with your new key.
Reassembling The Lock
Reassembling the lock is the final step in rekeying your Kwikset deadbolt. It brings all parts back together to make the lock work again. Taking your time ensures everything fits correctly and the lock functions smoothly.
Reinserting The Cylinder
Start by sliding the cylinder back into the lock housing. Align the cylinder so the key slot faces the outside. Push it gently until it clicks into place. Make sure the pins inside the cylinder are properly set. Test the key by turning it to check smooth movement.
Securing The Interior And Exterior Plates
Place the exterior plate on the outside of the door. Align it with the cylinder and screw holes. Next, position the interior plate on the inside of the door. Insert screws through both plates and tighten them evenly. Avoid overtightening to prevent damaging the lock. Test the lock again to confirm firm assembly and proper function.

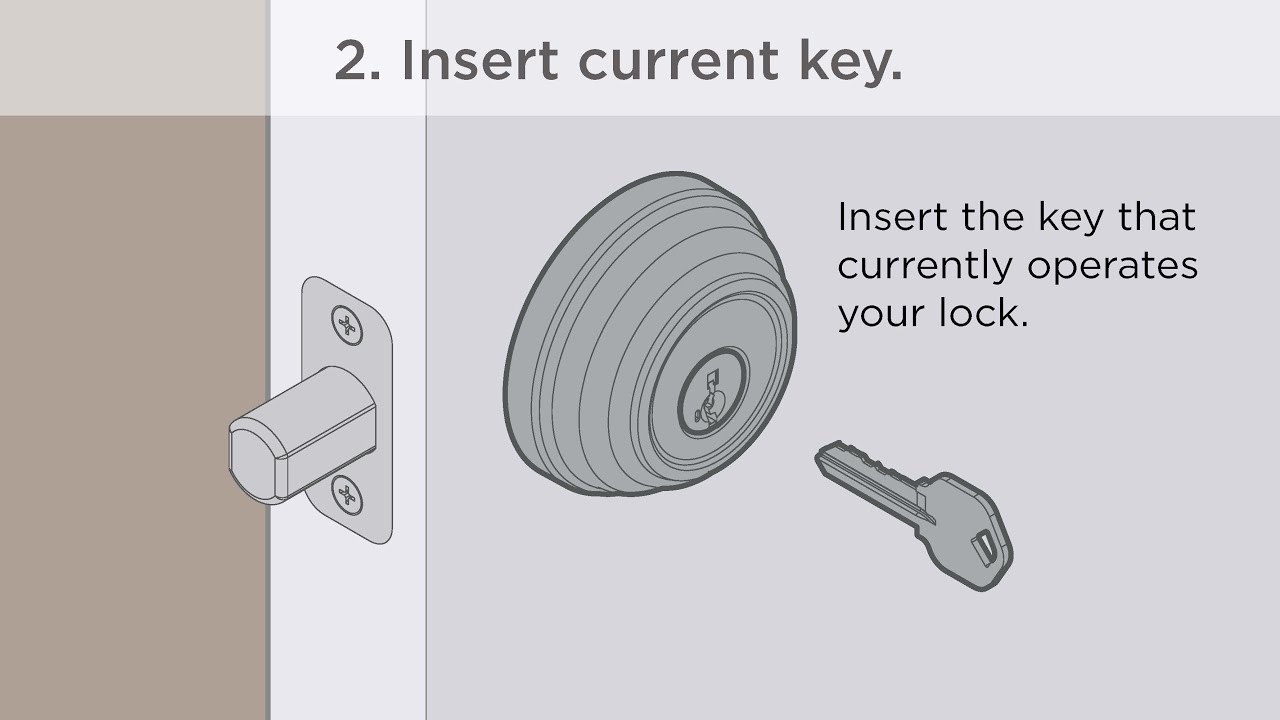
Credit: www.ifixit.com
Testing The New Key
After rekeying your Kwikset deadbolt lock, testing the new key is crucial. This step ensures the lock works correctly and the new key fits perfectly. Testing helps avoid lockouts and ensures security. Follow these steps to confirm everything operates smoothly.
Checking Smooth Operation
Insert the new key into the lock gently. Turn the key slowly to the locked and unlocked positions. The key should move without resistance or sticking. If it feels rough or hard to turn, the pins might not align properly. Test the key several times to confirm smooth movement. Also, check the deadbolt extends and retracts fully. Smooth operation means the rekeying process was successful.
Troubleshooting Common Issues
If the key does not turn or sticks, try these fixes. Remove the key and reinsert it, making sure it is fully inserted. Spray a small amount of graphite lubricant into the lock. Avoid oil-based lubricants, which can gum up the lock. If problems persist, the pin stacks may need adjustment. Disassemble the lock and check the pins again. Rekeying mistakes often cause issues with key rotation. Patience and small adjustments usually solve these problems quickly.
Tips For Rekeying Kwikset Deadbolts
Rekeying a Kwikset deadbolt can save money and improve home security. It lets you change the lock’s key without replacing the entire lock. Follow simple tips to make the process smooth and safe.
These tips help avoid common mistakes and protect your property. Knowing when and how to rekey ensures your lock works perfectly after the change.
When To Rekey
Rekey after losing your keys. This stops anyone who finds them from entering your home. Also, rekey when moving into a new house. Previous owners might still have keys. Rekey if you want to limit who has access. It is cheaper than changing the whole lock.
Safety Precautions
Work in a well-lit area. Keep small parts organized to avoid losing them. Use the correct tools for Kwikset locks only. Wear safety glasses to protect your eyes. Follow instructions step-by-step without rushing. Test the new key several times before final assembly. Keep children and pets away during rekeying.
Frequently Asked Questions
How Long Does It Take To Rekey A Kwikset Deadbolt?
Rekeying a Kwikset deadbolt usually takes 15 to 30 minutes. It depends on your experience and tools available. Following step-by-step instructions simplifies the process and ensures accuracy. Proper preparation helps avoid mistakes and saves time.
What Tools Are Needed To Rekey A Kwikset Lock?
You need a Kwikset rekeying kit, a flathead screwdriver, and a tension wrench. The kit includes new keys and pins. Having the right tools makes the process smooth and prevents damage to the lock components.
Can I Rekey A Kwikset Lock Without Removing It?
No, you must remove the lock cylinder to rekey a Kwikset deadbolt. Removing the cylinder allows access to the pins inside. Attempting to rekey without removal can damage the lock or cause improper reassembly.
How Often Should I Rekey My Kwikset Deadbolt?
Rekey your Kwikset deadbolt when you move, lose keys, or after a security breach. Regular rekeying keeps your home secure and prevents unauthorized access. It’s a simple, cost-effective way to maintain lock security.
Conclusion
Rekeying a Kwikset deadbolt lock is simple and saves money. You only need a few tools and clear steps. Taking your time helps avoid mistakes. Changing your lock’s keys improves home security quickly. Practice makes the process easier next time.
Stay safe by controlling who has your keys. This guide helps you feel confident doing it yourself. Keep your home protected with this handy skill.