Imagine turning your regular light switch into a remote control that lets you switch lights on and off without leaving your seat. Sounds convenient, right?
If you’ve ever wished for an easier way to manage your home lighting, you’re in the right place. This guide will show you simple steps to convert your existing light switch into a remote-controlled one. By the end, you’ll enjoy the comfort and control you never thought possible—all without calling an electrician.
Ready to make your home smarter and your life easier? Let’s dive in!
Tools And Materials Needed
Converting a light switch to remote control needs the right tools and materials. Prepare everything before starting. This saves time and avoids mistakes.
Each item plays a key role in the process. Using proper tools makes the job safer and easier.
Basic Electrical Tools
Use a screwdriver set for removing and installing screws. A voltage tester checks if wires have power. Wire strippers help remove insulation cleanly. Needle-nose pliers assist in bending and holding wires. These tools are essential for safe wiring work.
Remote Control Switch Kit
Purchase a remote control switch kit designed for home lighting. It contains the remote, receiver, and instructions. Choose a kit compatible with your switch and home wiring.
Additional Materials
Get electrical tape to cover wire connections. Wire nuts secure wires safely. Batteries may be needed for the remote. A small flashlight helps when working in dim areas.

Credit: www.amazon.com
Choosing The Right Remote Control Switch
Choosing the right remote control switch is important for a smooth conversion. The switch must work well with your home’s setup and your needs. Picking the right type helps avoid problems and saves time. Focus on the switch type and wiring compatibility before buying.
Types Of Remote Switches
Remote switches come in several types. The most common are RF (radio frequency) and Wi-Fi switches. RF switches use a remote control device to turn lights on or off. Wi-Fi switches connect to your home internet for control via smartphone apps. Some switches combine wall-mounted controls and remote functions. Choose a type based on how you want to control your lights and the devices you own.
Compatibility With Existing Wiring
Check your current wiring before selecting a remote switch. Some switches need a neutral wire in the electrical box. Many older homes lack this wire, limiting options. Confirm the switch matches your wiring type to avoid extra work. Look for switches labeled as compatible with your wiring setup. This step prevents installation problems and ensures safety.
Safety Precautions Before Starting
Working with electricity can be risky. Safety is the top priority before starting any electrical project. Taking simple precautions helps prevent accidents and injuries. Follow clear steps to protect yourself and your home.
Read these safety tips carefully. Prepare your workspace and tools. Stay cautious throughout the process.
Turn Off Power At The Circuit Breaker
Switch off the power supply to the light switch from the main circuit breaker. This stops electricity flow and reduces shock risk. Test the switch to ensure no power is running.
Use A Voltage Tester
Check wires with a voltage tester before touching them. This tool confirms if wires still carry electricity. Never assume wires are safe without testing first.
Wear Protective Gear
Use insulated gloves and safety glasses during the work. These protect against electrical shocks and debris. Keep your clothes tight to avoid snagging wires or tools.
Work In A Dry Environment
Ensure the workspace is dry and free from water. Water and electricity together cause dangerous shocks. Avoid working in damp or wet areas.
Read The Remote Control Kit Instructions
Follow the manufacturer’s guide for the remote control kit. Understand the installation steps and safety warnings. Proper use reduces errors and hazards.
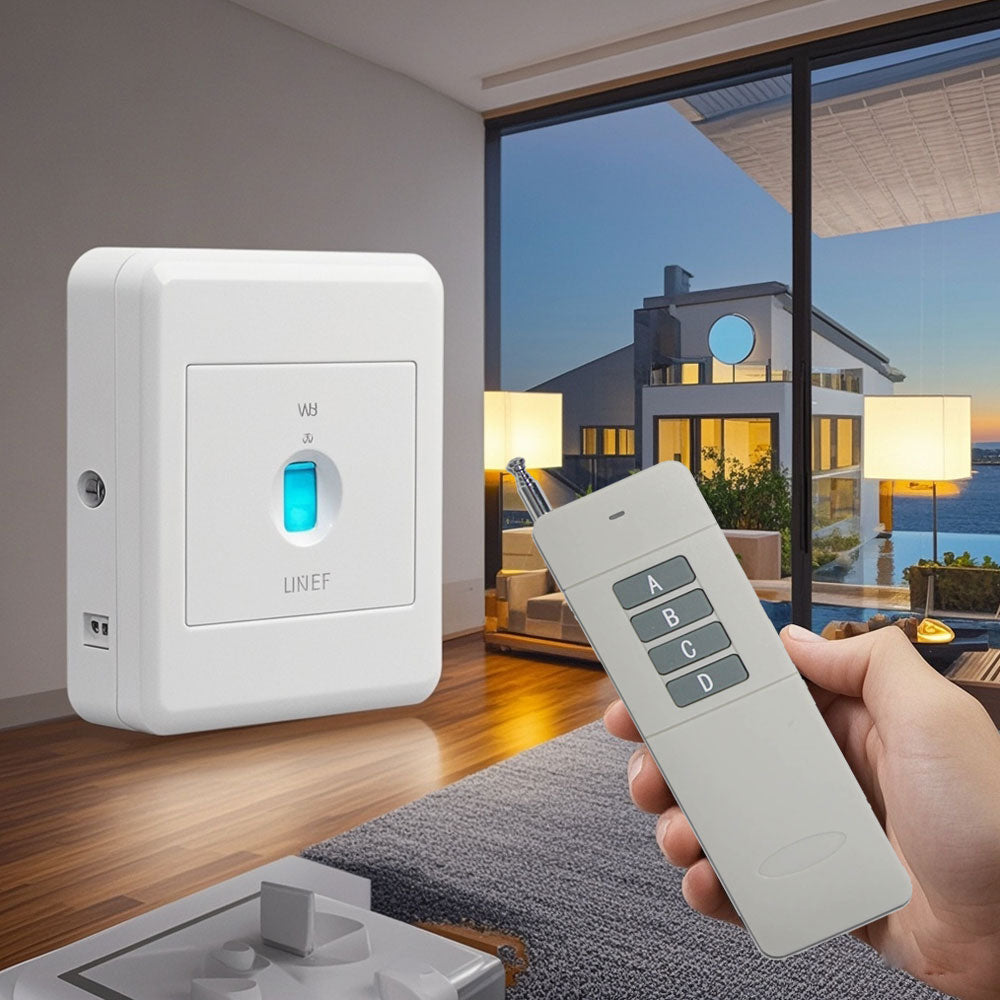
Credit: www.wireless-remote-switches.com
Turning Off Power Safely
Turning off power safely is the first step in converting a light switch to remote control. It stops electrical shocks and keeps you safe during work. You must be careful and follow simple safety steps before touching any wires.
Never start without cutting off power to the switch. This is the best way to avoid accidents. You can do this quickly and easily with the main power box in your home.
Locate The Circuit Breaker Panel
Find the circuit breaker panel in your house. Usually, it is in the basement, garage, or utility room. The panel holds switches that control power to different parts of your home.
Look for the switch that controls the room with the light switch. It may be labeled for easy finding. If not, you may need to turn off breakers one by one.
Turn Off The Correct Breaker
Flip the breaker switch to the “off” position. This cuts power to the light switch and the wires behind it. Wait a few seconds after switching it off. This helps ensure no electricity flows to the switch.
Test the switch to confirm power is off. Try turning the light on. If it does not light up, the power is off and safe to work on.
Use A Voltage Tester For Safety
Use a voltage tester to check wires for electricity. This small tool shows if any live current is present. Touch the tester to the wires connected to the switch.
If the tester lights up or beeps, power is still there. Do not touch wires yet. Double-check the breaker or try a different one. Only proceed when the tester shows no power.
Removing The Existing Light Switch
Start by turning off the power at the circuit breaker. Carefully remove the cover plate and unscrew the light switch from the wall. Gently pull out the switch to access the wiring for the next steps.
Turn Off The Power
Safety is the first step. Switch off the power at the circuit breaker. Don’t rely on the wall switch alone. Use a voltage tester to confirm no electricity flows to the switch. This prevents shocks and accidents.
Remove The Switch Cover Plate
Unscrew the cover plate gently. Keep the screws in a safe place for later use. Removing the plate exposes the switch and wiring. Handle the plate carefully to avoid damage.
Unscrew The Light Switch
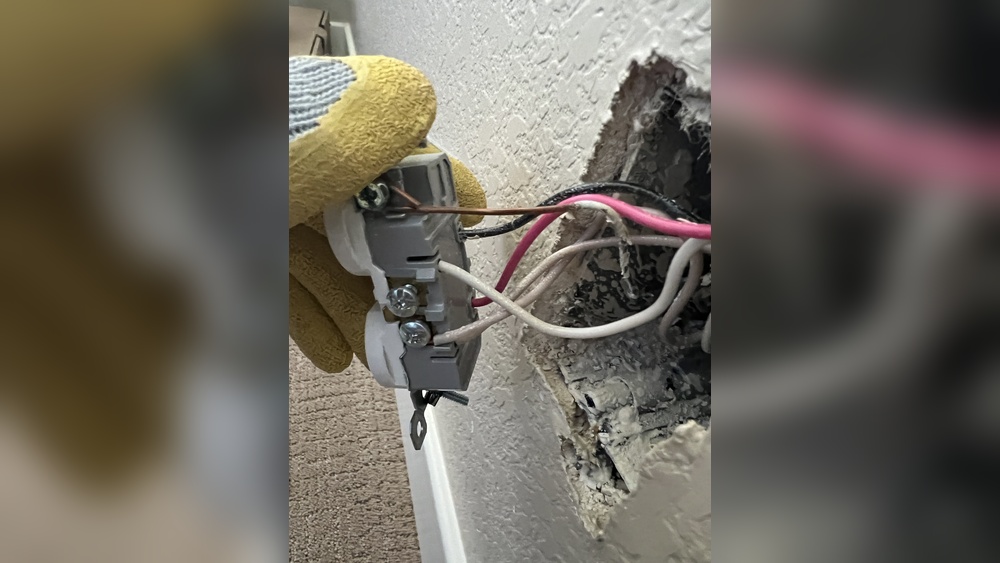
Use a screwdriver to remove the screws holding the switch. Pull the switch out from the electrical box slowly. This exposes the connected wires. Keep track of how the wires connect to the switch.
Disconnect The Wires
Loosen the screws or release the wire connectors. Carefully pull the wires free from the switch terminals. Avoid letting wires touch each other or metal parts. Use electrical tape to cover exposed wire ends for safety.

Credit: www.amazon.com
Wiring The Remote Control Switch
Wiring the remote control switch is a key step in converting your light switch. It ensures the switch works correctly and safely. This process involves connecting wires properly inside the switch box. Careful attention is important to avoid electrical problems or damage.
Always turn off the power before working on the wiring. Use a voltage tester to confirm no electricity flows. Follow the instructions that come with your remote control switch. Proper wiring helps your new switch work smoothly and last longer.
Connecting Live And Neutral Wires
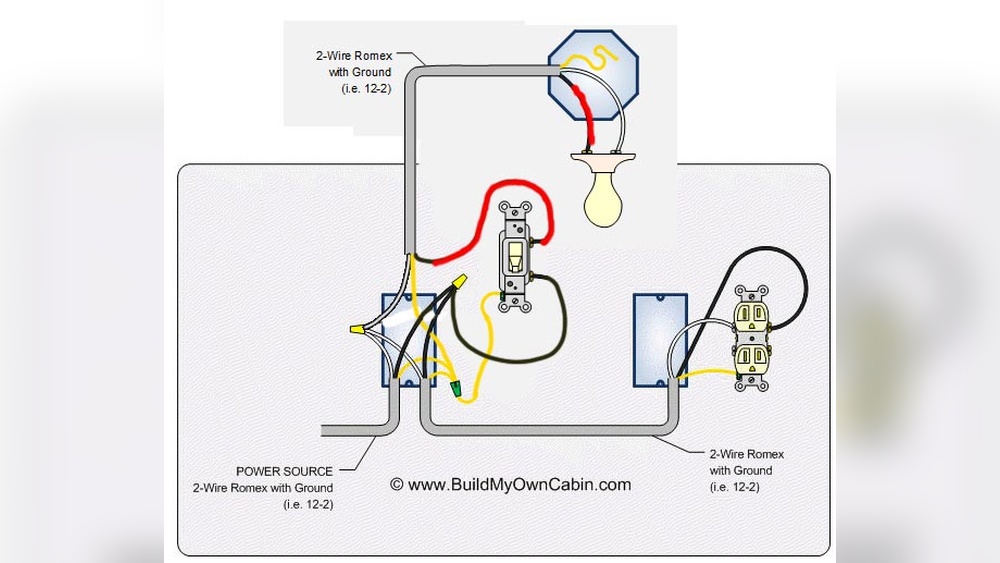
Start by identifying the live (hot) wire and the neutral wire. The live wire usually carries power from the electrical panel. The neutral wire completes the circuit back to the panel. Connect the live wire to the switch’s live terminal. Attach the neutral wire to the neutral terminal. Secure each connection tightly with a screwdriver. Loose wires cause flickering lights or switch failure.
Securing Ground Wire
The ground wire protects you from electric shocks. It usually has green or bare copper insulation. Attach the ground wire to the green grounding screw on the switch. If the box has a ground wire, connect it as well. Make sure all ground connections are tight and secure. This step increases safety and meets electrical codes.
Mounting The Remote Switch
Mounting the remote switch is a key step in converting a light switch to remote control. It ensures easy access and smooth operation. Proper placement also keeps your space tidy and safe.
Choosing the right spot for the remote switch matters a lot. It should be within reach and visible. The switch must not block pathways or cause clutter.
Preparing The Wall Surface
Start by cleaning the wall area where you want to mount the remote switch. Use a dry cloth to remove dust and dirt. A smooth surface helps the switch stick firmly. Avoid uneven or wet walls.
Using Adhesive Mounts
Many remote switches come with adhesive pads. Peel off the backing and press the switch against the wall. Hold it for 30 seconds to secure it well. Adhesive mounts work best on flat surfaces.
Mounting With Screws
Some remote switches include screw holes for extra support. Mark the spots on the wall using the switch as a guide. Drill small holes and insert wall anchors if needed. Screw the switch in place gently.
Testing The Remote Switch
After mounting, test the switch by pressing its buttons. Check if it controls the light as expected. Adjust the position if the signal is weak or the switch feels loose.
Testing The Remote Control Function
Testing the remote control function is the key step after installing a remote switch. It confirms the setup works correctly. This step ensures your light responds to remote commands without problems. Simple tests can show if wiring and settings are correct. Take your time to check every feature. This avoids issues later.
Turn On The Power
Start by turning on the main power supply. This activates the remote control system. Watch the light closely. It should be ready to respond. No power means no remote function. Make sure the circuit breaker is on.
Use The Remote To Switch On
Press the remote control button to turn the light on. The light should glow immediately. If it does not, check the batteries in the remote. Test buttons more than once to confirm.
Test The Off Function
Next, press the remote’s off button. The light should switch off quickly. If it stays on, there may be a wiring issue. Try moving closer to the receiver. Signal strength matters.
Check Range And Signal
Walk around with the remote to check its range. The light should respond from different distances. Walls and furniture may block signals. Note the maximum distance where it works well.
Reset And Troubleshoot
If the remote does not work, reset the system. Switch off power for a few seconds. Turn it on again and retry. Replace batteries if needed. Confirm all connections are secure.
Troubleshooting Common Issues
Troubleshooting common issues helps keep your remote-controlled light switch working well. Small problems can stop the switch from responding or cause flickering. Fixing these issues quickly saves time and frustration.
This section guides you through easy checks and fixes. Follow the steps carefully for safe and smooth operation.
Checking The Remote Battery
The remote may not work if the battery is low or dead. Replace the battery with a new one. Use the correct battery type to avoid damage. Test the remote after changing the battery to see if it works.
Verifying The Switch Wiring
Loose or wrong wiring can cause the switch to fail. Turn off the power before inspecting wires. Ensure all wires are connected tightly and correctly. Look for any damaged wires and replace them if needed.
Resetting The Remote Control System
The system might need a reset to fix glitches. Unplug the switch or turn off power for 30 seconds. Plug it back in and try using the remote again. This can clear minor errors and restore function.
Checking For Signal Interference
Other devices can block the remote signal. Move the remote closer to the switch. Remove any objects between the remote and switch. Avoid using many wireless devices near the switch.
Testing The Light Bulb
A faulty bulb can appear as a switch issue. Replace the bulb with a working one. Check if the new bulb lights up with the remote. This confirms whether the problem is the bulb or switch.
Tips For Enhancing Remote Control Experience
Changing a light switch to remote control adds comfort and convenience. To get the best use, follow some simple tips. These help your remote control work smoothly and last longer.
Small changes can improve how you control your lights. It also saves energy and keeps your home safe. Use these ideas to enjoy your new system fully.
Choose The Right Remote Control
Select a remote that matches your light switch and home setup. Some remotes work only with specific brands or types. Pick one that fits your needs and budget.
Keep Batteries Fresh
Replace batteries regularly to avoid sudden power loss. Weak batteries reduce remote range and response time. Always have spare batteries ready at home.
Position The Remote Well
Use the remote within the recommended distance. Avoid walls or large objects that block signals. Holding the remote directly toward the light switch helps too.
Use Multiple Remotes For Convenience
Consider having more than one remote for big rooms. Place remotes in easy-to-reach spots like near doors or on tables. This keeps control close at hand.
Regularly Check The Light Switch
Inspect the remote control switch for dirt or damage. Clean gently with a dry cloth to keep it working well. Fix or replace faulty parts quickly to avoid issues.
Frequently Asked Questions
How Do I Convert A Light Switch To Remote Control?
To convert, first turn off power. Replace the existing switch with a remote control switch. Follow wiring instructions carefully. Test remote functionality before finishing installation. This upgrade adds convenience and smart control to your lighting.
What Tools Are Needed For Remote Switch Installation?
You need a voltage tester, wire stripper, screwdriver, and remote control switch kit. Safety gloves and wire nuts help secure connections. Having the right tools ensures a smooth, safe installation process.
Can I Use A Remote Switch With Any Light Fixture?
Most remote switches work with standard fixtures. Check compatibility with dimmable or LED lights. Always verify the switch’s specifications and your fixture’s requirements before installation to ensure proper function.
Is Professional Help Necessary For Remote Switch Conversion?
If you’re comfortable with electrical work, you can DIY safely. Otherwise, hiring a licensed electrician is recommended. Professional help ensures code compliance and prevents hazards during installation.
Conclusion
Converting a light switch to remote control makes home lighting easier. It saves time and adds comfort to daily life. You can control lights from anywhere in the room. The process is simple and does not need special skills. Just follow safety steps and use the right tools.
Enjoy the convenience and modern feel of remote lighting. Small changes can make a big difference at home. Try it and see how it improves your space.