Have you ever tried to hang something important on your wall, only to find the anchor broken or loose? It’s frustrating, and it can leave your walls looking damaged and unstable.
But don’t worry—fixing a broken wall anchor is easier than you think. In this guide, you’ll learn simple, step-by-step tricks to repair your wall anchor quickly and securely. Keep reading, and you’ll have your wall strong and ready to hold your favorite items in no time.

Credit: www.instructables.com
Identify The Damage
Identifying the damage is the first step to fix a broken wall anchor. You must understand the problem clearly. This helps you choose the right tools and methods for repair.
Take a close look at the wall and the anchor. Spotting the type and extent of damage saves time and effort.
Check The Anchor Type
Different wall anchors have different designs. Some are plastic, while others are metal. Knowing the anchor type helps you find the best fix.
Look for visible signs like size, shape, and material. These clues tell you if the anchor is a toggle bolt, molly bolt, or plastic plug.
This step also shows if the anchor is broken or just loose. A broken anchor needs replacement. A loose one might just need tightening.
Assess Wall Condition
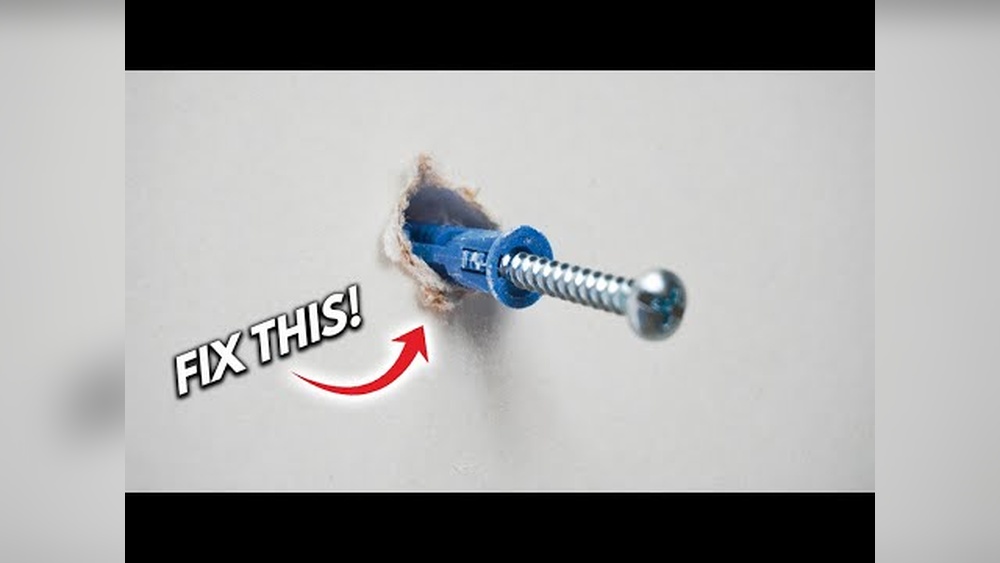
Look at the wall around the anchor. Check for cracks, holes, or crumbling drywall. Damage to the wall affects the repair process.
Soft or damaged drywall might not hold a new anchor well. You may need to patch the wall first. Solid walls provide better support for anchors.
Clear any dust or debris from the area. This makes the repair stronger and longer-lasting.
Gather Necessary Tools
Before fixing a broken wall anchor, gather the right tools. Having the correct supplies saves time and makes the job easier. It also helps you avoid damage to the wall or anchor.
Prepare a clean workspace and check your tools before starting. This step ensures a smooth repair process without interruptions.
List Essential Supplies
Start with a screwdriver that fits your anchor screws. You will need pliers to pull out broken pieces. A drill might be necessary for stubborn anchors. Keep wall putty or spackle handy for filling holes. Sandpaper helps smooth the surface after repair. A level ensures the anchor sits straight. Finally, have a replacement anchor matching the size and type.
Safety Precautions
Wear safety goggles to protect your eyes from dust and debris. Gloves prevent cuts from sharp edges or tools. Work in a well-lit area to see clearly. Avoid loose clothing that might catch on tools. Keep children and pets away from the workspace. Take breaks if you feel tired to maintain focus. Follow all tool instructions carefully to prevent accidents.
Remove The Broken Anchor
Removing a broken wall anchor is the first step to fixing it properly. The process requires care to avoid further damage to the wall. Follow simple steps to loosen and extract the broken anchor safely.
Loosen The Anchor
Start by gently tapping around the anchor with a screwdriver or a small hammer. This helps to loosen it from the wall. Avoid hitting too hard to prevent wall damage. If the anchor is plastic, try twisting it slightly to break its grip. For metal anchors, use pliers to wiggle it back and forth. Loosening makes removal easier and cleaner.
Extract Carefully
Use needle-nose pliers or a pair of tweezers to pull out the anchor. Grip the anchor firmly but do not squeeze too hard to avoid breaking it further. Pull slowly and steadily. If the anchor resists, apply a little more twisting motion. For deeply stuck anchors, insert a thin screwdriver behind the edge to pry it out gently. Patience is key to prevent wall damage.

Credit: www.youtube.com
Prepare The Wall
Preparing the wall is an important first step to fix a broken wall anchor. A clean and smooth surface helps the new anchor hold better. Taking time to prepare the area can prevent future damage and improve the repair.
Clean The Area
Start by removing dust and dirt from the damaged spot. Use a soft brush or cloth to wipe the surface gently. Clear away any loose paint or debris around the hole. This cleaning makes sure the wall is ready for filling and new anchors.
Fill Holes And Cracks
Fill any holes or cracks near the broken anchor with wall filler or spackle. Use a putty knife to spread the filler smoothly over the surface. Let it dry completely before sanding it flat. This step creates a strong base for the new anchor and stops the wall from crumbling.
Choose The Right Replacement Anchor
Choosing the right replacement anchor is key to fixing a broken wall anchor correctly. The new anchor must fit the wall type and hold the weight safely. Picking the wrong anchor can cause damage or failure. Focus on matching the anchor to the wall and checking its weight capacity.
Match Anchor To Wall Type
Different walls need different anchors. Drywall, plaster, concrete, and brick each require specific anchors. Use plastic anchors for drywall. Metal anchors work well for concrete or brick. Check the wall material before buying. The right anchor grips the wall firmly without damage.
Consider Weight Capacity
Every anchor has a weight limit. Choose one that holds the item’s weight plus extra. Heavy items need anchors with higher capacity. Light anchors may pull out or break under pressure. Always check the package or product details for weight limits. Safety is the top priority.
Install The New Anchor
Installing a new wall anchor is a key step after removing the broken one. It ensures your wall can hold the weight again safely. Follow these steps carefully to set the new anchor correctly.
Drill Proper Hole
Choose a drill bit that matches the size of the new anchor. Mark the spot on the wall clearly. Hold the drill steady and drill straight into the wall. Drill to the right depth, not too shallow or too deep. Clean out dust from the hole with a small brush or air blower. A clean hole helps the anchor fit tightly.
Insert And Secure Anchor
Push the new anchor into the hole gently. Use a hammer if it feels tight but tap lightly. Make sure the anchor sits flush with the wall surface. Tighten the screw or bolt slowly into the anchor. Stop when it feels firm and does not move. The anchor should hold strong without cracking the wall.
Test The Repair
Testing the repair is a key step after fixing a broken wall anchor. It ensures the anchor holds firm and supports the weight. This step helps avoid future damage or accidents.
Take time to carefully check the repair. A strong anchor means a safe and stable wall fixture.
Check Stability
Gently pull or push the item attached to the repaired anchor. Feel for any movement or wobbling. A solid anchor will not shift or loosen. Test with light pressure first. Gradually increase force to ensure firmness. Watch for cracks or new holes around the anchor.
Make Adjustments If Needed
If the anchor feels loose, tighten it carefully. Use a screwdriver or drill as required. Add extra filler or adhesive to strengthen the hold. Remove and redo the anchor if it still fails. Repeat the test after each adjustment. Continue until the anchor stays firm and secure.

Credit: diy.stackexchange.com
Prevent Future Issues
Preventing future problems with wall anchors is key for lasting repairs. Proper care helps keep walls strong and secure. Small steps can stop anchors from breaking again. This section covers simple tips to avoid common mistakes.
Use Correct Anchors
Choose anchors made for your wall type. Drywall, plaster, and concrete need different anchors. Using the right one keeps the weight balanced. Check the package for weight limits. This helps the anchor hold firmly without slipping or breaking.
Avoid Overloading
Do not hang items heavier than the anchor’s limit. Heavy objects pull anchors out of the wall. Spread weight across several anchors if needed. Light items keep the wall safe and stable. Always check the weight before hanging anything.
Frequently Asked Questions
What Causes A Wall Anchor To Break?
Wall anchors often break due to overloading, improper installation, or using the wrong anchor type. Weak drywall or excessive weight can also cause failure. Choosing the right anchor and correct installation prevents breakage.
How Do I Remove A Broken Wall Anchor Safely?
To remove a broken anchor, first try pulling it out with pliers gently. If stuck, push it into the wall cavity or drill it out carefully. Avoid damaging the wall during removal.
Can I Reuse A Broken Wall Anchor?
No, reusing a broken wall anchor is not safe. Once damaged, it loses holding strength. Always replace with a new, appropriate anchor to ensure secure support.
What Tools Are Needed To Fix A Broken Wall Anchor?
You need pliers, a drill, a screwdriver, and replacement anchors. A putty knife and spackle may be required to repair wall damage. Having the right tools ensures a smooth fix.
Conclusion
Fixing a broken wall anchor is easier than it seems. Start by removing the damaged anchor carefully. Choose the right replacement for your wall type. Drill a new hole if needed, then insert the new anchor firmly. Tighten screws gently to avoid damage.
This simple process restores strength to your wall. Taking time to fix anchors keeps your items safe. Small repairs prevent bigger problems later. Try these steps to maintain sturdy walls and secure fixtures. You can handle this task with basic tools and patience.