Have you ever looked at your old light switch and thought about replacing it but felt unsure where to start? Changing a light switch box might seem tricky, but with the right steps, you can do it yourself quickly and safely.
Imagine saving money on an electrician and gaining confidence in handling simple home repairs. In this guide, you’ll find clear, easy instructions that make the process straightforward. Keep reading, and by the end, you’ll know exactly how to change your light switch box like a pro.
Tools And Materials Needed
Changing a light switch box needs the right tools and materials. These items help you work safely and finish the job well. Having everything ready saves time and avoids mistakes. Use tools made for electrical work to protect yourself and your home.
Essential Tools For Changing A Light Switch Box
Start with a screwdriver set. Both flathead and Phillips types are needed. Use a voltage tester to check for electricity before starting. Wire strippers help remove insulation from wires. Needle-nose pliers make bending and holding wires easier. A utility knife is useful for cutting electrical tape or wire covers. A flashlight or headlamp helps you see in dark spaces.
Materials Required For The Job
Buy a new light switch box that fits your wall and switch type. Get a matching light switch that works with your wiring. Electrical wire is needed if any wires are damaged or too short. Use wire nuts to join wires safely. Electrical tape protects wire connections. Finally, have a wall plate to cover the switch and box after installation.
Safety Gear To Protect Yourself
Wear insulated gloves to stop electric shocks. Safety glasses shield your eyes from debris. Use a dust mask if you work in a dusty area. Wear old clothes that cover your skin fully. Make sure your shoes have rubber soles for extra safety.

Credit: icreatables.com
Safety Precautions
Changing a light switch box involves working with electricity. Safety must be the top priority to avoid accidents. Taking the right precautions protects you and your home. Follow these simple steps before starting any work.
Turn Off Power At The Circuit Breaker
Always switch off the power to the light switch at the main circuit breaker. Do not rely on the light switch alone to cut power. This step stops electrical current from flowing while you work. Use a circuit tester to confirm the power is off.
Use Insulated Tools
Choose tools with insulated handles to reduce shock risk. Insulated tools protect you if you touch a live wire by mistake. Avoid metal tools without insulation during electrical work.
Wear Safety Gear
Wear rubber-soled shoes and safety glasses. Rubber soles stop electricity from traveling through your body. Safety glasses protect your eyes from dust and sparks.
Keep The Work Area Dry
Make sure the floor and your hands are dry. Water conducts electricity and increases shock risk. Avoid working in damp or wet conditions.
Do Not Work Alone
Have someone nearby when working with electricity. A helper can assist or call for help in an emergency. Safety improves with a second person present.
Turning Off Power
Turning off power is the first and most important step before changing a light switch box. It keeps you safe from electric shocks. Always treat electricity with respect and caution. Never start work without cutting power first.
Power usually comes from your home’s main electrical panel. It controls electricity flow to different parts of the house. You must find the right switch to turn off power to the light switch box you want to change.
Locate The Main Electrical Panel
Find the main electrical panel in your home. It is often in the basement, garage, or utility room. The panel has many switches called breakers. Each breaker controls power to a different part of your home.
Identify The Correct Circuit Breaker
Look for the breaker that controls the light switch box. It may be labeled with room names or numbers. If no labels exist, turn off breakers one by one. Test the light switch after each to find the right breaker.
Switch Off The Circuit Breaker
Flip the correct breaker to the off position. This stops electricity flow to the switch box. Make sure the breaker stays firmly in the off position during your work.
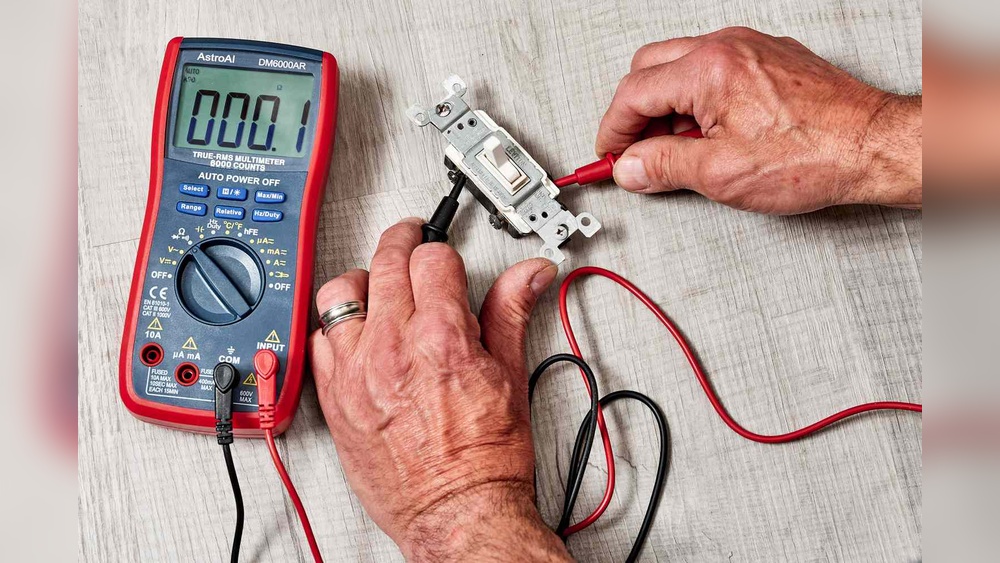
Verify Power Is Off
Test the light switch to confirm power is off. The light should not turn on. Use a voltage tester for extra safety. It detects any live electricity inside the switch box.
Removing The Old Switch
Removing the old light switch is the first step in changing a switch box. It helps to work carefully to avoid damage or injury. Follow these simple steps to take out the old switch safely.
Unscrewing The Cover Plate
Start by turning off the power at the circuit breaker. Use a screwdriver to remove the screws on the cover plate. Take off the cover plate and set it aside. This exposes the switch and wiring behind it.
Detaching The Switch
Next, unscrew the mounting screws holding the switch to the box. Gently pull the switch out, but do not pull hard on the wires. Keep the switch close to see the wires clearly.
Identifying Wire Connections
Look carefully at how the wires connect to the switch. Note the colors and where each wire is attached. Take a photo or label the wires for easy reference later. This step is important for connecting the new switch correctly.
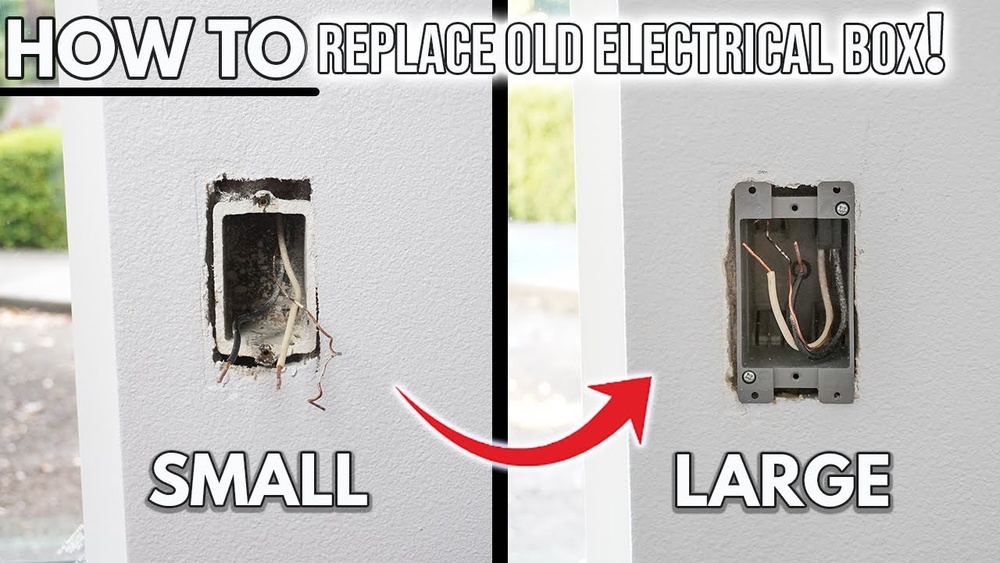
Preparing The New Switch Box
Preparing the new switch box is a key step before installation. This step ensures the box fits properly and works safely. A well-prepared box makes the replacement easier and more secure. It also helps avoid future problems with wiring or fitting.
Selecting The Right Box
Choose a switch box that matches your wall type. Plastic boxes work well for drywall. Metal boxes fit better with masonry or concrete walls. Check the size of your old box to find a similar one. Also, consider the number of wires inside. Pick a box with enough room for all wires and connections. This prevents crowding and keeps wiring safe.
Adjusting The Box Size
Some boxes need size adjustments to fit properly. Use a utility knife to trim plastic boxes carefully. For metal boxes, use tin snips to make small cuts. Make sure the box fits snugly in the wall opening. A loose box can cause switch problems later. Test the fit before wiring the switch. Proper size helps secure the switch firmly to the wall.
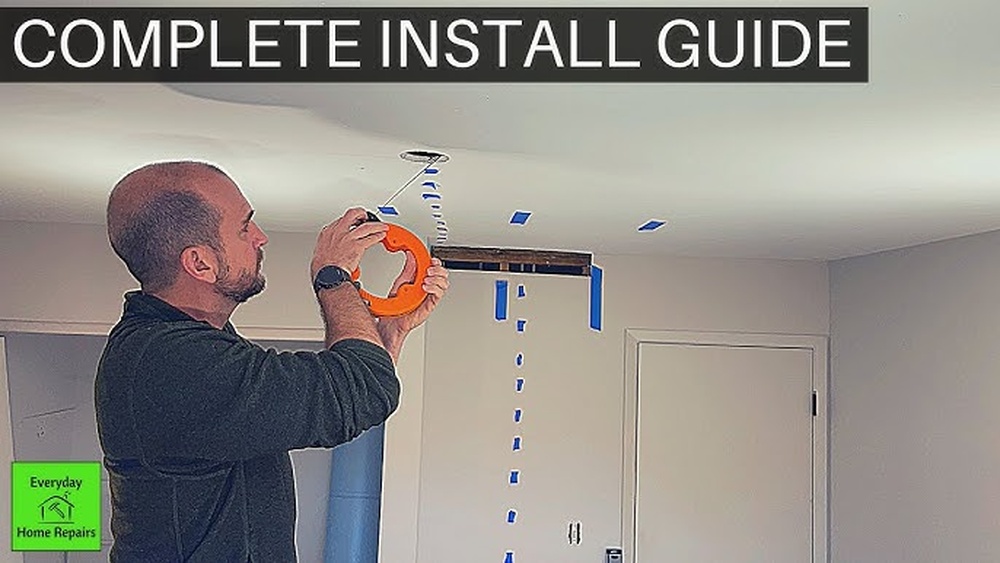
:max_bytes(150000):strip_icc()/how-to-replace-a-light-switch-1824670_07_newswitch_40431-69f2872f4a734dc89e3c2bed8711fc69.jpg)
Credit: www.thespruce.com
Wiring The New Switch
Wiring the new switch is a key step in changing a light switch box. This part ensures the switch works safely and correctly. Proper wiring prevents electrical problems and keeps your home safe.
Take your time. Follow each step carefully. Use the right tools and materials.
Connecting Wires Correctly
First, identify the wires: hot, neutral, and ground. The hot wire usually has black or red insulation. The neutral wire is white. The ground wire is bare copper or green.
Connect the hot wire to the switch’s brass or black screw. Attach the neutral wire to the white wire bundle, if needed. Connect the ground wire to the green screw on the switch.
Make sure wires are wrapped tightly around the screws in a clockwise direction. This ensures a strong connection when you tighten the screws.
Securing Wire Nuts
Use wire nuts to join wires safely. Twist the wires together before screwing on the wire nut. Turn the wire nut clockwise until tight.
Give each wire nut a gentle tug to check it is secure. Loose connections can cause sparks or shorts. Use the correct size wire nut for the wires.
Double-checking Connections
After wiring, inspect each connection carefully. Look for exposed wire ends or loose screws. Tighten any loose screws with a screwdriver.
Check that wire nuts cover all wire ends completely. No bare wire should be visible outside the nut.
Confirm the ground wire is connected properly. A good ground keeps you safe from electric shock.
Installing The New Switch Box
Installing the new switch box is a key step in changing a light switch. It ensures safety and proper function. This part of the process needs care and attention. Follow simple steps to do it right.
Mounting The Box
First, place the new switch box in the wall opening. Align it with the wall surface. Use screws to fasten the box to the wall studs. Make sure it is secure and does not move. Check that the box is level for a neat finish.
Attaching The Switch
Next, connect the wires to the new switch. Match the wires by color or label. Tighten the screws on the switch terminals firmly. Push the switch gently into the box. Avoid pinching the wires to prevent damage.
Replacing The Cover Plate
Finally, place the cover plate over the switch. Align the holes with the switch screws. Screw the plate in place carefully. Do not overtighten to avoid cracking the plate. This step completes the look and protects the wiring.
Testing The Installation
Troubleshooting common issues helps fix problems fast. It saves time and keeps your work safe.
This part covers simple problems you may meet. It gives clear ways to solve each one.
Check For Loose Wires
Loose wires often cause switches not to work. Turn off power first. Then, gently push wires into terminals. Tighten screws to hold wires firmly. Loose connections can cause flickering or no light.
Test The Power Supply
Power problems stop switches from working. Use a voltage tester to check for electricity. Test the wires in the box. No power means a tripped breaker or fuse. Reset the breaker or replace the fuse if needed.
Inspect The Switch Itself
Switches can wear out over time. Look for cracks or burn marks. Replace damaged switches to avoid hazards. A faulty switch may feel hot or make noise.
Verify Proper Wiring
Incorrect wiring causes many switch issues. Check the wiring against the switch diagram. Make sure hot, neutral, and ground wires connect correctly. Wrong wiring can prevent the light from turning on.
Look For A Tripped Circuit Breaker
Breaker trips cut power to switches. Find your breaker box. Look for a switch in the off position. Flip it back on to restore power. This often fixes no-light problems quickly.

Credit: www.youtube.com
Frequently Asked Questions
How Do I Safely Turn Off Power Before Changing A Switch Box?
Always turn off the circuit breaker to cut power. Use a voltage tester to confirm no electricity flows. This ensures safety before you start working on the switch box.
What Tools Are Needed To Change A Light Switch Box?
You will need a screwdriver, wire stripper, voltage tester, and pliers. These tools help safely remove and replace the switch box components.
Can I Replace A Switch Box Without An Electrician?
Yes, if you follow safety steps and local codes. Make sure you understand wiring and use proper tools. When unsure, consult a professional to avoid hazards.
How Do I Remove The Old Light Switch Box?
First, turn off power and test wires. Unscrew the switch and disconnect wires carefully. Remove the box from the wall by loosening mounting screws.
Conclusion
Changing a light switch box can be simple and safe. Always turn off the power before starting work. Take your time to follow each step carefully. Use the right tools and check your connections twice. A properly installed switch box keeps your home safe and working well.
Now, you can handle this basic task with confidence. Practice makes perfect. Keep learning for better home repairs.